A little secret about sorting your recent documents on the Revit ‘R’ menu.

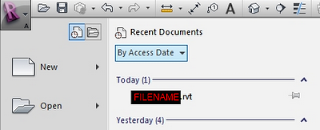
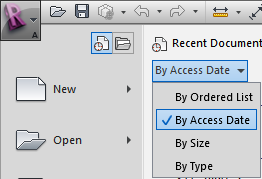
There is a drop down list that doesn’t really ‘jump out’ at you.  It is just below the ‘Recent Documents’ header:

The ‘Access Date’ option is quite useful, producing a view similar to that shown below:

There is also an option for ‘Size’ – this could quickly show you which of your current projects has the largest file size.

A big tip for new players:

Never import a DWG file.  

And never, ever explode an Imported DWG file.

Nothing good will come of it.  Trust me.  Instead, do this (in order of preference):

  1. Use Revit natively, without adding messy DWG or CAD import data.
  2. Link DWG files, rather than import.
  3. Import DWG files into a Detail Component family, and then load that family in.
  4. Eat a very sour lemon.
  5. Import DWG file.
  6. Import DWG file and explode it.
  7. Cry

If you have any thoughts, or any other methods that you use (like Importing a DWG file into a RVT link and then using ‘Linked Views’, feel free to comment).

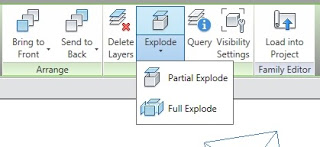
After selecting an Import instance, you can choose to Full Explode or Partial Explode.  Most users realise that exploding is a bad idea, and it can get very messy.  In fact, a number of experienced Revit users feel that you should NEVER import a CAD instance, always use Link.
In any case, the main difference between a full explode and a partial is this:
  • Full Explode will explode all blocks and XREFs into their most basic elements, such as lines and arcs.
  • Partial Explode will explode the instance into its nested blocks and XREFs.  You can use Partial Explode again to explode these blocks into their nested blocks, and so on, until you get down to the lines and arcs etc.
You can explode (disassemble) the import symbol into its next highest level elements: nested import symbols. This is a partial explode. A partial explode of an import symbol yields more import symbols, which, in turn, can be exploded into either elements or other import symbols. This is analogous to exploding in AutoCAD with nested xrefs and blocks. For example, you explode an xref into other xrefs and blocks. Those xrefs and blocks can, in turn, be exploded into more blocks and xrefs.
You can also explode the import symbol immediately into Revit text, curves, lines, and filled regions. This is a full explode.
Here are some of my most popular posts from the last 2 years:

How to use the new Keyboard Shortcuts Dialog and Tips

Make a Good…Impression Workflow (simple guide from Revit)

Unpredictable Properties Box Behaviour

How to add symbols to Schedules and Text in Revit

How to Print a large set of drawings to individual PDFs with automatic naming

Windows 7 and Vista ‘God Mode’ – very powerful

I hope you enjoy these links.

I will periodically do a ‘Top Posts’ post for your convenience.

Let’s say you want to take a door from one Level of the building, then use the Create Similar tool to make an instance of this door on a different Level.
This is quite easy.  Just open a view from each plan, select the Door, trigger the Create Similar command, and then switch views.
The Create Similar tool is still running, so you can happily place your Door.
Really quick video is provided below:
Did you know that you can select multiple objects with similar properties using a Schedule?
You may say “well, I can just use ‘Select All Instances’…”
However, what if you want to select objects that are not exactly the same, but can be grouped similarly in a Schedule?
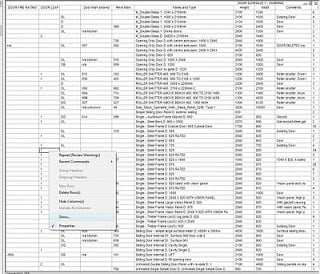
Its very simple.  Just set up the schedule with the Grouping you desire, then pick on the row of grouped objects you want to select.  Use right-click — ‘Show’.
Revit will select all the objects that were on that row of data.
Pretty cool huh?

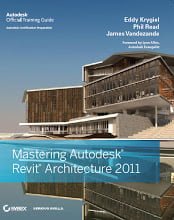
I received my copy of Mastering Revit Architecture 2011 yesterday, and it is truly an impressive tome! I don’t know of any other book that could so fittingly bear the designation ‘Revit bible’. At 1122 pages of Revit Architecture goodness, if it isn’t in this book you probably don’t need to know it.

I am particularly interested in the Revit Certification information. When I completed the Revit 2010 Associate and Professional Certifications, it was a real struggle to find quality information online. Well, having received the book, I don’t need to search aimlessly anymore. This book should certainly help you to prepare for and pass the Revit Architecture 2011 Certifications.

You may remember the ‘Tips and Tricks’ competition that the authors of the book held a while back, and that I was one of the winners. Here is the quote from the book (page 1069):
” What Revit Wants…is an online resource put together by Luke Johnson that is peppered with great tips and workflows with everything from tips on creating graphics to dealing with crashes. See www.whatrevitwants.blogspot.com “

If you want to become a true Master of Revit, it seems quite clear that this book will be part of that process. How can you get it? Click on this link or the image below:

And thanks Eddy, James and Phil for all your hard work, and for sharing your vast knowledge and experience.

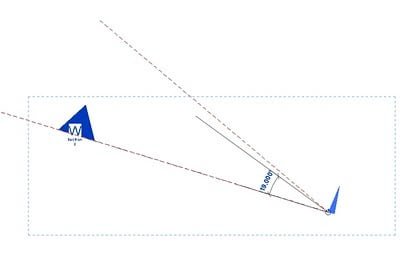
For some of you, this will be old news. However, it is a very important yet not very well known procedure. How do you accurately rotate an existing section view accurately?

Here are the steps:

  1. Draw a reference plane from the ‘tail’ of your existing section to (or through) the head point. The Reference Plan should snap to both of these. This is the current ‘plane’ of your section.
  2. Draw another Reference Plane that is parallel to the way you want the section to face.
  3. Move this new Reference Plane so that it also starts from the tail of the section.
  4. Select the Section.
  5. Rotate. Move the rotation marker to the tail of the section.
  6. Use the two reference planes to accurately rotate your section!