Interesting reading at:
Keeping it Real | LinkedIn
Some big players weigh in, including David Conant, Greg Demchak and David Baldacchino.
Associated blog post:
practical BIM: BIM is not so Real after all
What Revit Wants + Black Grid AI
AI Empowered Project Management
Interesting reading at:
Keeping it Real | LinkedIn
Some big players weigh in, including David Conant, Greg Demchak and David Baldacchino.
Associated blog post:
practical BIM: BIM is not so Real after all
This post was prompted by this from Darren Snook.
Firstly, let’s see actual pi to a decent level of precision:
3.1415926535897932384626433
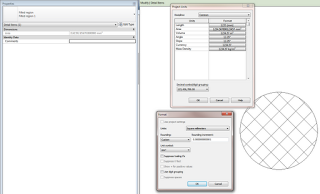
Can Revit handle high precision pi calculations?
As a test, let’s use a circle with a diameter of 2000mm (radius of 1m). Using the above precision, the area should be equal to pi in m².
Make a new project in Revit, no template, Metric. Draw a Filled Region with radius of 1000mm. The Properties Palette reports the area as:
Ok, obviously we need to increase the precision of Area in our Revit project. Into:
Properties box for the filled region NOW reports:
3141592.854703690900 mm²
3141592.653589793238 (same amount of digits from the definition of pi)
The percentage of inaccuracy between the two?
0.0000000640165425247805 % (the Revit value is slightly larger)
This was a value difference of 0.201113897662 mm²
However, I am prepared to accept the above level of precision, at least in 99.999994% of my projects 🙂
The lesson? If you are going to use Filled Regions for areas AND you want good precision, make sure you adjust your Project Units accordingly.

In response to:
Revit @ Waterman: Revit Needs to Go Back to School
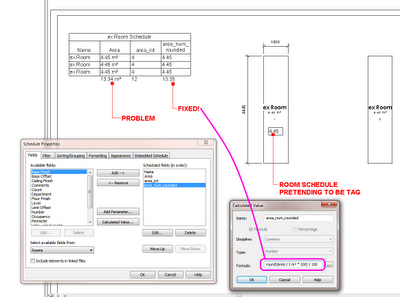
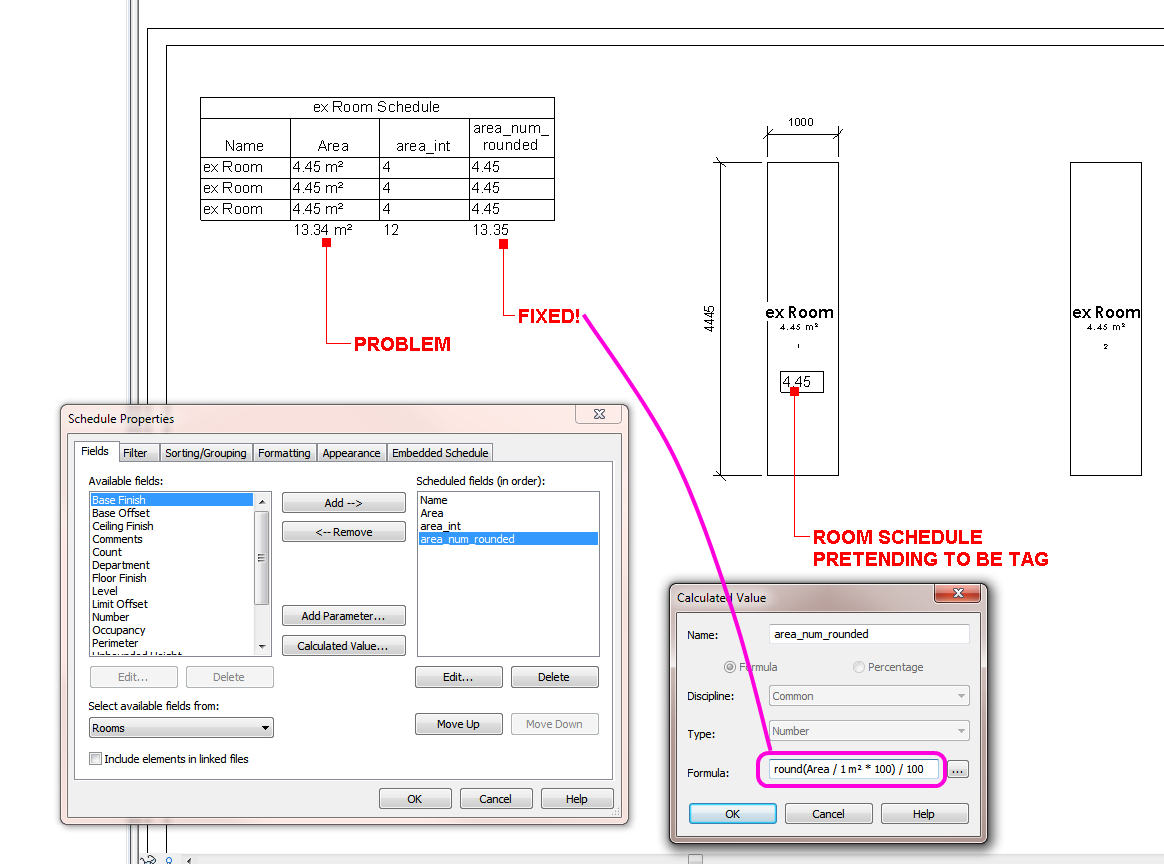
Thanks to one of our readers, we have a solution for the schedule precision problem described here.
The comment below the lines gives the formula to convert an Area into a rounded number in a schedule, and the totals work! Thanks Максим Ашихмин.
My previous post:
What Revit Wants: Area Calculation Totals – Rounding and Precision
The problem – even when you use Rounding (by changing precision settings in the schedule), the totals are still calculated from the most accurate measurement Revit has available. So, for 3 areas of 4.4m² Revit says that:
4 + 4 + 4 = 13m²
One workaround is to convert the Areas into Integers (using a Calculated Parameter), and hide the original Area column … still doesn’t exactly work sometimes. While you get an illusion of consistency, you tend to lose precision. The reason is that the overall rounding of the figures does not necessarily match the individual rounding of figures.
For example, lets say you have 3 areas of 4.4m² each. Using rounding to 0 decimal places by using the precision settings, you will get 13m² for the total, but using the integer method above you will get a less accurate but more consistent 12m².
I wonder if a percentage based technique could be used? It still wouldn’t be ideal, particularly if there were some ‘dumb’ constants that had to be added to Calculated Parameters.
What about you? How do you solve this precision vs consistency problem? One obvious way is to simply use more decimal places in your schedule – but then you cannot use the Integer method, and you can still run into the same problem… For example, 3 areas of 14.45m², using rounding to 1 decimal place:
4.5 + 4.5 + 4.5 = 13.4m²
Download the example file here
Here is what the Integer method looks like:

Some other info:
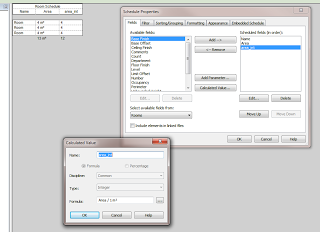
It’s possible with ordinary schedules too… There are a few things you need to do:
1. Sort your schedule on the units you want to differentiate on.
2. Add a calculated value, percentage, which calculates the percentage of a single element to the unit total (that’s why you need to sort on units, otherwise you can’t use the unit total in the percentage calculation)
3. Multiply Area by percentage in a calculated value, and check the “calculate totals”
4. Check off “Itemize every instance”. If you did it correctly it now shows proper totals.
This takes some fudging to get it right. If you can’t get it done, post an example.
via
2012: Total Cost in a schedule – Page 2
Steve made a few interesting points today about Revit and DWG (Import) extents. I previously posted about Revit accuracy and precision here.
However, did you notice this new setting when importing a DWG in Revit 2013?
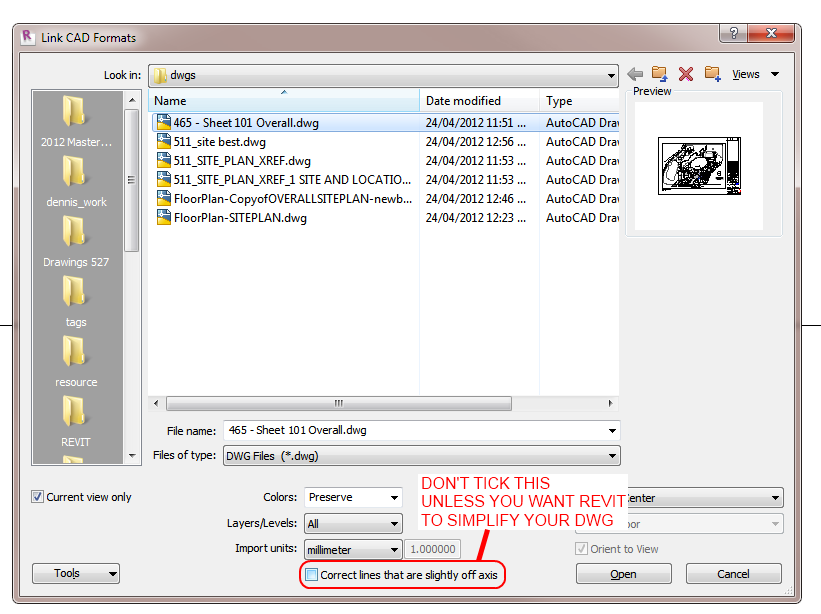
If you UNtick the box that says Correct lines that are slightly off axis, then Revit 2013 will bring in the DWG as-is. It won’t try to straighten things up to make the DWG more Revit-friendly.
Obviously, use this with care. But for me, 9 times out of 10 I want the DWG to come in EXACTLY as it was drawn.
Do you ever struggle with lines jumping around at extreme zoom levels, or weird numbers appearing when you are using many decimal points in your dimensions (like 1000.0000034)? This may be why:
Revit uses double precision numbers for all calculations (as do all CAD systems), and they are only good to around 14 or 15 digits.
http://forums.augi.com/showpost.php?p=134341&postcount=4
(the above post was by irwin, Revit Founder)
And:
Other programs allow more decimal digits but they do try to fake (unsuccessfully) more precision than they can really provide.
http://forums.augi.com/showpost.php?p=134356&postcount=5
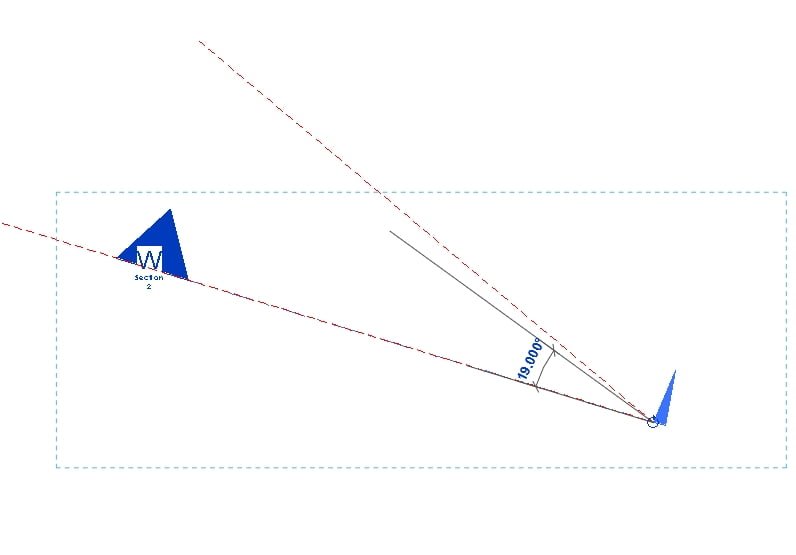
For some of you, this will be old news. However, it is a very important yet not very well known procedure. How do you accurately rotate an existing section view accurately?
Here are the steps:
Let’s say you have AutoCAD file of unknown origin, and it has some wacky or imprecise units (like the distance between two walls is 8250.092234897). What you need to do is reduce the precision, such that all the decimal points get ‘chopped off’.
To do this:
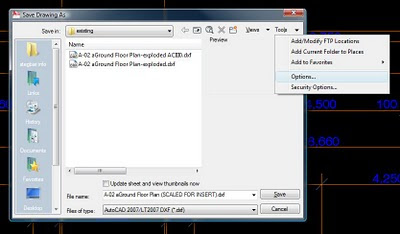
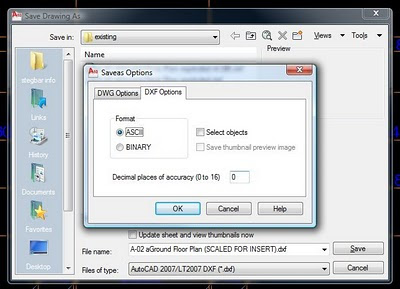
I recommend that you now open the DXF file you saved, and then resave it as a DWG file.Now you can insert your file into Revit, and you won’t have to deal with imprecise units.Please note that this process may result in some ’rounding off’ of values – you may want to double check the resulting file.
I found this process at the following link:
Forum Link