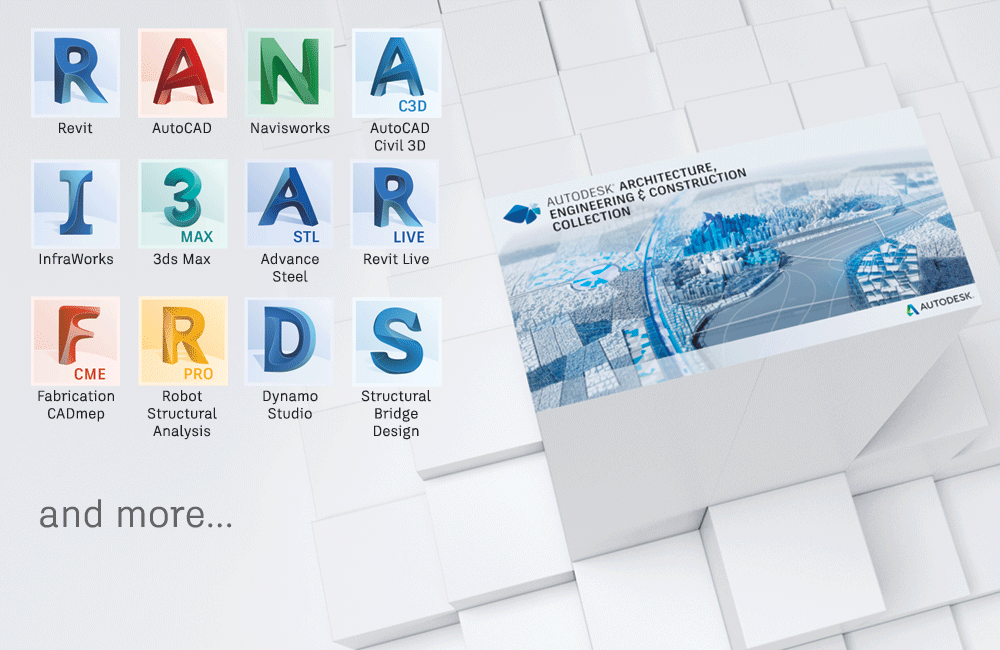
In case you missed it, the AEC Collection now includes:
Revit Live
Robot Structural Analysis Professional
Structural Bridge Design
Dynamo Studio
Advance Steel
Fabrication CADmep
You should find these in your Autodesk account after logging in.
Quote from In The Fold:
Here are some highlights of what we’re adding to the AEC Collection.
In the new Collection, you’ll find Revit Live. Revit Live allows you to visualize your Revit models by turning them into immersive visual experiences. You can even take your designs into a virtual reality environment—in just two clicks of your mouse.
Also included is world-class analysis and computational design software. Robot Structural Analysis Professional and Structural Bridge Design work with Revit to extend your capabilities to perform structural analysis for any structure. And, you can now access the Dynamo Studio standalone programming environment to help solve challenges faster by automating workflows that drive the geometry and behavior of your design models.
Finally, the AEC Collection now extends capabilities from design to fabrication. Interoperable with Revit and Navisworks, we’ve added Advance Steel and Fabrication CADmep to the Collection so you can conceive, model and fabricate better MEP and structural steel systems on an integrated platform.
If you are using more than one Autodesk SSO, you may come across this problem…
After a Windows Update or something similar, Revit is not responsive after first launch. Clicking has no effect, but there is no dialog shown either.
You may investigate the process details and determine that LMU.exe is thrashing, and you could look at log file in C:\ProgramData\FLEXnet and see it growing. You can also observe something like this in the Revit Journal file: ‘C 08-Aug-2017 14:53:49.479; 0:< manage licensing ‘C 08-Aug-2017 14:54:03.845; 0:< License checkout failed: 20 ‘C 08-Aug-2017 14:54:03.845; 0:< License cleanup skipped
This is telling us there is a licensing problem. In this case, a perpetual license has somehow become deactivated. What is the fix?
You need to login with Autodesk SSO login credentials that have the Perpetual license for that product available…
To do this:
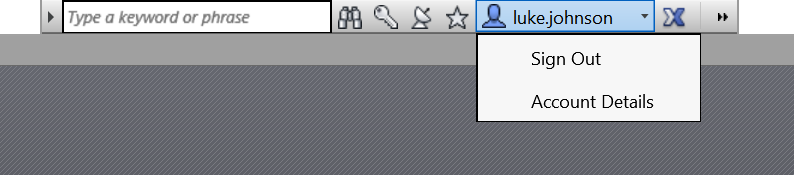
Start Revit Viewer for the same year version that is causing the problem, such as Revit Viewer 2015
Use the top right panel to logout and login with the correct SSO (login credentials)
Then, attempt to launch the full Revit application
It should re-activate itself now that the correct login credentials have been used
You can probably switch back to other credentials now that the activation has occurred
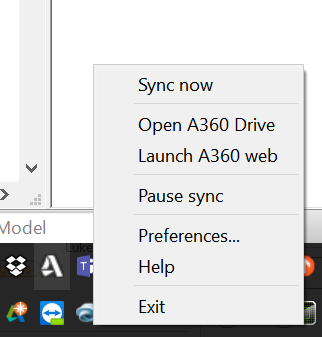
You can also use the A360 icon to sign in, this may be more reliable in some cases:
Yet another situation where you need to know What Revit Wants 🙂
This recent announcement revealed some new features coming to 3dsMax 2018.1, primarily a real-time VR engine in Max based on Stingray. This page has the steps to install it. Basically, you install update 2018.1, then install Max Interactive:
Here are some ‘facts at a glance’ coming from Autodesk:
What’s the news with 3ds Max 2018.1?
Autodesk 3ds Max 2018.1 now includes 3ds Max Interactive, a real-time engine based on Autodesk Stingray. This new 3D to VR workflow is designed to provide 3ds Max users with a new way to create interactive and virtual reality (VR) experiences. It is included with the 3ds Max 2018.1 update.
Who is 3ds Max Interactive designed for?
3ds Max Interactive is a real-time engine for design visualization specialists based on Autodesk Stingray. It can be used in a number of different contexts but its focus is on helping to simplify the process of turning animations, such as architectural visualizations, into stunning virtual reality experiences.
How does this relate to Autodesk Revit Live?
Autodesk is committed to creating VR solutions for the widest spectrum of users. Last year we rolled out Autodesk Revit Live, the powerful, easy-to-use cloud-based visualization service for architects that transforms Autodesk Revit models into VR experiences in one click. Autodesk Revit Live is designed for architects who require a solution to quickly explore, understand, and share Autodesk Revit designs on their desktop or in virtual reality. The new VR tools in 3ds Max 2018.1 we are announcing today are aimed at design visualization specialists working to produce high-end, photoreal experiences. With the new 3ds Max to VR workflow, we’re shoring-up data drudgery with capabilities like support for translating materials from the popular V-Ray renderer in 3ds Max to VR – freeing visualization artists to focus on the part they care most about: creating stunning imagery.
How much does 3ds Max Interactive cost?
3ds Max Interactive is available to all current 3ds Max subscribers – either as a standalone product, or as part of an Autodesk industry collection – at no additional cost. It cannot be purchased separately.
The internet is bleeding hard today due to the well-publicized Amazon S3 outages. Autodesk services are also severely affected.
Collaboration for Revit (C4R) users may be wondering how to get access to their files when the service is down. Your best bet is to find the most recent local copy and possibly use that for the day.
You can find it by going to Windows Explorer and copying this address:
%localappdata%\Autodesk\Revit\Autodesk Revit 2016\CollaborationCache
or for Revit 2017:
%localappdata%\Autodesk\Revit\Autodesk Revit 2017\CollaborationCache
Then, go looking for your RVT files. They will have a long name with letters and numbers.
I recommend you open this file ‘detached’, and be fully aware that your project will not sync to C4R after you do that. You could isolate your work to part of the project only, and then possibly copy / paste back to the C4R project when it comes back.
Alternatively, save it as a new Central to your local file server, and then overwrite the C4R project later when it comes back online.
None of this is ideal of course, but if you want to get any work done today, you may have to try the above workarounds.
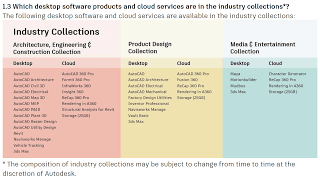
In case you missed it: Autodesk Suites are gone, you can’t buy them officially anymore. Instead, you can buy into an Industry Collection. Here are products in each Collection, from the FAQ:
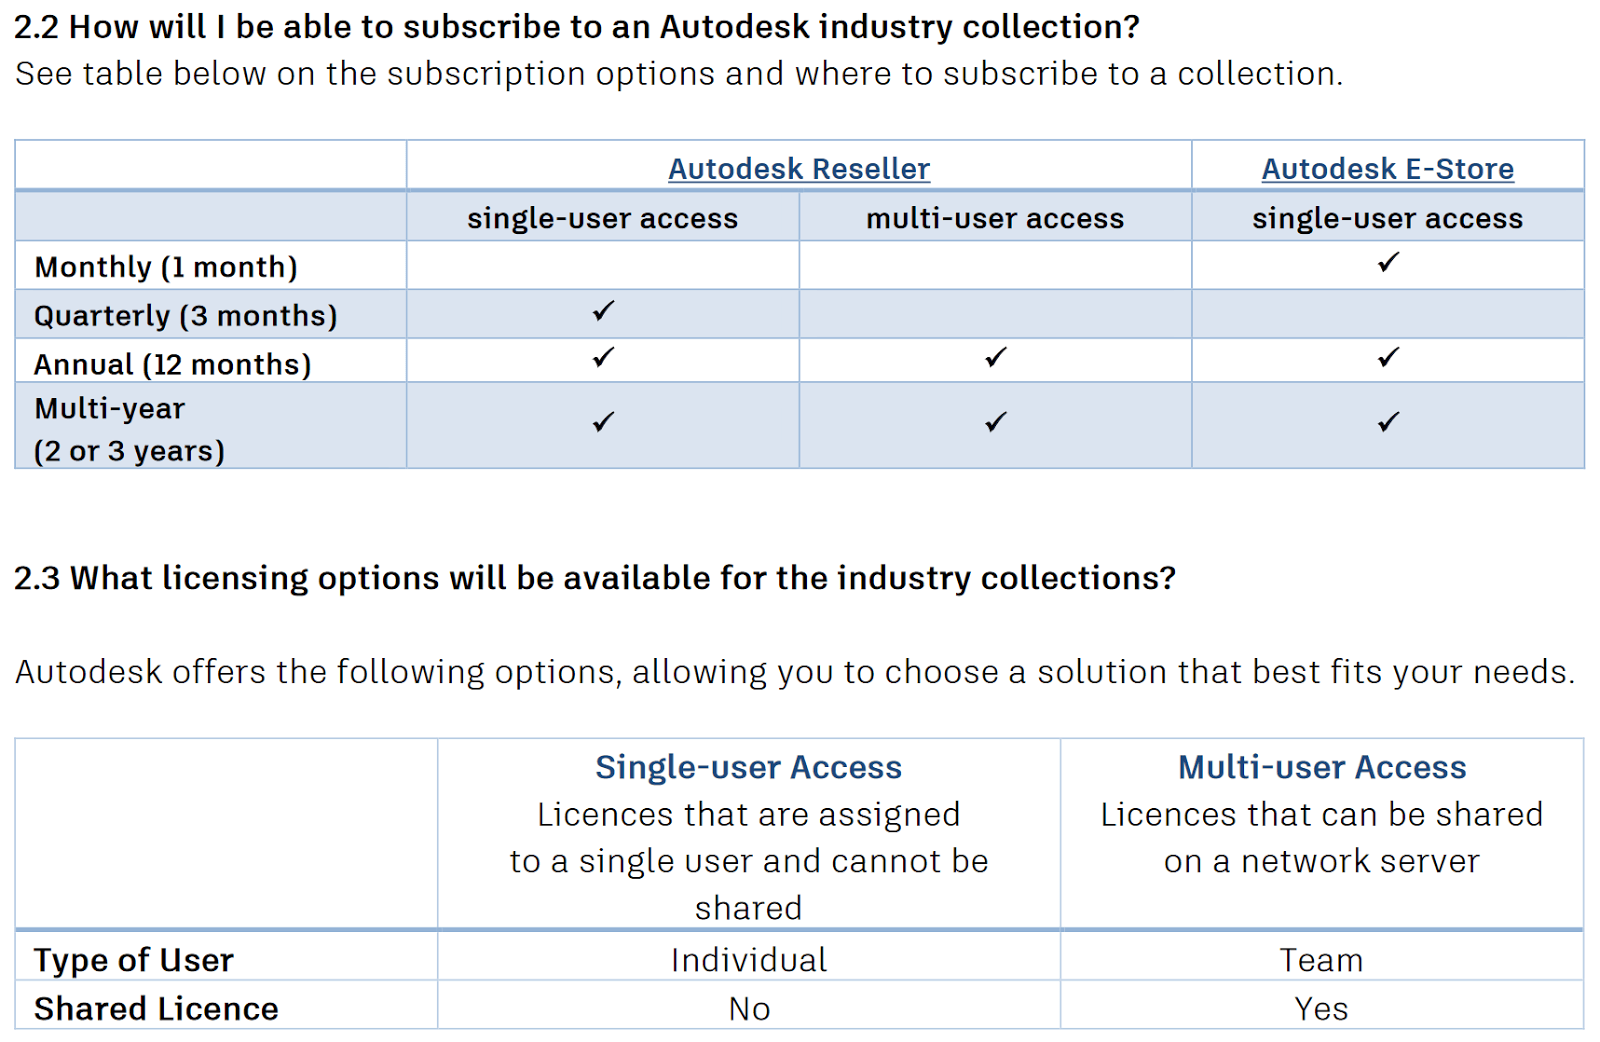
And here is some information on renewals and floating license provisioning:
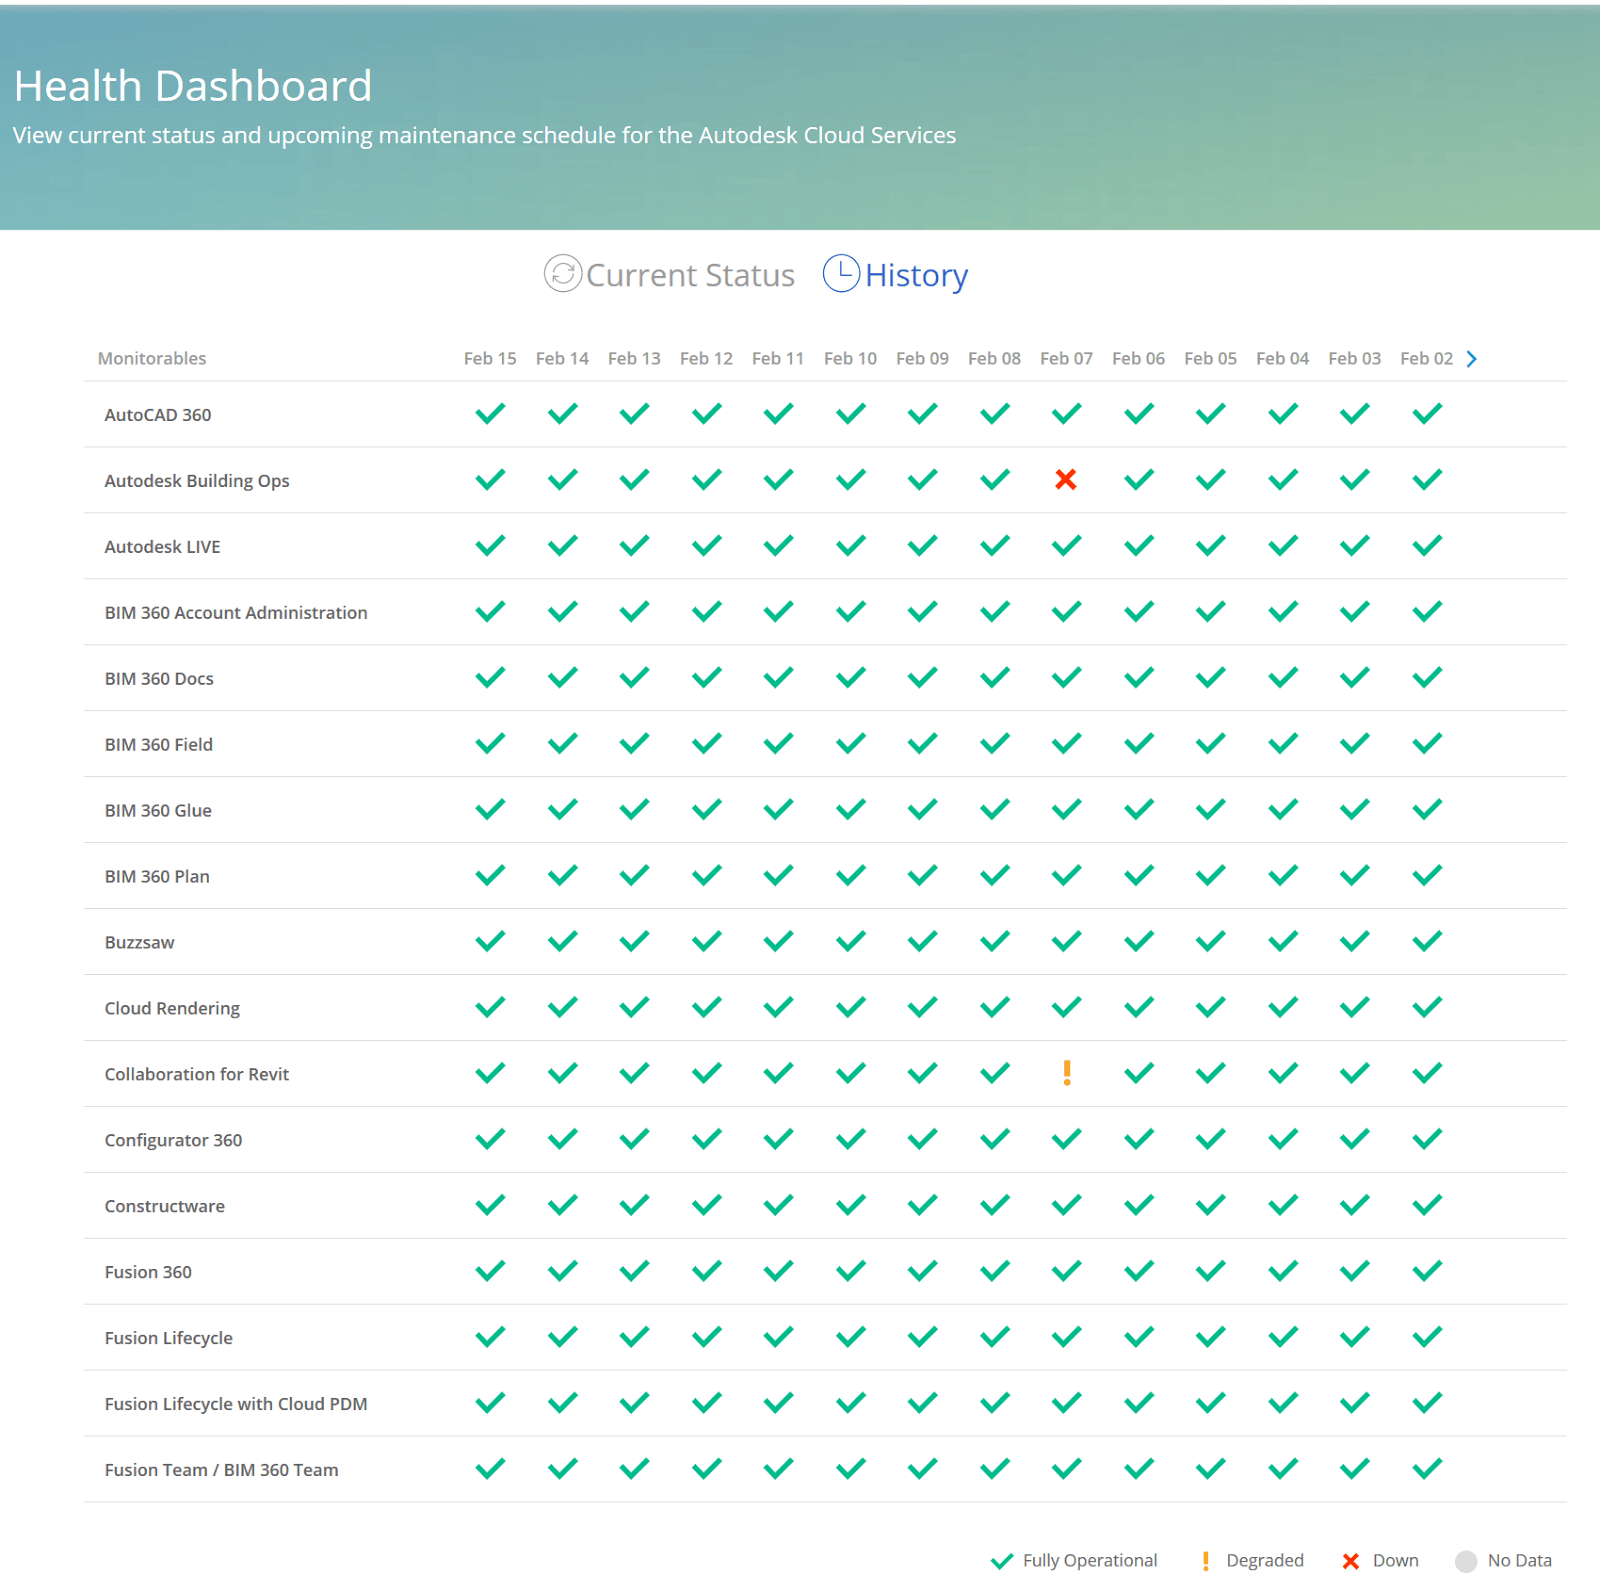
As we move more and more information and services to the cloud, 100% uptime becomes more and more necessary. In our BIM world, if you are running a project on C4R (Collaboration for Revit), and that cloud service goes down, the project could be severely affected.
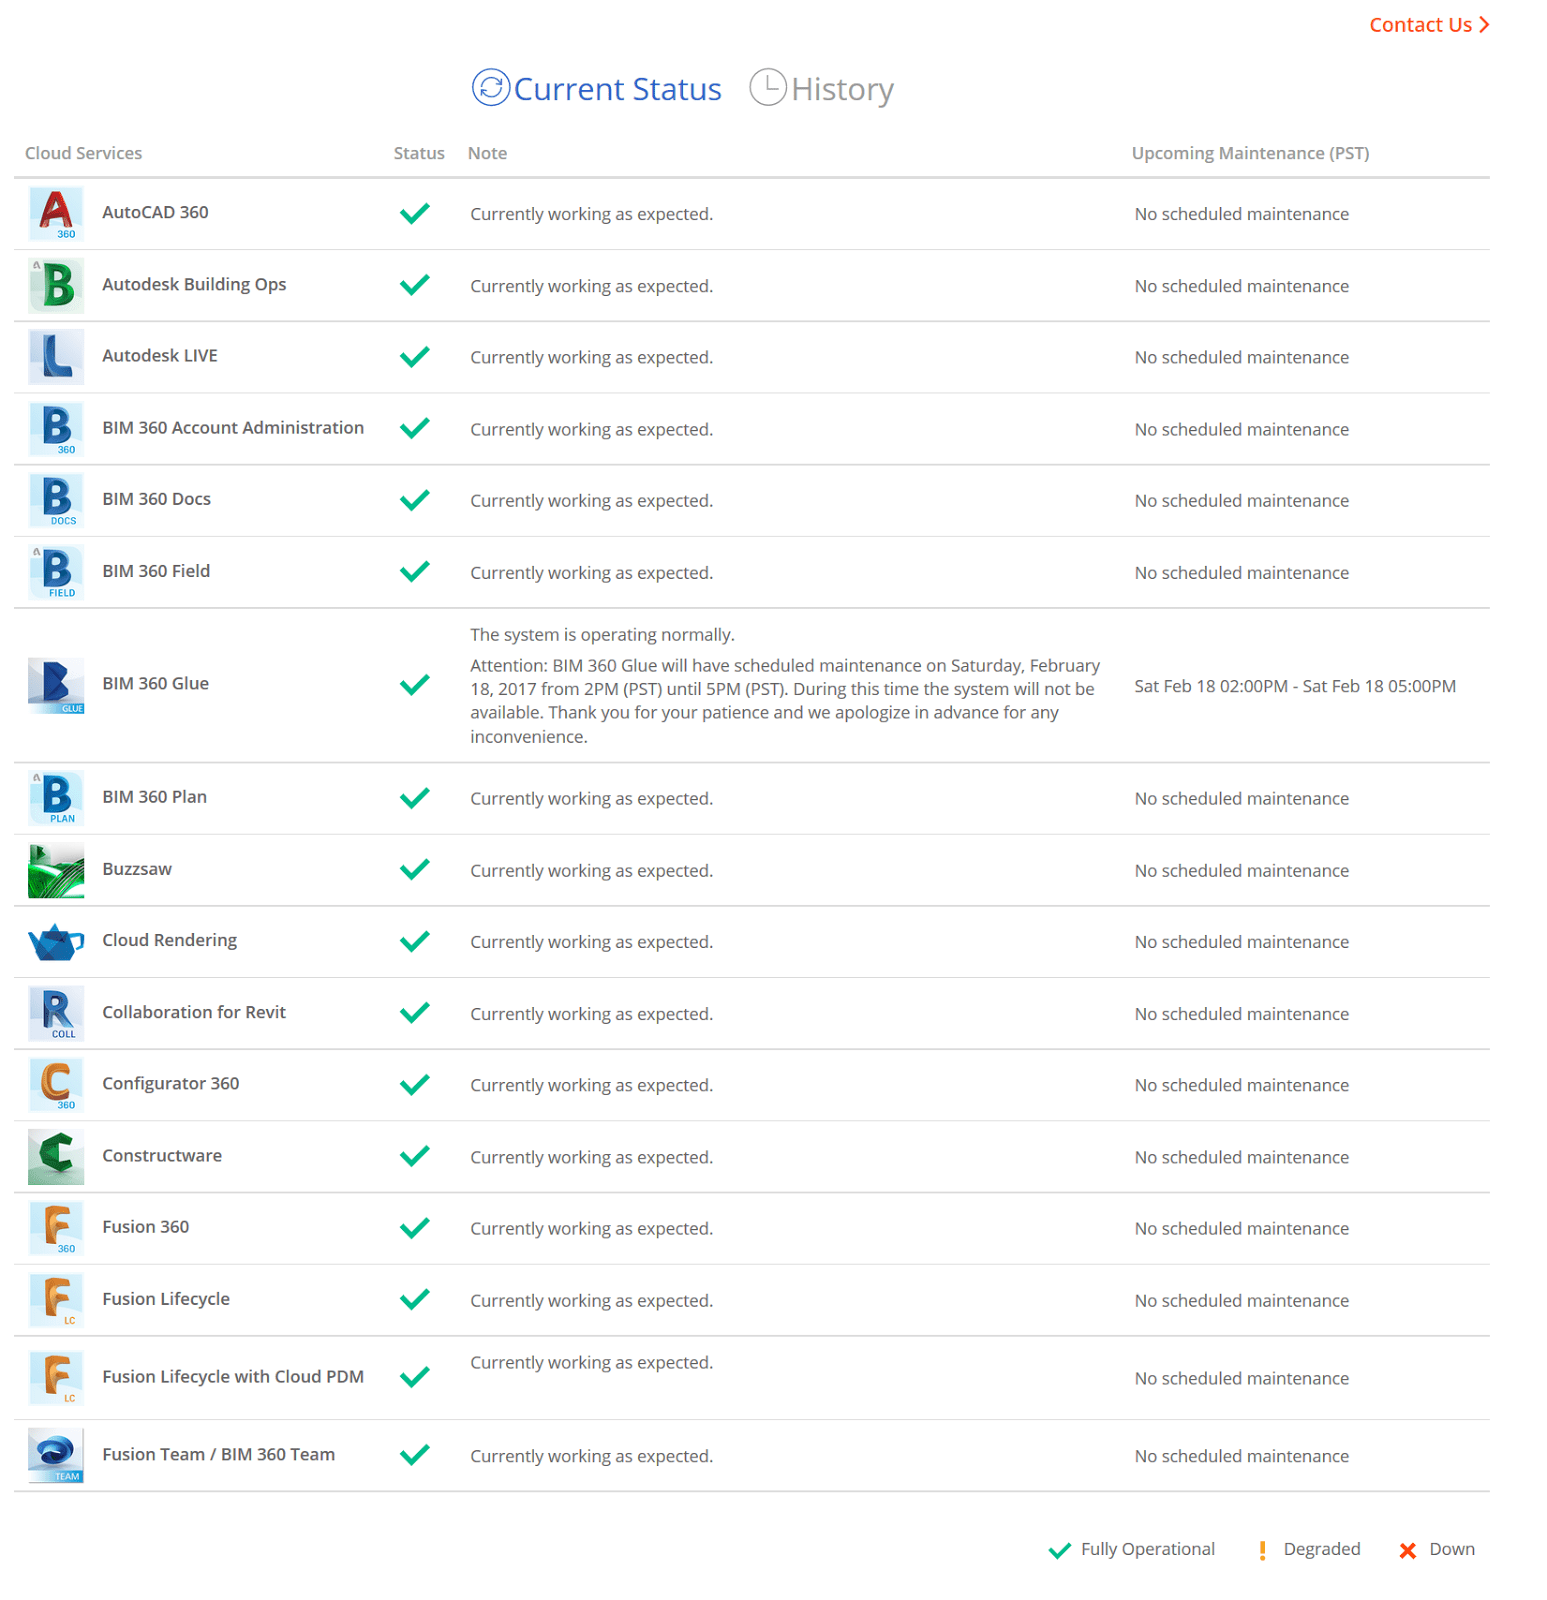
If uptime is important, so is monitoring and reporting. You can now view the latest “health” status and history of Autodesk Cloud products using the Autodesk Health Dashboard.
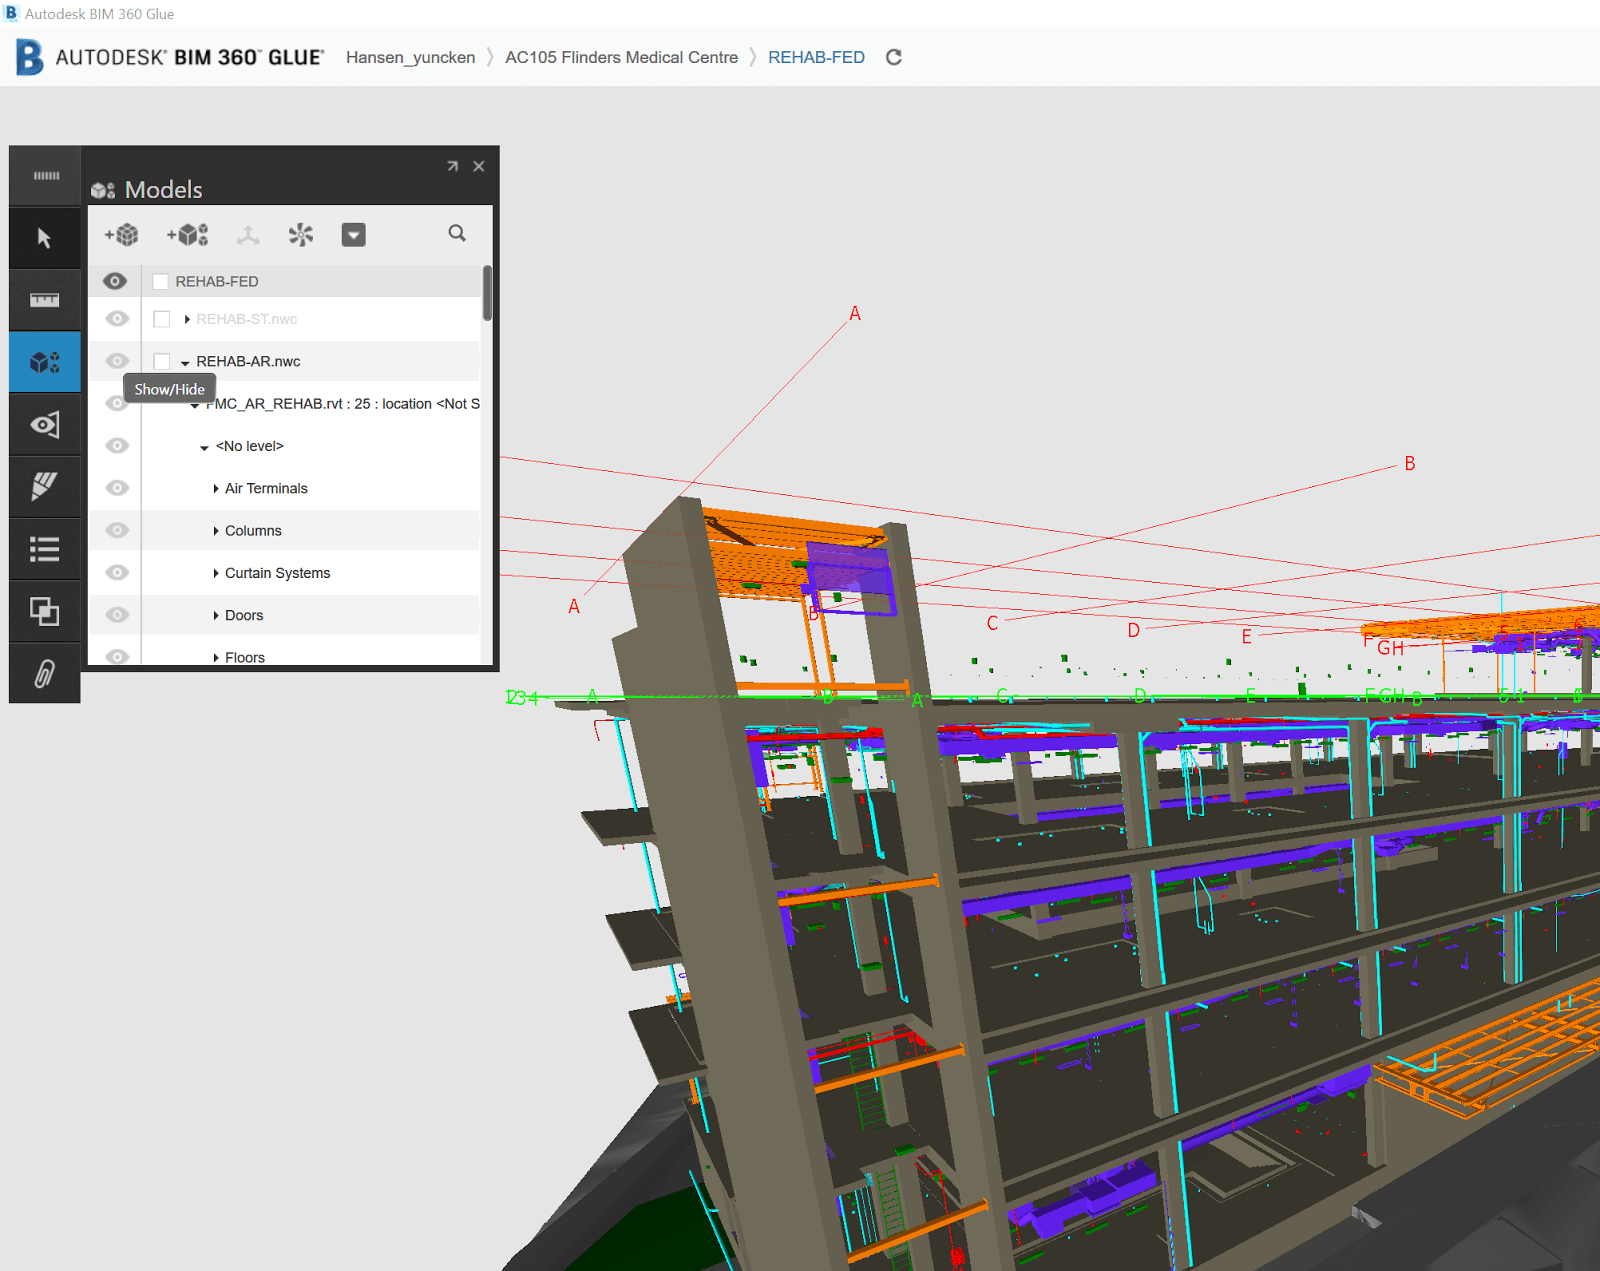
Recently I had an issue sharing colour overrides from Navisworks to BIM 360 Glue. This has been ok for a while, but something broke. After some investigation, it turns out that one of the sub-Models in the Glue merged model was causing the problem.
I typically convert IFCs using the Link method, which results in DirectShape objects. It seems that one of the Architectural files that I converted this way from ArchiCAD to Revit and then to BIM 360 Glue was stopping the colours from getting baked into the BIM 360 Shared View.
To workaround this issue:
Determine what problem model/s you have (possibly those converted from IFC)
Open your Merged Model in Navisworks for BIM360
Hide these problem models in Navisworks scene
Run Appearance Profiler or otherwise apply colour overrides
In the BIM 360 Shared Views pane, click New to make a new Shared View on BIM 360 Glue with the colours ‘baked in’
Go to Glue desktop app and confirm the colours are working
Then, Unhide the problem model here…
And then make a new view in the desktop app
This new view should have all models you want showing, and the colour overrides working ok.
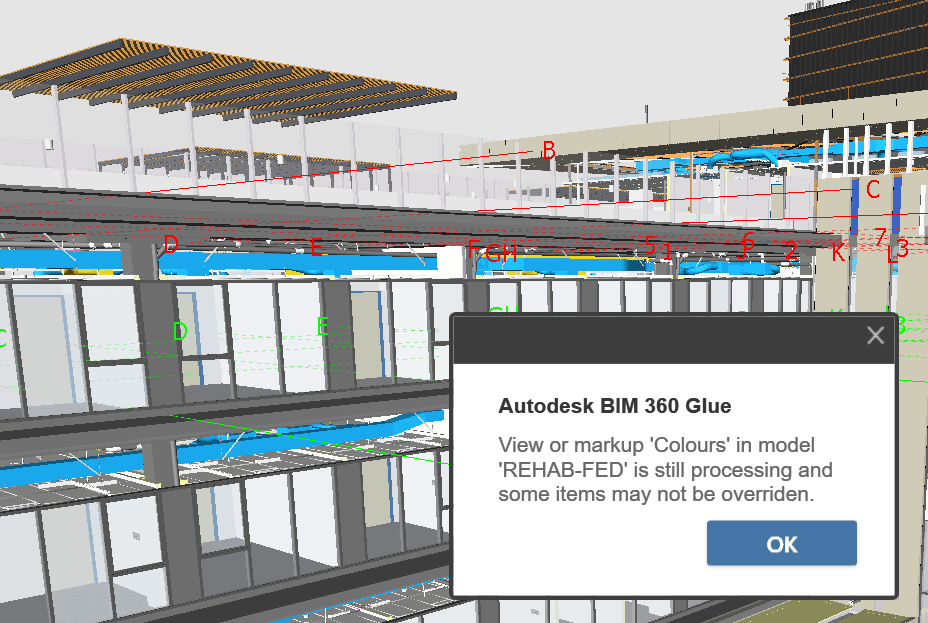
On a related note, you may have seen this warning:
View in model is still processing and some items may not be overridden
It seems that this might put your Glue merged model in a dirty state? Try deleting all views with this message before trying to create Shared Views from Navisworks with colour overrides.
The fact that I’m posting about it means that it probably isn’t really that easy, right? There are a few challenging pieces of the puzzle that all need to come together to get C4R or Collaboration for Revit working on a real project. I just went through this process with a mechanical firm so it is all pretty fresh in my mind.
Firstly, note that A360 Team has been rebranded as BIM 360 Team and will be migrated, more details at this post.
Secondly, Autodesk really wants your whole team (like everyone, every consultant, every Revit link) on Collaboration for Revit. However, out in the real world it is just happening bit-by-bit, and in the meantime some hacks and workarounds can make the process a little bit easier.
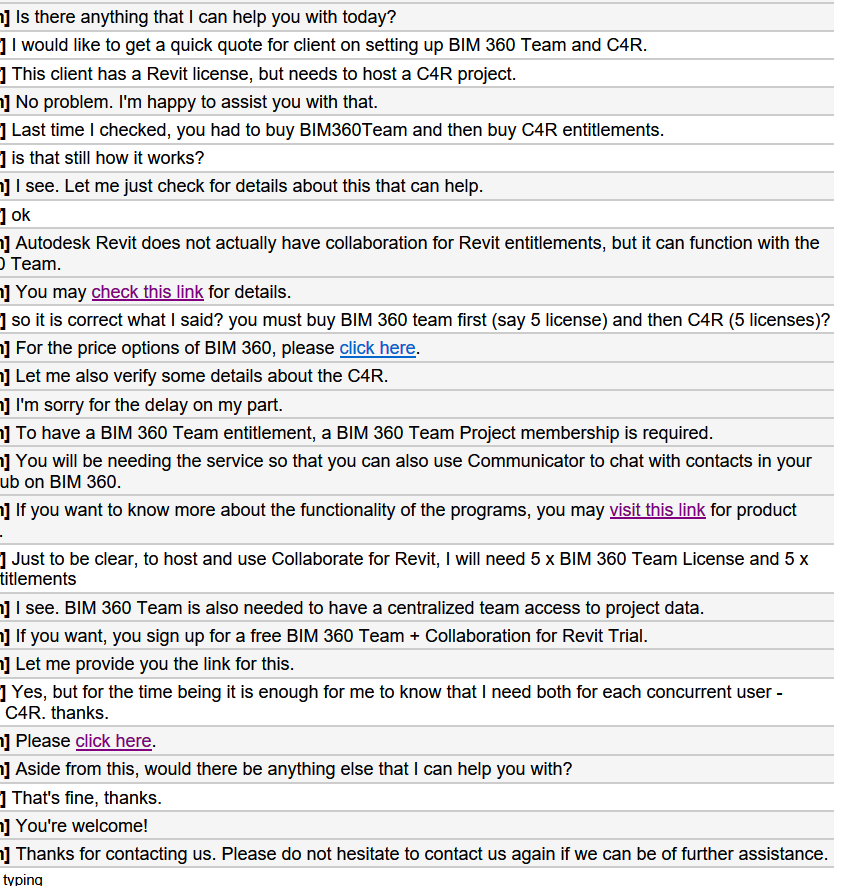
A Quick Overview
Ok, so Collaboration for Revit runs on top of BIM 360 Team. What this means is that you need to have an active BIM 360 Team license if you wish to run projects. Then, you need a Collaboration for Revit license for each Revit user who will be connecting to that BIM 360 Team site. You still with me? This also means that persons outside of your firm may connect to your projects, provided they have their own Collaboration for Revit entitlement applied to their Autodesk account.
Once you have the BIM 360 Team license, and the Collaboration for Revit licenses, you then need to “Assign” the Collaboration for Revit licenses out to the users (using their Autodesk login details).
Finally, you need to actually do some stuff, like:
make a BIM 360 Team project,
invite the users,
initiate Revit models, and
get the links working.
Its a lot to take in, so you can see that the blog title is actually a half-joke 🙂 However, we were able to get all this up and running in about 4 hours for one firm, so you can too. Hopefully. Something that will help
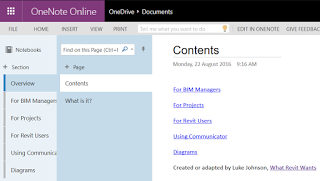
Given that there are a lot of moving pieces, I turned to my favourite research and documentation tool, OneNote. I have created a public notebook that you can view at this link: Revit Collaboration Public Help
Basically all of the steps involved in getting the licensing setup, inviting users, installing the addin, and initiating models onto Collaboration for Revit are in the notebook linked above. I will continue to update and add to this over time.
Any Questions?
Just comment to this post and I will endeavour to answer your question in the notebook, or point you toward the answer.
Now, here are a few other bits and pieces that may be useful, if the notebook doesn’t answer your questions…