When loading merged models from BIM 360 Glue, selection sets and clash tests that
were created with Navisworks 2018 or earlier now show and maintain the correct
individual model or file selections (NW-54655).
Changing a Timeliner appearance using the Configure tab no longer causes a crash
when .NET Framework 4.8 is installed (NW-54941).
Navisworks will no longer run out of memory and crash when saving an NWF file larger
than 2GB to an NWD format (NW-55133).
Patched a potential security vulnerability in the licensing code (NW-55168).
When Revizto Stamps were first released, I didn’t fully understand how powerful they would become – but now, Stamps are probably the most widely used method of issue creation in the entire Revizto ecosystem. A Stamp is basically an “Issue Template”. If you have a particular type of issue or problem or question that regularly comes up on your projects, you create a Stamp so that you don’t have to keep entering the same data over and over again. These stamps can be pre-tagged, prioritised, and pre-assigned, and that creates real efficiencies across your entire project team and lifecycle.
Up until now, Stamps could only be created inside the Revizto Viewer – but as of Revizto 4.11 (released today), you can now create a Stamp issue from Revit or Navisworks (or other software with the Revizto plugin).
Here’s how to do it in Revit (the workflow is similar in all platforms):
Open a Revit project that is connected to a Revizto project
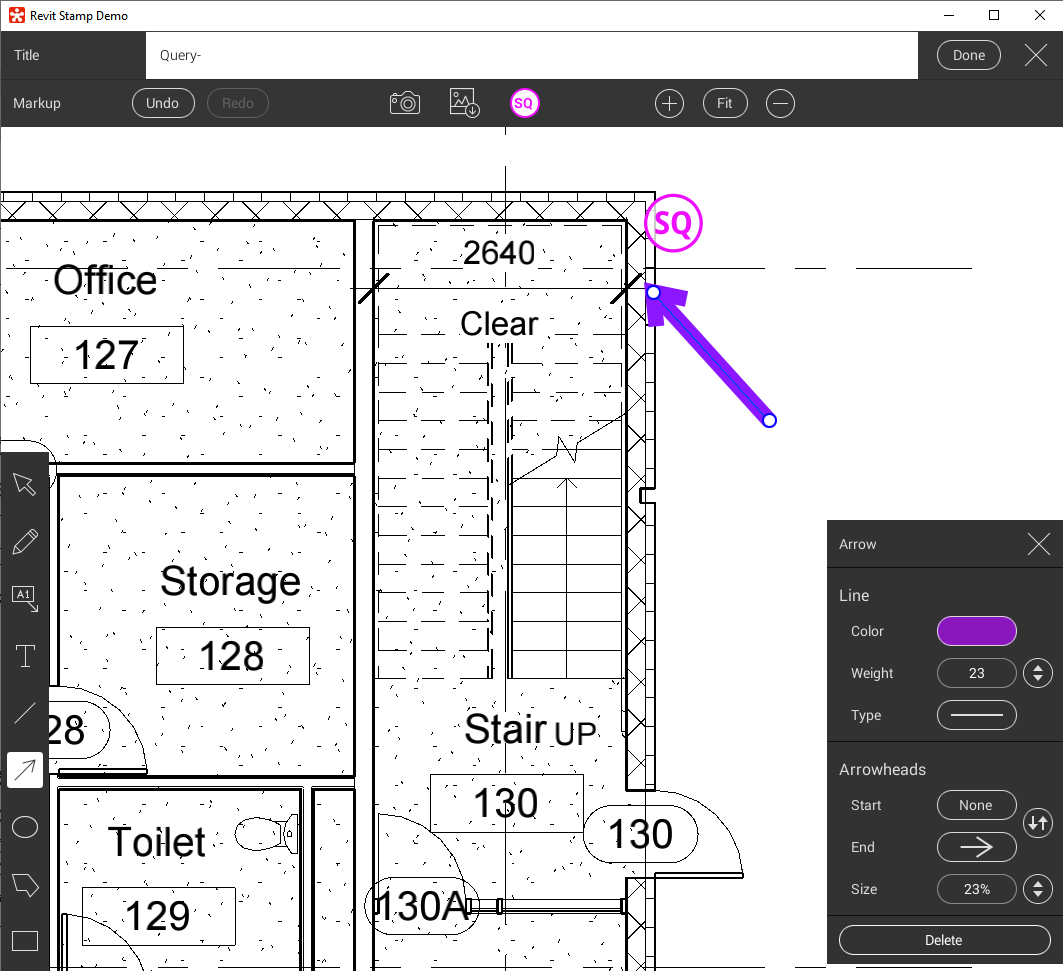
While reviewing the model or drawings, click the New Issue button
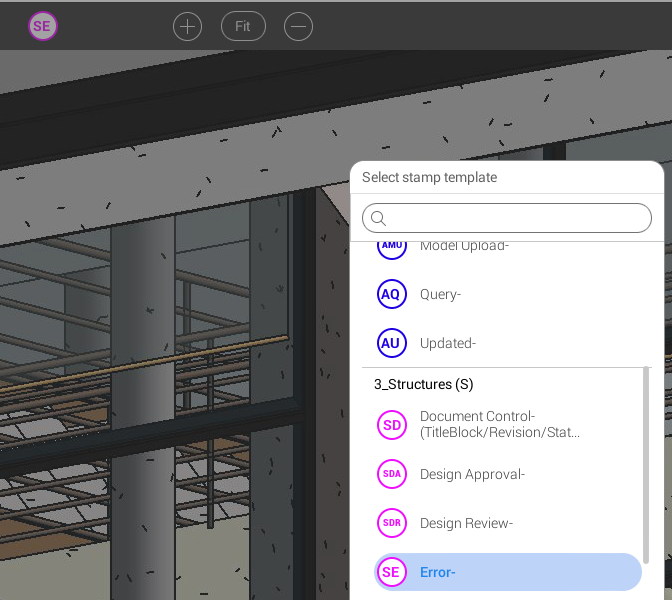
On the issue creation screen in Revizto, click the ST button (this allows you to apply the Stamp to the new issue):
Select the relevant Stamp from the list:
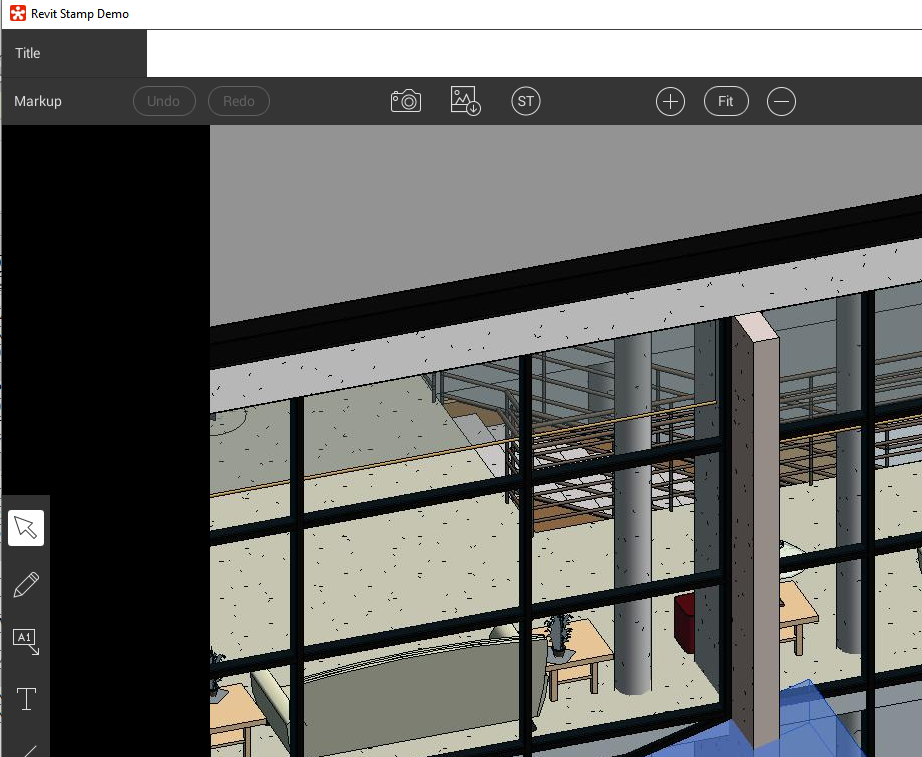
Optionally edit the pre-filled issue title to add more detail
Add any desired markups with the markup tools
Click Done
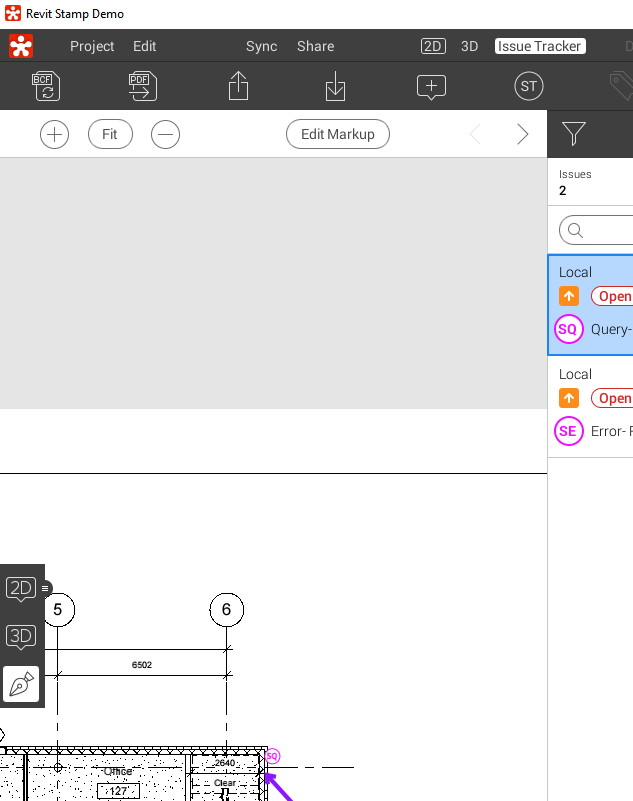
The above workflow can also be performed from a Revit Sheet (creating an issue on the 2D sheet that has been synced from Revit to Revizto):
If you want to adjust the Stamp pin position (for 3D issue):
Go to the issue
Click 3D on the far left
Click Update 3D at the top
Move the pin in 3D space
Click Done
The above workflow to move a pin position is similar for 2D issues, but you should click on the Markup icon on the far left, and then click Edit Markup at the top of screen.
This new feature will further increase the already widespread use of Revizto Stamps, and in turn improve the consistency of data applied to issues… regardless of what platform you are using to review or markup your designs!
Also in this new version is enhanced Procore integration, and Vectorworks 2020 support. Full release notes copied below…
Revizto 4.11 Release Notes
Version : 4.11.52232 (17 October 2019) Revizto app
– Direct integration with Procore RFI module. Ability to elevate Revizto issues to new or existing RFIs. Once the issue is elevated, its status will be locked – it will reflect the status of the RFI. All RFI status changes will be reflected in Revizto issue.
Important note: the integration with Coordination Issues module of Procore has been discontinued in favour of direct RFI integration.
– Ability to create stamps from plugins (Revit, Navisworks, etc). There is a new stamp button on the issue creation screen that allows converting issue to stamp upon creation.
– Enhancements for saved issue filters: ability to search by name and apply alphanumeric ordering.
– Clearing the cache for Revizto projects now has several options. For example, it now allows removing all project files to save space on the hard drive, while keeping export settings.
– Increased the character limit to 100 characters for stamp category names.
Having recently installed some more storage hardware, and previously posted about moving folders with symbolic links, I then decided to move my BIM 360 Glue cache folder and Navisworks Cache folder to a secondary hard drive. I did this using symbolic links.
You need to:
start a Command Prompt as Administrator
use the commands shown below
Moving BIM 360 Glue cache storage location:
if exist "%localappdata%\Autodesk\Bim360Glue 2016\LocalCache" rename "%localappdata%\Autodesk\Bim360Glue 2016\LocalCache" bim360glue2016.old
mklink /d "%localappdata%\Autodesk\Bim360Glue 2016\LocalCache" R:\BIM360Glue2016
if not exist R:\BIM360Glue2016 MD R:\BIM360Glue2016
robocopy /mir "%localappdata%\Autodesk\Bim360Glue 2016\bim360glue2016.old" R:\BIM360Glue2016\
Moving Navisworks cache storage location:
if exist "%localappdata%\Autodesk\Navisworks 2019\LocalCache" rename "%localappdata%\Autodesk\Navisworks 2019\LocalCache" Navisworks2019Cache.old
mklink /d "%localappdata%\Autodesk\Navisworks 2019\LocalCache" R:\Navisworks2019Cache
if not exist R:\Navisworks2019Cache MD R:\Navisworks2019Cache
robocopy /mir "%localappdata%\Autodesk\Navisworks 2019\Navisworks2019Cache.old" R:\Navisworks2019Cache\
After you have run the scripts above, you can delete the old folders with the .old suffix (Navisworks example shown below).
Experienced Navisworks Coordinators typically have a very solid workflow in place for grouping clashes into clash groups. Some prefer to do that part manually (with selection and filters), so they can observe and determine which items should be grouped together. Others will use an auto-grouping tool, like bim42 Group Clashes, or iConstruct.
If you are using iConstruct and you wish to use the Navisworks clash group data downstream, you may wish to preserve existing clash groups at each subsequent clash run, and only group the ‘new ungrouped’ clashes. The bim42 Group Clashes tool has a tickbox for this, and iConstruct 2019 provides a filter. If you are using iConstruct 2018 or older, you may be wondering how to preserve existing clash groups and only “push” the grouping rules for clashes that are currently not grouped.
Here’s how:
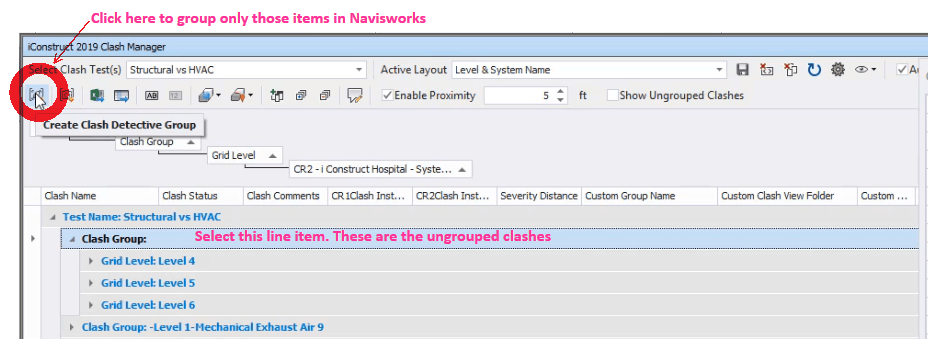
Run the Clash Manager from iConstruct
Find the list entry without a name
Versions:
iConstruct 2019 has a filter for “Show Ungrouped Clashes”
iConstruct 2018 – select only the ‘unnamed’ Clash Group: ,
Then click “Create Clash Detective Group”
iConstruct will immediately create the relevant groups from only the ungrouped clashes
You can then go ahead and Sync to Revizto, or use the data downstream in some other workflow
Here’s a video from Robert Gadbaw that clearly demonstrates this workflow:
This workflow will allow you to use iConstruct to group your clashes, and preserve those groups when Syncing with Revizto. Revizto has a very solid and customisable connection to Navisworks that includes the ability to sync the clash results with Revizto Issues in both directions.
Models change rapidly at various stages of the project, and it can be useful to review model status between different revisions of the models. What changed? Why?
There are a number of Model Compare tools out there, Navisworks has one built-in and there are addins for Revit. But what if you just want a quick visual check?
Here is one method using Revizto…
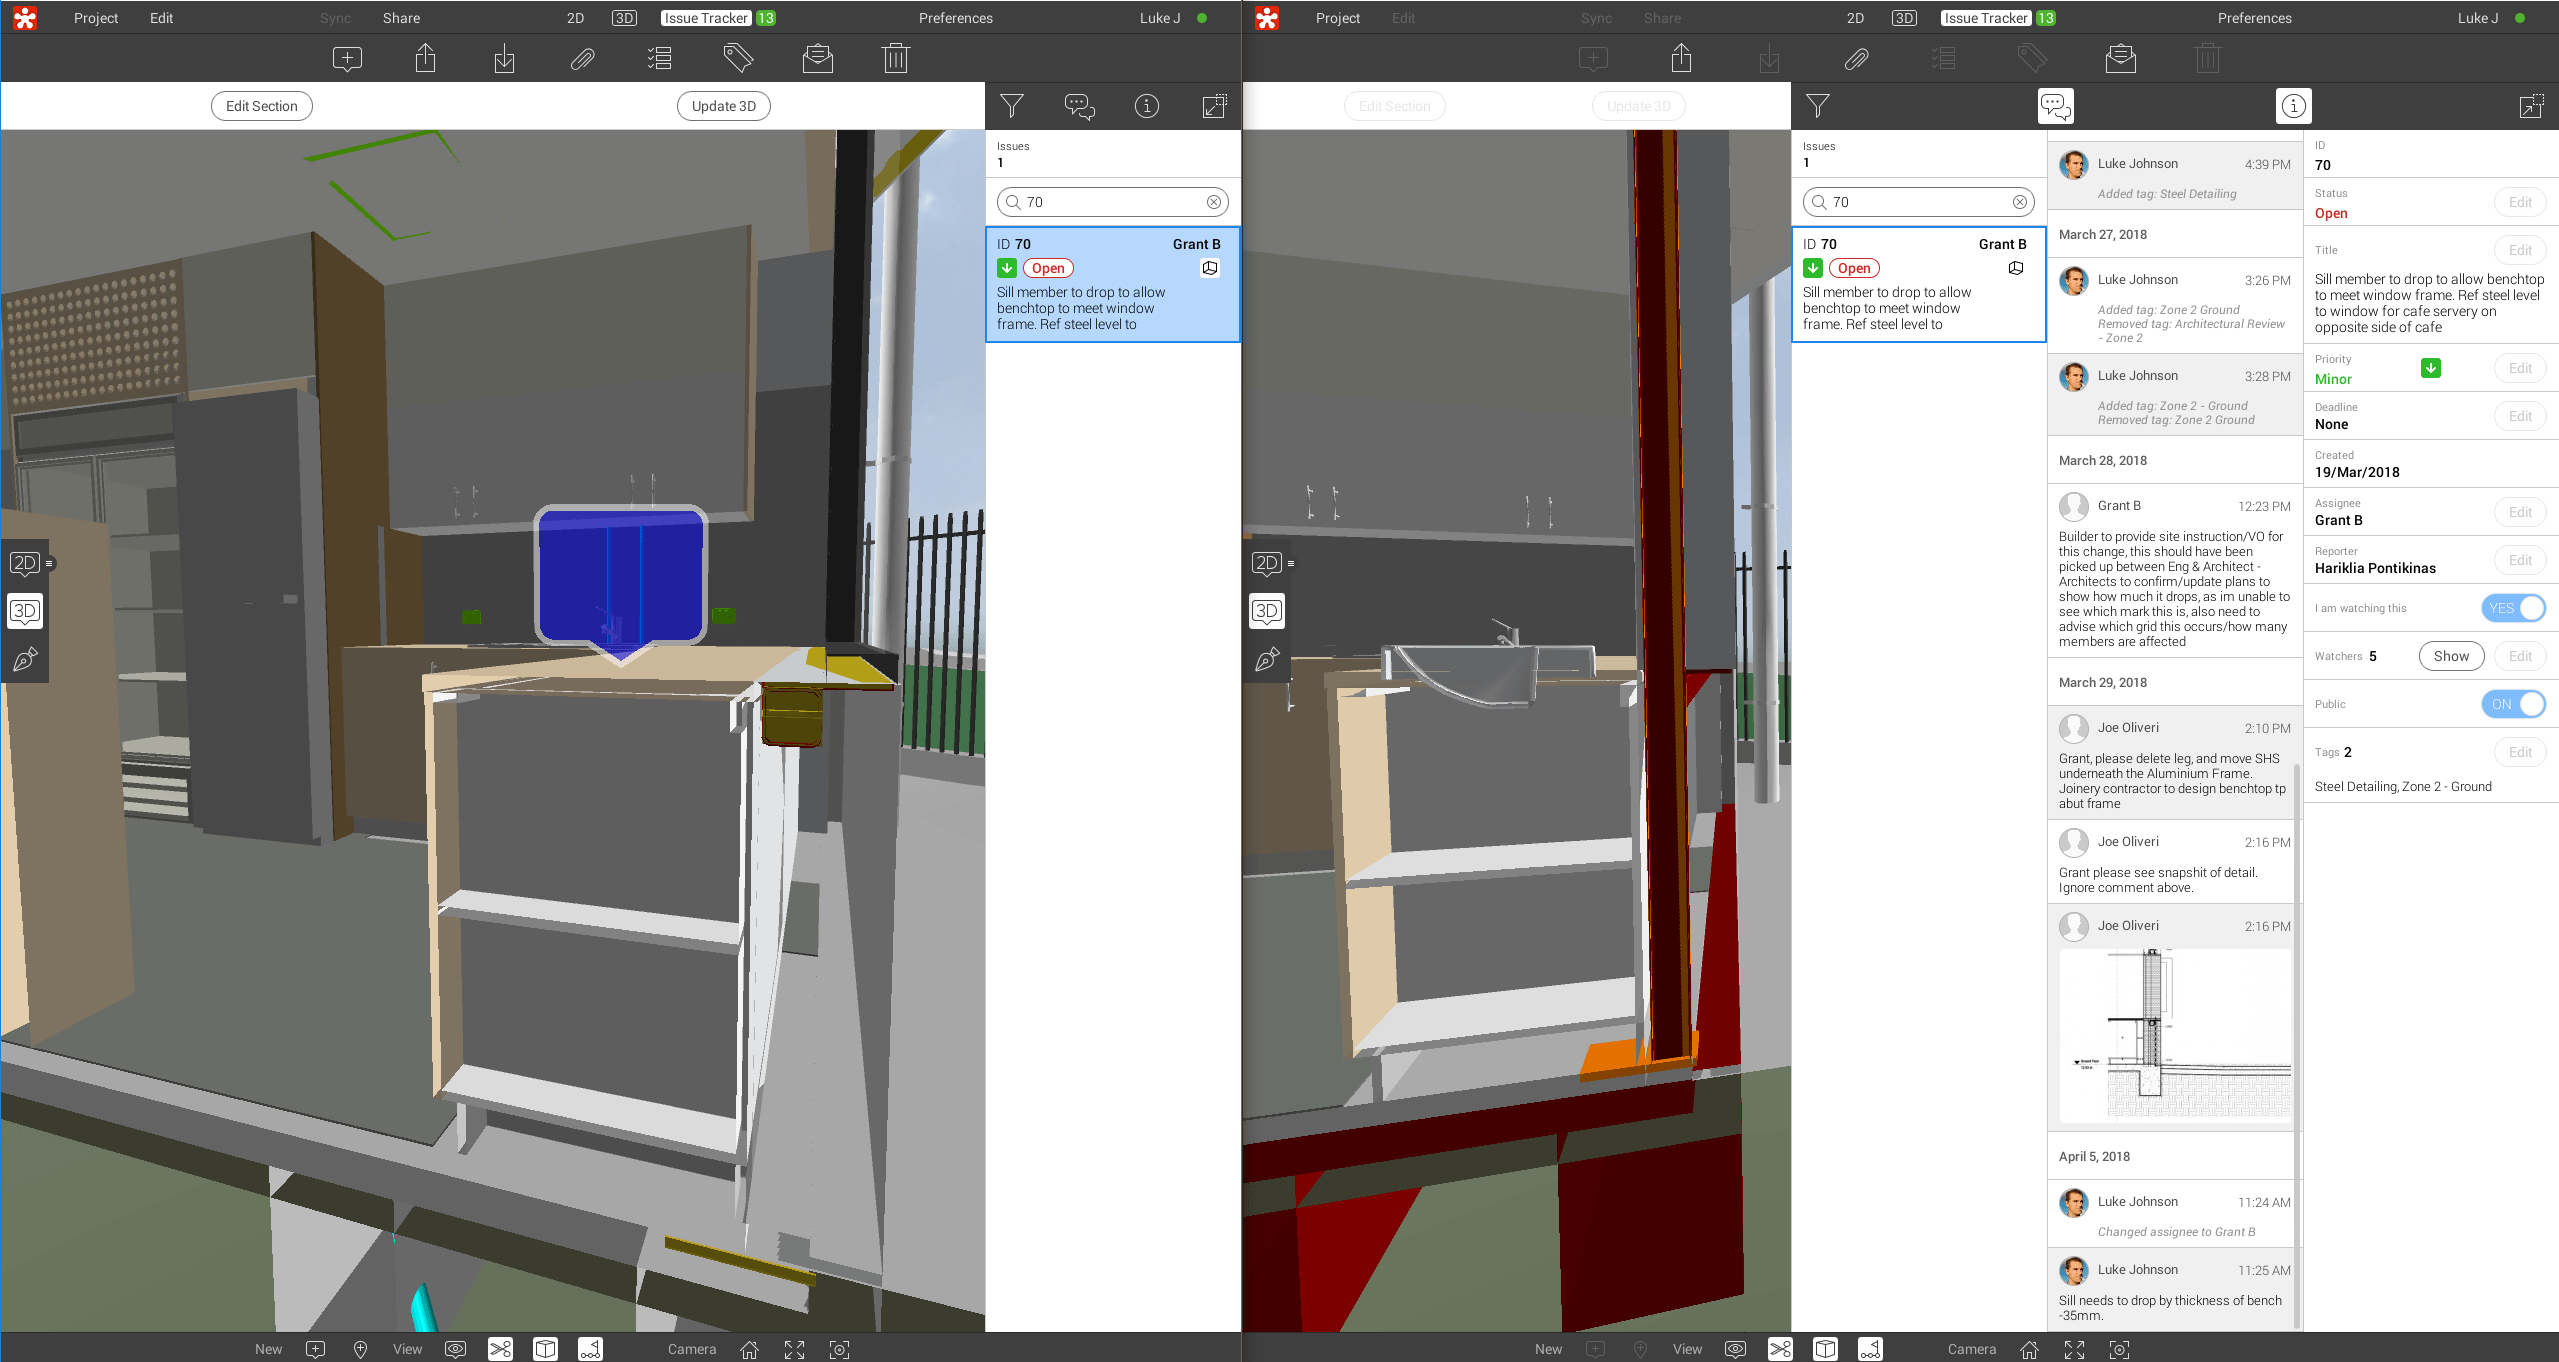
Using Two Instances of Revizto and the Issue Tracker to Compare Models
Open two instances of Revizto and put them side by side on your screen (large monitor will help)
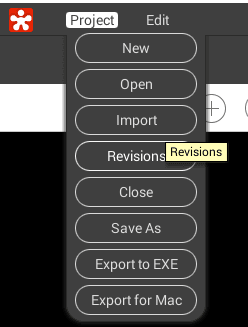
On one of the instances, go to Project -> Revisions and open a previous version of your model
You can now navigate between two different versions in these two instances
The issue tracker data is always up to date, so you can use the Issue Tracker to co-locate yourself in each file and check the differences. Just click on the same issue in the Issue Tracker, and then click on 3D to visually compare the models. Obviously, you can also enter data and snapshots into the Issue Tracker as per usual, perhaps to comment on why a particular model changed between versions.
Another Idea…
Essentially, this idea was to launch two instances of Revizto and use the Camera Share tool to navigate the same model between them. It was a bit more involved, and it requires you to have access to two different login accounts for Revizto, and two different login accounts for the current machine, and Revizto is installed ‘For Everybody’.
(needless to say that you should be careful to protect the password above)
Open Revizto normally and login
Run this CMD file, and in the new instance of Revizto you can login to a different Revizto account
Open the same Revizto project in each
You can now use the Camera Share tool to ‘drive’ both instances simultaneously. Pretty cool!
In one of the instances, open a previous Revision of the model
*This is where the idea fell down, as Camera Share no longer offered to share camera between two different versions of the model :)* Evidently, it won’t let you navigate non-similar models at the same time.
I re-tooled the steps above from my previous post about logging into multiple Autodesk logins at the same time:
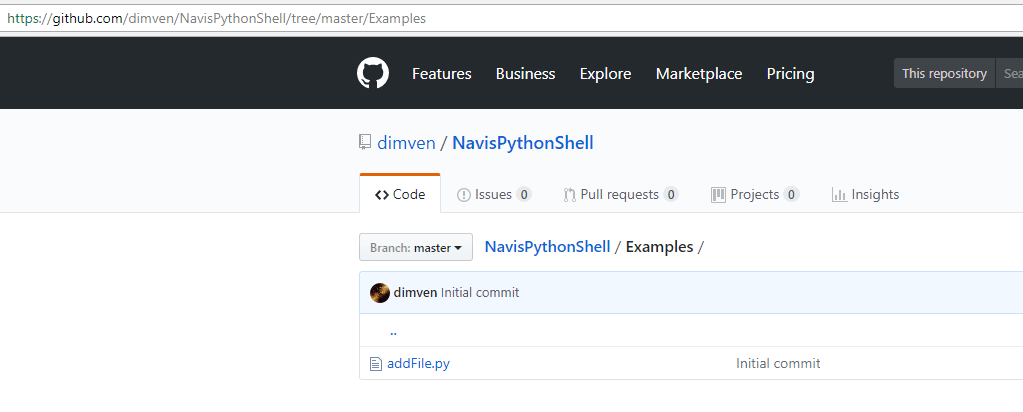
Interesting little release by Dimitar Venkov on Github a few months ago. It is essentially a Python shell for Navisworks 2016. You install by unzipping as per instructions below. You may have heard about RevitPythonShell, but obviously this one is for Navis.
To install, simply extract the zip archive in the below folder:
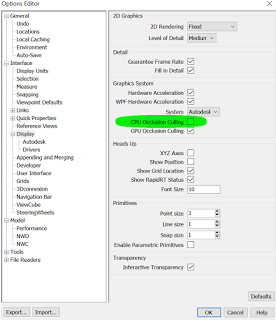
I’ve had a mixed experience using the Nvidia GTX 980 card in Navisworks and Revit, but I have one particular tip that helped in Navisworks 2017: Turn OFF CPU Occlusion Culling
My CPU is an i7-6700K that I generally OC to 4ghz. But obviously there is some slowdown when both of the Occlusion Culling boxes are ticked.
Aside from the usual tips of using ‘Guarantee Frame Rate’, Automatic Clipping Planes, and playing around with the File Options – Frame Rate, I found that turning off CPU Occlusion Culling and leaving GPU Occlusion Culling on made a real difference for the better.
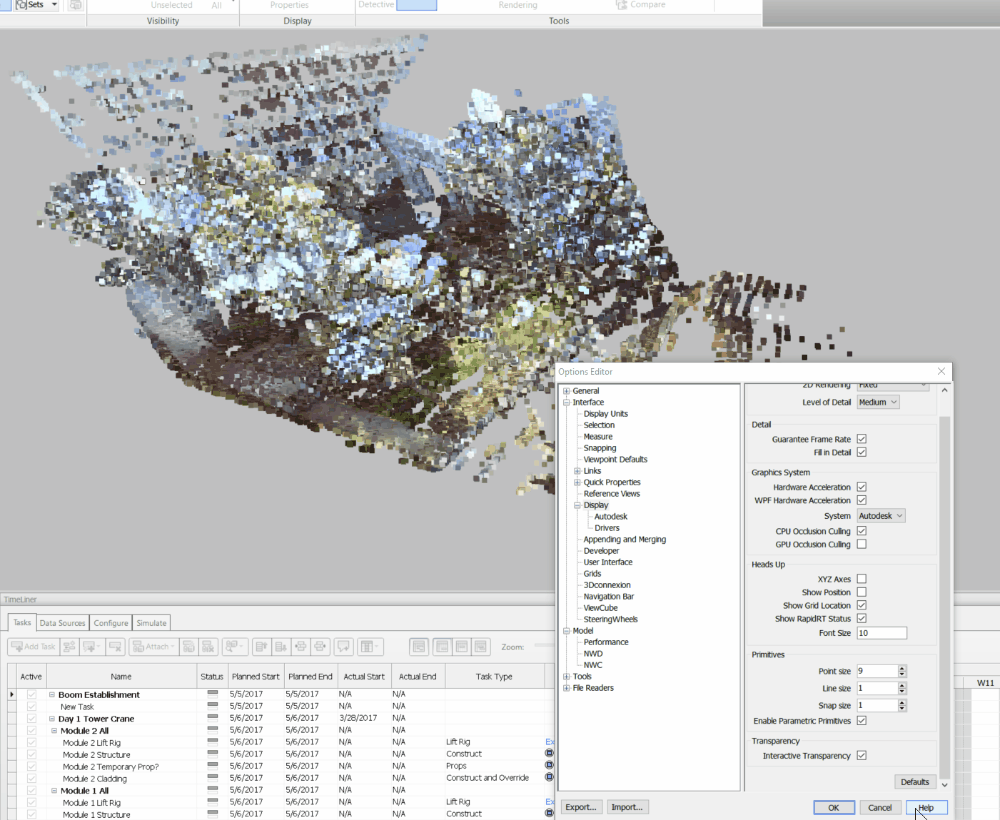
Navisworks works really well with Point Clouds, particularly in association with Recap. It will usually create ‘voxels’ – groups of points that you can hide or change colour or use in other Navisworks workflows.
However, sometimes the ‘point size’ seems too fine. To modify this, just open up Navisworks Options to Interface – Display, and change the Primitive size for Points to something that looks better. You can choose any size from 1-9.
Also, there are additional settings under File Readers – ReCap:
You can set an ‘interactive point size’ here, which is going to override the point display when you are zooming around or navigating the model.
Parts allow some extremely powerful workflows in Revit. Did you know that you can take an in-place family, and when you Divide Parts, Revit will make an individual Part for each geometric element?
For example, let’s say you have a big sweep that represents a large part of a Building, and that Sweep is inside an in-place Generic Model family in the project.
Firstly, use some Voids to cut the sweep into the sections or pieces that you want…
and then select that Generic Model Family and click Create Parts. You will get a Part for each geometric piece, like this:
Then, if you edit the underlying Family and divide it with more Voids, Revit will automatically create and update the Part elements as needed. Very cool.
From here, you can export those Parts to Navisworks for animation or sequencing, if you so desire.