Every now and then you come across a project that is still using a super-old version of Revit (remember Revit 2017? Yeah, it was released about 5 years ago…) You might have found that your old versions of Revit have actually stopped working or stopped activating due to Autodesk license system changes.
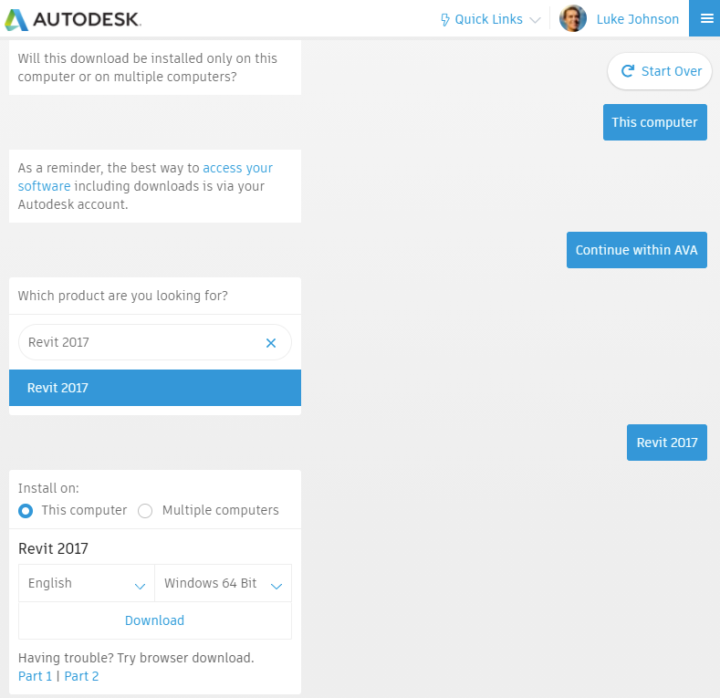
So… how can you get access to Revit 2017 or other old Revit versions? As recent as November 2020, Autodesk enabled access as shown below:
So you can use, at this point back to 2015 and next year and when the software advances to the new version in April, this will change to 2016.
There shouldn’t be any need to apply for the extra previous licenses. The seats won’t show up in the Autodesk Account however and you need to access the installers via AVA. https://ava.autodesk.com/
Please note that 2017 Autodesk software supports the login method. That means that you will not use a serial number when the install the software. You should gain access to 1 seat of the 2017 Revit for every applicable Revit product that you own on subscriptions. By assigning Revit to a user you will effectively grant them access to all versions so you don’t need to specifically assign 2017.”
As simple as that! Just use AVA to download and install the older version. See the short video below:
Thanks to Dave Murray from McGregor for the heads-up!
The Revit 2020 updates and hotfixes are cumulative and include all changes from previously released Revit 2020 updates.
After this hotfix is applied successfully, the build number specified on the Help > About dialog will be:
20.2.20.31
20200426_1515(x64)
2020.2.2
Software embedded in the update executable:
Revit 2020 – version 20.2.20.31
Autodesk Cloud Models for Revit 2020 – version 20.2.20.31
Personal Accelerator for Revit – version 21.0.11.0
OpenStudio – version 0.1.9
Issues Resolved
Annotation – Dimensions
Fixed an issue when upgrading a model with an incorrect dimension leader style.
Beams, Braces
Fixed an issue that structural framing elements might be incorrect for cloud rendering.
Fabrication – MEP
Fixed an issue that could lead to product instability when dragging to connect open ends of inline fittings.
Fixed an issue with the Optimized Straights feature which was occasionally incorrectly altering the length option from Auto to Value.
Family Editor
Improved stability when using Create Similar with certain families.
File Open/Save Internals
Improved stability when saving a family file from a cloud model after changing the Maximum backups in File Save Options dialog.
Floor
Improved stability when orbiting or editing elements in a 3D view.
gbXML
Fixed an issue that caused exterior wall surfaces to be assigned to a space without a spaceIdRef when exported to gbXML.
Import/Export Other
Updated Revit to use FBX Toolkit version 2020.0.
Licensing
Fixed an issue which caused Revit to become unresponsive.
Link Topography
Fixed an issue where coordinates were changed when the linked topography was reloaded.
MEP Other
Improved stability when editing a family that had been corrupted.
MEP Pipe
Fixed an issue that caused instability when switching views while editing a pipe’s diameter.
Reinforcement – Shape Driven Rebar
Improved stability when upgrading a Revit project containing rebar.
Improved stability when editing rebar constraints.
Revit Home
Fixed an issue where the name of the local copy instead central model was displayed on the Recent Files page.
Startup/Shutdown
Removed potential security vulnerability.
User Interface
When an unrecoverable error happens, a clear link from Revit to the self-service support page is provided.
View – Analysis Visualization
Improved the performance of the display of Analysis Visualization entities when more than one set of independent results is added to a view simultaneously.
ViewCube Navigation
Improved stability when click on the navigation bar.
Important Notes
Dynamo for Revit
In some cases Dynamo will not be visible within the Manage tab after 2020.2.2 Hotfix is applied. To restore Dynamo, replace DynamoRevitDS.sig and DynamoRevitVersionSelector.sig the following location: C:Program FilesAutodeskRevit 2020AddinsDynamoForRevitRevit
Content
Updated Content for Revit 2020.2 is not included in the patch deliverable and is provided on the Autodesk Knowledge Network, link.
Uninstall
Revit updates cannot be uninstalled to revert Autodesk Revit 2020 to its pre-update state. If you need to remove the update, please uninstall Autodesk Revit 2020 and then reinstall it.
When Revizto Stamps were first released, I didn’t fully understand how powerful they would become – but now, Stamps are probably the most widely used method of issue creation in the entire Revizto ecosystem. A Stamp is basically an “Issue Template”. If you have a particular type of issue or problem or question that regularly comes up on your projects, you create a Stamp so that you don’t have to keep entering the same data over and over again. These stamps can be pre-tagged, prioritised, and pre-assigned, and that creates real efficiencies across your entire project team and lifecycle.
Up until now, Stamps could only be created inside the Revizto Viewer – but as of Revizto 4.11 (released today), you can now create a Stamp issue from Revit or Navisworks (or other software with the Revizto plugin).
Here’s how to do it in Revit (the workflow is similar in all platforms):
Open a Revit project that is connected to a Revizto project
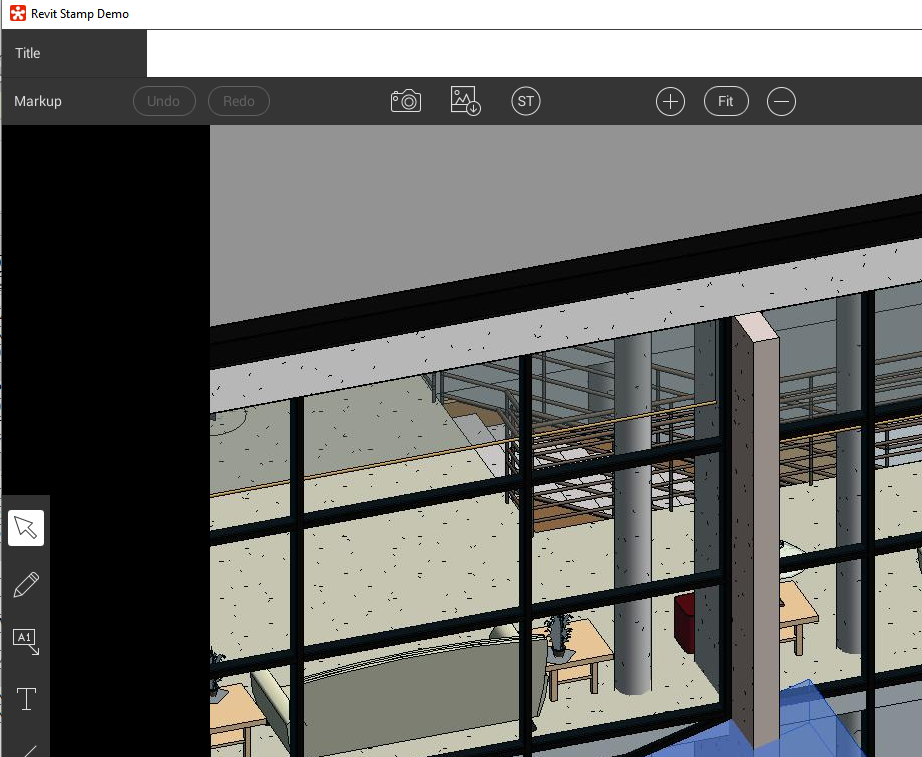
While reviewing the model or drawings, click the New Issue button
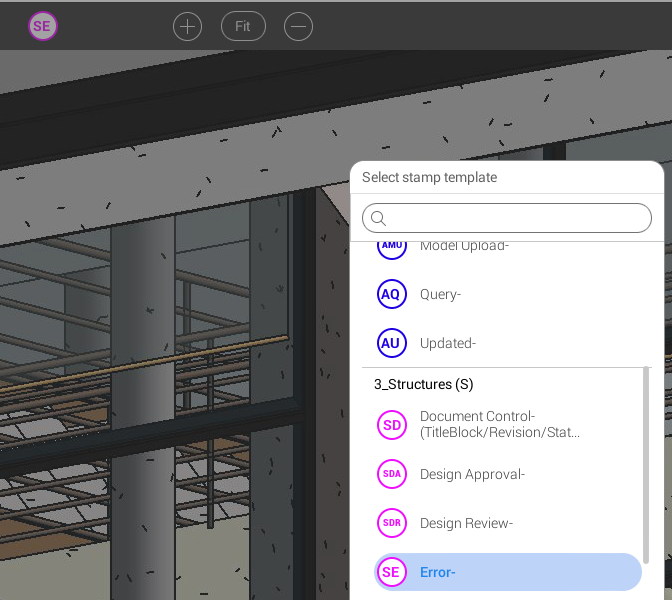
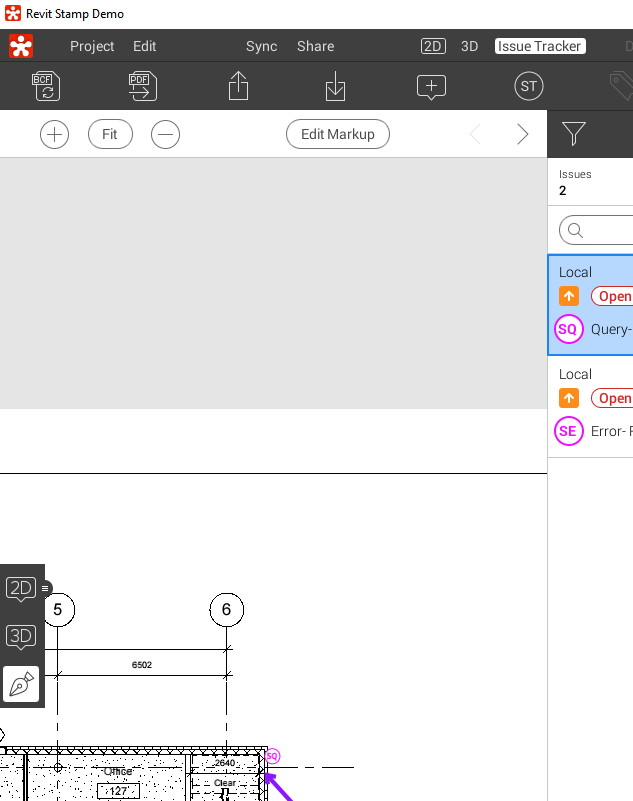
On the issue creation screen in Revizto, click the ST button (this allows you to apply the Stamp to the new issue):
Select the relevant Stamp from the list:
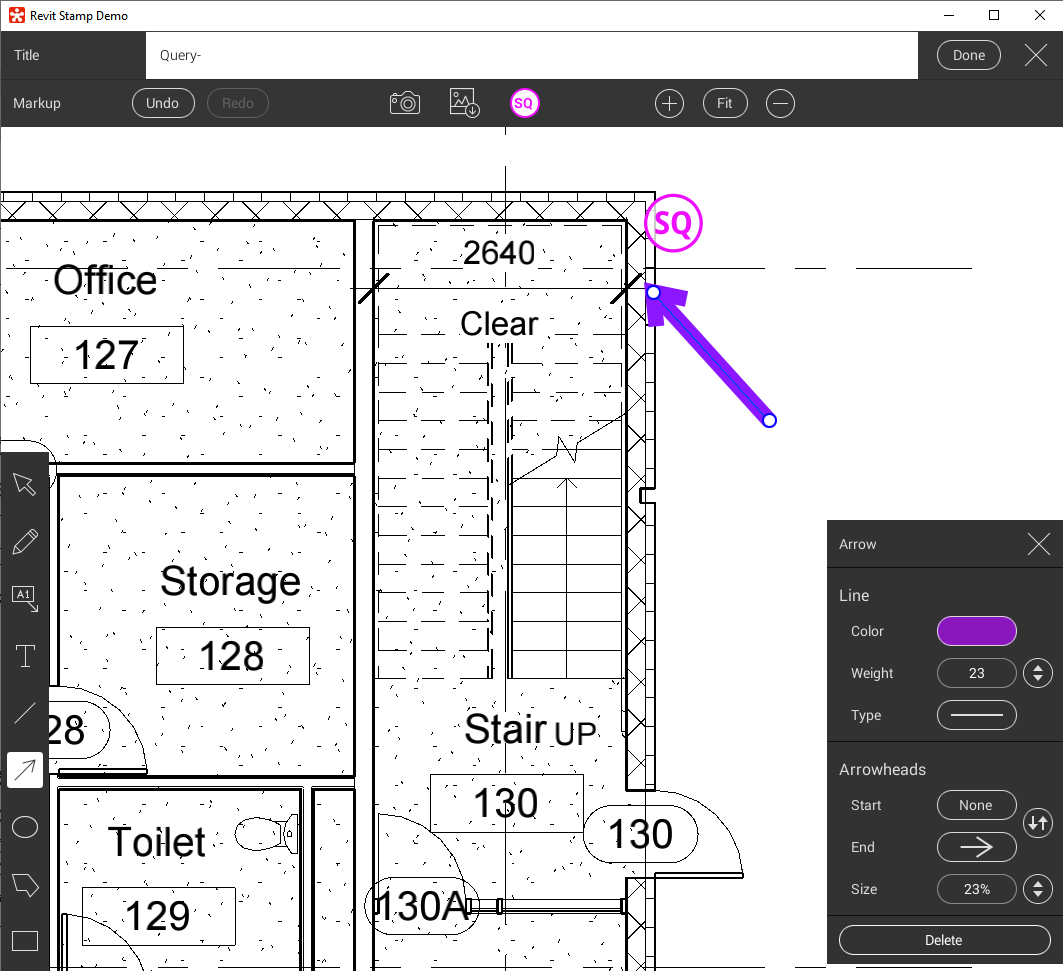
Optionally edit the pre-filled issue title to add more detail
Add any desired markups with the markup tools
Click Done
The above workflow can also be performed from a Revit Sheet (creating an issue on the 2D sheet that has been synced from Revit to Revizto):
If you want to adjust the Stamp pin position (for 3D issue):
Go to the issue
Click 3D on the far left
Click Update 3D at the top
Move the pin in 3D space
Click Done
The above workflow to move a pin position is similar for 2D issues, but you should click on the Markup icon on the far left, and then click Edit Markup at the top of screen.
This new feature will further increase the already widespread use of Revizto Stamps, and in turn improve the consistency of data applied to issues… regardless of what platform you are using to review or markup your designs!
Also in this new version is enhanced Procore integration, and Vectorworks 2020 support. Full release notes copied below…
Revizto 4.11 Release Notes
Version : 4.11.52232 (17 October 2019) Revizto app
– Direct integration with Procore RFI module. Ability to elevate Revizto issues to new or existing RFIs. Once the issue is elevated, its status will be locked – it will reflect the status of the RFI. All RFI status changes will be reflected in Revizto issue.
Important note: the integration with Coordination Issues module of Procore has been discontinued in favour of direct RFI integration.
– Ability to create stamps from plugins (Revit, Navisworks, etc). There is a new stamp button on the issue creation screen that allows converting issue to stamp upon creation.
– Enhancements for saved issue filters: ability to search by name and apply alphanumeric ordering.
– Clearing the cache for Revizto projects now has several options. For example, it now allows removing all project files to save space on the hard drive, while keeping export settings.
– Increased the character limit to 100 characters for stamp category names.
One of the many BIM Services we provide at Virtual Built Technology is Construction Animations and Visualisations.
Check out our latest Demo Reel!
Let us know what you think… leave a comment or get in touch info@virtualbuilt.com.au
The Technical Stuff
Some of you may be interested in how we go about producing some of this content. I’ll keep it short and sweet, but you can see some of the programs we use below.
Models: The actual model content always comes from a variety of different sources, but primarily we produce most of our modelling content in Revit. This is often where we start, where we federate models and develop up a scene. However, we’re also use prone to using Sketchup, 3DS Max, Meshlab, Reality Capture (Drone captures), Lumion (for content)
Animation and Visualisation: When we get into animating our scene, we again play with a few different tools. Navisworks is ok for relatively complex scenes, and if you persist with the rather clunky Animator you can get some really cool shots and sequences. The biggest downside with NW is the visualisation department. You can render our the animations, but it’s really intense on your computer… Navisworks is also good for dealing with construction programs in Primavera or MS Project which although not impossible (with the use of scripts) is difficult in other software. 3DS max is also good for animations, but we’re finding lately that’s it’s a bit overkill for what we need to do, plus there’s quicker and easier solutions. That brings us to Lumion. Lumion is really great at producing some of this content. However, I’m not going to go into it too much… stay tuned for an upcoming post!
Post Production: Gone are the days of Windows Movie Maker and iMovie. Most of our content goes into post in Final Cut Pro and Motion. Here we’re slicing up music, adding annotation and text overlays. Here we also can add calendar sliders and other widgets.
Workflow: As you can see above, we need to use a lot of different applications to get to the result. On some projects we may use several applications several times over to get to the final deliverable. There is a lot to of other things to consider along this journey too… things like file formats, budgets, and timeframes. The biggest thing here then is having a good workflow.
Sometimes you have a set of DWFs that you would like to work with in Revit. For example, you might have DWFs of site equipment, fences and trucks that would be useful for site modelling in Revit. Here is one way to get those dwfs into a more Revit-friendly format…
Note: You need to have iConstruct with their Smart IFC Exporter for this workflow
Phase 1
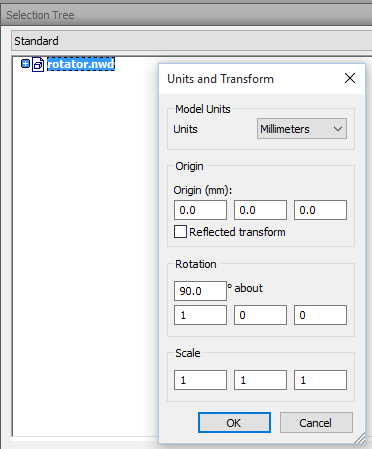
Create a container NWD for DWF files, so that you can fix rotation and coordinates:
Phase 2
Steps toconvertDWFto IFC with colours and object selectability:
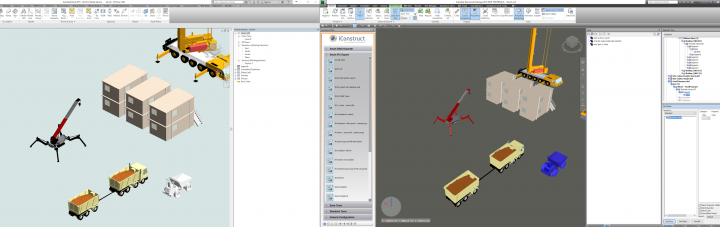
Open two Navisworks 2016 instances
Open the rotator.nwd from above in one instance
Append any DWFs you would like toconvert
Adjust their Units and Transform until they look right
Save the rotator.nwd
Open the container.nwf
Refresh to reload the rotator if necessary
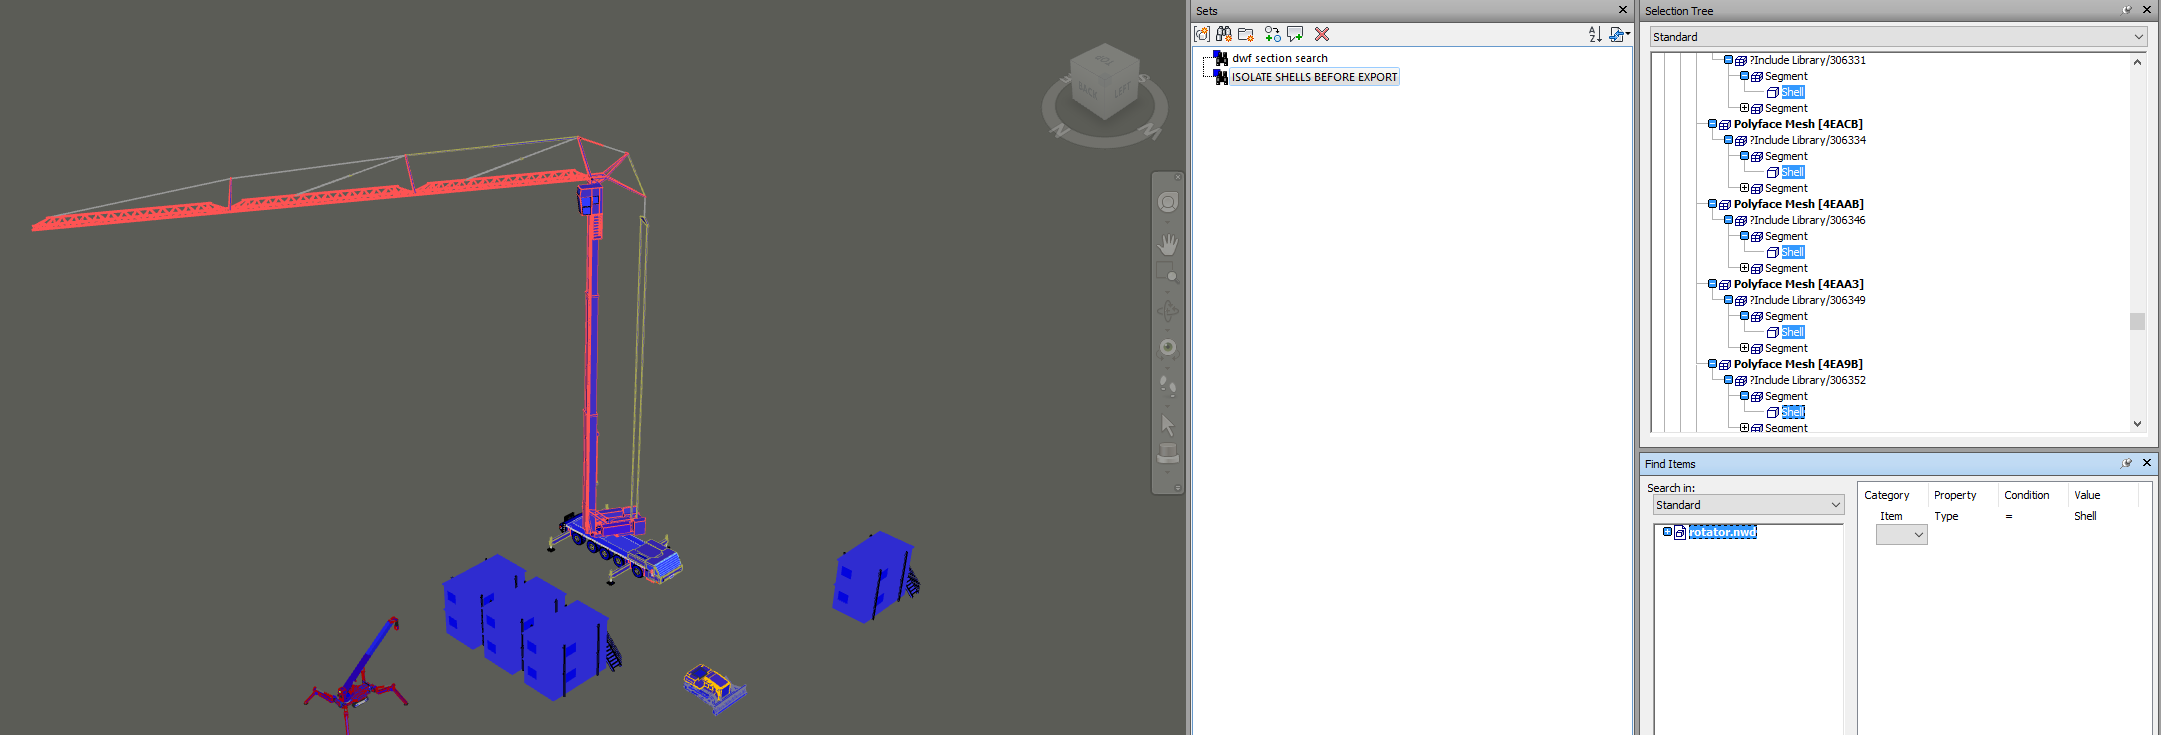
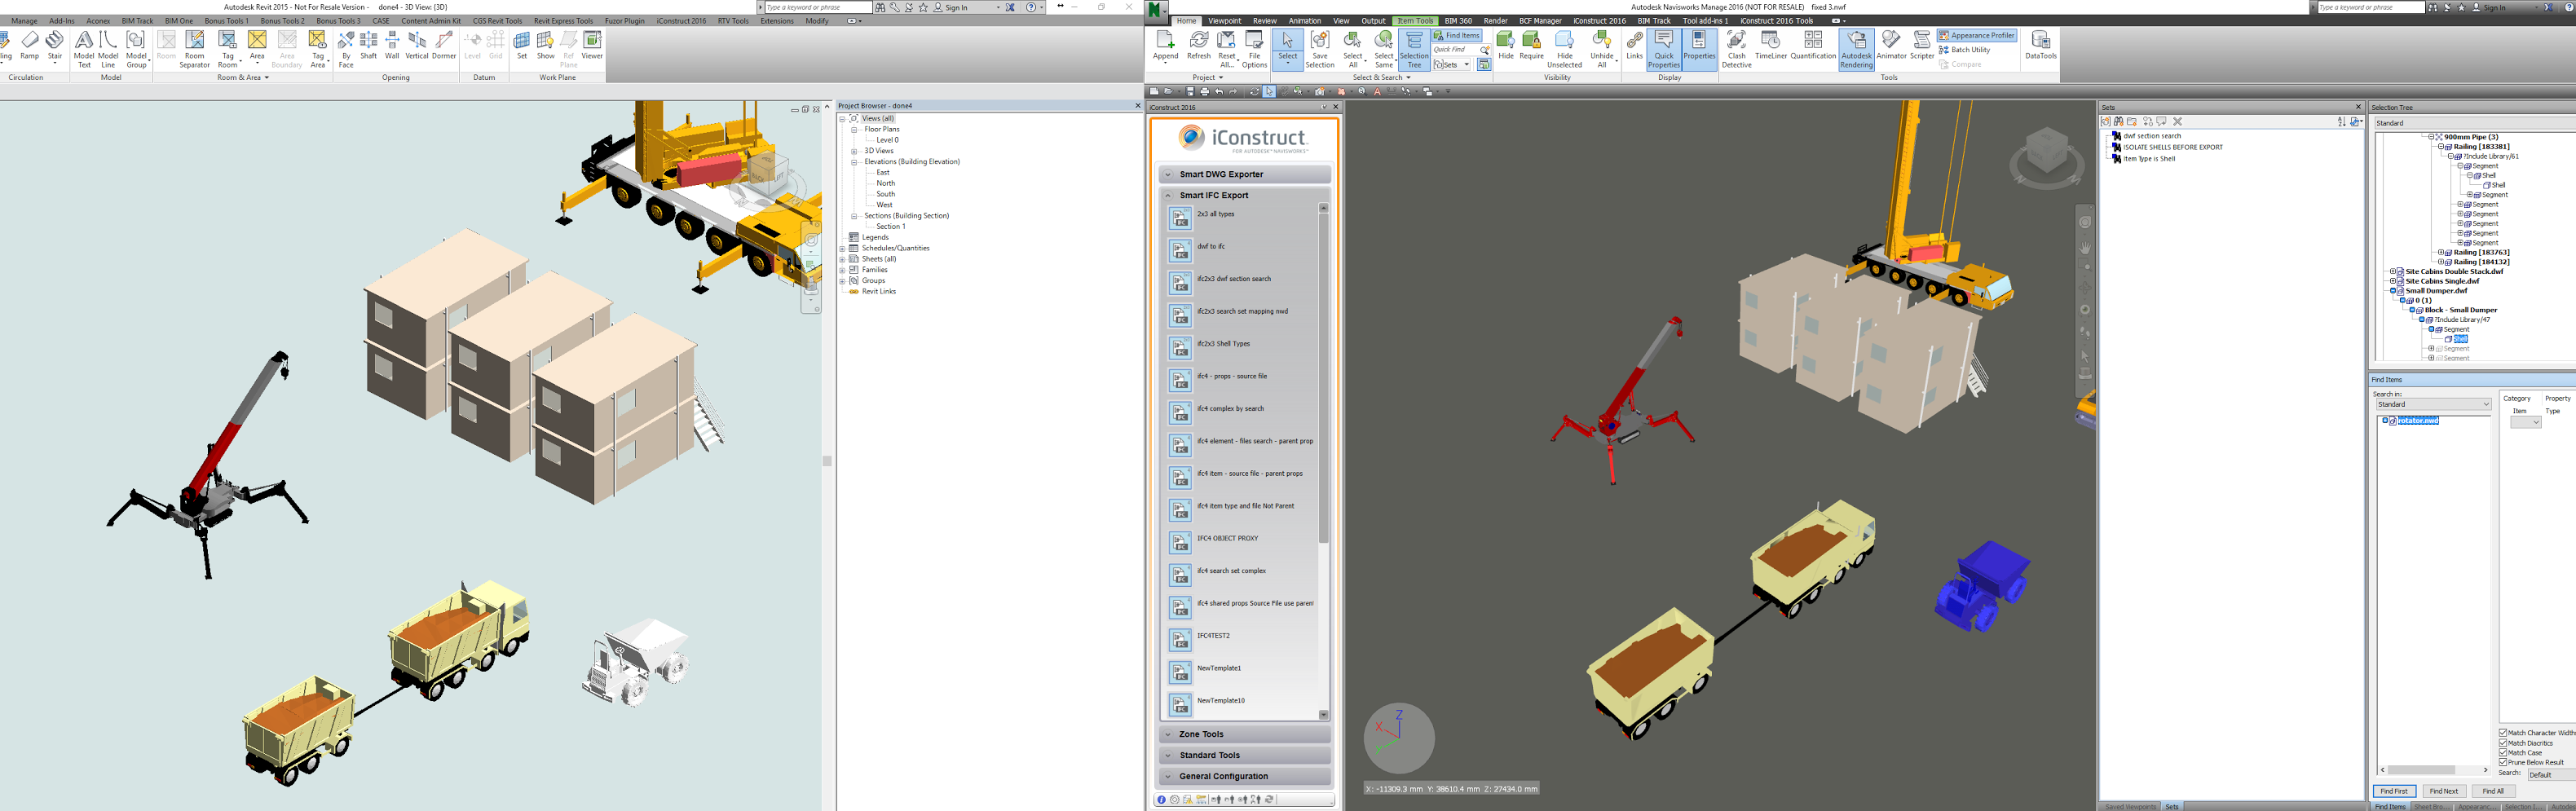
Now, hide everything but ‘shell’ elements using a search like this:
Save the search set for Item Type = Shell
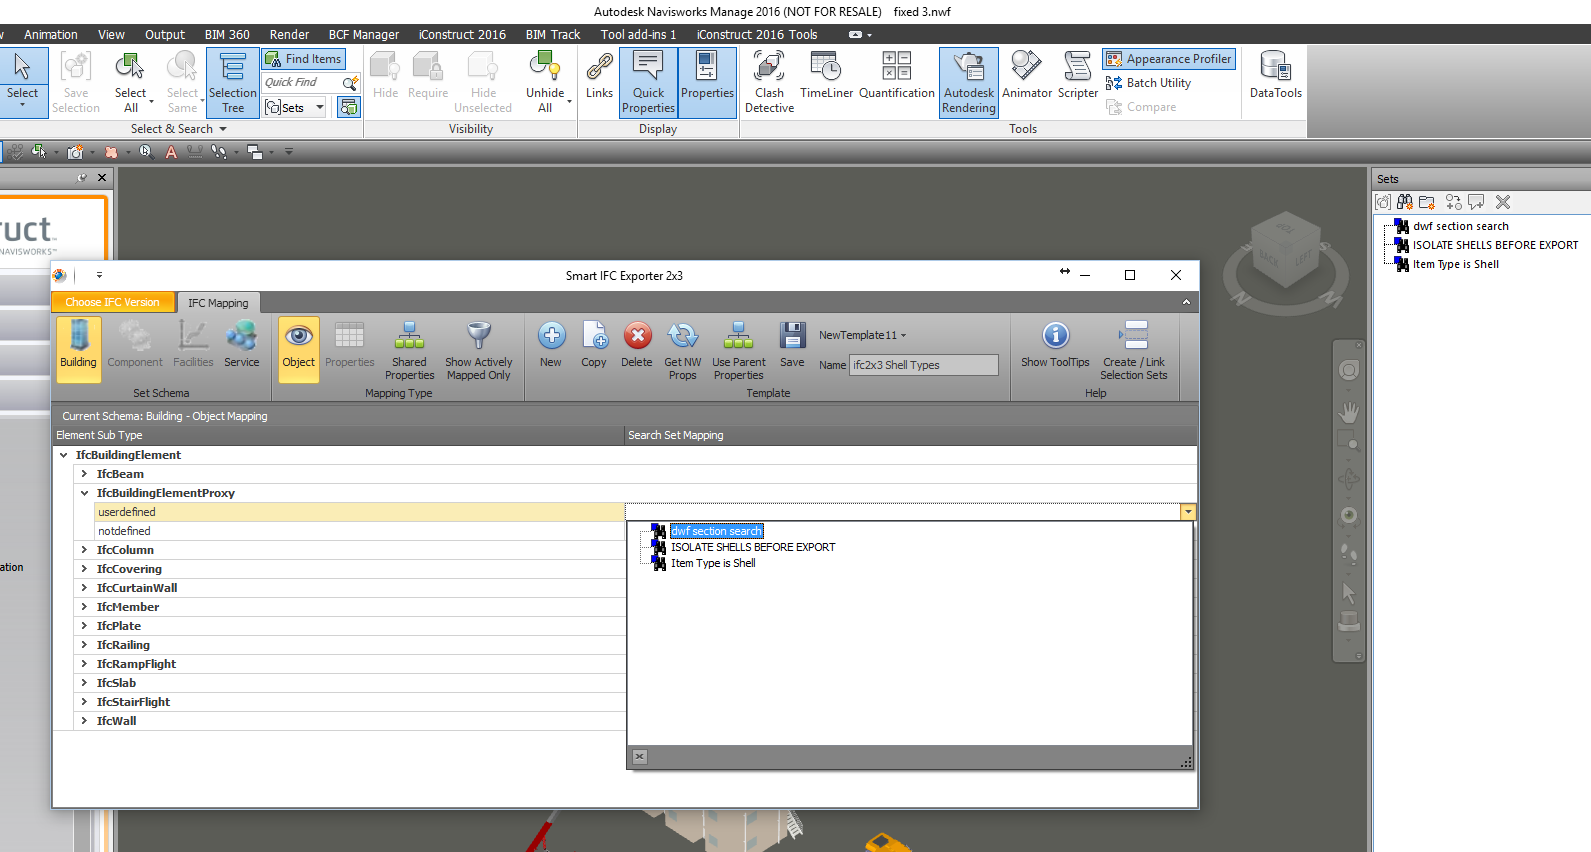
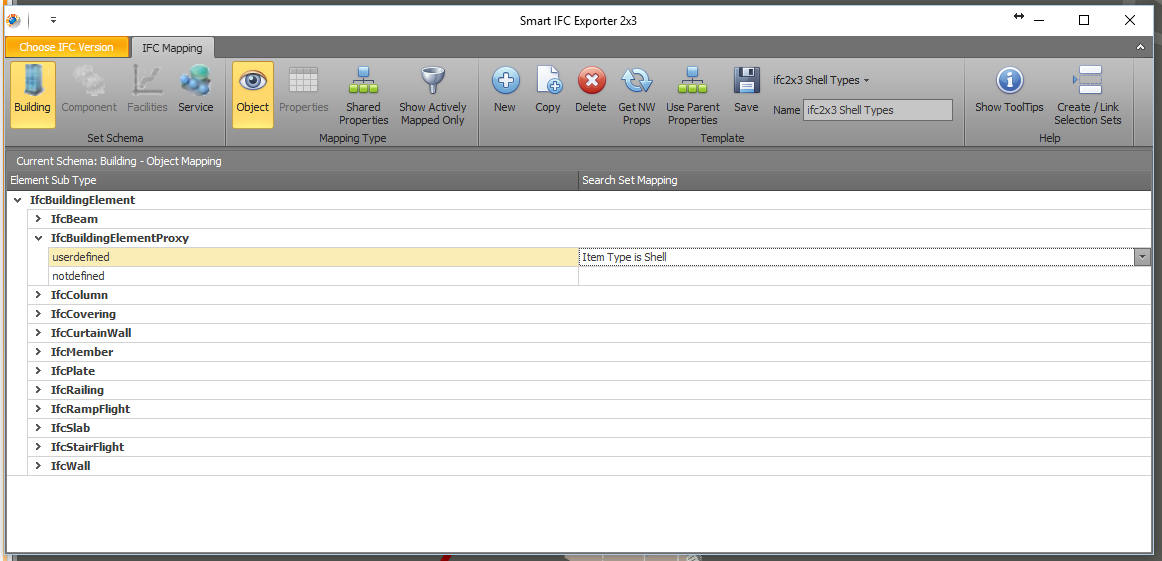
Set up an iConstruct IFC config…
IFC2x3
New
Type a Name
Press Building button
Expand to IfcBuildingElementProxy, userdefined
Choose search set for Item Type = Shell from above
Save
Should look like this…
Close config dialog
Go to Smart IFC Export and choose the export config you just saved
Fill out next dialog and press ok
Choose target IFC location
Wait for Navisworksto export the IFC
Phase 3 – intoRevit
After IFC is created, open Revit. Ensure you have latest IFC updates installed, then open the the IFC. Wait for Revitto complete importing… For the most part, you should get a pretty good looking result. One exception is where the DWF had one ‘shell’ with multiple materials, like this:
In any case, now you have a bunch of ‘Revit elements’ (yes, I use the term loosely) that can be made into Model Groups. They aren’t in families, but you can make them into little rvts to load as links. I realise there are some limitations in this workflow, but in some cases there is no other way…
If you are interested in more to do with DWF conversions, check out these links:
Free Add-In developed for use by Autodesk Revit programs in the Structure and MEP disciplines. This application is recommended for use with IFC-based model exchange between GRAPHISOFT ArchiCAD and Revit applications. The Add-In for Revit applications variously enables direct import of ArchiCAD IFC models and IFC model export to ArchiCAD, or serves to optimize Revit’s standard IFC import and export functions used to exchange data with ArchiCAD.