Sometimes you have a set of DWFs that you would like to work with in Revit. For example, you might have DWFs of site equipment, fences and trucks that would be useful for site modelling in Revit. Here is one way to get those dwfs into a more Revit-friendly format…

Note: You need to have iConstruct with their Smart IFC Exporter for this workflow

Phase 1
Create a container NWD for DWF files, so that you can fix rotation and coordinates:

  1. Append DWFs
  2. Save as rotator.nwd
  3. Append to an NWF
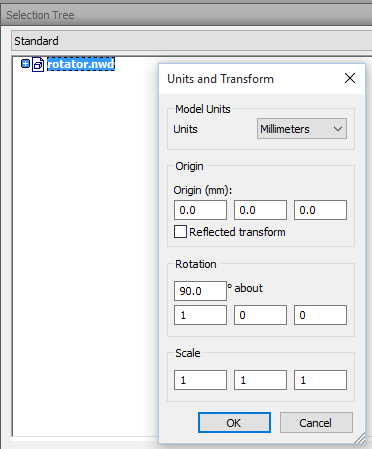
  4. Adjust units, 90 degree rotation about 1-0-0 axis as per this link:
    http://forums.autodesk.com/t5/navisworks-general-discussion/naviswork-imports-dwfx-file-incorrectly-quickpen-dwfx-export/m-p/2879154#M1154
  5. Save as container.nwf

Phase 2
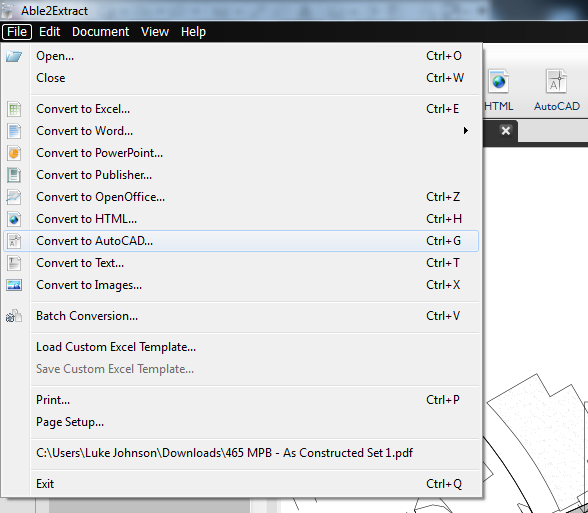
Steps to convert DWF to IFC with colours and object selectability:

  1. Open two Navisworks 2016 instances
  2. Open the rotator.nwd from above in one instance
  3. Append any DWFs you would like to convert
  4. Adjust their Units and Transform until they look right
  5. Save the rotator.nwd
  6. Open the container.nwf
  7. Refresh to reload the rotator if necessary
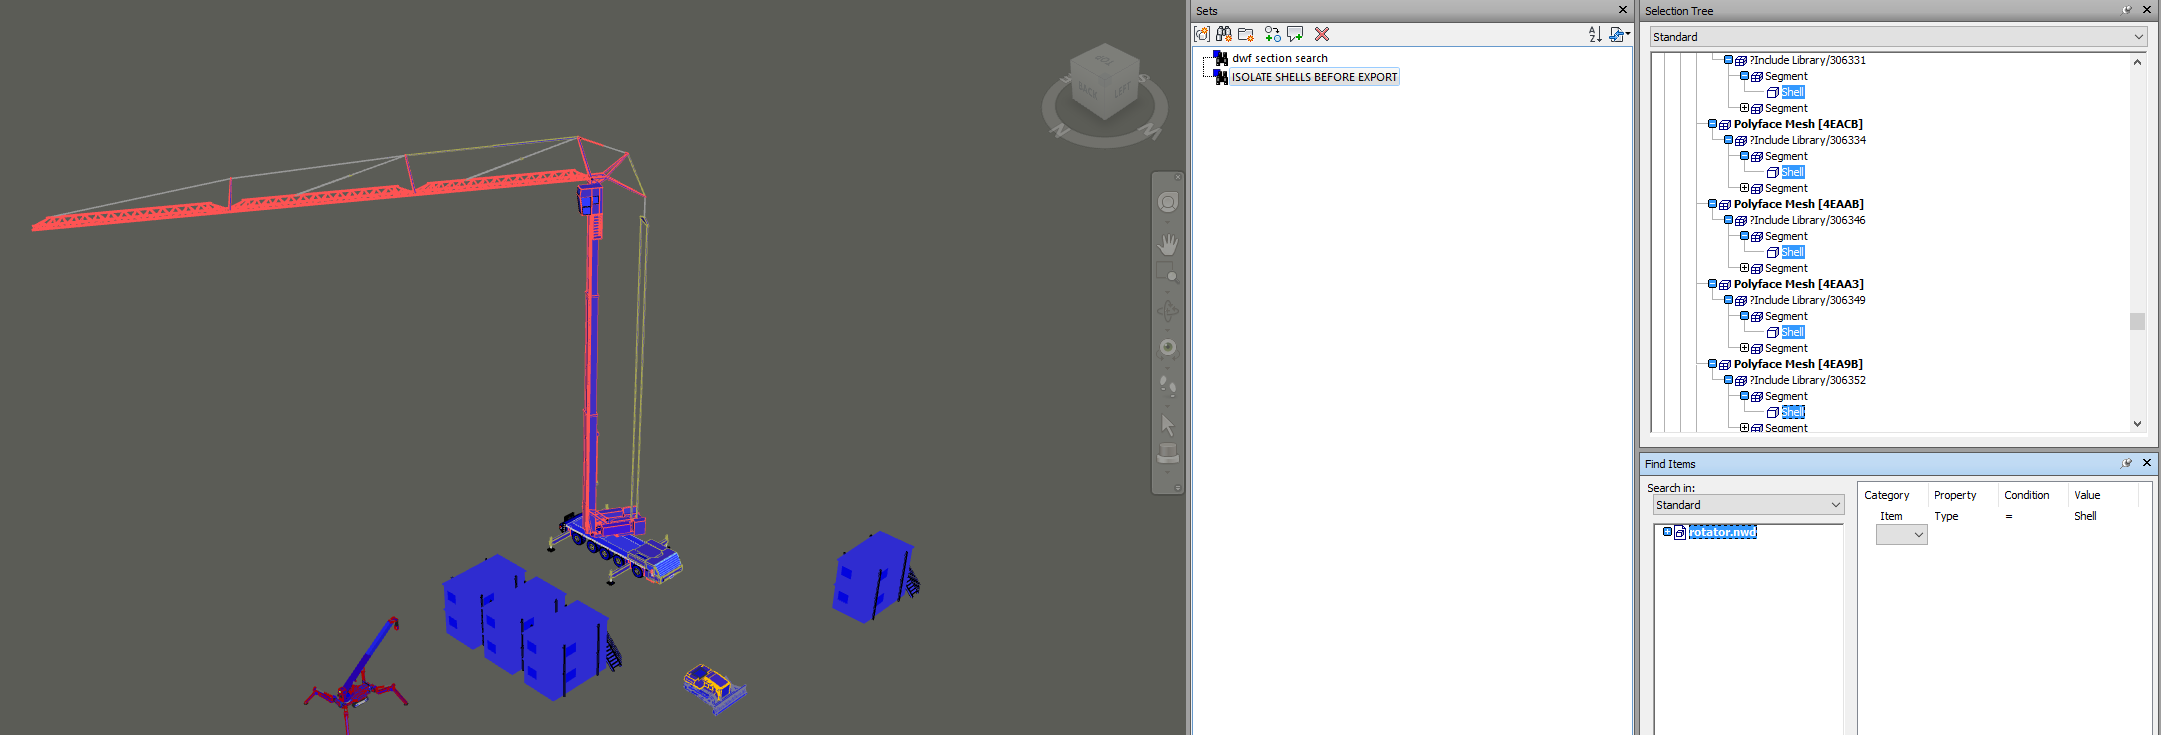
  8. Now, hide everything but ‘shell’ elements using a search like this:
  9. Save the search set for Item Type = Shell
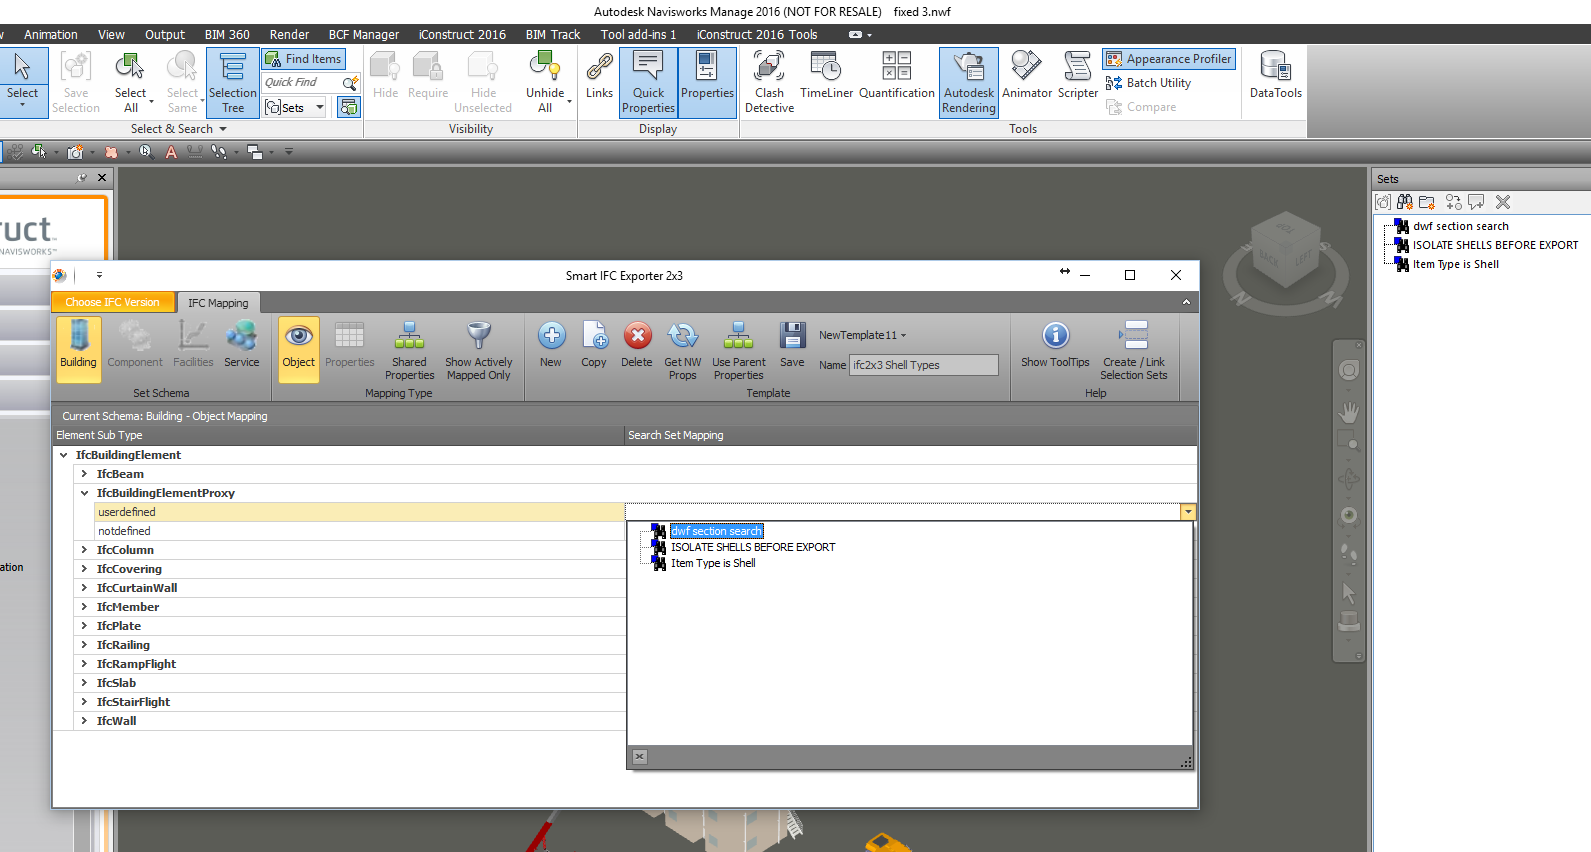
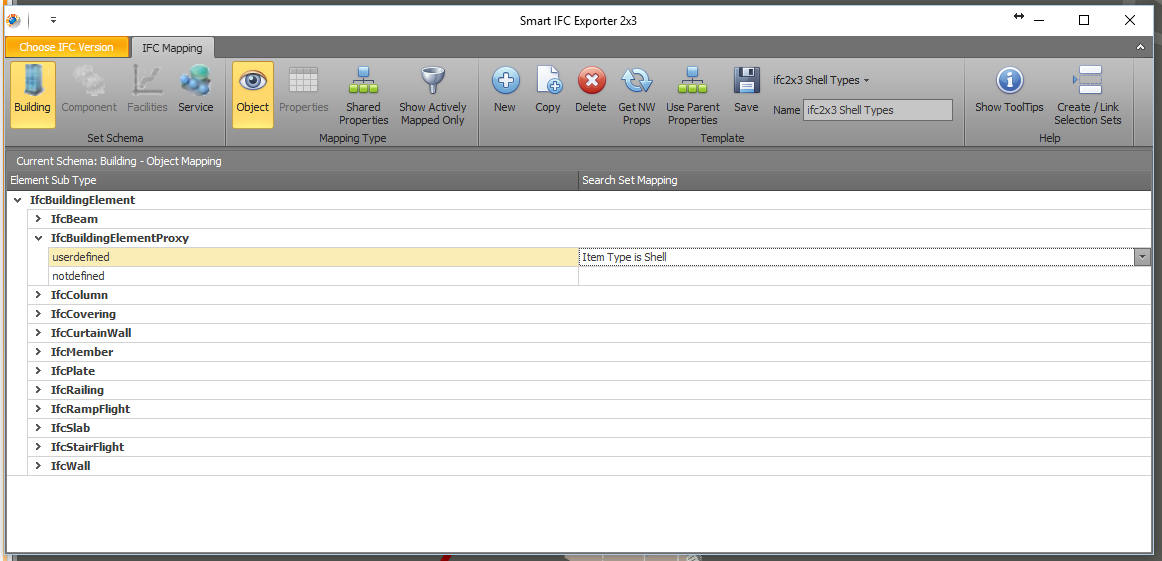
  10. Set up an iConstruct IFC config…

    IFC2x3
    New
    Type a Name
    Press Building button
    Expand to IfcBuildingElementProxy, userdefined
    Choose search set for Item Type = Shell from above

    Save

  11. Should look like this…

  12. Close config dialog
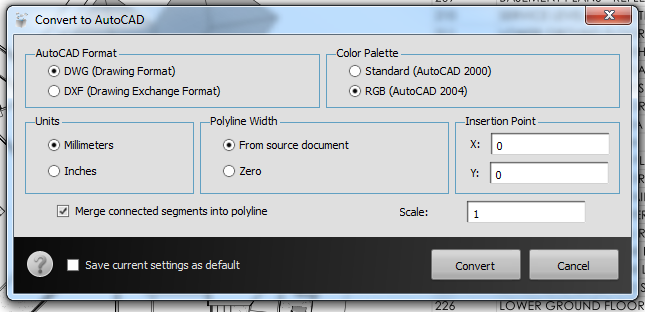
  13. Go to Smart IFC Export and choose the export config you just saved
  14. Fill out next dialog and press ok
  15. Choose target IFC location
  16. Wait for Navisworks to export the IFC

Phase 3 – into Revit
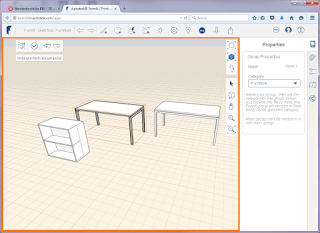
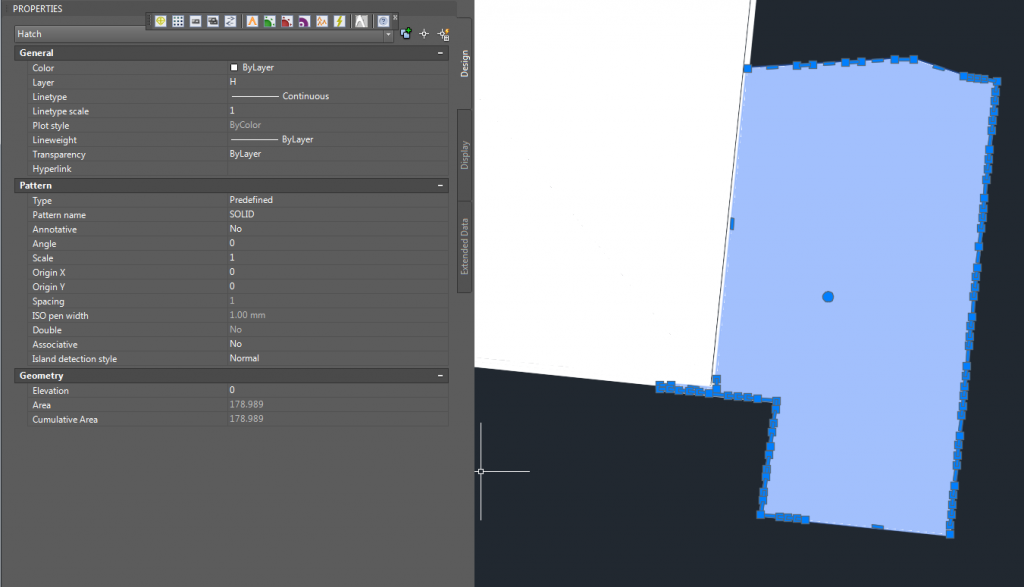
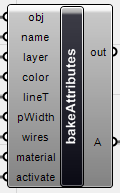
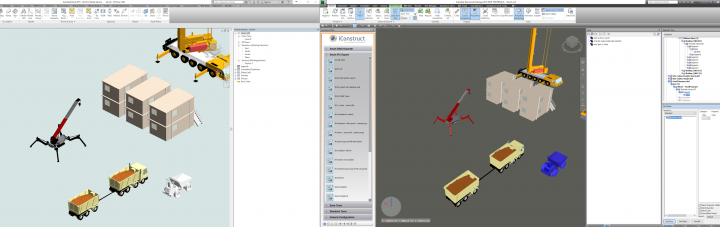
After IFC is created, open Revit. Ensure you have latest IFC updates installed, then open the the IFC. Wait for Revit to complete importing… For the most part, you should get a pretty good looking result. One exception is where the DWF had one ‘shell’ with multiple materials, like this:

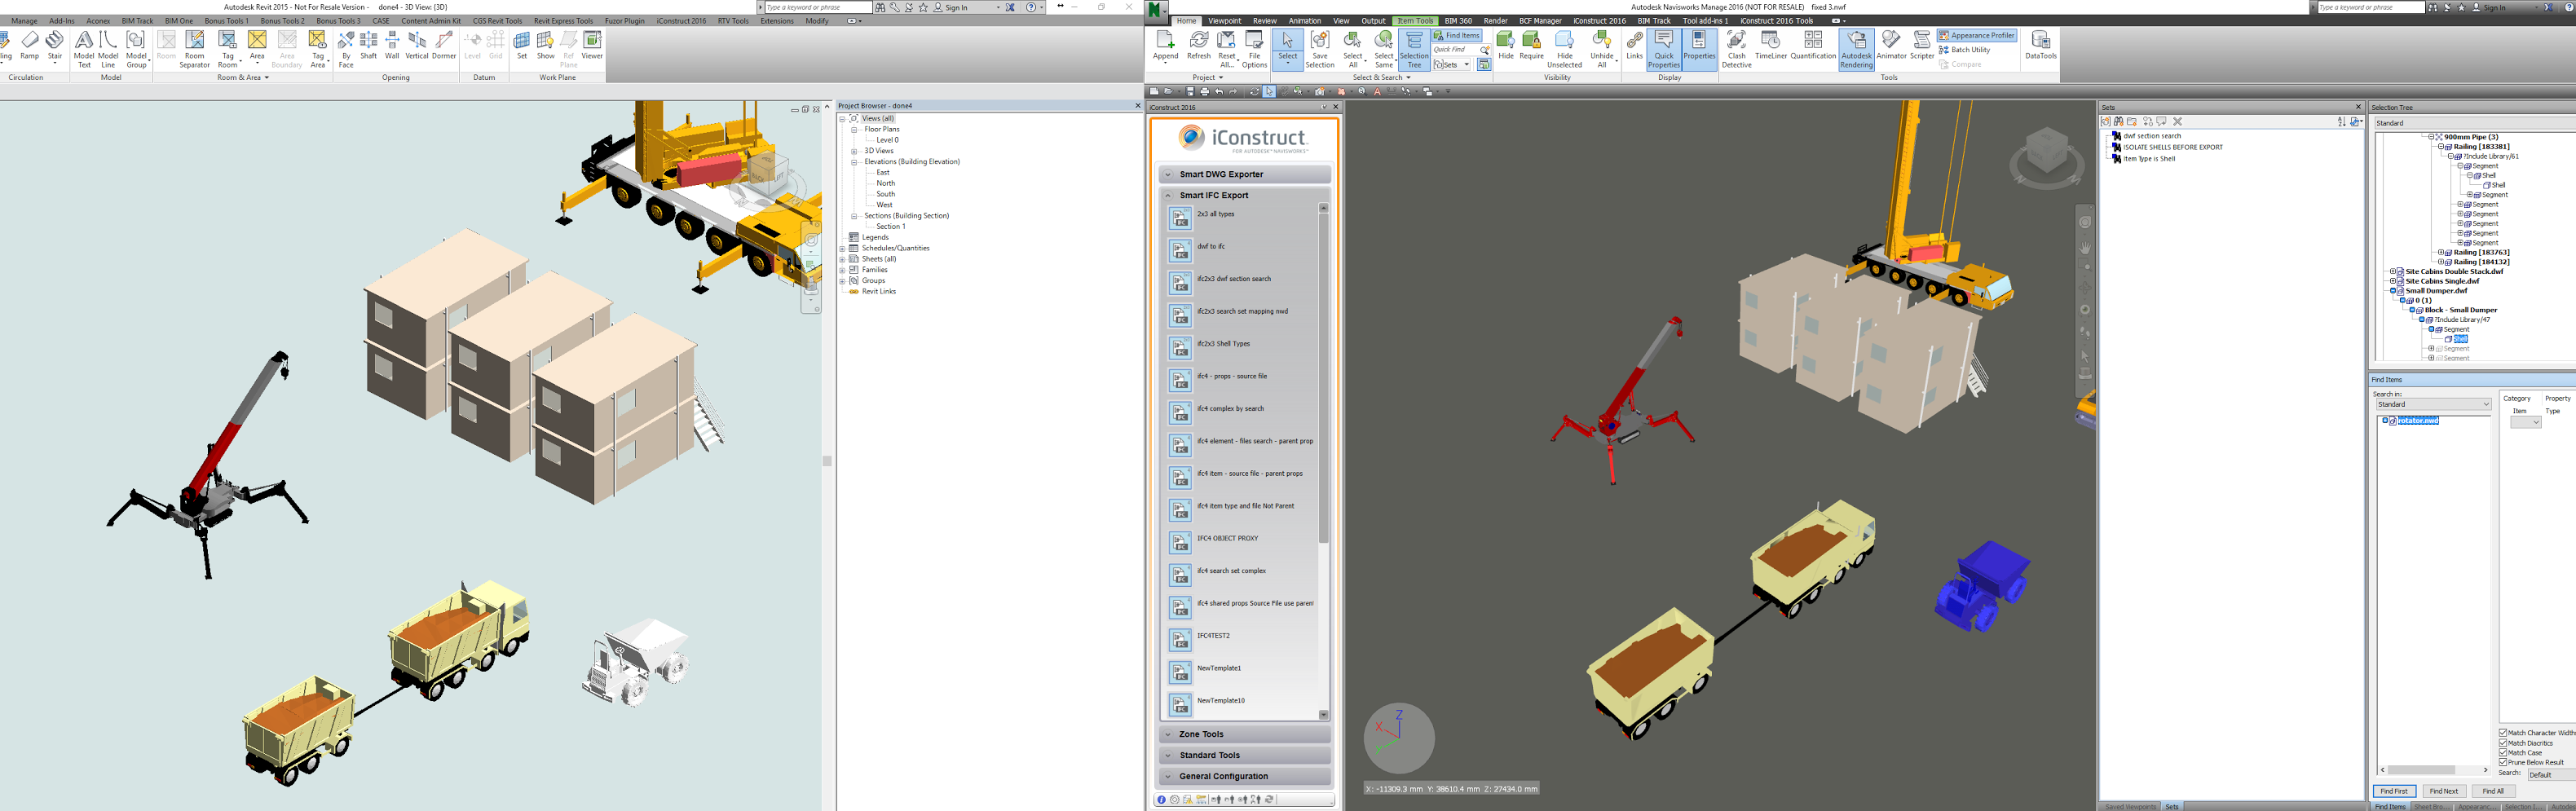
In any case, now you have a bunch of ‘Revit elements’ (yes, I use the term loosely) that can be made into Model Groups. They aren’t in families, but you can make them into little rvts to load as links. I realise there are some limitations in this workflow, but in some cases there is no other way…

If you are interested in more to do with DWF conversions, check out these links:

What Revit Wants: How to Convert a DWF to Editable Format, or How to Export from Navisworks and Keep Modelling in BIM
What Revit Wants: Convert DWF to DWG using free tools

Future post: hope to see some Dynamo method to consume DWFs and create DirectShapes in Revit 🙂

Check out this excellent forum post by Tobias Hathorn, in which he describes the best workflow for Sketchup to Revit conversion via FormIt 360. Interestingly, the major steps are:

  1. Install Revit addin
  2. Use addin to convert SKP to format for Formit
  3. Import to FormIt Web
  4. Export Locally
  5. Use the same Revit addin to convert the FormIt 360 Sketch to RVT

Some more detail here, reproduced from the post:

The one ‘gotcha’ (which should be kind of obvious)… if the model is poorly constructed geometrically in SketchUp, then that same geometry will come down the pipe into FormIt and eventually into Revit… 

Another comment about size – you’ll get better results componentizing your SketchUp import – doing a blanket conversion of your entire existing SketchUp model will take longer and be a MUCH bigger memory footprint.

Here are the steps for SketchUp conversion…

  • Go to the SketchUp Warehouse – browse to a great looking catalog – LINK
  • Download the files you want locally onto the hard drive
  • Get the free FormIt Converter Plugin for Revit 2015 – LINK
  • Install the Plugin and restart Revit 2015
  • Go to the Add-Ins tab, FormIt 360 Conversion panel and choose Convert SketchUp Files from the drop down menu
  • Navigate to the folder with the SKP files in them
  • Then navigate to where I want the FormIt 360 files to be (can also go to A360

Here are the steps for FormIt categorization…

  • Start FormIt Web – LINK
  • Import (or Link through the Content Library) the converted SKP’s – place the content in your FormIt scene…
  • Double click to edit the furniture group – you can push and pull the geometry as if you were in SketchUp!
  • While in Edit Group mode – set the name and category (Furniture) in the properties panel. Finish editing the group.
  • Save the FormIt file and download it locally (to your downloads folder) by clicking ‘Export Locally as FormIt 360 Sketch’

Here are the steps for FormIt to Revit conversion…

  • Open Revit 2015 – Click New file – choose the template you’d like to use for the design model
  • Go to the Add-ins tab and choose “Convert FormIt 360 Sketch to RVT
  • Navigate to the downloads folder and choose the FormIt sketch you exported locally
  • Click through any warnings and now you have Revit versions of SketchUp files!
  • The FormIt elements have the same categorization you set in FormIt
  • and you can double click to edit the families as you would normal Revit geometry

Thanks Tobias!

Original post:
http://forums.autodesk.com/t5/formit-360-general-discussion/sketchup-conversion/m-p/5670578#M235

Able2Extract can export a pdf to various formats:

In my testing, I opened a 97mb pdf file in Bluebeam and extracted one page to a separate pdf file for conversion. I opened this pdf in Able2Extract and tested exporting to DWG and DXF with various export options. My results are shown below.

Polyline width detection: Good

Connected segments into polyline: Good

Hatch creation: Good, with colours when RGB ticked on export

Scale:
Good, probably best to export 1:1 then scale in AutoCAD using commands SC and ALL for selection (can also use scale export option)

Text detection: Not good
EDIT: Explanation “The PDF you used contains 4 embedded fonts with custom encoding (File>Properties>Fonts in Acrobat Reader). “Embedded” means that the PDF contains all necessary info to draw them correctly. But, according to PDF Standard 1.5 (http://partners.adobe.com/public/developer/pdf/index_reference.html), page 427: 5.8 Embedded Font Programs…

Font programs are subject to copyright, and the copyright owner may impose conditions under which a font program can be used. These permissions are recorded either in the font program itself or as part of a separate license. A font program may allow embedding for the sole purpose of viewing and printing the document, but not for creating new or modified text using the font (in either the same document or other documents); the latter operation would require the user performing the operation to have a licensed copy of the font program, not a copy extracted from the PDF file.

It means that we can extract from the PDF its content, but not fonts.”

Now, the real question: is it worth it? I think the ease of use is good, and the overall functionality also seems compelling for the US99.95 price tag. This is obviously a lot cheaper than buying a full standalone license of Adobe Illustrator. However, the lack of text support when converting to DWG / DXF is unfortunate. If you plan on extracting the vector information out of PDFs for tracing or use in Revit, and you don’t really need the text, Able2Extract could be worth a look…

How you can get it:
Direct link to 7 day trial for Windows

Main download page here and help page for DWG conversion here

I have previously posted how to convert pdfs to vector information using free tools and using Adobe Illustrator (with video).

I have also provided a guide on converting a raster image to vector information for use in CAD and BIM in this post:
Raster to Vector to DXF for use in AutoCAD, Revit or Navisworks (with video)

Limitations:
I loaded a 97 mb, 208 page architectural set into Able2Extract. It opened up quickly, but then it crashed before I could initiate a conversion.

Paolo has “managed to complete tools for conversion from internal units and metric (meters, centimeters and millimeters) for lengths, areas and volumes (LAV).”

Download these and put them in C:AutodeskDynamoCoredefinitions
https://docs.google.com/file/d/0B_gxi8GkU4FEelNHQkpVQ1hIOTQ/edit

Original post:
http://puntorevit.blogspot.com.au/2014/01/dynamo-metric-lav.html

Updated links: https://www.autodesk.com/developer-network/platform-technologies/fbx-converter-archives

Windows

Mac

Autodesk have provided a bunch of handy FBX converters and plugins at this link.

The goal of FBX is to “constantly and significantly improve interoperability between Autodesk products and other Digital content creation (DCC) software packages.” http://en.wikipedia.org/wiki/FBX

Transfer files from one file format to another quickly and easily with the FBX Converter. This utility enables you to convert OBJ, DXFâ„¢, DAE, and 3DS files to or from multiple versions of the FBX format. New tools are now available with the FBX Converter 2012.1. You can view FBX animation files in real time with the FBX Viewer, explore and compare FBX file contents with the FBX Explorer, and manage animation takes with the FBX Take Manager.

Mac *

FBX 2012.2 Converter for Mac (tgz – 33931Kb)

via
Autodesk – Autodesk FBX – FBX Plug-Ins, Converter, and QuickTime Viewer Downloads

Here is a quick video of me converting a OBJ to FBX using the above tool.  In the video I also use the FBXIMPORT command to bring the FBX into AutoCAD.  From there, you could save as DWG and bring into Revit:

PS – This still doesn’t quite solve the Mesh to Solid conversion problem … I am currently experimenting with MESHSMOOTH and CONVTOSOLID.

EDIT:
Here is a vid showing Revit to 3dsMax via FBX.

I am deeply interested in interoperability between form creation tools, as well as workflows that allow you to translate forms between these tools.  Unfortunately, there is really no reliable way to bring forms from other tools into Revit and retain parametricism.  They have to be imported into Revit as geometry that Revit ‘likes’ (smooth ACIS solids), and then the geometry needs to be re-created as vanilla, or native, Revit geometry. 

However, the end result is a good one – because you are giving Revit What it Wants.

This post will look at the following main topics:

  • Translating geometry from Mesh to Solid
  • Rebuilding or re-creating the Solid as native Revit geometry
  • Going from Revit into Rhino via gb XML
  • Some plugins for Grasshopper

Mesh to Solid
I am always on the lookout for ways to convert a mesh 3D form into a nice ACIS solid.  From what I hear, Rhino / Grasshopper is the best way to do this.

Here are a couple of other methods:
Automesher
This is essentially an AutoCAD plugin that can translate polyface mesh forms to proper solids.


Geomagic
I installed Geomagic Studio 2012 64 bit.  It comes as a fully functional 30 day trial.  This software does have various plugins to facilitate parametric data exchange – including one for Inventor.  It can convert a mesh to polygons, and fill holes in a the object.  It can also smooth faces.

You can convert an object to Points, and then Wrap the points in a new Mesh, use some Mesh tools to tidy it up etc.  You can save as a 3DS or Open Inventor file…

From ACIS solid to genuine Revit Form
Once you have a nice, smooth closed ACIS solid form, it is time to import into Revit.

Earlier this year, David Light provided an example on how to re-create a (relatively simple) form that was imported from Rhino.  His method essentially involves:

  1. Importing the geometry into a Conceptual Mass family
  2. Divide surface of the imported geometry
  3. Create a template of intersections on the U and V grid.
  4. Trace the form using a few closed profiles
  5. Remove the Import
  6. Create the form using the traced profiles

You can read his full post here:

Revit: Rebuilding forms in Vasari or Revit 2012

Image from http://autodesk-revit.blogspot.com.au/

Going the other way – Revit into Rhino via gbXML
Sometimes you may want to translate geometry from a Revit model and bring it into Rhino for analysis.  The following quoted paragraph provides one method, and a plugin:

I wanted to streamline the process of transferring Revit geometry into Rhino and simplifying it for DIVA analysis.  gbXML seemed like a good way to do that.  So that being said, the plugin currently only uses a small portion of the gbXML schema to transfer basic geometry.  I would be interested in feedback as I am sure there are bugs…
You can download the plugin at the link below.  Installation instructions and an example are included.
http://www.hilojacobs.com/?page_id=464

Image sourced via http://www.grasshopper3d.com/forum/topics/chameleon?xg_source=activity

 via Hiroshi Jacobs at Chameleon – Grasshopper

Things you can do in Grasshopper with C#
Grasshopper features an impressive amount of highly interlinked components – from lines to trees, from circles to graph editors. Sometimes, however, when design tasks become more advanced, we might need to further customize this plugin by directly borrowing from Rhino commands. With these scripting components, the user can quickly solve otherwise more complex design behaviors.
This list of C# scripts is a work in progress and is open for requests. Supporting  v. 0.8.2 and some previous versions.

Above paragraph via Giulio Piacentino

Image from http://www.giuliopiacentino.com/grasshopper-tools/

Go to http://www.giuliopiacentino.com/grasshopper-tools/ for download links to the scripts, and the complete list.

Conclusion
Hopefully some of this information has been useful to you.

Feel free to post other methods or workflows as a Comment.  Thanks.

Here is what we want – you select an in-place family and click ‘Convert to Component Family‘ on the Ribbon.  Through API Wizardry, the following happens without any further user interaction:

  1. The family is edited in place
  2. All objects in the family (including reference planes etc) are selected
  3. A ‘group’ command is triggered
  4. The group is saved (as a file) to a temporary location (it will be an RFA)
  5. This family is loaded back into the project
  6. The family is placed in the correct location (XYZ) in the project
  7. The original in-place family is deleted from the project.

This can all be done manually of course, using the workflow described here.

I’m sure that many users would find this tool helpful, and for some of you advanced Revit API programmers, this utility should be a piece of cake!

Also: if you release this utility for free, just think of the Revit API street cred that would give you.

Finally, if you want to take it to the next level – make a Batch Convert option, that allows the user to ‘pick’ which In-place families (from the current project) that they would like converted, after which the Batch tool goes ahead and does steps 1 to 7 above on each and every in-place family you selected.