I anticipate there will be a lot of posts about the changes to Materials in 2013, on such topics as:

  • Why did this happen?
  • “I am angry about Materials 2013 for xyz reason”
  • How do I use this?
  • Will this change again next year?
  • Just, Why?

In any case, if you are looking for the Identity tab for Materials in Revit 2013, look for the arrow.

Video below:

I previously posted about how to get the average RGB colour of a sample and put it into Revit.   Revit Learning Club Blog today shows a nice, simple way to obtain the RGB values of any color on your screen (under the mouse cursor):

Someone has shared a very nice color picker utility called Colorette, which was written in AutoHotKey. The app description is at http://www.autohotkey.com/forum/topic69559.html and the EXE itself is http://www.autohotkey.net/~sumon/apps/colorette/Colorette.exe .


For an example of how to use Colorette with Revit, save the EXE to your Desktop and run it. Find a web page with the color you want to find, like http://www.jameshardie.com/homeowner/colorplus-palette.shtml , hover your mouse over the color on the screen and press Space on your keyboard.

via
Revit Learning Club Blog: How to Get a Color From Your Screen into a Revit Material

It must be hard to make money as a Revit application developer – because there are some cool free add-ins getting around.  From revit-app.com, check out these three free utilities:

Easy Family Loader
It will filter the path name, then the file name, and it’s quite easy to use.

Materials batch delete tool
This little tool will help you a lot when you want to delete multiple materials.

Auto Dimension

Download them all, for both Revit 2012 and Revit 2011, at:
Revit Applications – download center

In response to Andy’s musing that “I can’t help thinking though that there must be a better way of delivering Revit materials definitions to Architects,” I would like to direct attention to the method used by Lysaght. I previously posted about it here.

Essentially, you download a .adsklib file that you can then access through the Revit material manager / dialog.

Personally, I have struggled to keep up with the way that material definitions have changed over the past couple of years in Revit.  The sheer number of tabs and inconsistent screen divisions kinda confuses me (I don’t like having this split screen effect with 2 tabs on one side and 3 on the other… :-S )

In any case, currently the .adsklib method is, in my opinion, the quickest and best way for Suppliers to deliver appropriate Material Appearances into Revit – if any suppliers are listening…

In response to:
Shades of Grey: RUBBER CONTENT

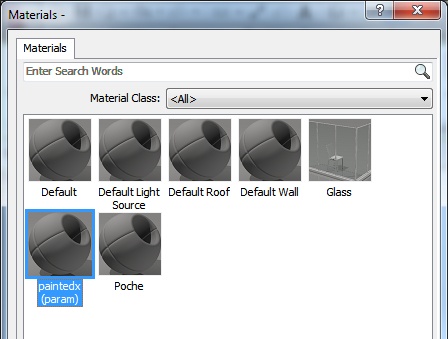
EDIT Keep in mind that if you import an SKP directly into Revit, it will create materials for each shading material as “Render Material xx-yy-zz” in the Material Library.  You can check which is which by looking at the colour on the Graphics tab, but you will need to manually map Render Appearances from here.

Also, remember that you can save all related material resources if you go via 3dsMax.
There have been many posts about how you can control Sketchup materials in Revit using Object Styles.  However, this relies on the existence of different layers for each distinct material in the original file.  If you have an SKP file and would like to create the layers you need (without using Sketchup itself), you can use this method:

  1. Import Sketchup SKP file in to 3ds Max Design
  2. Export as FBX file
  3. Use Import command in AutoCAD, choose the FBX file – choose to have a layer for each material (Assign Objects to Layers – By Material)
  4. For some reason, I had to untick the Block option – otherwise the file would not import at all.
  5. Save the DWG file
  6. Import to Revit – you now have granular control over each Material / Layer combination through Object Styles…

Note – this method uses only Autodesk tools, it does not require Sketchup to be installed.  If I remember correctly, you can instruct Sketchup to export different layers for each material when exporting a DWG (?)

If you have an alternative way of doing this, feel free to comment.

“For those that have seen enough of the standard Revit textures, there are remedies.
Recently, the company offers under the name LG Hausys HI-MACS textures for download.
The free file can be found at this link:
http://www.himacs.eu/produkte/farben_2″

ZIP file here

via
Google Translate
of
http://revitde.blogspot.com/2012/02/neue-texturen-fur-revit.html

Here is how you can assign a material parameter to a painted surface in a family:

  1. Go to Family Types dialog box
  2. Add – Material Parameter
  3. Paint
  4. Choose the material that you made – it will have the suffix (param)
  5. Done!  Save and load into project…

You can do this for multiple different materials on different painted surfaces.

This method was mentioned on the French ‘Mastering Revit’ blog:
Translated version of post

Original post
Revit mastering: Peindre

The overall premise of the book is to learn Revit Architecture while developing the interior of a two story law office. The reader is provided an architectural model with established columns, beams, exterior walls, minimal interior walls and roofs in which to work. This allows more emphasis to be placed on interior design rather than primary architectural elements. The chapters chronology generally follows the typical design process.

Download sample chapter (the sample chapter is chapter 4 – Revit Materials):
978-1-58503-664-6-4.pdf (application/pdf Object)

Link to main book webpage

Heads-up via http://bim.sandvik.bz/2011/11/12/ny-revitartikkel-new-book-for-revit-and-interior-design/

In previous versions of Revit, you could ‘re-paint’ surfaces using the By Category material.

However, this is not available in Revit 2012.

Instead, you need to use the drop-down arrow associated with the Paint tool – this will reveal the ‘Remove Paint‘ button (see image below).

Also, note that I have moved the Modify ribbon panel to be next to the Home panel.  Do you know how to do this?

Just hold Ctrl and click and drag the Ribbon Panel title to put it where you want it…