The incompatibility between 32 bit Microsoft Office database systems and 64 bit Revit program architecture have been causing headaches for a while, but this technical solution may provide the answer you have been looking for: how to get 64 bit database drivers running alongside 32 bit Office installation.

Support page:
How to install 64-bit Microsoft Database Drivers alongside 32-bit Microsoft Office | AutoCAD Civil 3D | Autodesk Knowledge Network

The Problem:
“You cannot install the 64-bit version of Microsoft Access Database Engine 2010 because you currently have 32-bit products installed…”

User-added image

Quote and heads-up from LinkedIn:
… a way to get Revit 64 bit systems to export an Access 2010 DB link on a 32 bit version. Here is the link with step by step instructions: http://knowledge.autodesk.com/support/autocad-civil-3d/troubleshooting/caas/sfdcarticles/sfdcarticles/How-to-install-64-bit-Microsoft-Database-Drivers-alongside-32-bit-Microsoft-Office.html 
 

How to install 64-bit Microsoft Database Drivers alongside 32-bit Microsoft Office knowledge.autodesk.com

via
Finally a solution for DB Link and Access compatibility for 64 bit vs 32 bit systems | LinkedIn

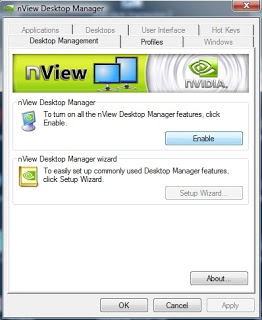
Have you struggled to install nview on Windows 7 64-bit?  Here are the steps:
Step 1 – Download the latest Drivers from the nVidia website

Step 2 – Download WinRAR (you could use 7-zip)

Step 3 – Open the Driver file with WinRAR and extract the nView.CAB file (onto your desktop for now)

Step 4 – Open the nView.cab file with WinRAR and extract all the files into a folder on your desktop

Step 5 – Run the nviewsetup.exe file as normal. 

I found these steps at:
These steps may help you install nview in a number of different situations.
What does nview do?
nVIew display management software provides:
  • Intuitive interface for easy display management
  • Customizable desktop by various usage models
  • Robust IT management tools for easy deployment and maintenance
  • Tested compatibility with industry-leading business applications
  • Proven stability – over millions of enterprise installations
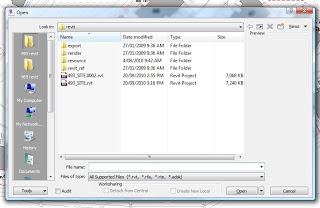
In RAC 2011, we can not directly modify the display name for a ‘My Places’ entry in the Open dialog.
This needs to be done in the Registry, as described over at Do U Revit in 2009.
I made a brief video of this process (there is no audio).
  1. Open Revit, go to Open dialog, add a folder to the ‘My Places’ dialog.
  2. Save the changes.
  3. Close Revit.  (You may not even have to close / re-open Revit).
  4. Open Registry Editor.
  5. Go to [HKEY_CURRENT_USERSoftwareAutodeskRevitAutodesk Revit Architecture 2011ProfilesAllAnavDialogs] (for 64 bit)
  6. Modify the ‘PlacesOrderxDisplay’ for the appropriate index / number entry.
  7. Re-open Revit.
 Be careful when modifying the Registry – you can break things if you aren’t careful.

Update: check out this page for the 64-bit Xvid codec

I previously described the difficulty of encoding walkthroughs on 64-bit Revit with any sort of compression codec. I did provide a workaround in this post.

However, in recent correspondence with Autodesk, a more suitable solution was revealed to me. Apparently, some users discovered that the Lagarith Lossless Video Codec works properly in Revit 64-bit. Needless to say, I was quite excited. After some testing, I can confirm that this codec works very successfully.

Here are the steps to get it working:

  1. Download the installer from here.
  2. Install the codec.
  3. Open a Revit walkthrough view.
  4. Export … Walkthrough.
  5. Follow the usual steps, but use the new codec you installed. The default settings worked for me.
  6. Wait for your walkthrough to export and check out the result!

You may have seen the long list of fixes already available for Revit 2011. Perhaps the first release will be stable, perhaps it won’t, but many of you might like to consider running Revit 2011 in a virtual environment (at least to start with).

I wanted to play around with Revit MEP and Revit Structure, so I :

  1. Set up a virtual PC,
  2. Installed Windows 7 64-bit, and then
  3. Installed the Revit software.

This is a stable and safe way to test Revit in a ‘sandbox’ type environment – where really bad things shouldn’t happen. There are some minor issues – it can be difficult to get 3D Hardware acceleration working in a virtual environment. But for testing purposes, its great.

The virtualisation software that I used was VirtualBox, as this allows for 64-bit guest operating systems.

If you don’t have a copy of Windows 7 64-bit handy, you can download the media from the internet. You can also reset the activation period to allow for 120 days use.

Please note that you will need some decent hardware to virtualise Revit in a 64-bit environment 🙂

I recently stumbled across the fix for an issue that has annoyed me for ages.

The problem we had was that Revit would always crash when tearing off any ribbon panel. This issue affected two of our high end Vista 64 bit Workstations. I had tried many things to fix the issue, all to no avail. So, are you ready for the solution?

Both of these workstations were running a pre-release version of Service Pack 2 for Vista. The Windows desktop had the following text imprinted on it – Build 6002 – Evaluation Version. I determined that this note referred to a Release Candidate of Service Pack 2, and not to the actual licensing of Vista itself. The fix is as follows:

  1. Uninstall Service Pack 2. (Go to Control Panel – Programs and Features. Then click ‘View Installed Updates’. The update is labeled as Service Pack for Microsoft Windows (KB948465). Once this was uninstalled, I could now tear off the ribbon panels successfully, with no crashes.
  2. To put Service Pack 2 on, you can use a couple of methods. After removing SP2, I allowed Windows Update to install updates. However, this did not reinstate SP2 onto my system.
  3. I then downloaded the Service Pack 2 package for 64 bit, and installed it. Finally, I was back at SP2, and my ribbon panels would still tear off without any crashing!

Please note that this process will probably take a couple of hours. However, I am very happy that I can now tear off the Workplane ribbon panel – it is very handy to have that panel always visible.I guess I better contact Autodesk now and notify them of the fix…this Service Request has been open since 23 June 2009!

Found some very interesting information on Wikipedia about 32 bit and 64 bit processor architecture – check it out (italics by me):

AMD licensed its x86-64 design to Intel, where it is marketed under the name Intel 64 (formerly EM64T). AMD’s design replaced earlier attempts by Intel to design its own x86-64 extensions which had been referred to as IA-32e. As Intel licenses AMD the right to use the original x86 architecture (upon which AMD’s x86-64 is based), these rival companies now rely on each other for 64-bit processor development. This has led to a case of mutually assured destruction should either company refuse to renew the license. Should such a scenario take place, AMD would no longer be authorized to produce any x86 processors, and Intel would no longer be authorized to produce x86-64 processors, forcing it back to 32-bit x86 architecture. However, the agreement provides that if one party breaches the agreement it loses all rights to the other party’s technology while the other party receives perpetual rights to all licensed technology.
http://en.wikipedia.org/wiki/X86-64

If you want to read more about MAD, http://en.wikipedia.org/wiki/Mutually_assured_destruction

Update: check out this page for the 64-bit Xvid codec

I encountered a problem today related to walkthrough creation in Revit 2010 64 bit with Vista 64 bit. I was exporting a large walkthrough to uncompressed AVI format, and the file size would reach 4.00 GB (4,294,967,296 bytes), and then corruption of the AVI would result. It appears that a 4 GB limit was being imposed at some point in the walkthrough creation process.

Therefore, I tried to use an encoding format. When using Revit 32 bit, I recall that I had a number of options in the Video Compression ‘codec’ dialog when exporting a walkthrough. However, in Revit 64 bit, I only had a couple of basic options (Microsoft Video 1, Intel IYUV Codec, Full Frames (uncompressed)).

After some searching, and trialling a few different ideas, I found that I could access some decent codecs in this box after installing Shark007’s 64 bit components (link below).

64 bit Encoding Components

In addition to the above, it is recommended that you install Shark007’s 32 bit Codec Pack (link below):
Vista Codec Package 5.5.3 Final

After installing both of the above and restarting Revit (you may also need to restart Windows), I was intermittently able to access an additional filter in the dialog called ‘ffdshow’ – clicking ‘Configure’ opened up a whole range of encoding formats for use!However, there appear to be a few problems:

  1. The ‘ffdshow Video Codec’ encoder only appeared in the Video Compression dialog when a certain ‘Size Crop’ and resolution were selected. For me, the only settings that consistently seemed to work were: Size Crop width = 150 mm, and export resolution 886 x 500.
  2. The corruption still seemed to result if the uncompressed AVI format would have exceed 4 GB (even while using a compressed codec).
  3. Choosing H264 actually crashed Revit.
  4. WMV 8 using libavcodec simply did not proceed past the first frame.

Given the above limitations, my solution at this point is:

  1. Split the walkthrough into parts that have a size less than 4 GB (ie. part 1 = frames 1 to 100, part 2 = frames 101 to 200 etc) and use FULL FRAMES (UNCOMPRESSED) AVI format.
  2. Use VirtualDubMod to ‘append’ these segments together, and
  3. Use VirtualDubMod to ‘Save As…’ a different format. I was able to choose ‘Cinepak’ compression in VirtualDubMod, which turned my approx 5.4 GB uncompressed AVI into a 167 MB file in only about 5 mins of processing time.

After spending quite a few hours trying to make this work in a satisfactory and simple manner, I decided to contact our reseller and lodge a support call. I will let you know if I learn anything helpful.During this investigation, I tried a few things without success. They may be of interest to you (see links below).

Windows Media Encoder 64 bit

Xvid 64 bit

x264 64 bit
Have you mastered file and folder navigation in Windows Vista yet? If you haven’t, here are a few simple tips, guaranteed to increase your productivity (well, hopefully 😉

  1. Use Vista ‘Links’.
    What is it? It is a special list of shorcuts to your favourite locations. When you open Windows Explorer, these show up as ‘Favourite Links’ in the top-left area of the window. To add items to the list, simply drag and drop from the ‘Folders’ list into the ‘Favourite Links’ area (be careful not to drop items ‘on top’ of each other!) Once you have a good list of your favourite locations, its time to put them to good use, so…
  2. Add your ‘Links’ to your Taskbar.
    In Vista, simply right-click on your Taskbar, go to ‘Toolbars’ and click on ‘New Toolbar…’ In the resulting dialog, click on your ‘Links’ folder (you can get to it by going to your main ‘username’ folder, then you will see the ‘Links’ folder) and then click ‘Select Folder’.
  3. Make your ‘Links’ visible in the Start Menu.
    Click on the Start button, then right-click in a blank area and go to ‘Properties’. Click the ‘Customize…’ button, scroll down to ‘Personal folder’ and click on the ‘Display as a menu’ radio button. Click OK twice, and now your Personal Folder can expand to show your ‘Links’ directly from the Start Menu!
  4. Use your Links in Revit.
    You can add the ‘Links’ list to your Revit Places. Simply go to an ‘Open’ dialog in Revit, browse to your ‘Personal folder’ (this is the one that is usually your name), then drag the ‘Links’ across to the Places area in Revit. I then drag this to the top of the Places so I can quickly access the ‘Links’.

I’m sure there are other ways to use this ‘Links’ list. What are your Vista navigation tricks and methods? Feel free to comment. I hope this has been of some help to you all. Happy Reviting!