In response to my post yesterday about using Selection IDs to save selections, Tom Pesman of tnux.net has created a free Revit add-in to automate the process.
At this stage, it only allows the you to save and restore one selection set. However, it is very easy, very fast, and I’m sure some of you will find it useful:
DOWNLOAD PAGE for Revit Save Selection – Tom Pesman
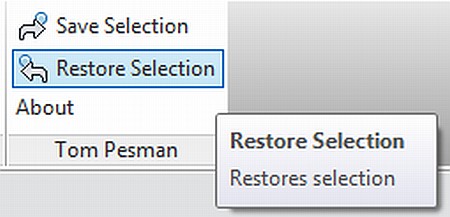
Interestingly, his About box for this add-in states:
This is a very tiny add-in to demonstrate how usefull small add-ins can be. For more information visit my website (tnux.net).
I agree – I wish certain things were built-in to the program, but at times, these little add-ins can quickly and successfully satiate the common needs of users.
Here is Tom’s blog post on the subject:
Save Selection Add-in – Tom Pesman
Thanks Tom!