Are you sick of waiting ages for a Revit walkthrough to render? Using this technique, you can cut your walkthrough rendering time in half! Essentially, we make half the frames we need in Revit, and then use some post-processing software to interpolate extra frames. Here is how:
- Create a rendered AVI walkthrough from Revit with HALF the frames you actually want. In other words, this walkthrough will be twice as fast as the walkthrough you will end up with.
- Install Adobe After Effects trial
- Open Adobe After Effects.
- New – Project
- Drag the Revit walkthrough file into the ‘Project’ area
- Right click on the file in the Project Area – Interpret Footage
- Set Loop = 2 times
- Drag the file from the Project Area to the Composition Area
- Right click on the file in the Composition Area
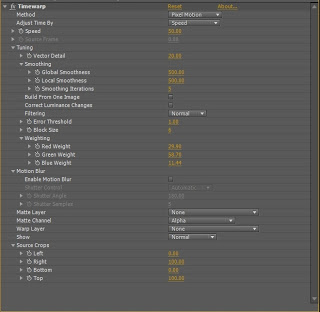
- Effect – Time – Timewarp
- Ensure speed is set at 50 (that is 50%, or half speed)
- Composition – Make Movie…
- Adjust the Output settings to suit.
- Click ‘Render’
- View your new ‘slow motion’ walkthrough
I have found this technique to be effective on a very large, 1800 frame walkthrough. You could further tweak some settings in the Timewarp effect to get better results. You could even try slowing the walkthrough down further – although I anticipate that the output will degrade quite quickly once you go lower than 50% Timewarp speed.
Here is a video that describes the process:
Here are a few associated posts:
Distributed Parallel Rendering in Revit
Using Avisynth and VirtualDub to join BMP to AVI


Great post — That will definitely shave time off of renderings in NavisWorks as well.