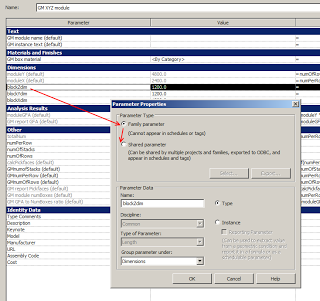
Did you know you could swap a previously added Family Parameter for a Shared Parameter?
Just select it in the Family Types dialog and click Modify…
Next question – should you swap, or just add the SP and equal it by formula? What’s your opinion?
What Revit Wants + Black Grid AI
AI Empowered Project Management
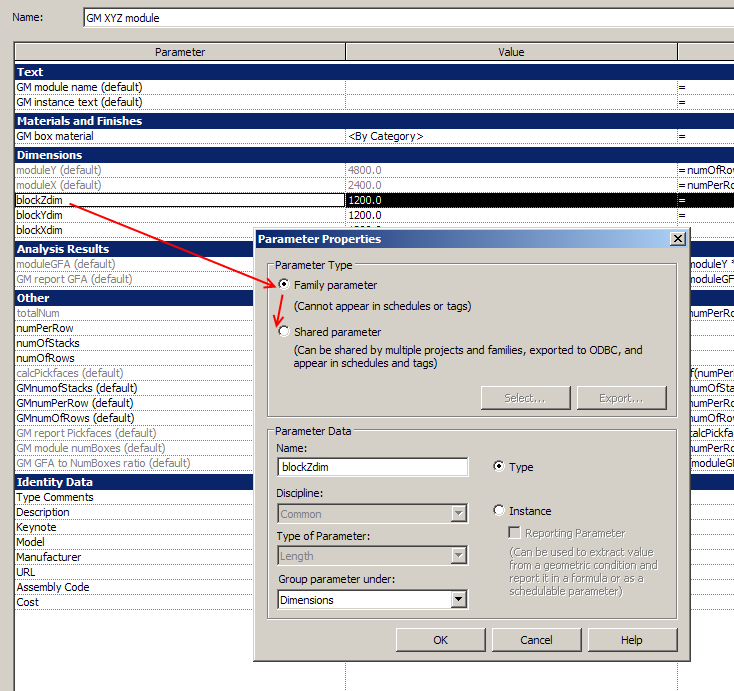
Did you know you could swap a previously added Family Parameter for a Shared Parameter?
Just select it in the Family Types dialog and click Modify…
Next question – should you swap, or just add the SP and equal it by formula? What’s your opinion?
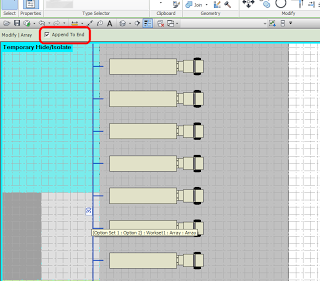
When you select an Array element (the line with the blue number), did you ever notice the little checkbox in the Options Bar?

By toggling this value, you can tell Revit to either add extra elements between the first and last element (thus squashing the elements closer together), or append elements to the end of the array using the current spacing.
Heads-up for this great little tip goes to Revit Family Planner:
Die Optionsleiste oder Neues (?) beim Reihe-Befehl
For some time, I have been looking for a way to get 3D geometry from any format, make it into a nice, Revit-friendly SAT and then use it in massing or visualizations. Can Memento help me with this? Answer – not really.
What it can do:
First, download and install it:
Direct Download Link
Read more at:
Autodesk Labs Project Memento
Ok, now that you have installed it… I previously explored point cloud geometry workflows at:
https://wrw.is/2013/06/using-point-cloud-tools-to-convert-any.html
Upon opening an OBJ file, Memento will create an associated RCM (Recap mesh) in the same folder. Here’s what I did (this is a failed workflow):
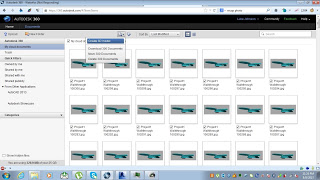
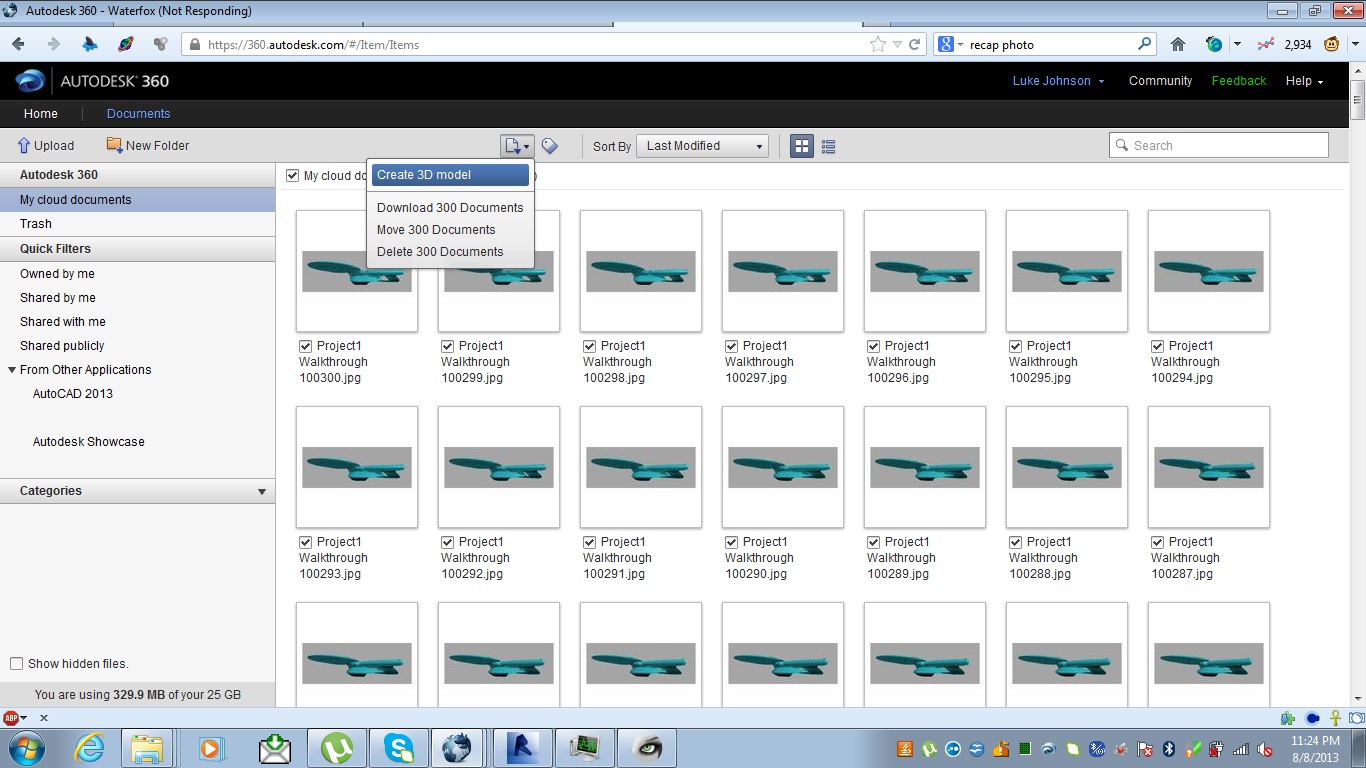
I realised at this point that you can’t make an RCM file from Recap… What a pain! So, looks like we need to make one using Recap Photo. To use Recap Photo, upload some images to Autodesk 360.
This time, I sort of succeeded by:
My first experience with Memento wasn’t great … I was expecting a Fix All button 🙁
Note: Memento will not run on Windows XP.
Heads-up via
Here’s the Labs link to download Memento. Is this the end of gift shops with miniature trinkets (lets hope so)?http://t.co/meq6XPnaCO
— Sean David Burke (@seandburke) August 8, 2013
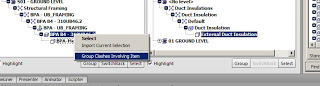
What is Navisworks Manage good for?
Note: this article based on using Navisworks Manage 2013, Service Pack 2 (10.2.0.91043) on Windows XP 64-bit.
Key things to keep in mind when exporting or opening Revit files for use in Navisworks:

Here’s an idea I came up with for document aggregation:
Download Design Review install package from here (700mb).
You can also download the 2D DWF writer (printer driver) from here.
Importing 2D DWF data:
When trying to import a 2D DWF, don’t use the Append command (it won’t work, and will tell you it doesn’t contain 3D data). Instead, use the Import Sheets button on the Project Browser:
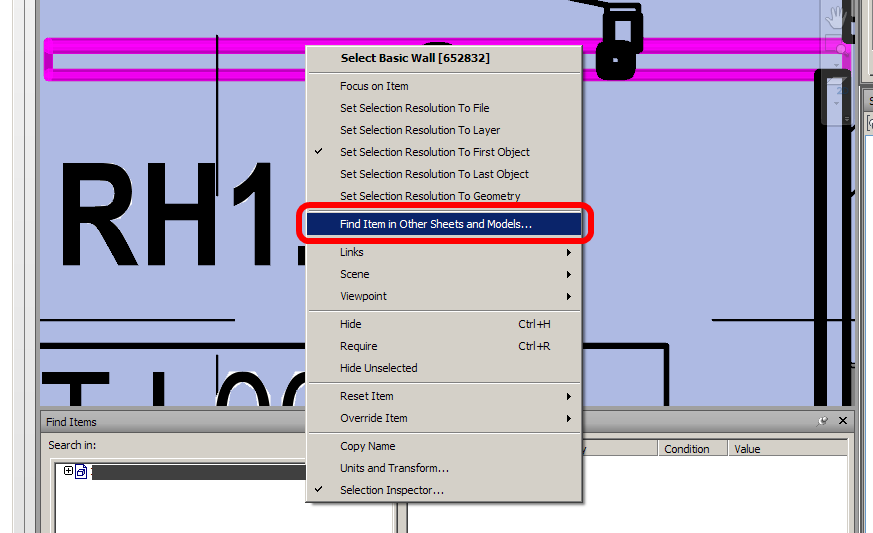
Now, you can navigate to an item on the Sheet view, right-click and Find Item in Other Sheets and Models. To make this all work properly, you should also click the Prepare All button at the bottom of this dialog…
Once you have found the item in your main NWC, click View. You can then use Focus or Zoom commands to correctly visualize the item from that particular sheet.
You can’t easily put items in folders in the Project Browser, but when you import a new DWF, it puts all of those Sheets together (adding them to the bottom of the list)
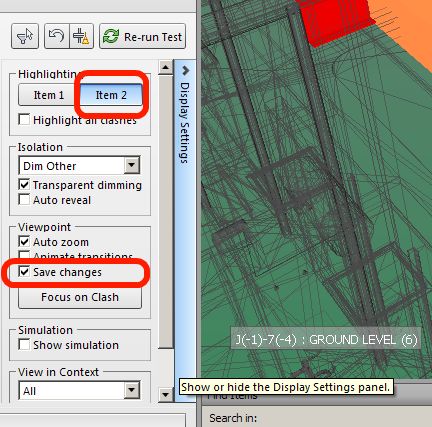
You can save multiple viewpoints for each Sheet View. If you draw redlines on one of these saved sheet viewpoints, be sure to finish the command or switch to modify to input the redline / text into the saved viewpoint.
Double-click on the toplevel NWC in the Project Browser to return to your model.
A note on Phasing:
When exporting a report:

Sadface – There is no Tab key for selection cycling of objects under the cursor.
Further reading / resources:
Great class for new Navisworks users – download the video from AU:
Autodesk University – BIM for Contractors: An Introduction to Autodesk® Navisworks® Manage 2012, Part 1
Autodesk University – BIM for Contractors: An Introduction to Autodesk® Navisworks® Manage 2012, Part 2
A kind-of workaround for the selection cycling annoyance:
@lukeyjohnson Use Selection Box and select them all, then isolate what u want in the Selection Inspection dialog box.
— Chris Ehly (@cjehly) August 7, 2013
Other Navisworks classes from AU you may want to check out:
Autodesk® Navisworks®: Practical Tips and Tricks from Seven Years in the Construction Industry
Quote:
“nanoCAD is a well-proven DWG-compatible CAD program that includes AutoCAD-like APIs. It’s totally free. No catches. No adware. No crippleware. No incessant nagging. Up until now, the free version has been the only version of nanoCAD offered to the USA. No doubt, the best value in the industry (even better than DraftSight [it lacks APIs in the free version]).”
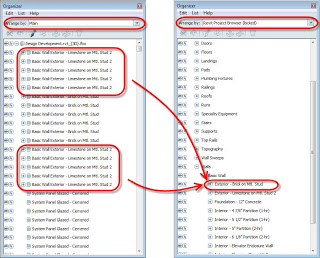
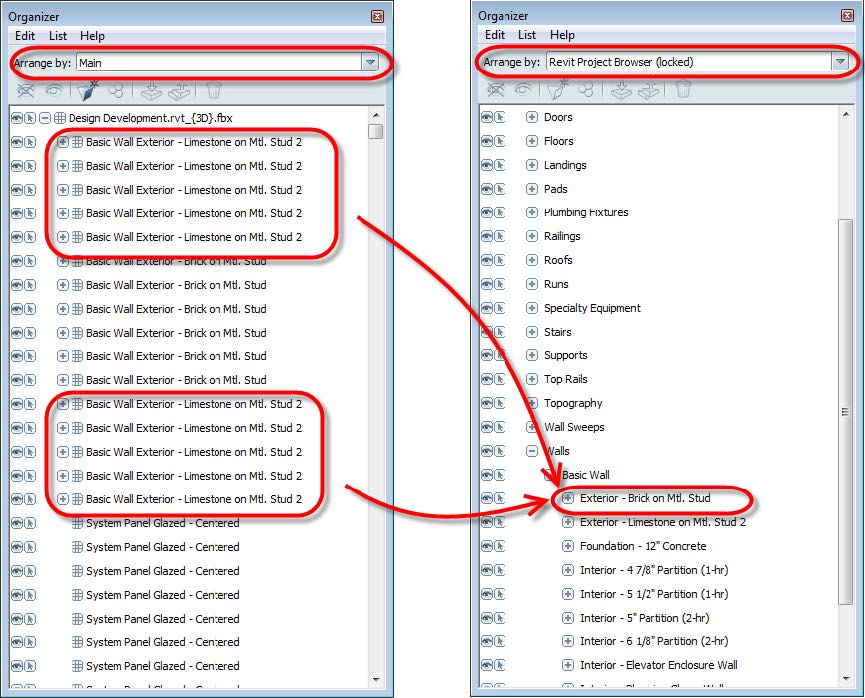
Some good tips on using the Revit Project Browser “Arrange By” setting in the Object Organizer in Showcase to make things a bit easier to manage…
PDF download link:
http://dccadd.com/bldg/wp-content/uploads/2012/10/Building-Design-Suite-Workflows-Revit-to-Showcase.pdf
via
Building Design Suite Workflows – Revit to Showcase | Building Solutions
Heads-up: Belinda Thompson
What’s so good about FBX?
Geometry, materials, lights and camera assets are all contained in the file. It also supports animation.
What formats can FBX Review handle?
.fbx, .3ds, .obj, .dxf, .dae, .bvh, .htr, .trc, .asf, .amc, .c3d, .aoa, .mcd.
From the App description:
Features
* Import and review 3D files without using full commercial 3D animation software.
* DirectX 11 enabled viewport for high-fidelity asset review.
* Toggle shading modes, animations, cameras, and scene lights.
* Familiar and intuitive playback controls to review animations.
* Formats supported: .fbx, .3ds, .obj, .dxf, .dae, .bvh, .htr, .trc, .asf, .amc, .c3d, .aoa, .mcd.
Essentially, an artist can work with whatever 3D software he or she prefers and then share the asset output without having to worry about compatibility or conversion.
(via View 3D models and animations on Windows 8 with Autodesk FBX Review | Windows Phone Central
Note – if you are using XP, you will have to use the superseded FBX Converter:
| FBX 2013.3 Converter for Windows (exe – 26335Kb) | |
| FBX 2013.3 Converter for Windows 64-bit (exe – 26303Kb) |
Heads-up via
Easily share and review 3D assets and animations with @Autodesk’s free new #FBX Review app: http://t.co/zjcJwHHStm via @StudioDaily
— Lynn Allen (@Lynn_Allen) July 24, 2013
Further reading: Autodesk ships FBX Review | CG Channel
The coordinate scheduling tool, developed by Excitech for the Revit Platform will allow accurate and simple scheduling of X,Y and Z coordinates from Revit model elements. This is suitable for a whole range of applications but particularly the easy production of Piling schedules.
It is part of the free Excitech Revit Toolkit. It has also been around for a long time, as Revit add-ins go. The other key function of this tookit is the Element Renumber tool.
Download by clicking on appropriate version link at the bottom of this page. You will need to register / login.
Other info:
http://www.excitech.co.uk/products/syndicated_content/revit-toolkit.asp
Heads-up:
Revit @ Waterman: Schedule those Levels – A Method (with a little help from our friends)
Do you know the difference between at:
?
If not, you may want to check out this post by Chris Price:
Revit Rants: A guide to employing a BIM Manager or Revit Manager
From Hagerman & Company Blog:
This video tutorial explains how to do a rolling offset using Revit or Revit MEP. The concepts are shown in Revit 2014, but can be performed on 2013. The rolling offset can be done using duct, pipe of conduit.