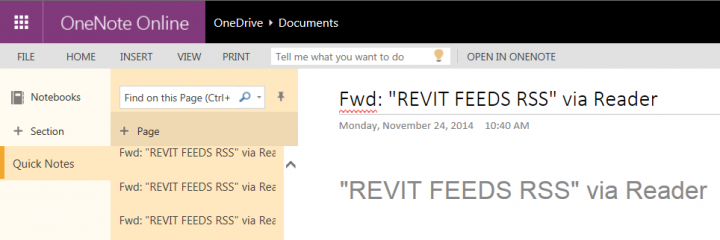
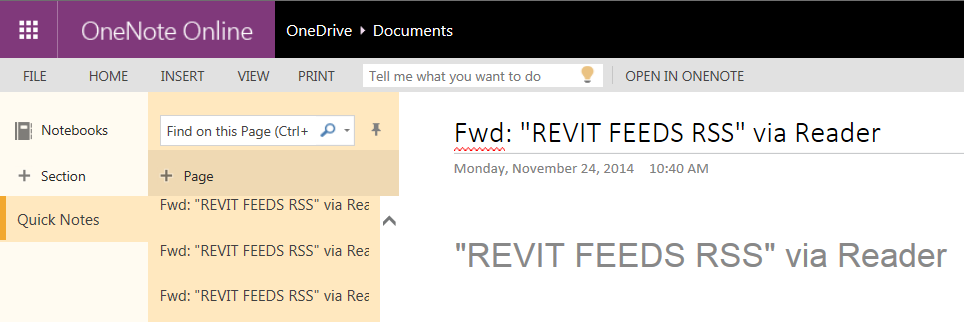
OneNote is becoming a bit of an obsession lately. Its one tantalising step closer to a paperless life.
My latest project was to feed a large RSS reading list from Inoreader into OneNote (for offline use, archiving, searching etc). Inoreader has a paid version that can do this, but I’m always search for the free option…
The short version:
Subscribe to an RSS feed with your Microsoft account
Set up a rule to forward to me@onenote.com
The longer and more powerful way:
Set up a new Microsoft account (so we can use Quick Notes default notebook freely)
Make a Google account (if you don’t already have one)
Burn the RSS feed you want with Feedburner (I am using a large list from Inoreader, so I take that folder and burn it so I can use Email Subscription)
Subscribe to it via email with the Google account
Set up forwarding from the Google account to the Microsoft one. (I use the Google account so that I can do another thing later…)
Forward emails matching Subject line of subscribed RSS feed to the Microsoft email address
Make sure the Microsoft account is an approved alias for OneNote (step 3)
In Outlook email rules, forward emails matching the FROM address of the Google account to me@onenote.com
Share the default notebook from this newly created Microsoft account to your ‘real’ one.
Now, why do we use the Google account (step 6)? So that we can use this Google script to grab lots of stuff (from that Google account) and forward it to the OneNote Notebook and populate it with lots of interesting data. In my case, I had a few years worth of these daily RSS digest emails, and I applied a label to them in Gmail and then used the script to forward them to the Microsoft account. As the rule was set up in step 9 above, these are automatically forwarded to me@onenote.com and then added to the OneNote Notebook.
Slowly but surely, this Notebook is filling up with thousands of pages of research that can be searched, taken offline and shared.
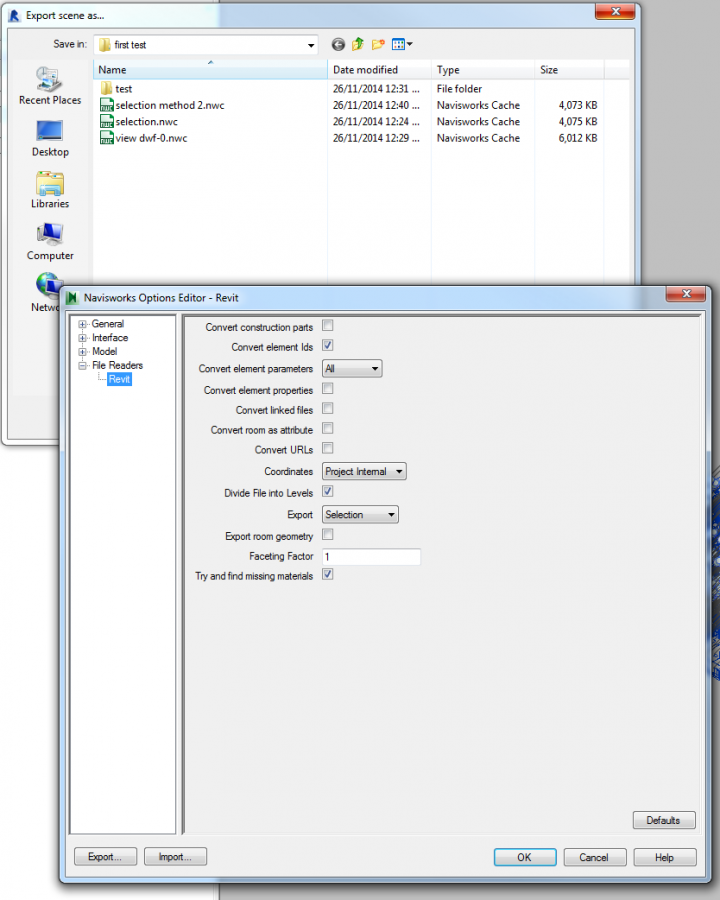
On latest R2 version of Revit 2015, with Navisworks 2015 SP3 and Navisworks Exporters R3, there remains a Navisworks export bug that affects some projects after upgrade from previous versions of Revit.
Set Level of Detail of view to something other than Fine
Set Level of Detail of categories in V/G to the setting you desire (can be Fine)
Try exporting again
or Try turning off categories one at a time to find out which Category the problem geometry resides in.
or using “uncut” in the Family Editor to uncut the voids from everything, and then using ‘cut’ to cut them again. after reloading back through into the project, this also allowed the export to continue.
or some other way…
The log file reports: Autodesk.Revit.Exceptions.ExternalApplicationException: Object reference not set to an instance of an object. at Autodesk.Revit.DB.CustomExporter.Export(View3D view) at NavisWorks12.LcIRevitBase.Export3DView(View3D view_3d, StateDictionary state_dict) at NavisWorks12.LcIRevitBase.ExportDocument(String& return_message, ElementSet elements, LcIRevitParameters* params)
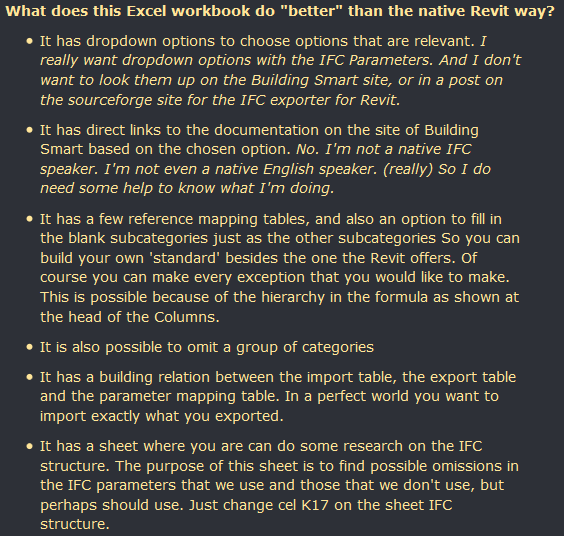
Teun De Vries shared an: “Excel document (download), with which you can build the mapping tables that Revit can use when importing from, or exporting to IFC. It is still a bèta. You can use it or even change it, but at your own risk of course. And if you do so, Teun would love to know what your experiences are. The RevitGG is also using this tool to help build some parts for in the Dutch Revit Standard the DRS.”
BIM Troublemaker has kindly shared his Dynamo tutorial dataset, including the presentation slideshow and related resources including Dynamo definitions. Thanks!
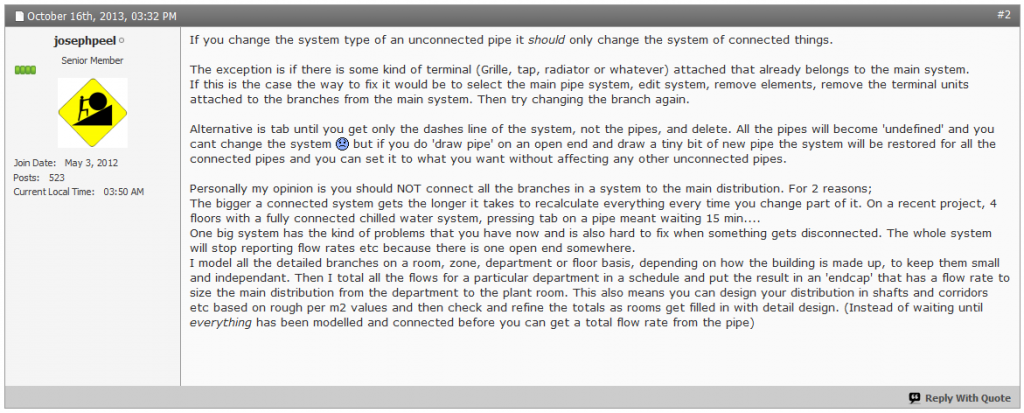
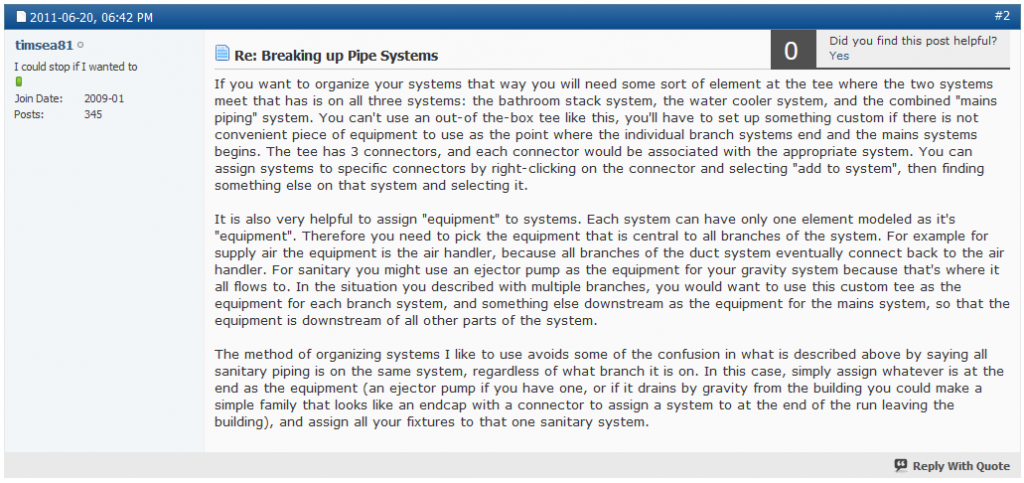
To change the System Type for the connected run, Tab-select until you have the System, then change the Type. You can also change the name here.
To completely undefine pipes, tab-select the system, then delete it. Pipes will become undefined. Start Draw Pipe command from one end and a new name will be automatically created. Apply System Name and System Type as above.
Note on upgrading: we discovered an interesting thing in the Design Office recently. When upgrading Revit 2013 files containing Systems (in this case Pipe) to Revit 2015, it is highly advisable to install the latest update (preferably R2, which is roughly equivalent to Update 4) prior to upgrading. If you use the ‘initial release’ version of Revit 2015, it will come up with lots of warnings if you have systems with duplicate names. However, it appears that the R2 version will automatically go through and un-duplicate the System names for you, making them all unique. Obviously, there may be a situation where this is not desirable (tagged systems linked to quantity takeoff or something), but for the most part it is nice to have all of those errors / warnings fixed during the upgrade to 2015.
UPDATE: Tip from Jim in the comments regarding Revit and Sysque, and exploding systems… In 2015 REVIT-Sysque if you are having the problem where when you change pipes to a certain system more pipes than you thought (sometimes all) of the pipes change to one system or another.
SOLUTION: Pick a pipe, a tab opens up which says “piping systems” pick that tab. It highlights the whole system the pipe you have selected is apart of. It may consist of supply and return piping. This is where you can explode the system. DO IT. You can then change what pipes you want change to a particular system and not have to redraw anything. jim badiali
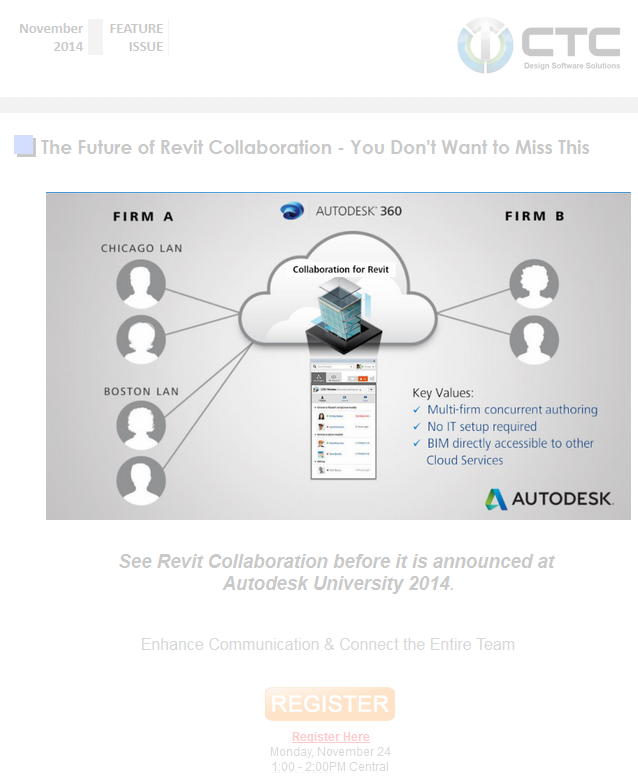
I’m pretty sure this is what Revit Skyscraper is going to look like when it gets released, and I’m guessing it will be called “Collaboration for Revit” or “Revit Collaboration” (sounds like an addin, yeah?). Check out the image:
Posts and articles about Level Of Development are so prevalent, and they can tend to be repetitive, or controversial, or somewhat tedious (or is it just me?) But recently I thought of a different way to look at LOD. What if you take the perspective of the individuals or teams who have to deal with a given generation of data? How does that relate to LOD? Here’s one way it could be expressed:
LOD100
The Client says “We want something that will maybe look a bit like this”
LOD200
The Architect says “OK, but here is a more realistic and developed idea of the design”
LOD300
The General Contractor says “Nice design, but here is something that is more coordinated and ‘buildable’
LOD400
The Trade Contractor says “That was close, but this is how it is actually going to get fabricated and put together”
LOD500
The Builder Operator says “Let’s take some of those 3D models and as constructed documents, and figure out what is actually going to be useful moving forward”
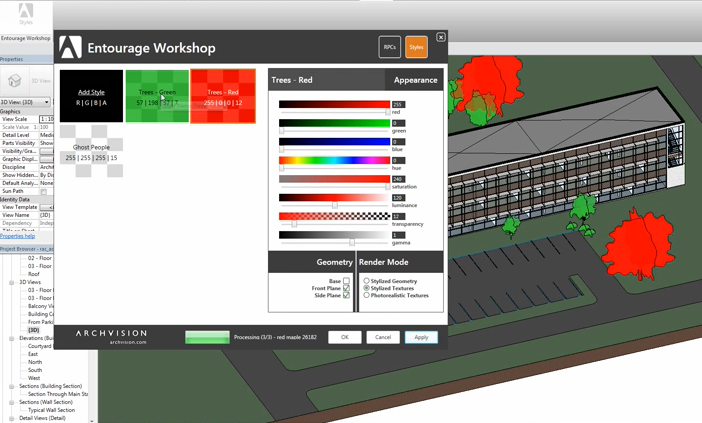
random image from web, not related to text above 🙂
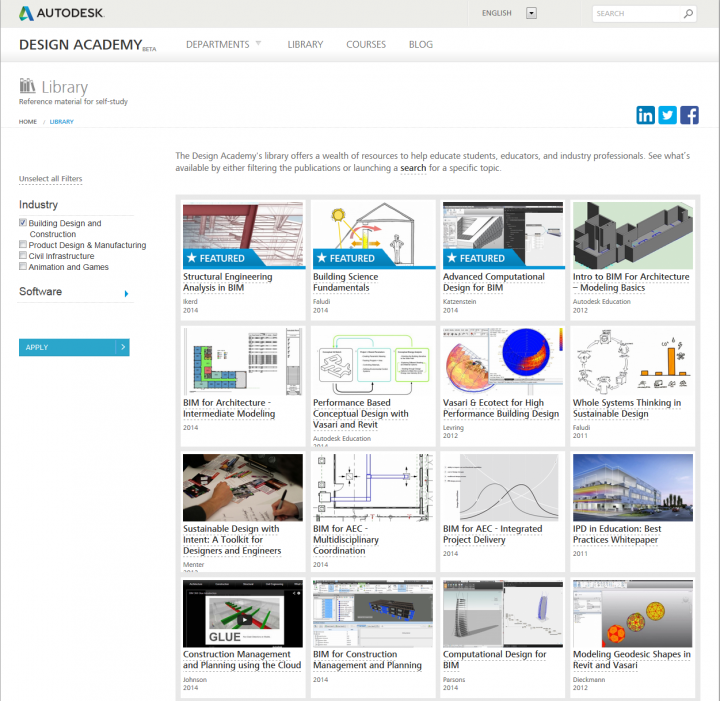
Huge library of written reference material + more available free on Design Academy Beta, new Autodesk learning portal http://t.co/DjwIv1lfN4 — Luke Johnson (@lukeyjohnson) November 11, 2014
Automation is the key to productivity. Don’t we use computers so that they can do the repetitive, boring stuff while we focus on the creative, interesting things? In BIM world, if there is something that is repetitive and requires little or no user interaction, it should be automated by some addin or script. RTV Xporter Pro is a great example of this.
Basically, it allows automatic exporting to a number of different formats, with little user interaction required. You can set up task schedules to export the formats that you need, from the Views or Sheets in your Revit model. You can use parameters from inside the Revit model (Views, Sheets, or Project Parameters) to automatically generate the correct names for the exported files. You can even integrate with the built-in Revision Schedule in Revit.
Coming from an architectural documentation background, I have spend many hours trying to find quicker ways of doing exactly these things. But RTV Xporter Pro takes a lot of the pain and guesswork out of it – you don’t have to reinvent the wheel, just use this to get the job done. My current work is more on the subcontractor side, and I have seen the time involved in generating deliverables that need to comply with certain requirements. This addin for Revit can help automate these deliverables, meaning you have more time to meet other deadlines.
This review is a collection of tip, links and resources to help you see the value in RTV Xporter Pro, and hopefully give you a head start in using the tool to accelerate your productivity.
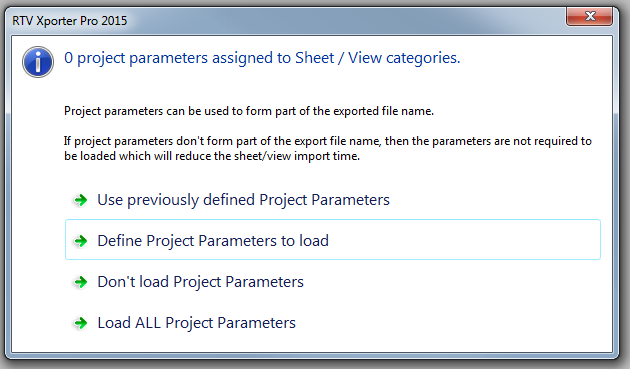
When launching the addin for the first time in a Project, you will see this screen:
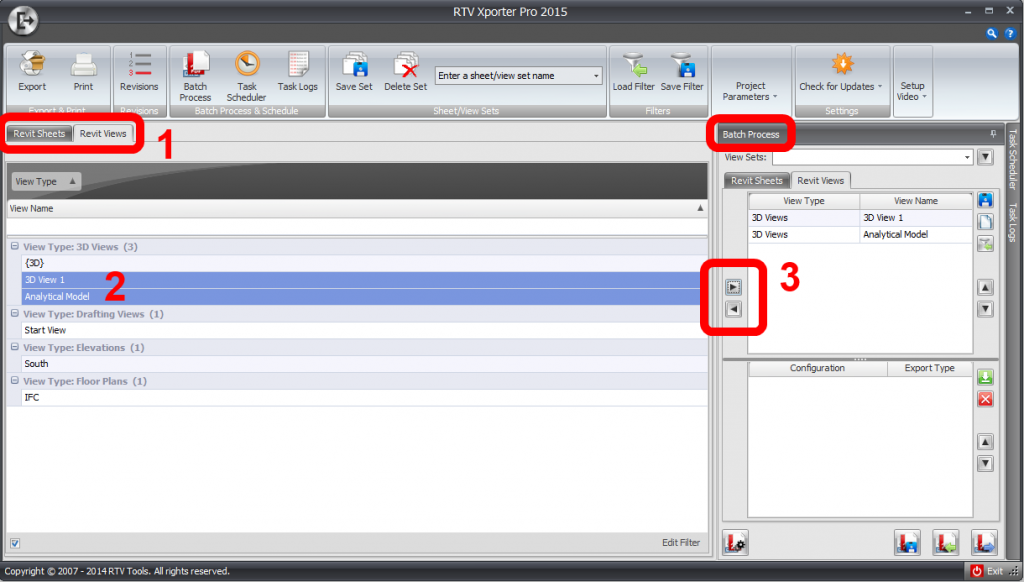
If you don’t need to use Project Parameters, click “Don’t load Project Parameters” Once the pane loads, you will be able to choose between the Revit Sheets and Revit Views tabs. On the right, you will see a Batch Process section. The two little arrows can add selected items from the left (current Revit model) section into the right (Batch) section.
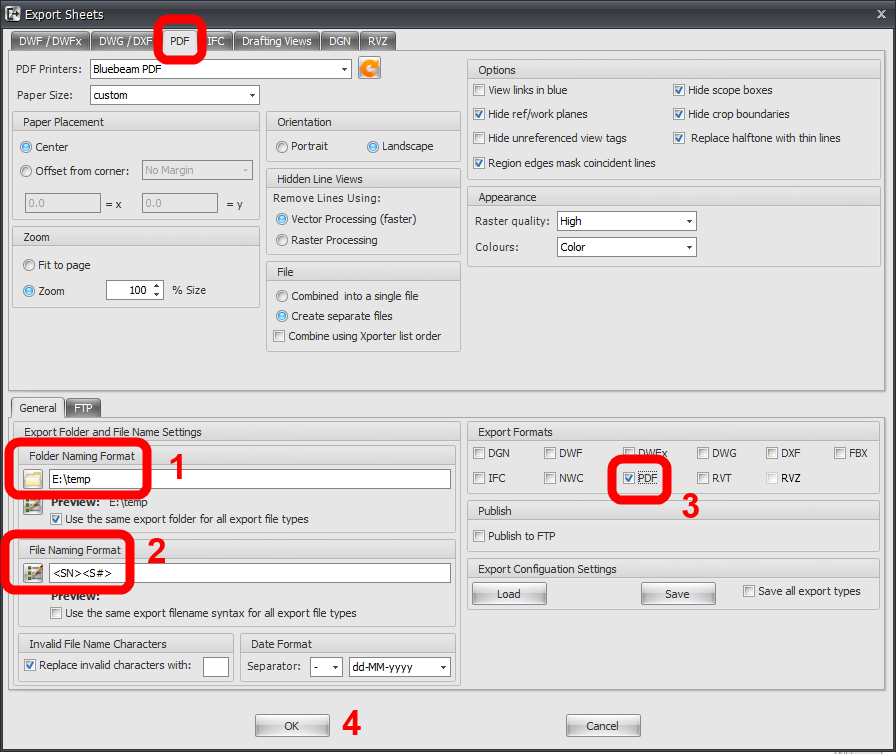
Exporting PDFs … is very easy. Just add the Sheets you want, then click the Export button in the top-left. Tick the PDF box, and set any options you would like for target folder and naming, then click OK. Done!
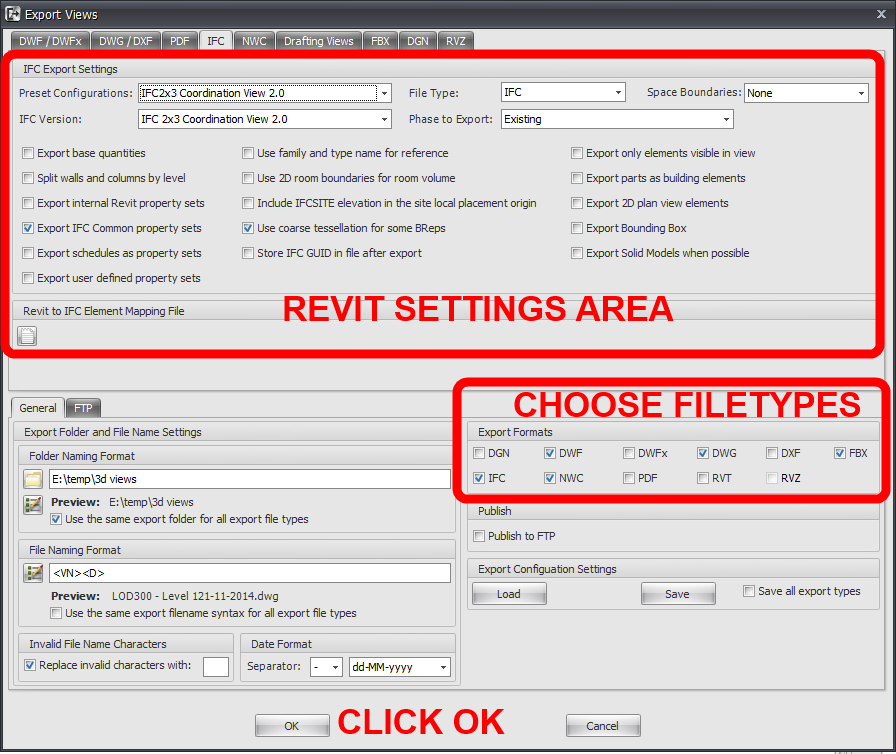
3D Deliverable Export What about exporting multiple views to DWF, DWG, FBX, IFC and NWC with the click of a button?
Start RTV Xporter, then
Add the Views you want to export to the Revit Views tab.
Click Export in the top left
On the Export Views dialog, flick through each tab and set the options you would like. (Notice how the settings you see in the top of this dialog are essentially the same as the settings you would see in the DWG, IFC, or NWC export dialogs in Revit.)
Set each export tab to suit your preferences
Tick all the filetypes you want
Set output folder
Set File Naming Format
optional – Click Save to save your settings to an XML for future use or scheduling
Click OK
Do some other work in another instance of Revit, or grab a coffee
Come back and transmit your files to the required parties
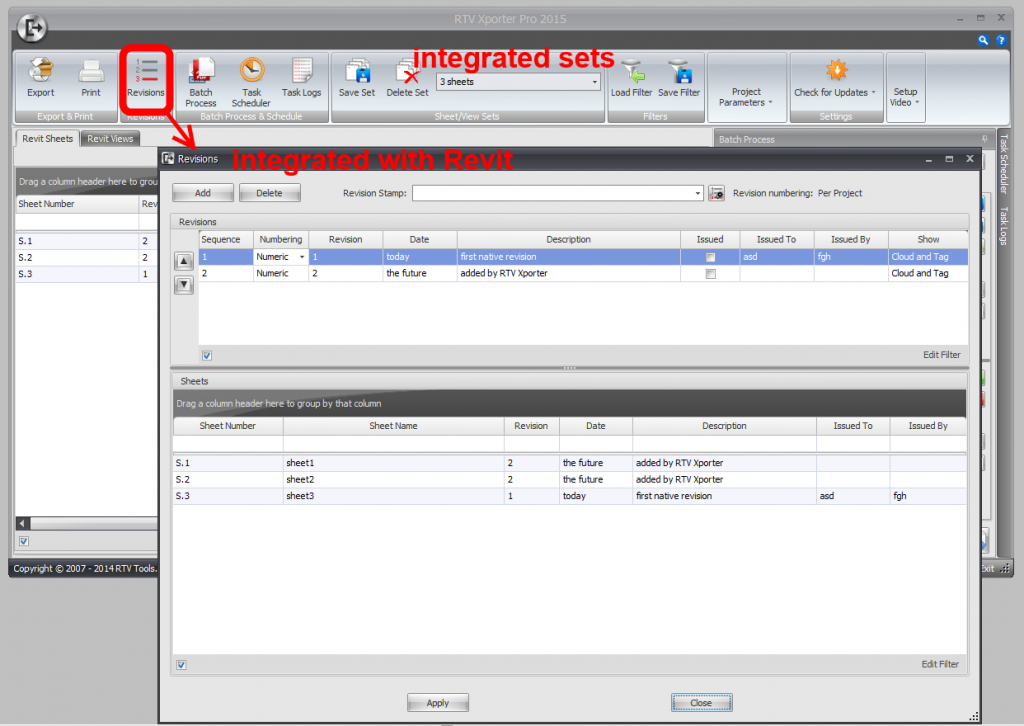
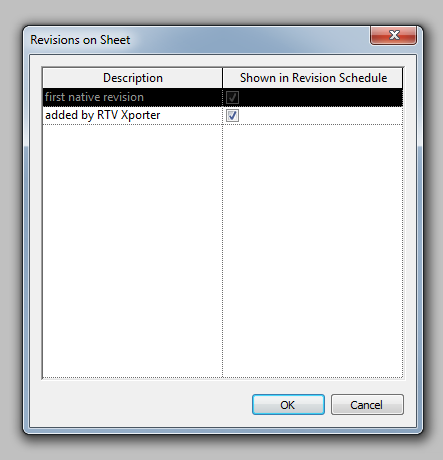
Revisions RTV Xporter can load and edit your Revit Revision Schedule. This means that there remains one point-of-truth for Revisions, and it is stored in your RVT file – great! Additionally, the View / Sheet Set selections are also read and written by RTV Xporter straight into your Revit model. There is no external database to manage, and I must admit, I love that.
Summary As you can see, this addin could become an integral part of the way you handle the creation and transmission of documentation. It provides a powerful yet simple automation engine, that integrates well with native Revit capabilities. I recommend that you give it a try…
Activation: Once you have purchased a license, RTV Xporter Pro is activated using the send email request… receive activation code method. Features:
output to multiple formats at one time
automatic naming (including revision)
print to two different printers at the same time
batch processing (unattended)
task scheduling
uses native Revit Revisions
can use Sheet, View or Project Information parameters in automatic naming
ability to Check for updates from inside the addin
Advanced Features (some are ‘coming soon’):
new Transmittal function (RTV Xporter and RTV Drawing Manager share some of the same space but the Xporter is built to work on top of Revit’s internal functions where as the Drawing Manager has been built to extend Revit functions, particularly revisions and giving users in the UK an option to comply with BS1192)
remote processing server for Revit, which will allow you to send printing and exporting jobs to a PC other they your own for processing, like backburner for rendering in 3DS Max
new file export extension to export Revit files to GSI via Safe Software’s FME Server
Output formats:
DWF / DWFx
DWG
DXF
PDF
IFC
NWC
Drafting Views (as RVT)
FBX
DGN
RVZ
Configuration and Deployment: Batch settings can be saved to XML to allow for easy sharing of consistent options
Tip: Right-click in the data grid to see various ways you can manipulate it (add columns, filter by columns and rows etc)
Training: I also reviewed some of the course material for the official Xporter Pro 2015 Training course, and there were some good step-by-step guides to get you started.