There was an API addin available a while back, but in recent years I have used:

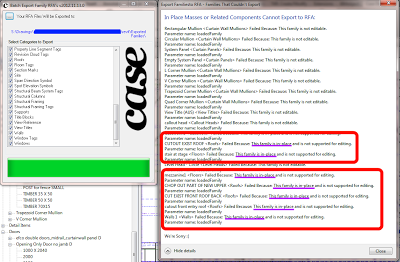
  • the Case Batch Export Family RFA’s tool
    https://wrw.is/2012/12/how-to-determine-if-family-is-in-place.html
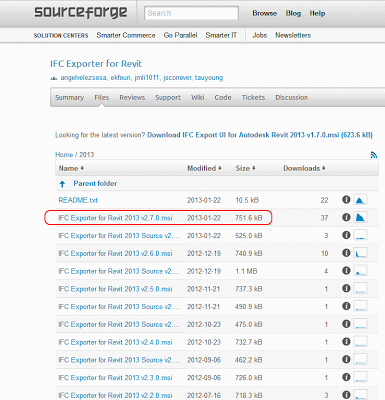
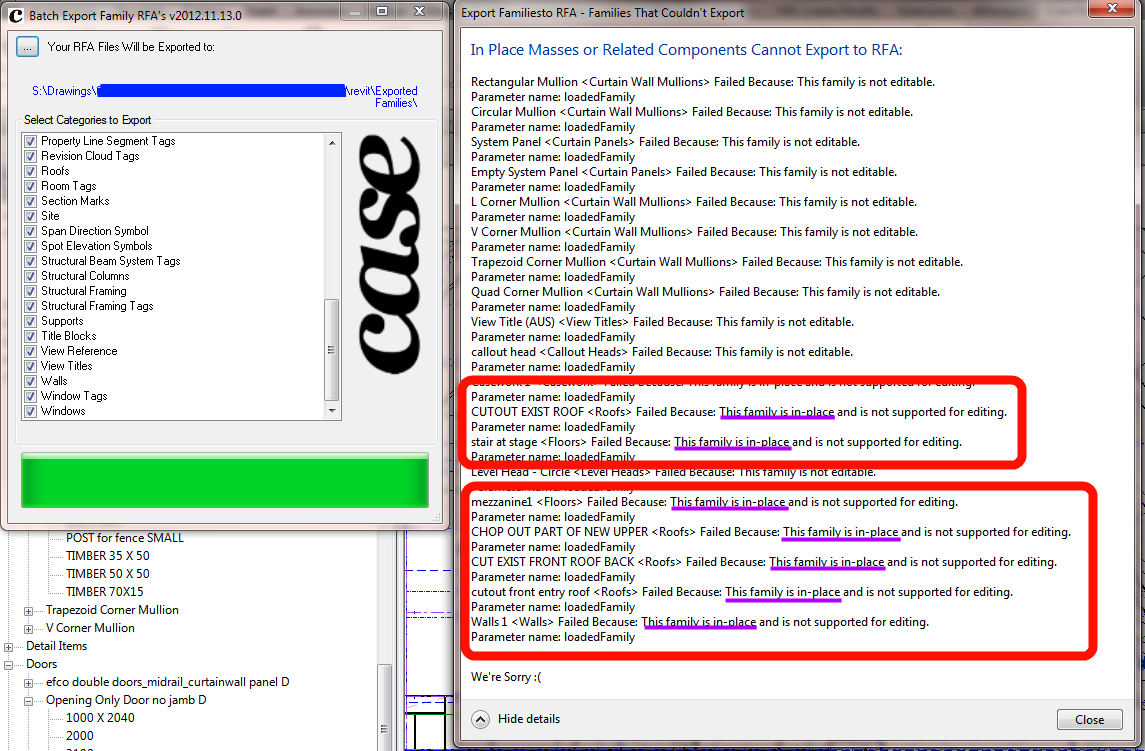
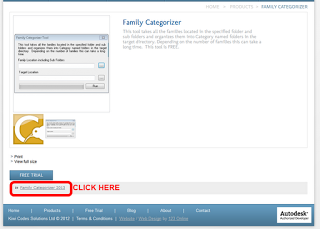
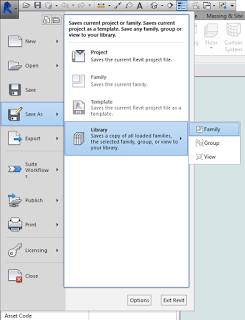
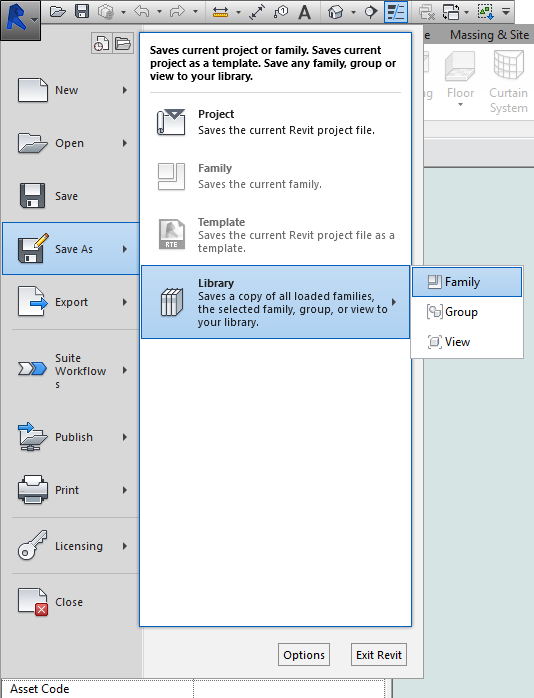
    This way is pretty robust, as it also gives you a list of inplace families and masses that it couldn’t save to rfas. Unfortunately, it is pretty hard to get now that Case have shut down their free app downloads 🙁 Hopefully someone in your office already has it installed? Just copy all the files starting with Case between the relevant addin folders to get it going.
  • You could also use the builtin method File – Save As – Library – Family – All Families to export the rfas, and then (for 2013 version only) the free Kiwi Codes Family Categorizer to sort them into Category folders. More on that here:
    https://wrw.is/2012/11/free-utility-that-will-sort-all-of-your.html

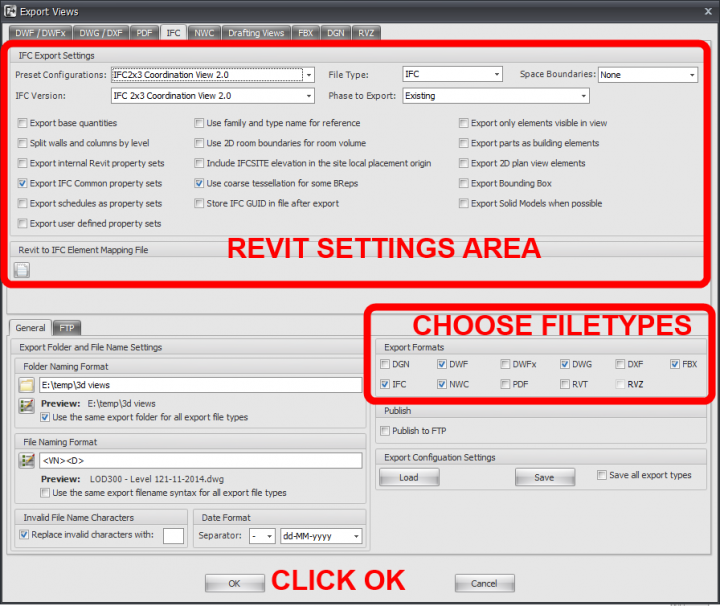
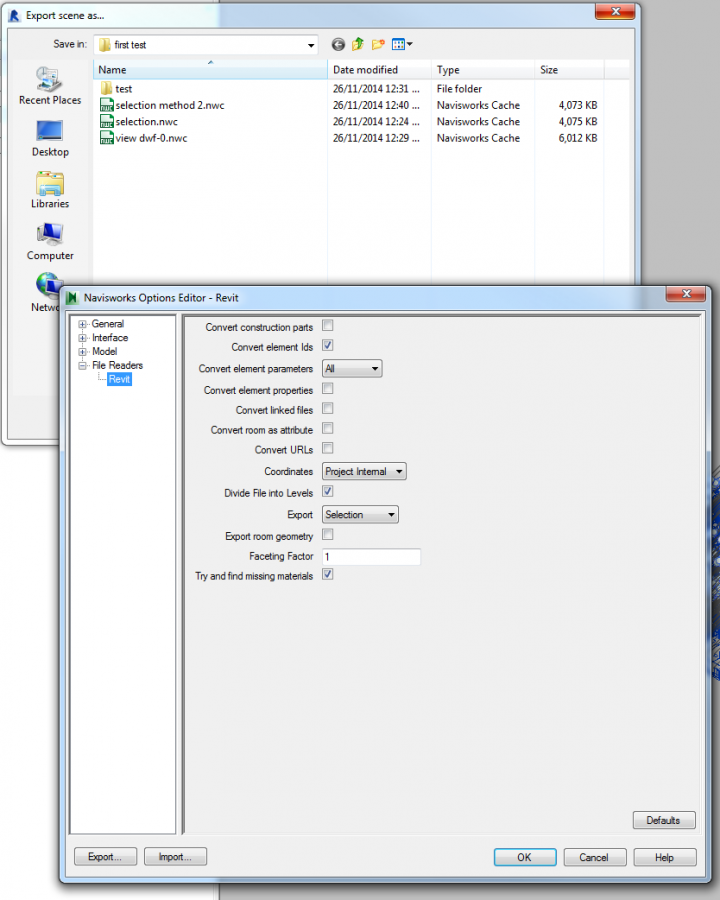
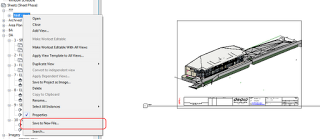
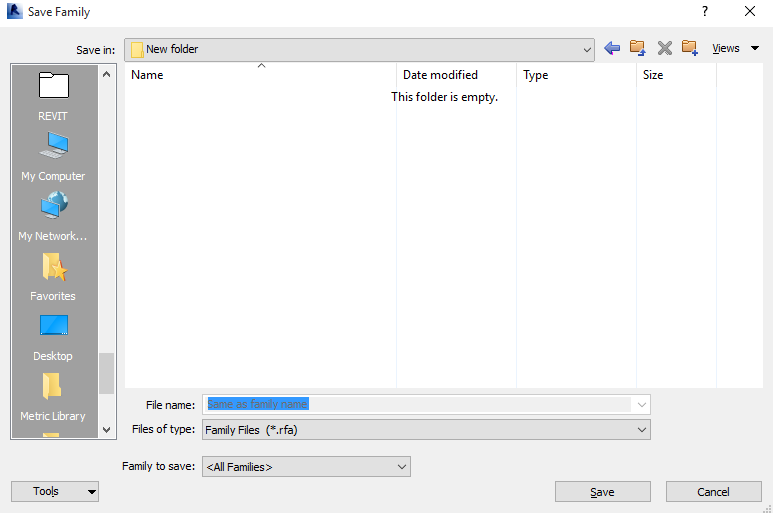
These are the steps to export the families using the builtin workflow:

Personally, I now usually use Unifi to export and manage Revit content.

Thanks to Matt Wash for prompting me to do an update post on these different methods.

I reviewed RTV Xporter PRO late last year, but there have been a few updates and new features since then so I thought I’d briefly list them here.  For less than $50US per user, you get a lot of automation capability. A 2016 compatible version is now available. Also, a new build for Revit 2015 has been released.

Here are some of the new features in Xporter PRO 2015 build (599):

  • improved revision management
  • improved stability for unattended scheduled tasks with Revit
  • improved PDF connectors
  • new Citrix Sharefile connector
  • new Edit/Update Revit Sheet Parameter data mode
  • new Right-Click shortcut menu options on the main interface
  • new Create 3D views split by floor level and export to individual NWC files

Get it here

A few of the other key features of this addin:

  • tasks can be automatically run as a single Batch process or on a repeating Daily, Weekly, Monthly and Hourly Scheduled process.
  • Automatic creation of PDFs, DWG, DWF, DWFx, DXF, DGN, NWC and IFC files from Autodesk® Revit® drawing sheets and views.
  • Built-in parametric file naming engine automatically saves exported files to match any company’s or project team’s file naming conventions.
  • Batch print large format and reduced hardcopies to two separate printers simultaneously.

If you want to know more, you can check out my November 2014 review:
What Revit Wants: Automatic Batch Printing and Exporting from Revit that could save you Dollars and Time (RTV Xporter Pro review)

On latest R2 version of Revit 2015, with Navisworks 2015 SP3 and Navisworks Exporters R3, there remains a Navisworks export bug that affects some projects after upgrade from previous versions of Revit.

Error: documented at http://knowledge.autodesk.com/support/revit-products/troubleshooting/caas/sfdcarticles/sfdcarticles/Error-No-suitable-geometry-found-when-exporting-from-Revit-to-Navisworks-2015.html

Workaround: You can use the selection method to Export and the error does not seem to occur:

  1. Open the 3D view to export 
  2. Select all visible objects 
  3. Go to Addins ribbon, 
  4. choose External Tools – Navisworks 2015 (Exporter) 
  5. In the settings, choose “Selection” (see attached screenshot) 
  6. Name the file and export as usual

Other suggested workarounds (did not work in this instance):

  1. Turn off Detail Items
  2. Try exporting again

or

  1. Remove View Template
  2. Set Level of Detail of view to something other than Fine
  3. Set Level of Detail of categories in V/G to the setting you desire (can be Fine)
  4. Try exporting again 

or
Try turning off categories one at a time to find out which Category the problem geometry resides in.

or
using “uncut” in the Family Editor to uncut the voids from everything, and then using ‘cut’ to cut them again. after reloading back through into the project, this also allowed the export to continue.

or
some other way…

      The log file reports:
      Autodesk.Revit.Exceptions.ExternalApplicationException: Object reference not set to an instance of an object.
         at Autodesk.Revit.DB.CustomExporter.Export(View3D view)
         at NavisWorks12.LcIRevitBase.Export3DView(View3D view_3d, StateDictionary state_dict)
         at NavisWorks12.LcIRevitBase.ExportDocument(String& return_message, ElementSet elements, LcIRevitParameters* params)

      Related forum:
      v2015 – Navisworks Can’t Import Revit – Autodesk Community

      IFC Exporter for Revit 2013 | Autodesk Revit | Autodesk Exchange Apps
      or
      http://sourceforge.net/projects/ifcexporter/files/2013/IFC%20Exporter%20for%20Revit%202013%20v2.7.0.msi/download

      Apparently this is version 2.7.  I may be wrong, but there doesn’t seem to be an easy way to check the ‘version’ on Autodesk Exchange Apps.  If you download the MSI, you can check the properties of the file, where you will see that the digital signature is timestamped:
      ‎Wednesday, ‎23 ‎January ‎2013 10:39:38 AM

      You could also check the IFC Exporter page on Sourceforge:

      From the documentation:
      The source code for this application is available on open source, at the SourceForge project : http://sourceforge.net/p/ifcexporter/home/Home/
      This application is a good complement to the IFC Exporter UI client app, also available on the Exchange store. However, it is not required to get the latest version of that application when installing this application. Nor is it required to use this alternate UI when getting the latest IFC Exporter UI.

      More info:
      24th January 2013, version 2.7.  Read more at BIM Blog
      http://translate.google.com/translate?u=http%3A%2F%2Fbimblog.typepad.com%2Fautodesk_bim_blog%2F2013%2F01%2Fifc-exporter-v27-for-revit-2013.html&hl=en&langpair=auto|en&tbb=1&ie=UTF-8

      Here is an easy way:

      1. Install Case Add-in Manager
      2. Using the Add-in Manager, install Batch Export Family RFA’s tool (I am running v2012.11.13.0)
      3. Open a Revit project and run the tool
      4. After families have been exported, you will be presented with an error message that tells you which families are in-place (see below).

      NOTE:  The Case exporter also creates folders for each Category as it exports.  Nice.

      This was in response to:

      In the Parameter Properties dialog, click Export.

      Note:  The Export option is not enabled if the selected parameter is already in the current shared parameter file.

      A message displays informing you that the shared parameter will be exported to the shared parameter file you set up in Step 1.

      Here is the rest of the how-to:
      Exporting Shared Parameters to a Shared Parameter File – WikiHelp
      Edit:

      You can export from the Family or Project environment. If you already have a SP with the same name in your current SP file, you will need to switch to a blank SP file, export the parameter, and then possibly you can “hack” it into your current file by text editing the SP files (maybe).

      From time to time, I export all of the families in a project and add it to our Library as a ‘snapshot’ of where our families were at during that project.  However, Revit still does not export the families into folders by Category (there used to be an add-in that did this).

      Happily, a new free tool from Kiwi Codes will take a folder and then sort all of the RFAs into folders by Category for you!

      1. Download (need to submit email as per image below). 
        You can also download it from Autodesk Exchange. (direct link)
      2. Install
      3. Run from Revit

        I did a test run of this on about 200 families – it sorted them in a couple of minutes.  If you don’t know how to export families from a Project, just go:

        1. File – Save As
        2. Library
        3. Family
        4. All families

        From their website:
        This tool takes all the families located in the specified folder and sub folders and organizes them into Category named folders in the target directory.
        via
        Family Categorizer | Products | Kiwi Codes Solutions Ltd

        Heads-up via
        Family Categorizer | AEC-APPS

        EDIT 2 – I have received confirmation from the Director of Kiwi Codes that the tool is “totally Free and not time locked …”

        EDIT – While the website clearly states ‘This tool is free’ (see image above), I received the following by email:
        Thank you for your interest in Family Categorizer and downloading the 21 day trial. We hope that you see the benefits that Family Categorizer will bring to your business like others worldwide are reporting.
         

        You may want to do a very aggressive cleanup of your Revit file, getting rid of all Views while retaining all 3D elements as proper Revit elements.  You can use the ‘Save to New File’ function to do this. (Note: when I say aggressive, I mean it – use at your own risk, and be sure to verify the contents of the output file).  Thanks to the revitogbim blog for this tip.

        This is the trick: when you right-click a 3D view, the Save to New File option is grayed out, but when you put it on a sheet – its back!

        Here’s how to do it:

        1. Create a Sheet and place a 3D view on it.  The 3D view has to ‘contain’ all of the elements you want to keep in the new file.
        2. In the Project Browser, right-click on the created sheet and select “Save to New File …” (it will take a while as it collects the elements, then it will prompt you to save the RVT file somewhere)
        3. Open the exported file and Transfer Project Standards for Line Weights / Patterns / Styles and also Object Styles (and anything else you want)

        Views in the resultant file:

           (the following lists are not exhaustive)
          Things that are removed:

          • Design Options
          • Floor Plans – well actually, the only view that remains is the ‘export’ view and the Default 3D view
          • Everything else that was unused or not visible

          Things that are retained:

          • Floor levels
          • The 3D Revit elements that you could ‘see’
          • RVT links if they were visible in the 3D view
          • the Sheet that was exported

          To make things look right, you will probably need to Transfer Project Standards for things like:

          • Line Weights / Patterns / Styles
          • Object Styles

           For my test case, I also turned off all Annotation Categories in the original 3D view, and I scaled it so it would fit the sheet.

          This workflow and the basic steps were from:
          Translated version
          of
          http://revitogbim.blogspot.com.au/2012/10/model-export.html