Over the years I have posted a lot of workflows for PDF creation and management, including the use of CutePDF Writer and PDF Creator. I’m also a regular user of RTV Xporter Pro, as it is the quickest and easiest way to generate PDFs from Revit, and its pretty affordable too.
To automatically create PDFs with automatic naming from RTV Xporter, you need a PDF print driver that supports automatic naming. Adobe PDF can do this with the correct settings, but you can also do it with the correct version of the free PDF Creator print driver. CutePDF does not support automatic naming. You need a PDFCreator version equal to or older than 2.5.3.
How to configure PDF Creator (thanks to Jason Howden at RTV for these slides)
Some basic settings of RTV Xporter for batch PDF printing
Installing PDF Creator:
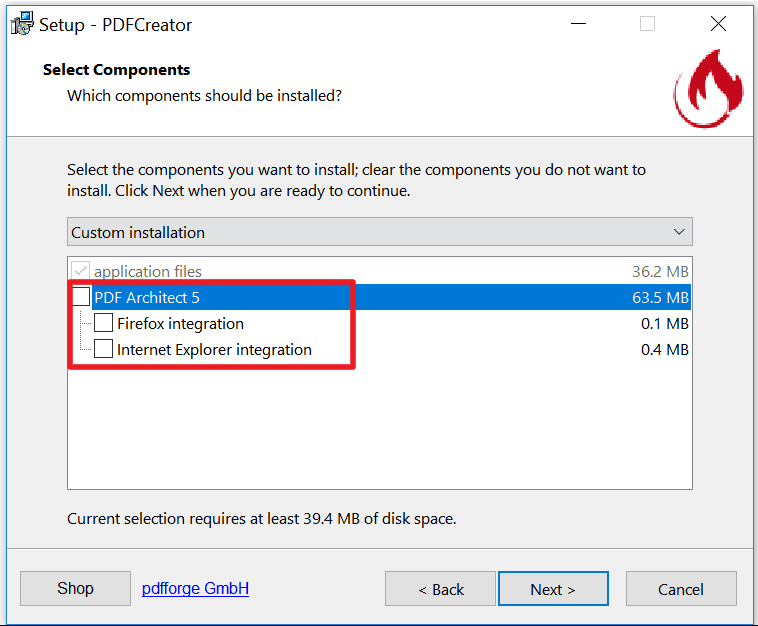
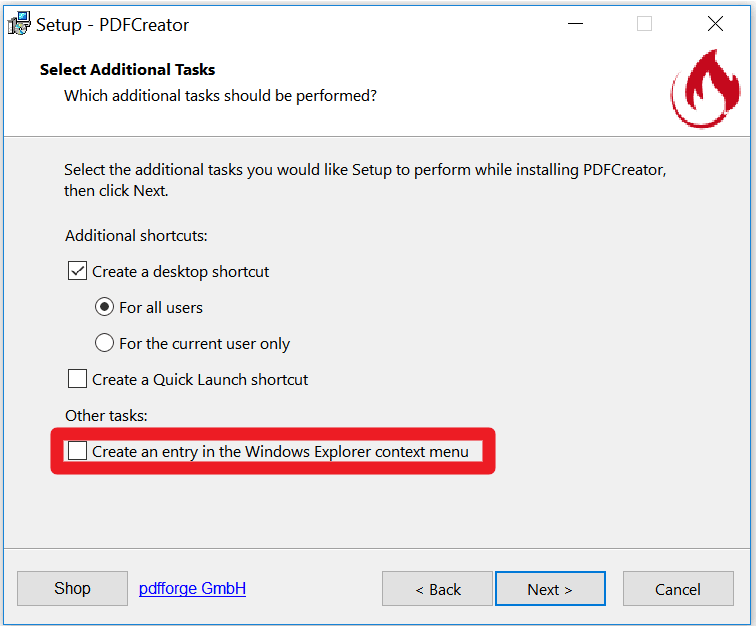
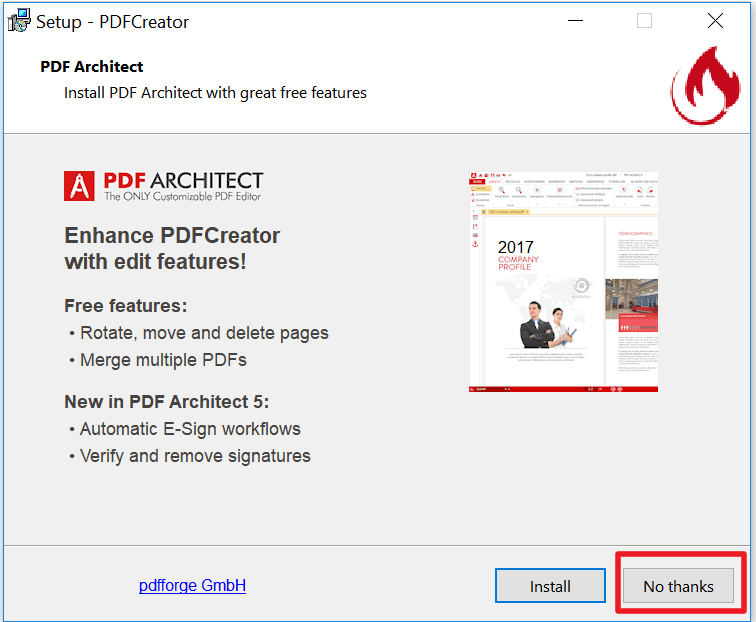
Screenshots below show some suggested options to avoid getting things installed that you don’t want.
Accessing the Settings:
Launch PDF Creator
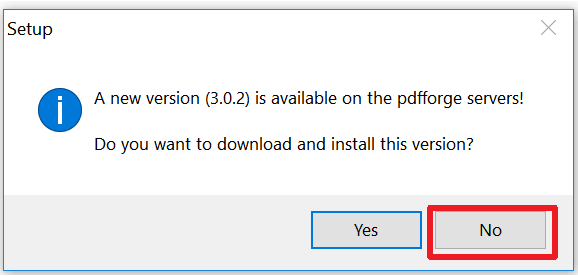
Skip any update prompts
Click Profile Settings
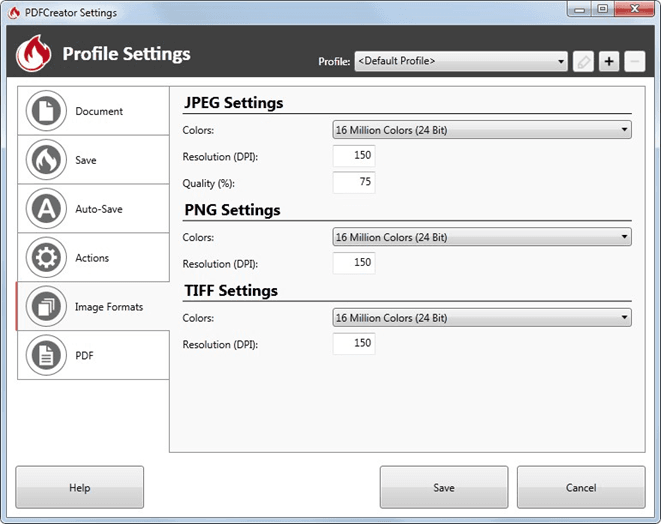
RTV Tools PDF Creator 2.2 Configuration/Profile Settings
Printing to PDF automatically from Autodesk Revit with RTV Tools (Xporter/Xporter PRO/Drawing Manager) and PDF Creator (versions 2.5.3 and prior) can be enabled with the below settings.
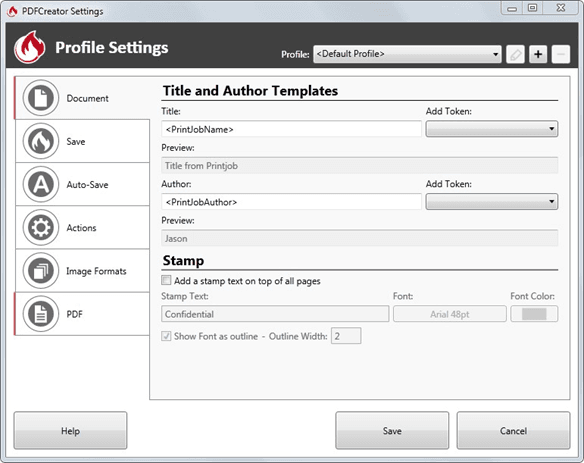
Document (Tab) Settings
No changes required (optional)
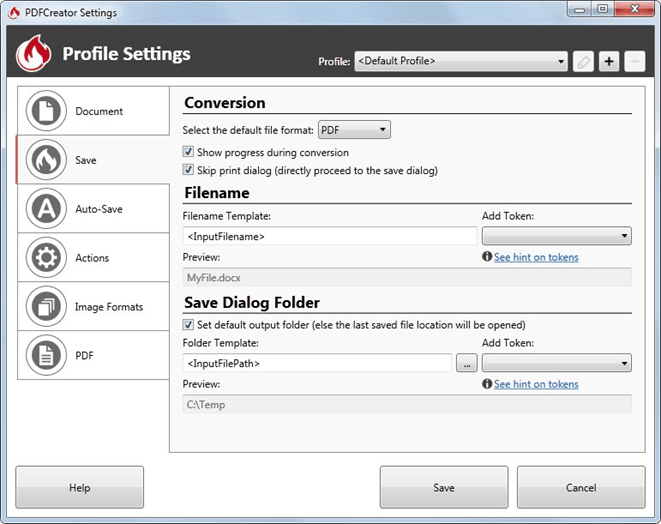
Save (Tab) Settings
Tick Show progress during conversion
Tick Skip print dialog (directly proceed to the save dialog)
Add Token <InputFilename>
Tick Set default output folder (else the last saved location will be opened)
Add Token <InputFilePath>
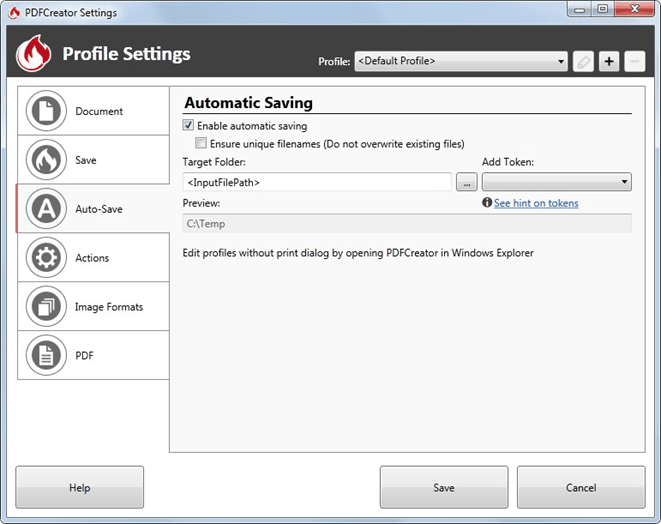
Auto-Save (Tab) Settings
Tick Enable automatic saving
Un-Tick Ensure unique filenames (Do not overwrite existing files)
Automation is the key to productivity. Don’t we use computers so that they can do the repetitive, boring stuff while we focus on the creative, interesting things? In BIM world, if there is something that is repetitive and requires little or no user interaction, it should be automated by some addin or script. RTV Xporter Pro is a great example of this.
Basically, it allows automatic exporting to a number of different formats, with little user interaction required. You can set up task schedules to export the formats that you need, from the Views or Sheets in your Revit model. You can use parameters from inside the Revit model (Views, Sheets, or Project Parameters) to automatically generate the correct names for the exported files. You can even integrate with the built-in Revision Schedule in Revit.
Coming from an architectural documentation background, I have spend many hours trying to find quicker ways of doing exactly these things. But RTV Xporter Pro takes a lot of the pain and guesswork out of it – you don’t have to reinvent the wheel, just use this to get the job done. My current work is more on the subcontractor side, and I have seen the time involved in generating deliverables that need to comply with certain requirements. This addin for Revit can help automate these deliverables, meaning you have more time to meet other deadlines.
This review is a collection of tip, links and resources to help you see the value in RTV Xporter Pro, and hopefully give you a head start in using the tool to accelerate your productivity.
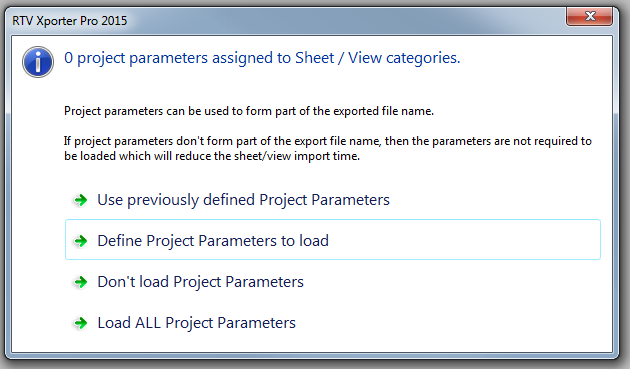
When launching the addin for the first time in a Project, you will see this screen:
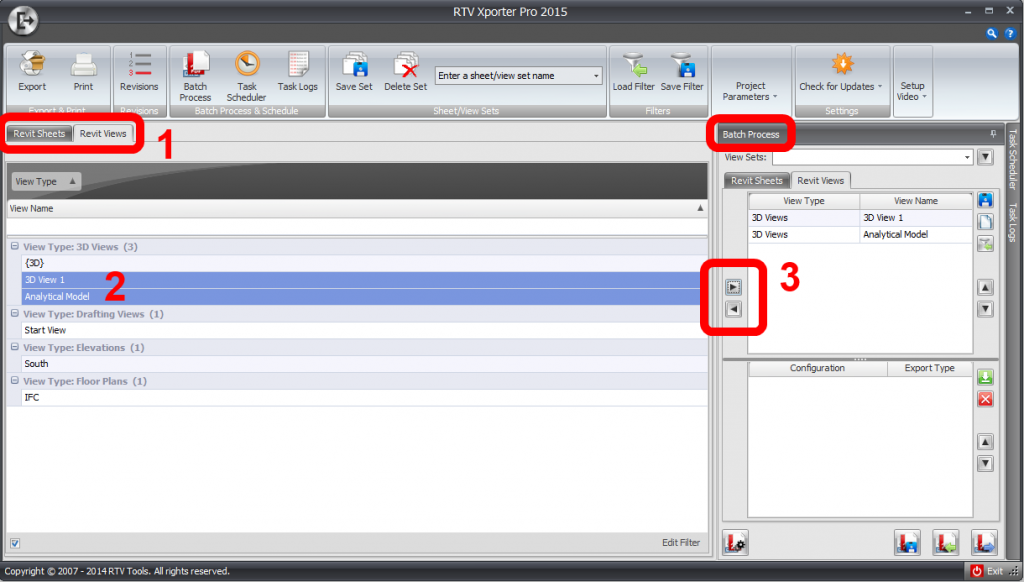
If you don’t need to use Project Parameters, click “Don’t load Project Parameters” Once the pane loads, you will be able to choose between the Revit Sheets and Revit Views tabs. On the right, you will see a Batch Process section. The two little arrows can add selected items from the left (current Revit model) section into the right (Batch) section.
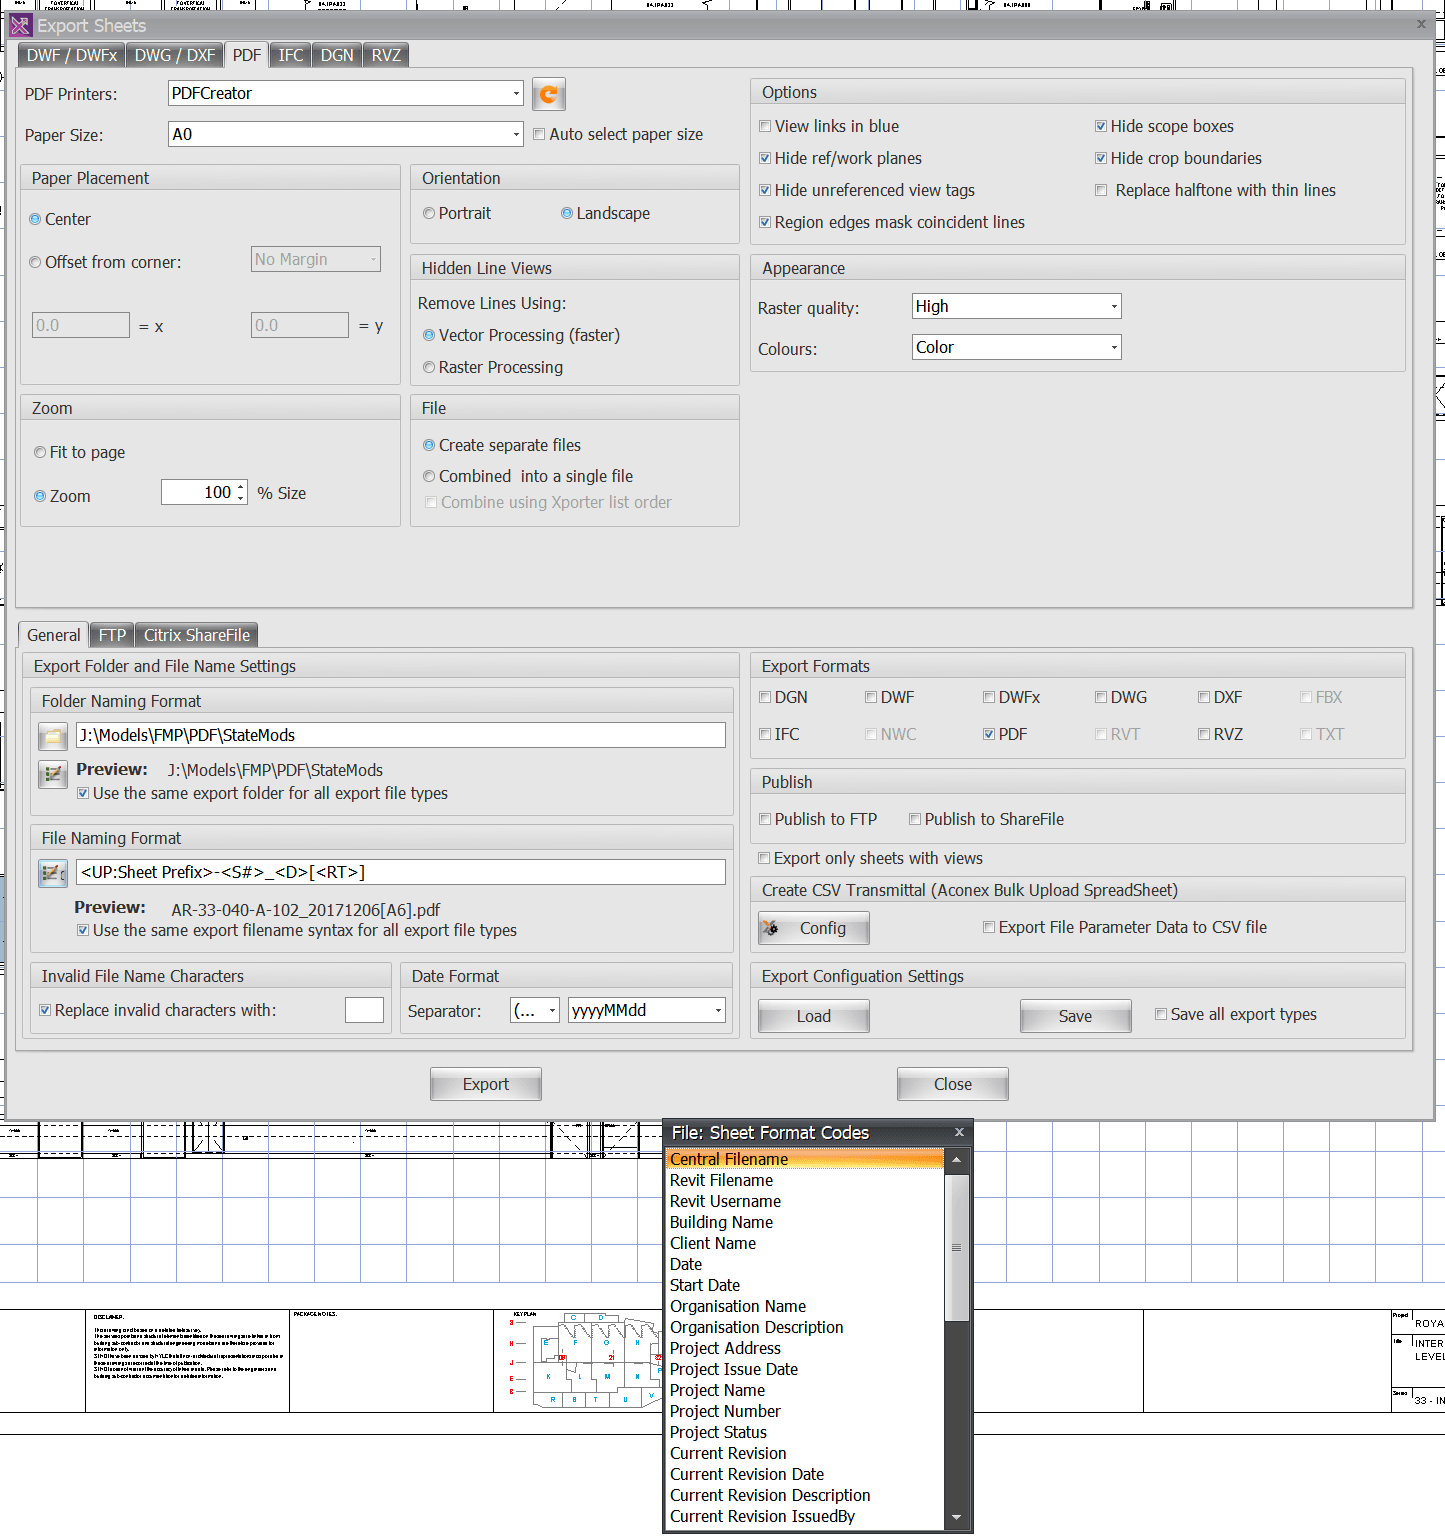
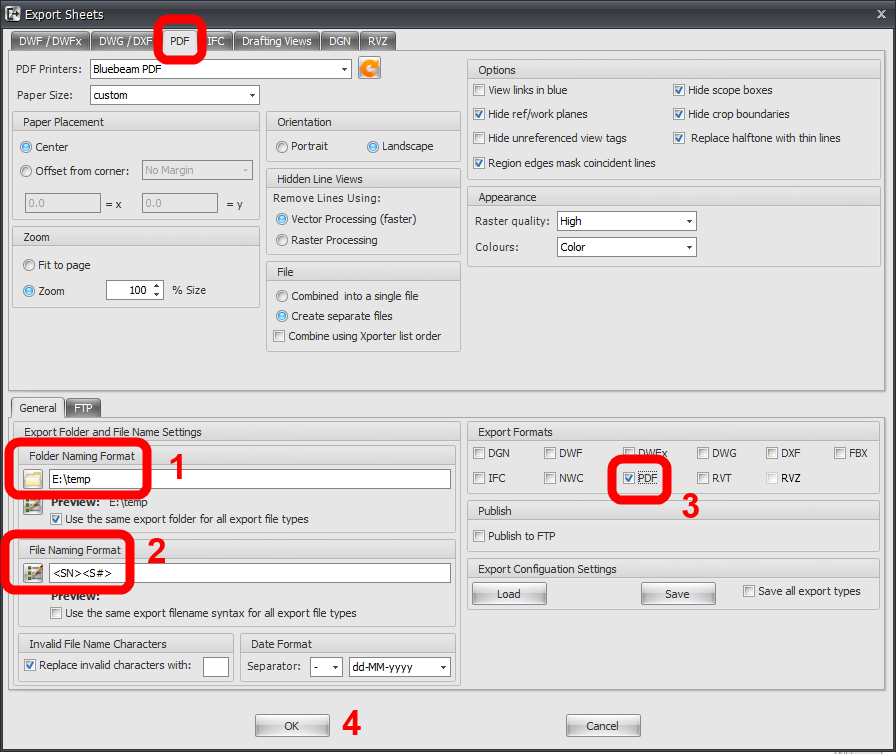
Exporting PDFs … is very easy. Just add the Sheets you want, then click the Export button in the top-left. Tick the PDF box, and set any options you would like for target folder and naming, then click OK. Done!
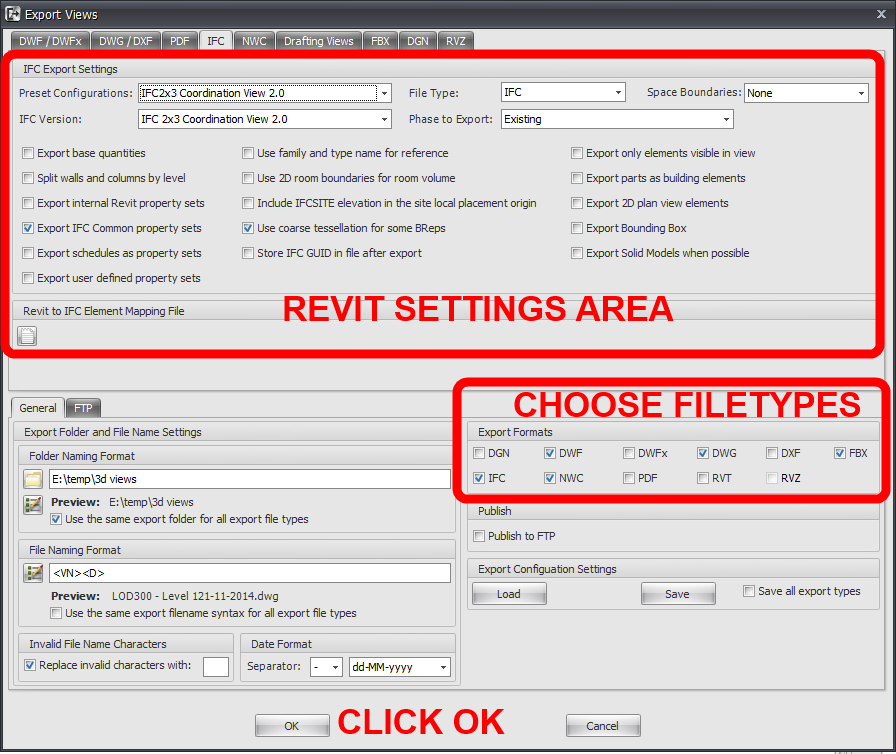
3D Deliverable Export What about exporting multiple views to DWF, DWG, FBX, IFC and NWC with the click of a button?
Start RTV Xporter, then
Add the Views you want to export to the Revit Views tab.
Click Export in the top left
On the Export Views dialog, flick through each tab and set the options you would like. (Notice how the settings you see in the top of this dialog are essentially the same as the settings you would see in the DWG, IFC, or NWC export dialogs in Revit.)
Set each export tab to suit your preferences
Tick all the filetypes you want
Set output folder
Set File Naming Format
optional – Click Save to save your settings to an XML for future use or scheduling
Click OK
Do some other work in another instance of Revit, or grab a coffee
Come back and transmit your files to the required parties
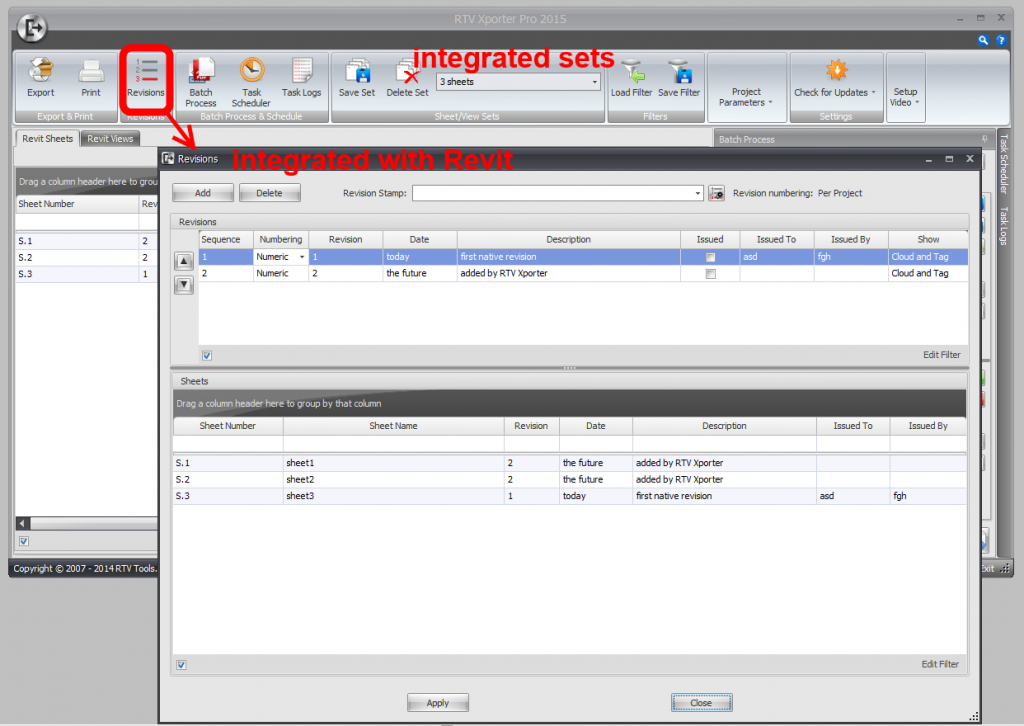
Revisions RTV Xporter can load and edit your Revit Revision Schedule. This means that there remains one point-of-truth for Revisions, and it is stored in your RVT file – great! Additionally, the View / Sheet Set selections are also read and written by RTV Xporter straight into your Revit model. There is no external database to manage, and I must admit, I love that.
Summary As you can see, this addin could become an integral part of the way you handle the creation and transmission of documentation. It provides a powerful yet simple automation engine, that integrates well with native Revit capabilities. I recommend that you give it a try…
Activation: Once you have purchased a license, RTV Xporter Pro is activated using the send email request… receive activation code method. Features:
output to multiple formats at one time
automatic naming (including revision)
print to two different printers at the same time
batch processing (unattended)
task scheduling
uses native Revit Revisions
can use Sheet, View or Project Information parameters in automatic naming
ability to Check for updates from inside the addin
Advanced Features (some are ‘coming soon’):
new Transmittal function (RTV Xporter and RTV Drawing Manager share some of the same space but the Xporter is built to work on top of Revit’s internal functions where as the Drawing Manager has been built to extend Revit functions, particularly revisions and giving users in the UK an option to comply with BS1192)
remote processing server for Revit, which will allow you to send printing and exporting jobs to a PC other they your own for processing, like backburner for rendering in 3DS Max
new file export extension to export Revit files to GSI via Safe Software’s FME Server
Output formats:
DWF / DWFx
DWG
DXF
PDF
IFC
NWC
Drafting Views (as RVT)
FBX
DGN
RVZ
Configuration and Deployment: Batch settings can be saved to XML to allow for easy sharing of consistent options
Tip: Right-click in the data grid to see various ways you can manipulate it (add columns, filter by columns and rows etc)
Training: I also reviewed some of the course material for the official Xporter Pro 2015 Training course, and there were some good step-by-step guides to get you started.