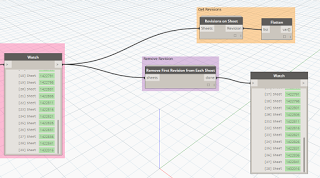
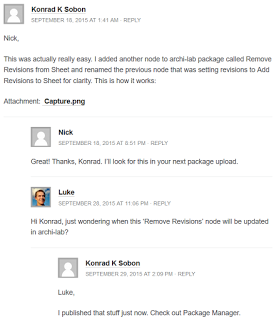
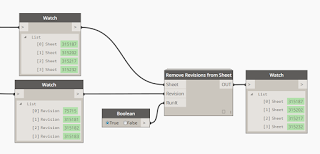
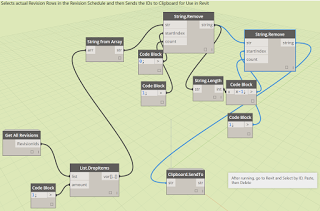
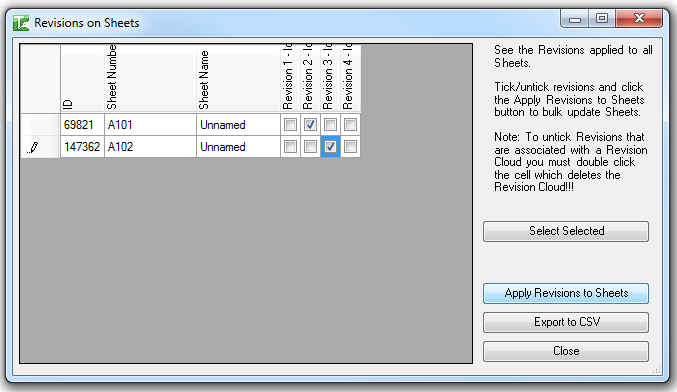
Konrad has put together some very handy nodes to work with Revisions in Dynamo and Revit. I have packaged up a simple implementation of these in my Bakery package that takes a list of sheets, gets the first revision from that sheet, and then removes it (ie. unticks the Revisions on Sheet parameter). It looks like this:

This is useful for when you have copied or inserted sheets into your model, and they have automatically adopted a revision. You want to clean them up? Use the above, but make sure you filter that list of sheets first.

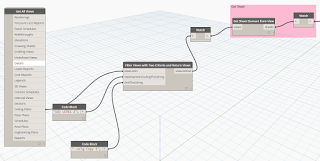
I use some a couple of these nodes from Bakery to grab views, filter them, then get the sheet from the view:

For more info:
revisions on sheet w/ dynamo | archi-lab

Quickly Deleting Revisions (graph from Konrad):

Also, for deleting revision entries from the Revision table:
I have an alternate version if you want to test it. I made one that splits off the list of revisions away from the first revision (otherwise you get an error – presumably because Revit needs at least Revision there).

You might need the custom node Eraser from the package manager.

I used the Eraser tool and a giant list.create to make a tool that deletes everything unwanted from incoming models (ie, sheets, views, tags, schedules, lines, etc) but I’m still testing it. Essentially the code is the same as the attached one.

As usual use this how you wish and post if you like.

Regards,
Troy

Update
Method 1: after seeing my post, Troy Wright kindly shared his take on this. It uses only one custom node – Eraser by Julien – and it also works for Revisions that have been ‘ticked’ as issued, so this is probably the more powerful method.

Here is a download link to his DYN. Thanks Troy!

I will also add his email as a comment to this post.
Method 2
Steps:

  1. Install Dynamo
  2. Install Bakery package 
  3. Open a Revit project where you want to delete Revision Schedule rows
  4. Open this definition
  5. Run it
  6. Close Dynamo window
  7. Manage – Select by ID
  8. Paste
  9. Delete
  10. Done!

As always in Revit, it leaves behind the first row in the Revision Schedule… However, this method is more robust than deleting Revision Clouds as it also removes items appearing based on the “Revisions on Sheet” schedule. It is also much faster than laboriously using the Merge Up command one by one in the Revision Schedule.

As always, use with care 🙂

Video:

I have posted about KiwiCodes Bonus Tools before, particularly the Excel and data tools. A Sheet Revisions manager has recently been added to the toolset. Check out how quick and easy it is to add revisions to sheets with this:

Honestly, if you have $35 to spend on Revit addins, this Bonus Tools package is definitely what I would spend it on…

Versions for 2013, 2014 and 2015 in one install package:
Bonus Tools | Autodesk Revit | Autodesk Exchange Apps

Video playlist showing all of the Bonus Tools in action:


Clash Report XML to Revit:

Update, new download links (you will probably need to login or create a new free account):

Download Full Installer

FULL INSTALLER / EXE

XrevFreebiesSetup_2.1.0.exe
Revit 2012/13/14/15/16
Use this file to install the Xrev Freebies Suite on both 32-bit (x86) and 64-bit (x64) systems.

Download Full Installer

FULL INSTALLER / MSI

XrevFreebiesSetup_2.1.0_x64.msi
Revit 2012/13/14/15/16
This Windows Installer package can also be used to deploy to 64-bit (x64) systems

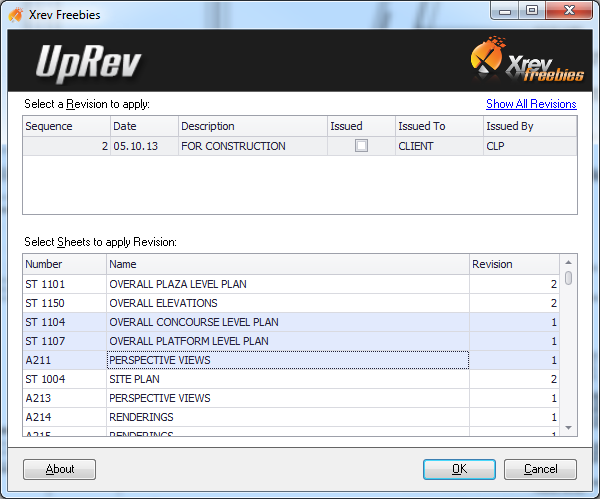
“Xrev UpRev enables you to quickly apply a revision to many sheets. Simply select the Revision you wish to apply, then select all the sheets you want to apply it to, click OK and its done …”

Functionally, I assume it goes through and ticks the “Revision on Sheet” box for you on multiple sheets.

For a non-addin method, you could use the Paste Aligned workflow described here.

Direct download links:

Register at:
Xrev Freebies � Products | Xrev.com.au


Revising large sets of drawings in Revit can be a little challenging.  I previously posted about a method using Detail Groups, but these two tips are pretty great too:

“One other thing I thought of that is a bit more automatic is to create a revision cloud on one sheet, copy it, and the in the Paste drop down box, choose aligned to selected views.  You’ll get a list of all the sheets in the project, where you can paste the cloud.  Then turn the visibility for the clouds and tags off for that revision, and now each sheet that’s part of that “issue” can be scheduled via a typical sheet index with a parameter for revisions enabled.”
Ross Kirby
BIM Manager

What about for large revision sets for a particular project issue package?  Here:
“Gotcha, so what you’re talking about is not a revision, per se, but more of an issue package (like a 75% set, bid set, or permit set), right?

For those situations, we have a shared parameter that we use as part of the project information parameters, and a separate section in the titleblock for those labels.  That gets manually filled in on one sheet, and is propogated to all other sheets.”
Ross Kirby
BIM Manager

Great stuff Ross!

Read the whole thread:
http://forums.autodesk.com/t5/Revit-Architecture/Revit-Change-Revision-to-Multiple-Sheets/m-p/4322508#M70456

Issue

You want to update a revision/issue title block label globally in multiple sheet views without the need to edit every single individual sheet view.

Solution

The following steps explain how to add a label to a titleblock, which can be updated globally in multiple sheet views.

via
Autodesk – Autodesk Revit Architecture Services & Support – You want to update a revision/issue title block label globally in multiple sheet views

I was trying to delete a view today, and I got this Error:
The Revision of this Revision Cloud has been issued.  Deletion of this Revision Cloud is prohibited.

So, obviously there are some Revision Clouds, marked as ‘Issued’, in this view.  But how do I find out which ones are on there?  There is no ‘Revisions on Sheet’ button because this view is no longer on a sheet…aha, got it!

  1. Make a new sheet
  2. Place the ‘orphaned’ view on the sheet
  3. Now you have access to the ‘Revision on Sheet’ button from the Sheet View
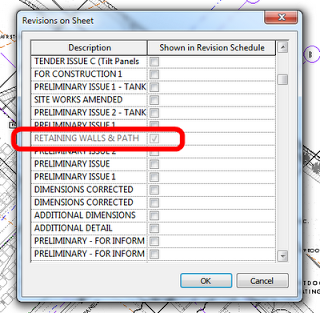
  4. The Revision Clouds that exist in that view will be ‘greyed’ out in the dialog box.

To delete the view:
  1. Un-issue the selected Revision/s
  2. Find the Revision Cloud
  3. Delete the Clouds
  4. Delete the View

PS – If your sheet family has a Revision Schedule on it, this should also show the Revision Clouds that are in the view…

I had a bit of a problem using Revit OOTB (out of the box) parameters to group sheets by Revision, so I did it super-quickly using a custom parameter.

Here are the steps:

  1. Add a new custom parameter to sheets, such as ‘Sheet Revision Group’ or similar.
  2. Open a schedule that shows the Revision you would like to group, and add this parameter to the schedule.
  3. Modify the custom parameter on all the sheets to match the Revision (you can do this quickly by toggling the ‘Itemize each instance’ tick box).
  4. Now you can easily use this parameter to group your sheets by the Revision.

Please note that this technique forms a ‘break’ between Revit native revision data and the custom parameter, so only use this technique if you understand this issue.

I have provided a quick video of the technique:

Have you ever wanted to ‘re-issue’ or revise a large group of sheets such that they all receive the same, updated revision in the Revision Schedule?

Lets say you have 100 sheets and these form the ‘Approval’ set of documents – how do you go about amending and reissuing them?

For significant revisions, it is our company policy that all revised sheets have the same entry in the Revision Schedule. Therefore, we use the following method (it takes a little setting up the first time, but it is worth it):

  1. On the first sheet you would like to re-issue, create a small section of Revision Cloud that is associated with the appropriate revision in from the Sheet Issues/Revision dialog box.
  2. Select this small section of Revision Cloud and Group it into a detail group. Call this group whatever you like – something like ‘Approval Revision Set 1’
  3. Select the Detail Group and Ctrl-C (copy to Clipboard)
  4. (At this point we usually Hide the Revisions from the sheet by Tab-selecting the Revision Cloud and Hide Category in View, as we don’t really use Revision Clouds in the traditional sense)
  5. Go to the next sheet in the set and Paste-Aligned
  6. Repeat this for each sheet you would like in the ‘Revision Set’ (you will notice that as you do this, a new entry appears in the Revision Schedule – as you would expect)

Now, you can quickly re-issue that entire set. How?Just edit the ‘Approval Revision Set 1’ Detail Group that you created, and:

  • Add a new piece of Revision Cloud that is associated to the appropriate entry in the Revision Schedule. All your sheets have now been issued with the new entry, and the Revision Schedule on each sheet shows the new entry!

You can do some tricky things with ‘nesting’ these Detail Groups to give you more flexibility or add new sheets to sets.