Revit gets a new version every year, and every year we theoretically have to upgrade our Revit files. If you are a pro-active BIM Manager, you also have to upgrade a bunch of families and other files. If you are working on certain large projects, maybe the updates are deferred for a year or two, and then you find that you have to upgrade about 800 Revit files from Revit 2015 to 2018. Obviously, they all have to upgraded at once to maintain the integrity of the data and the workflows. What is the best way to do it?
I investigated a few different options and my notes and links are list below. In my case, I decided to go with RTV Xporter Pro and its File Upgrader option. It is an extremely affordable addin (currently $49USD), considering the amount of batch processing functionality that it provides.
The very first thing to do is ensure you have a backup. In my case, I had a complete offline mirror of the Revit files, and I ran the upgrade against that mirror. Then, I could just overwrite the live network location once I confirm that everything works as expected.
I would say that another thing to do is to create some form of data snapshot of your Revit models prior to upgrade. I have a method of doing this which is pretty powerful, but its a secret (for now).
Here are the steps to upgrade a Revit dataset using RTV Xporter Pro 2018:
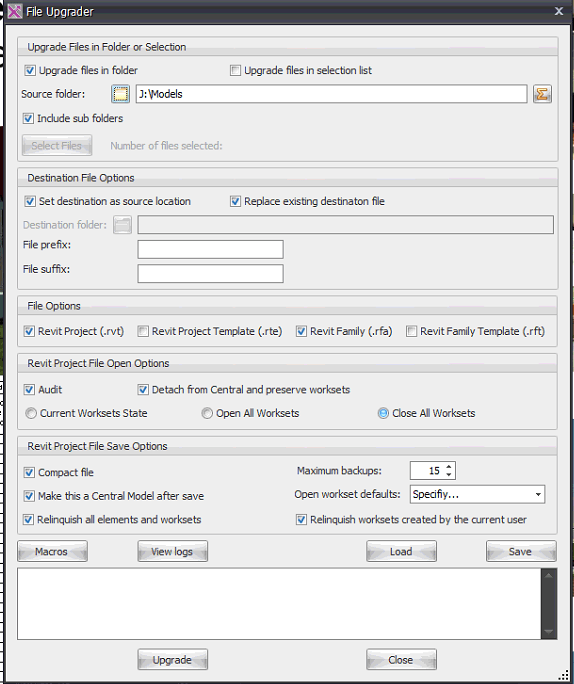
- Set up a File Upgrader XML file (my settings shown below). As you can see, I chose to Detach and Audit and then Save the file over the top of the current file in the same location. This way, all of the Revit links should be maintained once the whole dataset is upgraded to the new version.
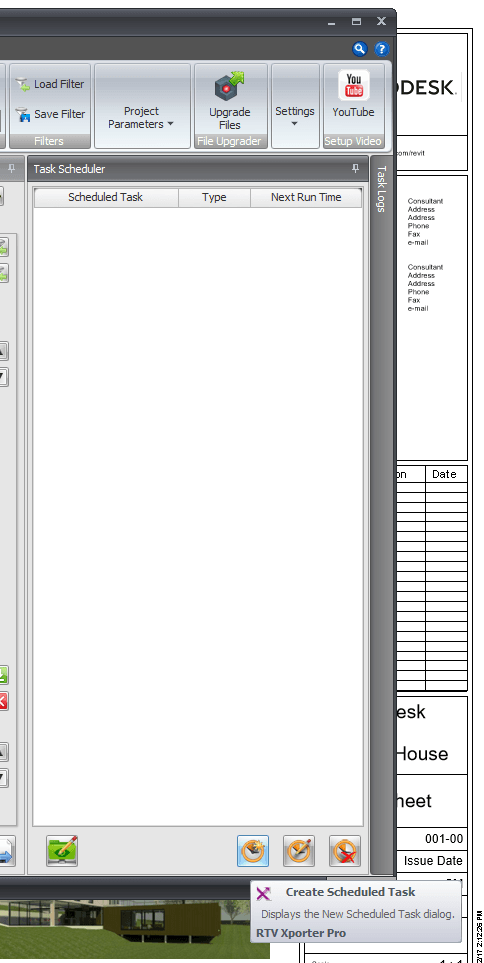
- Open Xporter Pro link from Revit
- Create Task Schedule
- Import the Upgrade XML as a Batch Process
- Set the Revit EXE location for the target version
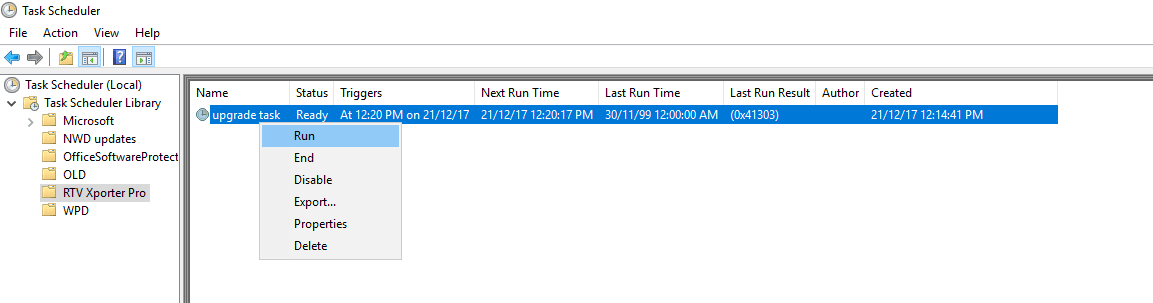
- After saving the task, open in Windows Task Scheduler and you can run it immediately.
The screenshots below show the important stuff from the above steps.
1) My RTV Xporter Pro Settings:
3) Creating the Scheduled Task:
4 and 5) Load Batch Process XML and Set Revit Application, like for 2018:

6) Running the Scheduled Task:
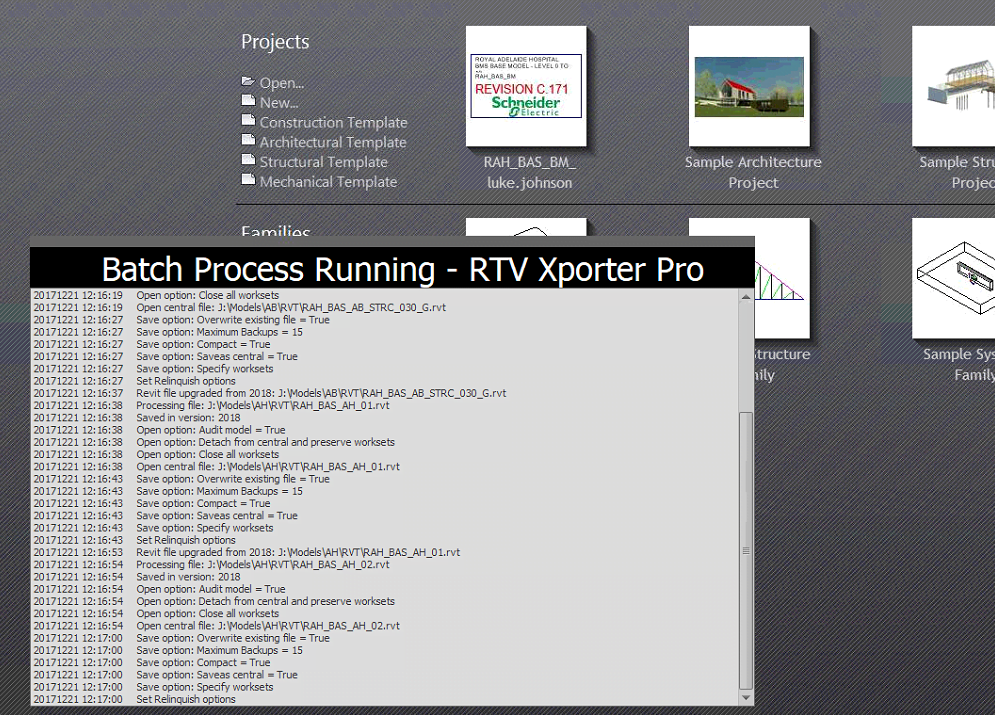
Tip: During a typical file upgrade, Revit will often come up with warnings. If you run the RTV File Upgrader task in Interactive mode, you will get the dialog box which requires user interaction (export warnings and proceed past the Revit warnings). However, if you run the upgrade from the Task Scheduler, it will automatically dismiss the warnings for you as it upgrades. Some examples are warning dialog including errors like ‘could not cut instance out of wall’. In the Scheduled Mode, this process will all happen unattended.
This is what it looks like as it upgrades (scheduled mode):
This is what it looks like as it upgrades (interactive mode):

Update 10/1/18: RTV Xporter Pro can define rules for dismissing dialog boxes, in the Task Dialog Settings. See below:
 end Update 10/1/18
You can get RTV Xporter Pro here
There are other addins and ways to upgrade. Here is a pretty comprehensive list:
Paid Revit Addins:
- Harry Mattison has built a powerful Bulk File Upgrader addin that has a lot of good reviews on the App Store. You can find it here.
Current price: $99USD - BIMWERX Batch File Upgrader. Very simple UI and good reviews. You can get it here.
Current price: $10USD - NTI Tools have a File Upgrader. You can get a trial at this link. You have to register and then get an email with the download.
Previous posts:
These previous posts show some other pretty useful methods to keep in mind…
Upgrading with File Upgrader (previously provided by Autodesk)
Batch Upgrade Family Templates by Renaming Hack
Batch Upgrade Families with Dynamo
Using this definition or the Rhythm node, as per this forum post.
Content Batch Utility Help Link:
Old Maller tweet:
Aaron Maller
http://t.co/O0eqcPo8t1
Upgraded Batch utility and journal for Fam upgrades. Does TPS of OS/LW/LT, and does Parameter Re-order in 2015.
http://t.co/O0eqcPo8t1
Upgraded Batch utility and journal for Fam upgrades. Does TPS of OS/LW/LT, and does Parameter Re-order in 2015.— Aaron Maller:Prlx (@Twiceroadsfool) May 9, 2014
Dead link?
Even older links:
http://www.revitforum.org/architecture-general-revit-questions/1976-revit-2012-a.html
http://forums.augi.com/showthread.php?83775-RVT-file-batch-Upgrade
Batch Utility
This Batch Utility is usually available on you Revit installation media:
“C:Program Files\Autodesk\Revit 2013\Program\en-US\Utilities\ContentBatchUtility\Upgrade_RFA.bat”
Old re-post:
Run this utility, then run the Family Categorizer – instant and up to date Family Library!
The Revit Jedi: Batch Upgrade Utility
Feel free to comment with your thoughts.