Beta 6 is available at:
Autodesk 123D – Download Free 3D Modeling Software
AI Empowered Project Management
Martijn is starting up an interesting series of posts about Custom Curtain Wall creation at RevitForum Blog – it would pay to follow this series of posts.
In part ‘zero’, he establishes some groundrules that any decent Revit user will be interested in reviewing. I was particularly interested in his Family creation guidelines. The workflow he presents may look basic enough, but if you do things in this order, you may save yourself much heartache and re-work. Check it out:
via Martijn de Riet at
RevitForum Blog: Custom Curtain Wall, pt 0: setup
Looking for some good, free content? Check out ProductSpec. Its free, you don’t even have to register to download!
Productspec | The National Building, Architecture, Design and Landscape Product Database
Heads-up via
RevitDE
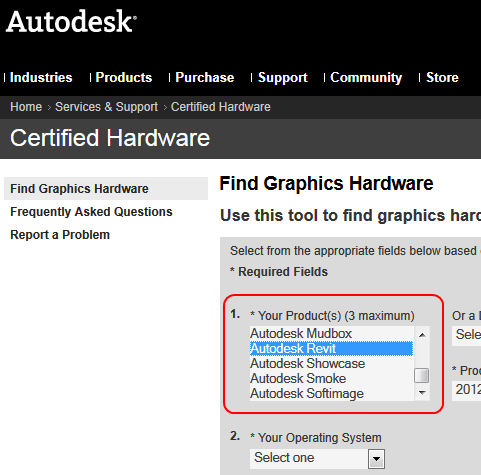
The Autodesk Certified Hardware page allows filtering by the products you intend to use (ie. Revit). This page should be your ‘first stop’ when installing or updating your Graphics Card / Display drivers. Once you find a Certified, Recommended driver, you can download it direct from this page.
Autodesk – Certified Hardware – Find Graphics Hardware
Mine was at 3.2 gb today (see image):

This is just a little reminder to periodically check your journal file folder and delete any old backups and journal files.
You may be interested in this Autodesk support link:
Location of journal files
An interesting little article that relates to the food service industry and the fact that Revit is something they may not want, but will have to deal with.
Because Revit was not specifically developed for the foodservice industry, it presents a steep learning curve for design consultants and equipment distribution channel companies. This concern is reinforced by the fact that no single standard for Revit applications to foodservice facility design projects has yet emerged, leaving industry members to sort among different erstwhile providers claims and features to determine whether to go with “VCR” or “BetaMax.”
via
Revit: Problem Or Solution? | tsrmag.com – The Schechter Report –
Sometimes you may have trouble using a DWG that contains ‘points’ to create a Revit topography.
There are two main ways around this.
METHOD 1
Here is a LISP routine to export points in a DWG to CSV file:
http://www.revitcity.com/forum_files/69930_RegCoorPointsCsv.lsp
These points can then be imported when making a Revit topography by selecting ‘Specify Points File’ on the Ribbon.
via
RevitCity.com | Topo point does not import?
METHOD 2
Alternatively, you can Replace the points with some other object that Revit will make use of more easily (for instance, a block with some very short lines). To do this, use the ‘RP’ LISP routine from the following post:
Re: Replace point with block/object – Autodesk Discussion Groups
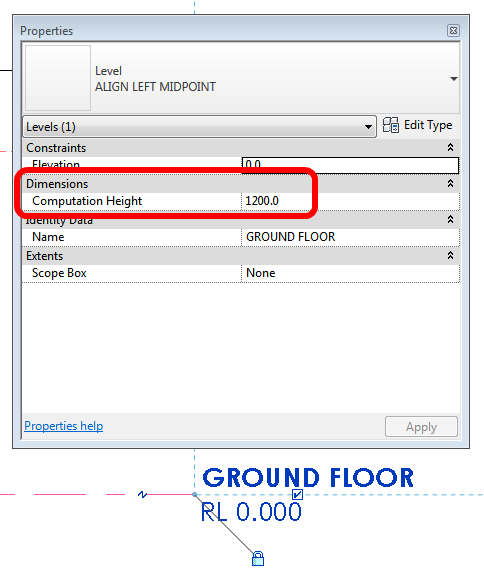
I can’t believe I had not come across this change until today. In Revit 2012, the Room Computation Height is no longer a Type Property of the Level – it is now an Instance Property.
Some of the impacts of this when upgrading are described in the Revitez post below:
This eliminates the need to create a kind of different level for adjusting the heights of the different calculation levels.
When your old projects, where you took the trouble to create these types of additional levels, your types still exist, but they no longer control the height and therefore not used to anything if their purpose was the control of this value.
The value is copied into the parameter of occurrence. All is well, just be careful if you need to change height calculation, there is no need to change the type as you did in the 2011 version, this will have absolutely no effect.
via
Google Translate of Revitez post
I received this comment to one of my posts:
…Being new to Revit (2011) is there a way to locate newly created views in the project browser? Or do a search? Or am i stuck using filters?
Comment link
Here are a few different ideas that may assist:
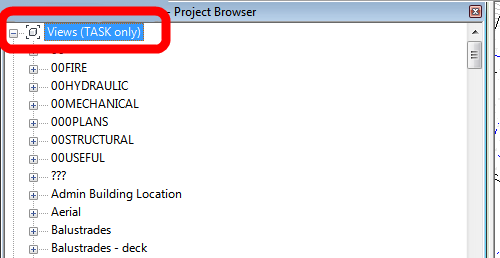
Hope some of these ideas help you newer users to find those sneaky new Views!
According to Einstein, people who properly create #Revit Families, are genius. “Intelectuals solve problems, genius’ prevent them.” #fb
via
Twitter / @revittotd: According to Einstein, peo …
