When working with multiple linked files, you can utilize the ability of Revit to close Worksets in Linked Files, and in some cases this is a good visibility shortcut. Along these lines Simon over at BIM42 has written “a few line of code for set up every Scope Box, and Reference plane to the correct workset…”
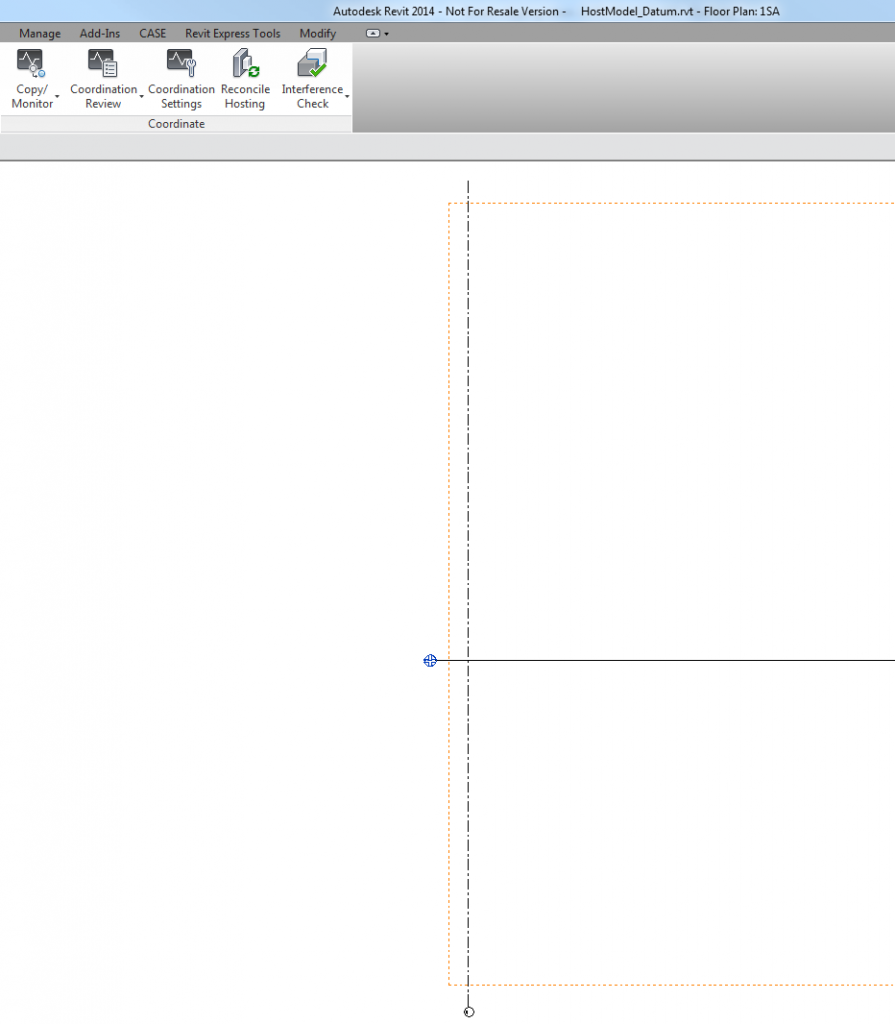
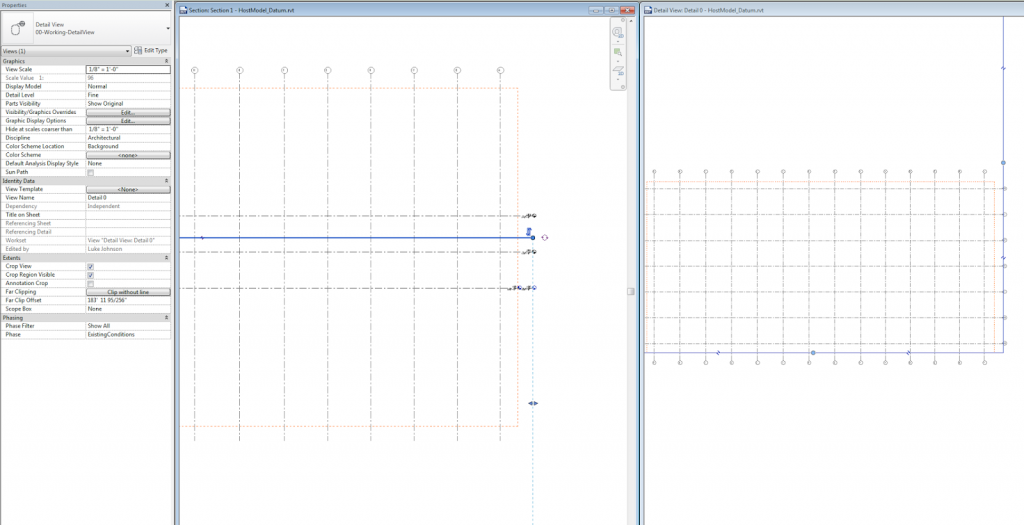
The standing rule with linked datums is that if they intersect the view cutting plane, they should show up in the host. However, Matthew Nelson discovered an interesting inconsistency – for Plan Views, this doesn’t seem to apply when Scope Box has been added to Grids.
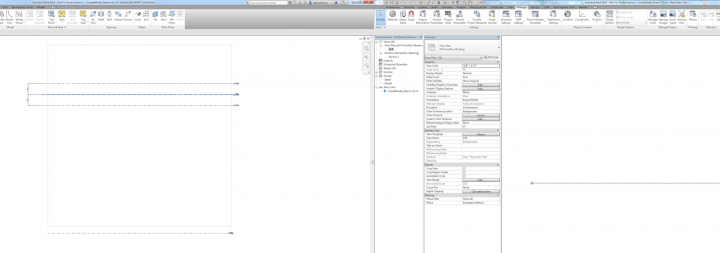
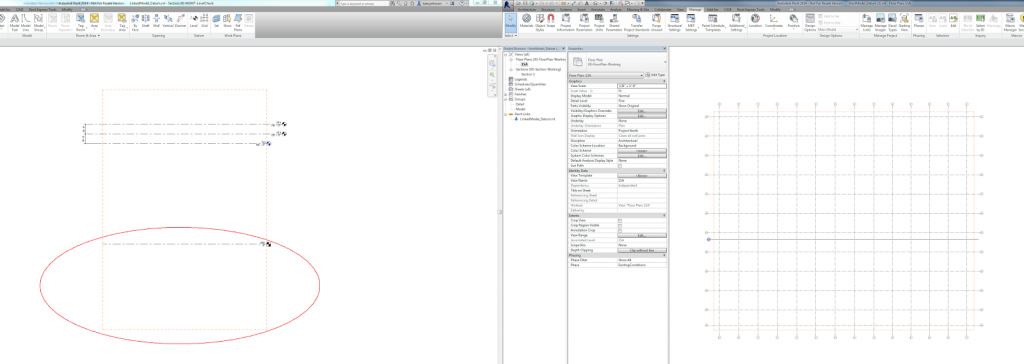
In other words, the Grids in the Linked project, when applied to a Scope Box, do not seem to show in the Host project, even if the Host plan view range intersects the Grid elements.
After some experimentation, including testing on Revit 2013, 2014 and 2015, I think I have found the solution: If the Scope Box in the Link intersects the Level in the Link with the lowest Z value (the lowest level), then that Scope Box and any associated Datum (Grids and Reference Planes) WILL appear by default in the Host.
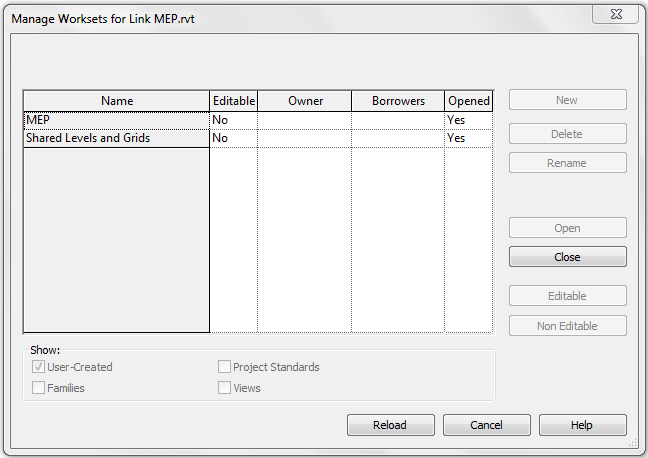
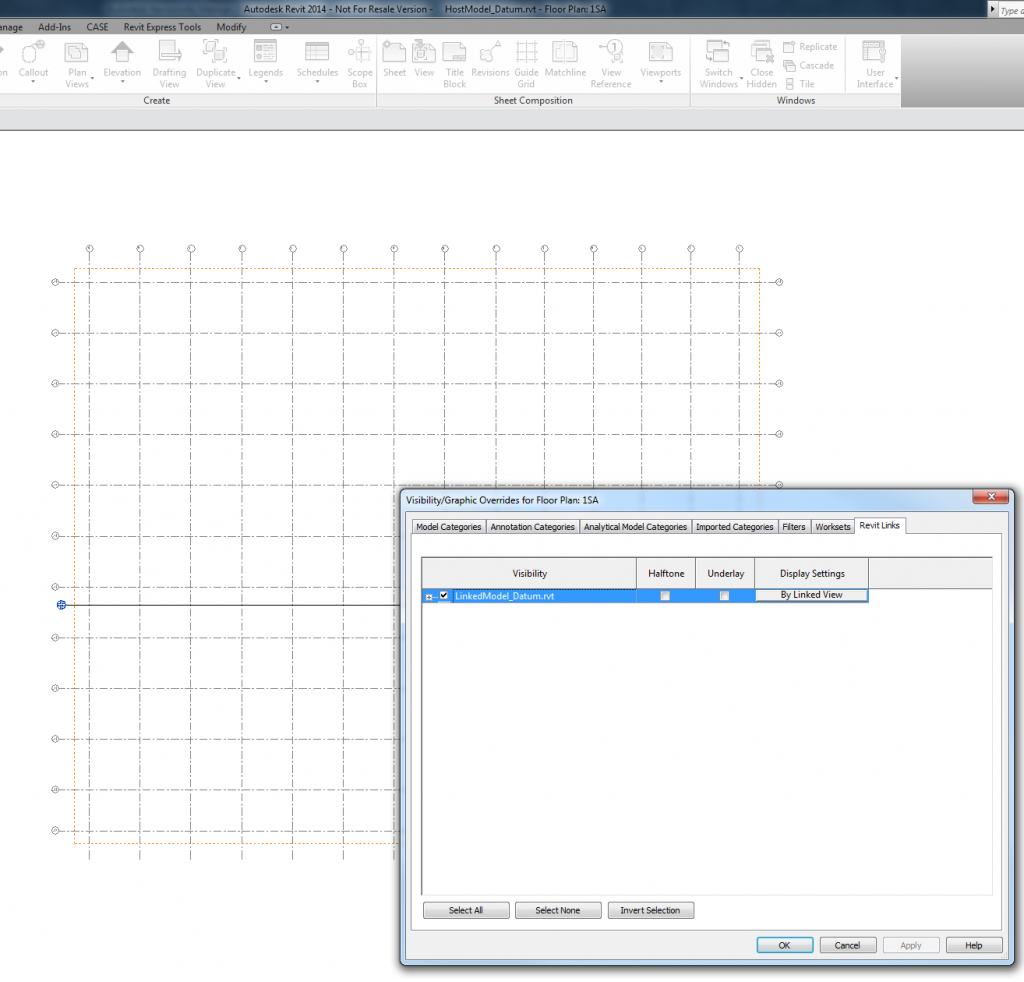
Ah, the simple option is often best. Just close the Workset that has Levels and Grids on it in the Manage Links dialog. See image:
Idea from this post on Revitize (it uses language related to older Revit versions): Go to File menu > Manage links… and select the structural model and select ‘Reload From…”
and select the same linked structural file. Before pressing ‘open’, select the small arrow next to the ‘open’ button:
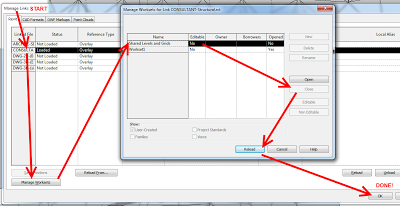
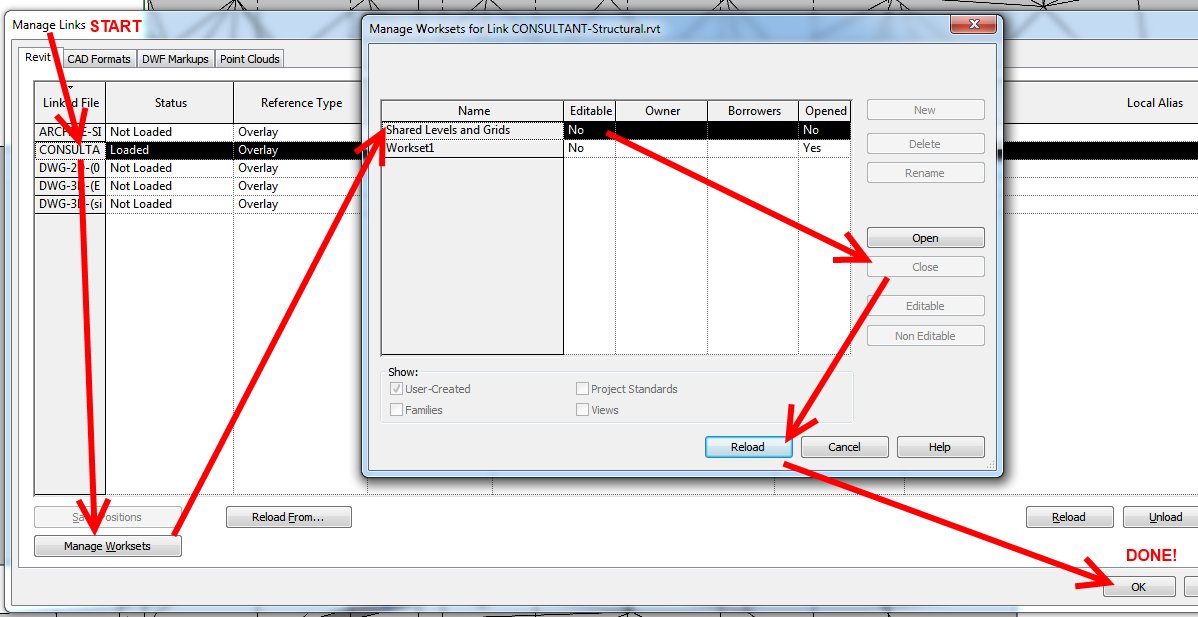
and select specify. Then press ‘open’. Revit shows the ‘Linking Worksets…” dialog box.
Select the ‘Shared Levels and grids’ workset and press ‘close’ and then Ok and again Ok. Now the ‘Shared Levels and grids’ workset from the linked file is closed and is NOT visible in any Revit view. Even though the linked grids are not visible, Revit still ‘monitors it!!!
If for some reason you want to see the structural grids, you can repeat the steps above to make them visible.
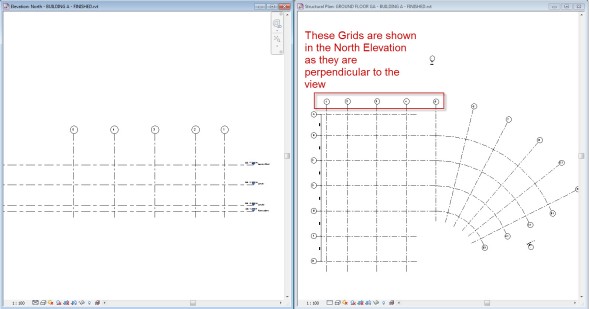
Nice post over at revitstructureblog. A couple of highlights: When working with Radial grids you will typically find a couple of problems. The first issue you will find is that the grids will not show on new levels. This is because the grids need to be elevated to cut through the levels and a grid is not shown unless a view is perpendicular to the grid as shown in the image below.
… A new feature of Revit 2013 is the ability to create a continuous grid line with the same reference called a multi-segment grid. The grid is simply drawn with a series of lines and arcs and then when the sketch is finished the grid is created. It is worth noting that the grid cannot be controlled with a Scope Box (Covered Below).
1. Pick the name you want the Views and Level to use. ie: Level 1 2. Rename both the Floor Plan and Ceiling Plan something different (not Level 1) and nothing already in use. This is a temporary name. 3. Rename the Level to be Level 1 4. Rename the Floor Plan and Ceiling Plan Level 1 5. Now try renaming either the Floor Plan, Ceiling Plan or Level and you will get the ‘renaming’ message again and you can say ‘Yes’
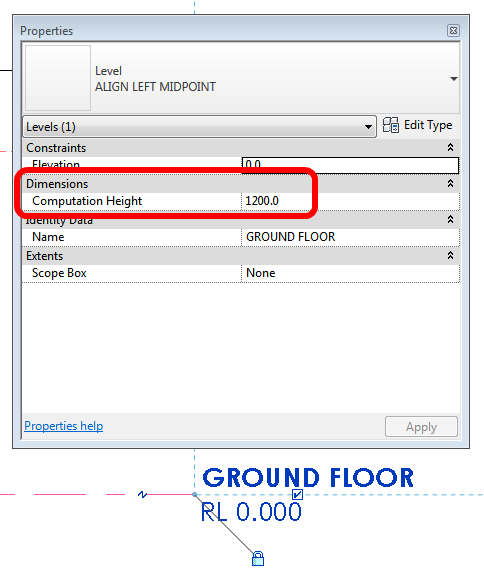
I can’t believe I had not come across this change until today. In Revit 2012, the Room Computation Height is no longer a Type Property of the Level – it is now an Instance Property.
Some of the impacts of this when upgrading are described in the Revitez post below:
This eliminates the need to create a kind of different level for adjusting the heights of the different calculation levels.
When your old projects, where you took the trouble to create these types of additional levels, your types still exist, but they no longer control the height and therefore not used to anything if their purpose was the control of this value.
The value is copied into the parameter of occurrence. All is well, just be careful if you need to change height calculation, there is no need to change the type as you did in the 2011 version, this will have absolutely no effect.
Over the past few years using Revit, a few tips just keep coming up. These are things that Revitconsistently wants you to do, in order to have a pain free modeling experience. I call these ‘SuperTips’ and I will progressively reveal these on this blog.
SuperTip #1 – Don’t make too many levels
It may seem like a basic thing to say, but many amateurs will get in and create levels for everything little thing, which results in a huge mess as the project progresses. Try to make the minimum amount of levels possible. These should always coincide with the major structural floor levels of your building. An excess amount of levels will make the project difficult to work on and difficult to work in. Please refer to this previous post for some tips on how to deal with this issue.
If you create heaps of levels, it will be very difficult to track which level elements are created on. For assistance with this, please refer to this previous post.
Instead of creating unnecessary levels, consider using reference planes in areas where you would normally put a superfluous level.
Revit does not want you to make too many levels. Again, this is something that we tend to do when we are just starting out. Then, you end up with this messy model and you go “That’s ok, I’ll just delete the levels I don’t need…” But guess what happens when you delete a level? The elements associated with it are also deleted. Uh oh!
So, let’s say you have a file with too many levels in it. You could try and reassociate everything to the levels you want to keep, and then delete the levels. But if you are on a deadline and need to hide these levels, consider this option:
Create a new level type called ‘archived’.
Create a new Filter for Levels (call it ‘archived levels’), with Filter By – Type Name – equals – archived.
Go to a view, let’s say a section, and select each Level you want to archive. Change the type to ‘archived’.
Go to Visibility / Graphics for the view, Filters tab, click Add – ‘archived levels’, then turn off the tickbox.
So, they are hidden in this view. To make them not show up in new Section views:
Set up a Section view that looks how you want new Section views to look. Make sure you untick the Filter checkbox for the ‘archived levels’
Right click on it in the Project Browser and select ‘Create View Template from View…’
Name it something.
Make a new Section, select it in the Project Browser, right click and select ‘Apply View Template…’
Select the View Template you just made, and make sure you tick the tick box at the bottom – “Apply automatically to new views of the same type”
Now, each new section won’t show the archived levels.
Beware, however, because the levels are still in the project, and they may come back to haunt you…