From Mark Wieringa in comments on my previous post:
Hi Luke,
There’s a quick workaround for your problem. You’re able to hack tags for certain categories to show the Level that the elements have been created on.
What you need to do is open a ceiling tag, then make the label for Level. Copyclip the label and delete the original, then change the category to for instance floors and pasteclip.The label will still refer to the Level parameter and will report it for categories that have the parameter available.

Greetings
Mark Wieringa

Great tip!  As proof of concept, please see files for download at:
https://drive.google.com/file/d/0B1dGdRkpk2beVVZNSGU4UlRrcE0/edit?usp=sharing

It is one of the few tags that can directly access the Level parameter – quite useful, even to the point where I created secondary Design Option called Level Tagger with a bit of Ceiling on it, and then use a Ceiling “Level” Tag to give me the Level in given views.

Using Copy – Paste Aligned to Selected Levels for the bit of Ceiling, and

Copy – Paste Aligned to Selected Views for the Ceiling “Level” tag.

The secondary Design Option is only turned on when I want to use this particular tag, meaning that the Ceilings are typically hidden.

Oh, you can also tag normal Ceilings with Ceiling Tags 🙂

Another method of tagging the Level parameter is using the Case Param to Param tool:

  1. Add a Text SP in the Project (shared parameter) to the Category for which you want to tag the Level property (ie. Floors)
  2. Use Param to Param to copy the Level parameter of Floors to the SP you added in step 1
  3. Add that SP to a Floor tag to tag the “Level”
The obvious problem – this is not a live link.  Also, it doesn’t work too well with Grouped Floor elements.

  1. Turn the Underlay on for the Level that shows the items you want to Tag
  2. Tag the Item/s
  3. Use Linework tool on the items that you have tagged.  This is important – if you don’t do this, then the Tag will disappear when you turn the Underlay off.  *However*, you can use the Linework tool with Invisible Lines (if you don’t want to see them) – this will still force the element to be considered by Revit when it determines if it should keep the Tag visible or not.
  4. Turn the Underlay off
  5. Your items are still Tagged!
Interestingly, if you use the Linework tool again, this time with By Category on the lines you previous selected, then the Tag will immediately disappear (Revit is no longer considering the object when drawing the view).

You can’t make a schedule of Levels in Revit.  I won’t get into the argument of “should you be able to” or not.  The fact is, some people want to make a Level Schedule.  Here I provide one workaround that works for the current version of Revit.

  1. Download this example Revit project file
  2. Copy / paste an instance of the LEVEL SCHEDULERS family into your project
  3. Make a section view where you can see the family in profile, just like in the example RVT file:
  4. Copy / paste the LEVEL SCHEDULE into your project
  5. You need to place one instance of the family ON EACH LEVEL, and then lock the handle to the ZERO LEVEL (always).  If your level is BELOW ZERO, then use the Yes/No tickbox for that instance.
  6. Once all the families are placed and locked, you have a Level Schedule that will adjust when (if) your levels move.  Obviously, if a new level is placed, you will need to add a new instance of the LEVEL SCHEDULERS family.

Do you have another workaround that is perhaps easier or quicker or more BIM than this one?  Feel free to comment…

    As the plugin’s name suggests, this plugin can be used to generate multiple adjacent levels with one command. It is compatible with Revit Architecture 2012.
    // Download Level Generator for Revit Architecture via Autodesk Labs

    Read more and via:
    February’s free ADN Plugin of the Month: Level Generator for Revit Architecture Now Available – It is Alive in the Lab

    1. Pick the name you want the Views and Level to use. ie: Level 1
    2. Rename both the Floor Plan and Ceiling Plan something different (not Level 1) and nothing already in use. This is a temporary name.
    3. Rename the Level to be Level 1
    4. Rename the Floor Plan and Ceiling Plan Level 1
    5. Now try renaming either the Floor Plan, Ceiling Plan or Level and you will get the ‘renaming’ message again and you can say ‘Yes’

    Nice tip on how to fix up the synchronization of Level objects and Plan view names via
    REVIT Rocks !: REVIT Tip Cannot Rename Level Name Entered is in Use

    I can’t believe I had not come across this change until today. In Revit 2012, the Room Computation Height is no longer a Type Property of the Level – it is now an Instance Property.

    Some of the impacts of this when upgrading are described in the Revitez post below:

    This eliminates the need to create a kind of different level for adjusting the heights of the different calculation levels.

    When your old projects, where you took the trouble to create these types of additional levels, your types still exist, but they no longer control the height and therefore not used to anything if their purpose was the control of this value.

    The value is copied into the parameter of occurrence. All is well, just be careful if you need to change height calculation, there is no need to change the type as you did in the 2011 version, this will have absolutely no effect.

    via
    Google Translate of Revitez post

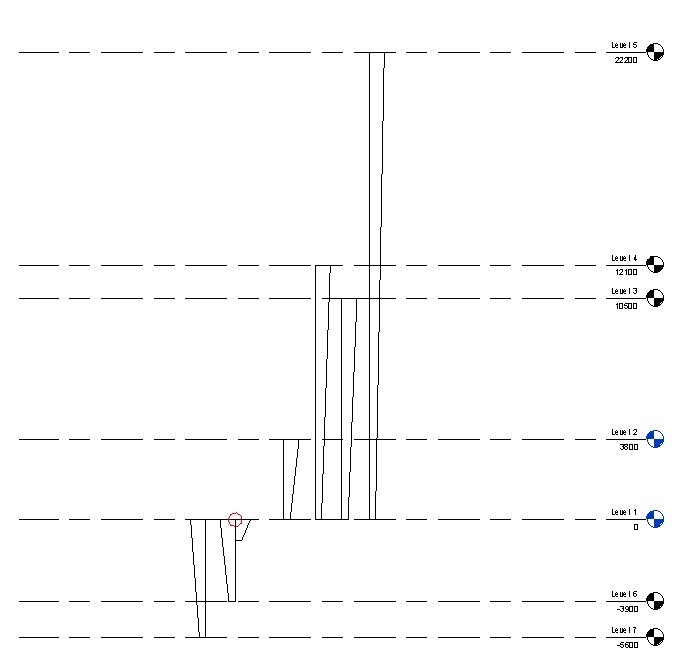
    Revit does not want you to make too many levels. Again, this is something that we tend to do when we are just starting out. Then, you end up with this messy model and you go “That’s ok, I’ll just delete the levels I don’t need…” But guess what happens when you delete a level? The elements associated with it are also deleted. Uh oh!

    So, let’s say you have a file with too many levels in it. You could try and reassociate everything to the levels you want to keep, and then delete the levels. But if you are on a deadline and need to hide these levels, consider this option:

    1. Create a new level type called ‘archived’.
    2. Create a new Filter for Levels (call it ‘archived levels’), with Filter By – Type Name – equals – archived.
    3. Go to a view, let’s say a section, and select each Level you want to archive. Change the type to ‘archived’.
    4. Go to Visibility / Graphics for the view, Filters tab, click Add – ‘archived levels’, then turn off the tickbox.

    So, they are hidden in this view. To make them not show up in new Section views:

    1. Set up a Section view that looks how you want new Section views to look. Make sure you untick the Filter checkbox for the ‘archived levels’
    2. Right click on it in the Project Browser and select ‘Create View Template from View…’
    3. Name it something.
    4. Make a new Section, select it in the Project Browser, right click and select ‘Apply View Template…’
    5. Select the View Template you just made, and make sure you tick the tick box at the bottom – “Apply automatically to new views of the same type”

    Now, each new section won’t show the archived levels.

    Beware, however, because the levels are still in the project, and they may come back to haunt you…

    http://forums.augi.com/showthread.php?t=45852&highlight=delete+levels&page=2