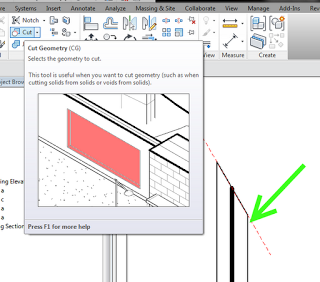
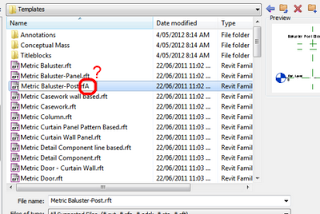
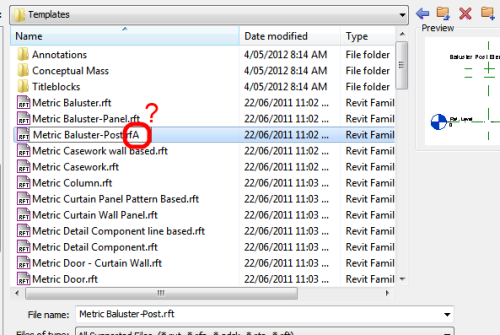
In the past, a workflow was available in which you could rename older RFT files to RFA, then upgrade them to the most recent version of Revit (perhaps using a batch upgrade tool), then rename back to RFT. This was one way to upgrade your customized family template files. This method does not always work in Revit 2013, due to newly introduced restrictions.
There are still a few ways to upgrade your Template files, however:
Make a new Family using the RFT file that you want to upgrade. Then, save as RFA. Navigate to the folder, then rename the RFA to RFT. This is a slow, one-at-a-time method.
In some cases, you can still use the original workflow (rename the RFT to RFA and then open) – but this likely will only work on 2011 and older RFT files, not 2012 RFTs.
Confused yet?
Please comment if you have any tips or workarounds related to upgrading Template files.
Have you made something cool and architectural in Minecraft and you want to make it real? How about sending it out to Blender? Direct CG has made a tutorial to show you how …
This tutorial covers:
downloading and installing the mcobj Minecraft to .obj exporter by quag
converting your Minecraft world into usable .obj format
importing your Minecraft world into Blender
rendering your first Minecraft image
how to showcase your world with clay materials with Fabio Russo’s Clay Render addon
How to install (from the readme): Copy the following files to the appropriate Revit Addins folder, either “%AppData%AutodeskREVITAddins2013” or “%AppData%AutodeskREVITAddins2012”:
– ADNPlugin-eStorage.addin: add-in manifest – ADNPlugin-eStorage.bundle: bundle folder which contains all other supporting materials
In this 30 second video example, I take a PDF file and save it in the extensible storage of a Raster Image in Revit, then I Restore the contents back out of the image into a PDF file again!
Using the ‘List’ button shows all of the file data stored in extensible storage in the current RVT project.
This actually reminds me a little bit of VEO Archive (a model linked document library) … the concept of attaching documents and file data to elements in a Building Information Model is actually VERY powerful!
EDIT:
Guess what – you can also store this file data in family RFA files! Yay. For example, I opened a Door family and then attached a PDF to a Text Note. I then loaded this into a project, closed the source family, and opened it again FROM the project – and the extensible data stays with the Family.
How about this for an idea – set up a File Browser drafting view with Text Notes. Then, attach project related documents to these notes using eStorage.
This could be very handy in a Worksharing scenario as a way to push out Meeting Minutes / Agendas / Deadline documents inside the Revit model
You could even scale this idea up to Revit Server as a way to track, update and distribute project related documents throughout the globe!
EDIT 4:
What about embedding your Project Standards as a RVT file in eStorage? Whenever you want to Transfer Project Standards, just save the file out, open it and go for it.
Most of us use the old Reference Line with angular dimension method to control rotation in our vanilla Revit families.
However, Marcello Sgambelluri has posted three alternative methods to control rotation and angular dimensions, with full step-by-step instructions, at his blog Simply Complex.
Marcello says: I have given three rotation rig methods that do not use the angular dimension parameter in these last two postings. These methods are the Ride the Rail method, the Open Reference Circle method, and the Revolve method.
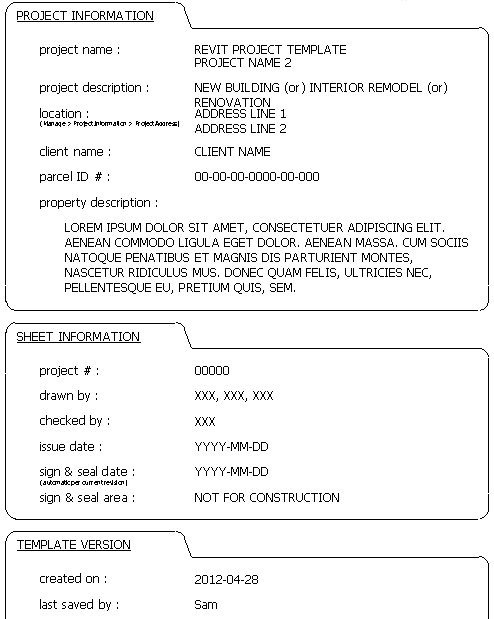
Here is a nice idea from the Revit Templateer – make an invisible project setup sheet so that you can see and edit ALL of the important project data in one place!
Hardware acceleration is not available in the Parallels 7 environment, and Revit will revert to a DirectX 9 based software graphics mode, which will not render materials, sky, artificial lights, and other features when the Realistic visual style is in effect.
o Workaround 1: When you first start Revit and see the Graphics Options – Cannot Use Hardware Acceleration dialog, select the Save Hardware Acceleration Setting option, and then close and restart Revit. Upon restart, DirectX 11 software mode will be used and features will display correctly in Realistic visual style.
o Workaround 2: Manually add the following to the [Graphics] section of the Revit.ini file before startup: UseGraphicsHardware=0
EDIT: Workaround 3 (allow hardware acceleration hack) – from Gordon in the comments:
Dig down to the Revit folder in program files, where Revit.exe lives, and look for a file called AdskHardwareCertificationReport.xml. Delete this file. Revit will now allow you to enable hardware acceleration, and performance will be MUCH better than the no HA fallback of using WARP (which is an API that uses the CPU to mimic graphics hardware and manages to provide performance on par with, say Intel HD2000 hardware). WARP is much better than true hardware acceleration disabled as in earlier versions, but no where near as good as Parallels virtual hardware. End Edit
This issue was also reposted at microsolresources.com:
Workaround 2: Manually add the following to the [Graphics] section of the Revit.ini file before startup: UseGraphicsHardware=0″ Workaround 1 did not present itself to me, but workaround 2 was pretty easy to achieve:
[Graphics] TempDimFontSizeInPoints=12 InvertBackground=0 Antialiasing=0 SemiTransparent=1 UseGraphicsHardware=0 I added the last line above to the 2013 Revit.ini file, restarted RAC 2013, and…. As they say these days: “SWEET!!”