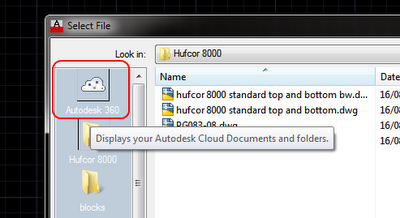
Daryl Gregoire posted about this recently and I found his post very helpful.  In the past, if the checkbox was grayed out to ‘Create New Local’, I would just manually copy the file to my C: drive, append my username to it, and then open it that way.  This is ‘old school’ Revit, before the automated local file creation became available.  However, Daryl’s fix is better than my workaround…

Why is the checkbox not available?
you are NOT using the same version of REVIT that was used to create the Central file

How to fix it properly?
open the file, upgrade it to your version of REVIT (done automatic) then ‘save as’ the file and click the ‘Option‘ button in the Save dialog box and tick the option for ‘Make this a central file after save‘.

Read more:
REVIT Rocks !: REVIT – My Create New Local is Greyed Out

EDITSteve posted about another cause for this problem, and he gives some wise advice along the lines of “before you upgrade, think about the consequences…”  Check out his post:
Revit OpEd: Can’t Alter Create New Local Selection

FM, or Facility Management, is sometimes thought of as the sixth dimension of BIM, or 6D BIM.

Mario Guttman, creator of Whitefeet tools, reposted an interesting video / case study by David Mettler showing a potential workflow from Revit into an FM scenario using MySQL:


The process:  “I exported the Revit tables out to Access using the DBlink. From Access I had to setup a ODBC export using SSH Tunneling to get the remote host to show up as a  localhost. It took a lot of time to figure out the connection issues get the data across to MySQL. Once I got the bugs work out on the ODBC connection it’s a piece of cake post the information into MySQL. I used phprunner with the SSH Tunnel to create the pages.”
via
Revit FM Tool | WhiteFeetTools

The goal of this Preview Version of “SOFiSTiK Reinforcement for Autodesk® Revit®” is to enable the productive design of 3D reinforcement with Autodesk® Revit®. This particularly includes the creation of 2D plans and steel schedules.
via
SOFiSTiK AG – Finite Elemente & CAD Software f�r den Ingenieurbau: LabsReinforcement

Register / download link

Heads up:
http://bimblog.typepad.com/autodesk_bim_blog/2012/08/sofistik-bewehrung-f%C3%BCr-revit-2013-als-labs-version.html

The problem – you want to subscribe to an online newsletter, but they don’t offer an RSS or Atom feed.  You don’t want to disclose your personal email address.

You can use the following service to set up a ‘bridge’ between a nominated email address and an RSS feed.  Then you can simply subscribe to the RSS link that the you are provided with:
Emails to RSS Forwarding

It takes a little bit of setting up, but it does solve the specific problem described above.

There are a few freely available applications for AutoCAD that allow it to do some powerful spline editing – tools we don’t have in vanilla Revit just yet.  You can use the tools below to do some line operations in AutoCAD and then Link / Import the resulting elements into Revit:

Splines to Polylines
Download VLX from page below and use APPLOAD in AutoCAD to load it, then SP2PL to run it:
http://www.cadforum.cz/cadforum_en/download.asp?fileID=1488

Polylines to splines
Copy / paste the script from the page linked below into a text file, then save as pl2sp.lsp
APPLOAD in AutoCAD, then PL2SP to run it
Here is a routine that allows you to turn a “Fit Curve” Polyline into a Spline…
AutoLISP: Polyline to Spline | AutoCAD Tips:

Free Add-In developed for use by Autodesk Revit programs in the Structure and MEP disciplines. This application is recommended for use with IFC-based model exchange between GRAPHISOFT ArchiCAD and Revit applications. The Add-In for Revit applications variously enables direct import of ArchiCAD IFC models and IFC model export to ArchiCAD, or serves to optimize Revit’s standard IFC import and export functions used to exchange data with ArchiCAD.

via
Interoperability Downloads

The download page linked above was updated: Wednesday, August 22, 2012

Heads up – Revit3D

First of all, this was a bit too funny not to share:

Finally!  I am now subscribed to BIM itself!  What will this new entity reveal?  Has BIM become self-aware?

Enough of that…

From the BIM/IPD [AUS] website:
The Australian Institute of Architects and Consult Australia formed a BIM and IPD Steering Group in mid-2011 with participation of leading experts from architecture, engineering and construction. The purpose of this group is to develop resources and guidelines for practitioners in the Australian building industry. The Steering Group has formed four Working Groups with focus on particular themes to jointly produce material that will be managed and updated via this website.

There are a few handy resource pages, including the following:

BIM QnA >   BIM STANDARDS >
BIM GLOSSARY >   COLLABORATION DOCUMENTS >
REPORTS >   LEGAL DOCUMENTS >
WORKING GROUP PUBLICATIONS >   CONTENT LIBRARIES >
    REPORTS >

I previously posted about how to duplicate Array Group types and swap them in and out here.

Interestingly, I created a detail Array Group in Revit 2013 today and noticed that it did not immediately appear in the Project Browser.  Further to this, I could not Duplicate or Rename the Array Group Type.  What to do?

The short answer – group the Array Group.  This will force Revit to populate the Project Browser with the Array Group type name.  It also allows you to Duplicate and Rename the Array Group.  All of this then allows you to use the swap-in-swap-out method I linked to above.

Watch the short video here:

Follow these steps:

That should get you to the Room Separation line entry in Visibility / Graphics.  Then, you can:

  • press Spacebar to toggle visibility on / off
  • press Right Arrow, then Spacebar to open the Override sub-dialog

As you probably know, I’m a big believer in Keyboard Shortcuts.

However, in all honesty, if you have mouse and are using Revit 2013, it is probably going to be quicker to:

  • Select a Room Separation line
  • Right-click
  • Override Graphics in View – By Category…