If you Close All Worksets when opening a model on BIM 360 Design, you may get this error (related to Project Info):

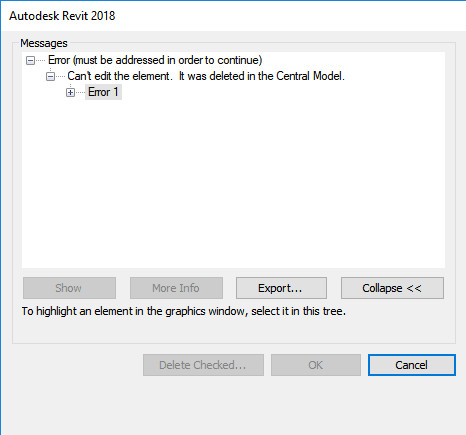
Can’t edit the element. It was deleted in the Central Model.


As you can see, it is related to the Project Info : Project Information element:


The error looks like this. You must click Cancel to proceed:

It appears to be some synchronisation bug or similar, possibly related to BIM 360 cloud worksharing. You can force the error to reappear by clicking on the Location option in the Ribbon

To fix it, try doing a full Sync with Central. It seems that this rectifies the bug for that session and future sessions with that particular cloud workshared model.

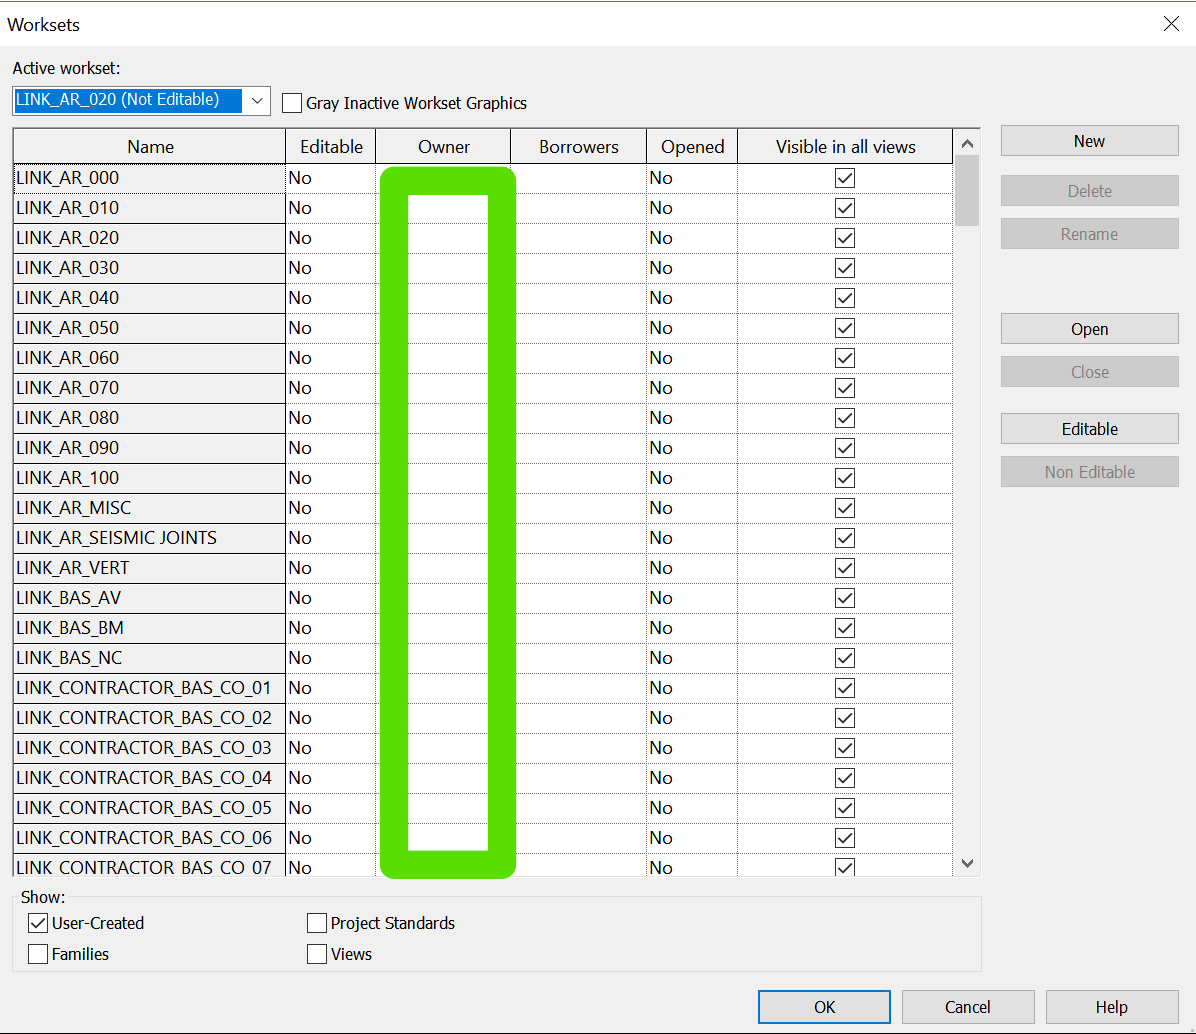
If you have gone through a process of saving Central models, and you have forgotten to ‘Synchronize with Central’ before closing them for the first time, you may find that your user has all User Created Worksets checked out in those files. A quick recap:

  • Workshared Revit files use a persons Revit user name (sometimes linked to an Autodesk SSO login) to determine if things are checked out
  • If someone has a User Workset checked out, you won’t be able to edit it until they Relinquish. (Note: you can Detach and recreate the file but that is dangerous if you have multiple people working on something)

Basically I had a bunch of Revit files that had all User Worksets from certain usernames checked out. They were upgraded and they were Central files. All that was needed was a simple Open and Relinquish. As I didn’t want to do this manually, I sourced some macro code from here and adapted it for my situation.

What does it do?

This Application level macro starts with a dialog box where you can select files. After you select them, it then loops over each file and Opens it, then does a Relinquish All Mine on User Created Worksets, and then it Syncs with Central and Closes the file. The key part of the code is here:

How to set it up?

First, get the code below. Copy and paste it into a new Application Macro in Revit.

 /*
  * Created by SharpDevelop.
  * User: lukes
  * Date: 1/10/2018
  * Time: 2:54 PM
  * 
  * To change this template use Tools | Options | Coding | Edit Standard Headers.
  */
 using System;
 using Autodesk.Revit.UI;
 using Autodesk.Revit.DB;
 using Autodesk.Revit.UI.Selection;
 using System.Collections.Generic;
 using System.Linq;
 using Autodesk.Revit.ApplicationServices;
 using System.IO;
 using System.Windows.Forms;
 
 namespace relinquish
 {
     [Autodesk.Revit.Attributes.Transaction(Autodesk.Revit.Attributes.TransactionMode.Manual)]
     [Autodesk.Revit.DB.Macros.AddInId("30EBC375-5A4C-4917-AB07-D7212C9ED3FA")]
     public partial class ThisApplication
     {
         private void Module_Startup(object sender, EventArgs e)
         {
 
         }
 
         private void Module_Shutdown(object sender, EventArgs e)
         {
 
         }
 
         #region Revit Macros generated code
         private void InternalStartup()
         {
             this.Startup += new System.EventHandler(Module_Startup);
             this.Shutdown += new System.EventHandler(Module_Shutdown);
         }
         #endregion
         public void RelinquishMineFromFiles()
         {
             
             
 OpenFileDialog theDialogRevit = new OpenFileDialog();
 theDialogRevit.Title = "Select Revit Project Files";
 theDialogRevit.Filter = "RVT files|*.rvt";
 theDialogRevit.FilterIndex = 1;
 theDialogRevit.InitialDirectory = @"C:\";
 theDialogRevit.Multiselect = true;
 if (theDialogRevit.ShowDialog() == DialogResult.OK)    
             
     {             
 /* string mpath = "";
         string mpathOnlyFilename = "";
         FolderBrowserDialog folderBrowserDialog1 = new FolderBrowserDialog();
         folderBrowserDialog1.Description = "Select Folder Where Revit Projects to be Saved in Local";
         folderBrowserDialog1.RootFolder = Environment.SpecialFolder.MyComputer;
         if (folderBrowserDialog1.ShowDialog() == DialogResult.OK)
         {
          mpath = folderBrowserDialog1.SelectedPath;*/
                 foreach (String projectPath in theDialogRevit.FileNames)
                 {
                  FileInfo filePath = new FileInfo(projectPath);
                         ModelPath mp = ModelPathUtils.ConvertUserVisiblePathToModelPath(filePath.FullName);
                         OpenOptions opt = new OpenOptions();
 /*                        opt.DetachFromCentralOption = DetachFromCentralOption.DetachAndDiscardWorksets;*/
                          WorksetConfiguration openConfig = new WorksetConfiguration(WorksetConfigurationOption.CloseAllWorksets);
                         // Set list of worksets for opening 
 /*                        openConfig.Open(worksetIds);
                         opt.SetOpenWorksetsConfiguration(openConfig);
                         mpathOnlyFilename = filePath.Name;*/
                         Document openedDoc = Application.OpenDocumentFile(mp, opt);                               
 /*                        SaveAsOptions options = new SaveAsOptions();*/
                          TransactWithCentralOptions twcOpts = new TransactWithCentralOptions();
                         SynchronizeWithCentralOptions syncopt = new SynchronizeWithCentralOptions();
                         RelinquishOptions rOptions = new RelinquishOptions(true);
                         rOptions.UserWorksets = true;
                         syncopt.SetRelinquishOptions(rOptions);
                         syncopt.SaveLocalBefore = false;
                         syncopt.SaveLocalAfter = false;
 /*                        options.OverwriteExistingFile = true;
                         ModelPath modelPathout = ModelPathUtils.ConvertUserVisiblePathToModelPath(mpath + "\\" + mpathOnlyFilename);
                         openedDoc.SaveAs(modelPathout, options);*/
                         openedDoc.SynchronizeWithCentral(twcOpts, syncopt);
                         openedDoc.Close(false);
                }
         }
 }}}

Then,

  • Add the System.Windows.Form reference and
  • Build the Solution

Note: I built and tested this on Revit 2018.2.

How to Use It?

  1. Set your Revit User Name to the user that you want to Relinquish the Worksets for…
    • You may have to logout of your own SSO first
    • Go to Revit Options
    • Input the exact user name (including @ if an email address)
  2. Start a new blank project in Revit
  3. Start the Macro Manager
  4. Select the RelinquishMineFromFiles macro that you built
  5. Click Run
  6. Select the files you want to fix
  7. Click Ok
  8. Wait for the result. The macro will step through them, Relinquish, Sync and Close the files.


Note:

Please use at your own risk, this has the potential to be pretty risky in a real project environment. Only use it if you understand what is going on 🙂

Also, you can refer to this Revit API Doc page.

If you are using multiple instances of Revit, against one Central file, using different ‘pseudo’ usernames, you may have run into trouble because Autodesk single sign on (SSO) always keeps you logged out in that situation. As soon as you log in, all your Revit usernames get switched back to your SSO username.

Okay, so how can we work around this? Basically, by using psexec to launch Revit using another Windows user. This allows us to have SSO running in one ‘Windows user’ and SSO logged out in the other.

Steps:

  1. Ensure you have psexec available
  2. Make a CMD with this text (for Revit 2015):
    psexec -u OtherWindowsUsername -p OtherWindowsUserPassword -d -i “C:\Program Files\Autodesk\Revit 2015\Revit.exe” /language ENU
  3. Open Revit in current user and sign out of A360
  4. Run this CMD file, and in the new instance of Revit you can sign back into A360

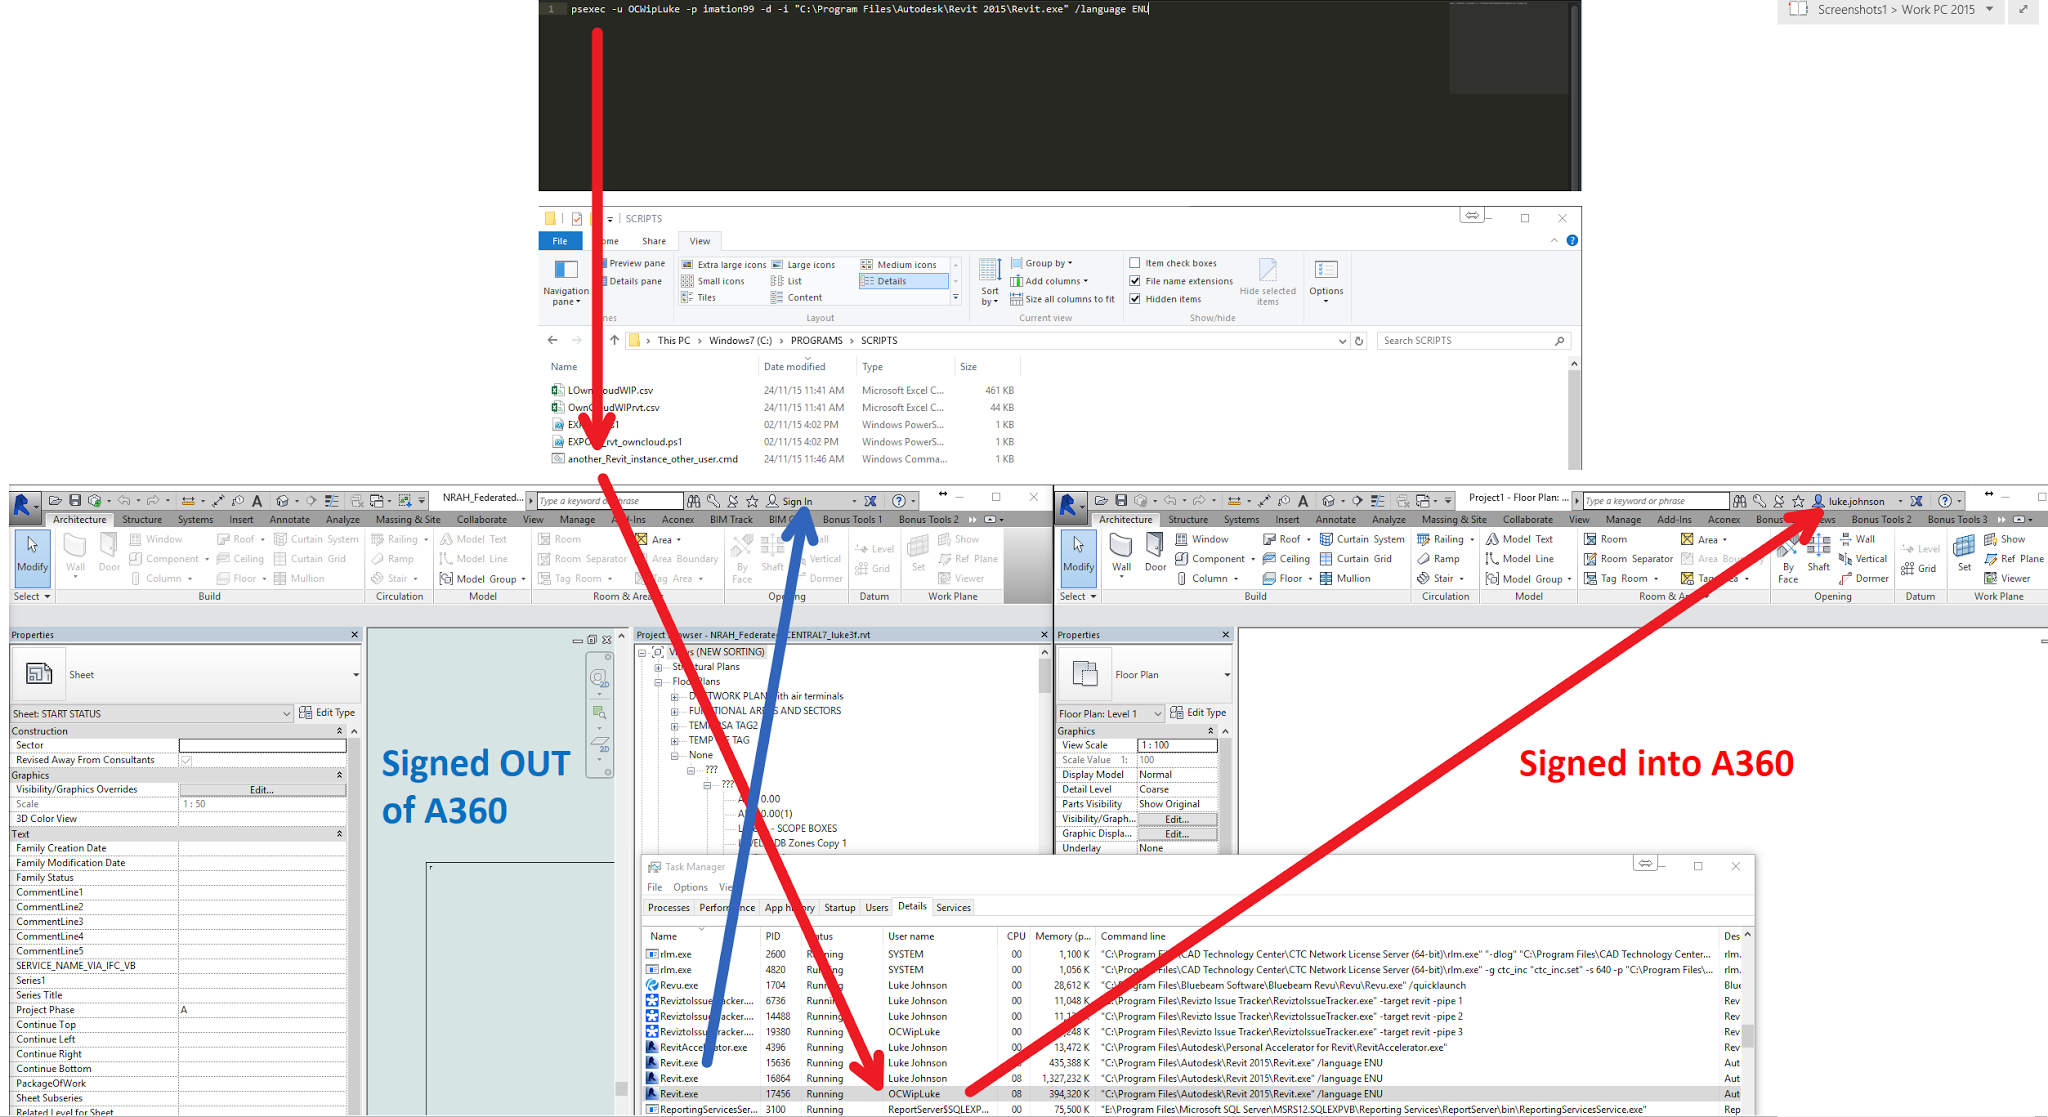
The workaround and outcome is shown in the image below:

 As usual, there may be complications with this method (such as access to different network resources etc), so please use at your own risk 🙂

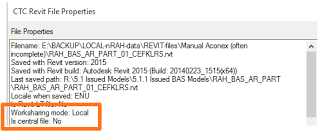
Revit Wants you to transmit ‘detached copies’ of Central files for linking into other models. If you ignore this and transmit your Local copy instead, Revit always remembers where that instance of the Local file was saved, and it causes havoc in a federated model situation. You can use the free CTC explorer extension to quickly check this:

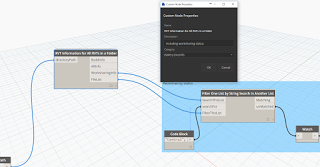
Or you could use Dynamo with my Bakery package:

 Hypothetically, let’s say you have received a file from a consultant, and after reloading you realise it was a Local file, not a Central. Now, your federated model may already have changed the name of the file to match whatever the local was called. Let’s say this problem has caused another problem: multiple instances of that same model have been loaded into this file.

If you are using View Templates, only one of these instances will be the point-of-truth for your View Template Revit Link Overrides. Time to get out your magnifying glass and investigate. Firstly, we will create multiple copies of the RVT file with different names, and then use Reload From (in Manage Links) to get these loaded into the current Revit session. This will create a Local alias:

Now, only one of these is the historical, correct link in the context of this federated model. How do we know which one to keep and which ones to remove?

We can use our View Template Revit Link Overrides to tell us… after all, they are the reason we are going through this process, right? We want Revit to ‘remember’ the overrides we have made in those templates. So let’s have a look at the View Template and see what it tells us.

Basically, by reviewing the Custom overrides here, I was able to determine which version of the Link to keep. It just so happens that the correct historical link had:

  • a lower number as its instance name (shown above as 149), and
  • a lower number as its element ID (450048 compared to 1288492). I found this by using Project Browser, Select All Instances – In Entire Project and then Manage – IDs of Selection

The above two ‘numerical’ investigative methods are probably not 100% reliable, but they may give you a good idea of which link instance is older in terms of this project.

Now, simply Remove the wrong links using the Manage Links dialog, and be aware of not re-linking multiple new instances if you just so happen to get a Local copy from someone in the project team. And remember…

What does Revit Want? Central copies for linking purposes.

Why does this happen? Because the Bulk File Upgrader doesn’t work if it is trying to upgrade a Local and it can’t find a Central (I believe this is a Revit API thing)… and you may get this error:
filename.rvt could not be upgraded: The file-based central model could not be reached, because e.g. the network is down or the file server is down. 

The core problem here is that someone has probably given you a Local copy, when they should have given you a Central or Detached copy to link into your project.

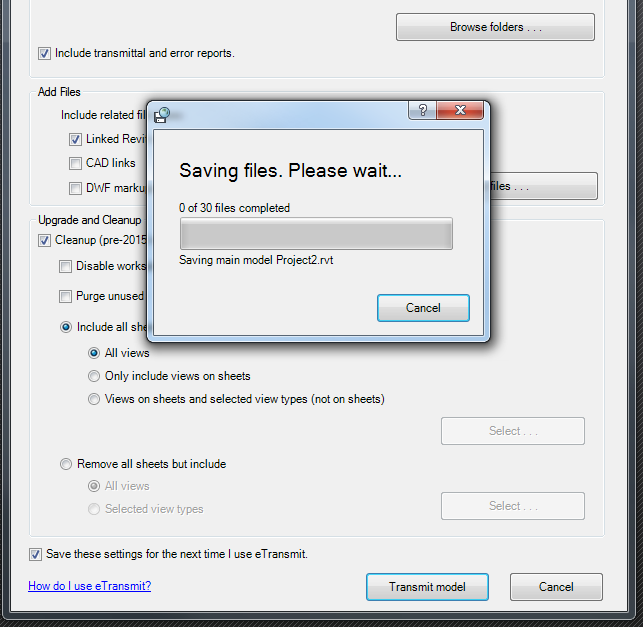
If we want to upgrade lots of these “local-type” linked files, how can we get around this batch upgrade limitation? We will need to to use eTransmit – twice. Let’s say we are upgrading from Revit 2013 to Revit 2015:

  1. Make a blank 2013 RVT project
  2. Link in all the 2013 version files you want to upgrade
  3. Save the host file in 2013 and close it
  4. Transmit the host using Revit 2013, including Links and tick the ‘Open and Save models in the active version of Revit’ option (this places the newly saved linked models into a transitory state, where you can choose to save as central or work with this model temporarily)
  5. Open Revit 2015
  6. Addins – Transmit a Model
  7. Choose the output eTransmitted 2013 host file from step 4
  8. Make sure to tick the “Linked Revit models” and “Cleanup” boxes
  9. Click Transmit Model and wait for all of the files to be upgraded (yay)
  10. Remember to discard the host file before transmitting or copying the files

Note: using the “Add Files” option in eTransmit and adding RVTs manually will not upgrade them.

Here’s the link for eTransmit for Autodesk Revit 2015.

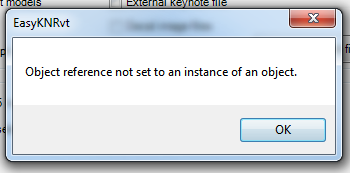
Also, you *might* have to press ok after each if you get this error (Easy Keynoter?)

From Daniel Gijsbers blog:
“if you try to open a revit workshared file (central file) with LT it right away makes a copy of the file with LT added to it’s name.

But what is even more surprising it leaves the central file intact. With that I mean I saved the central file in Revit LT and next I open the same file in it’s bigger brother. Big Revit says right away: Would you like to create a new local? In other words, you are trying to open a central file. Revit LT doesn’t throw away the worksets!

When you have opened the file take a look at the worksharing display


Revit LT has created it’s own workset… called Revit LT user”

Read more about the implications of this:
Daniel on Autodesk AEC software: Revit files and Revit LT

From rvit:
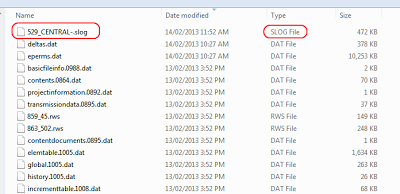
We got everyone else to sync and get out of the model.  Then, in the central file’s backup folder, we hunted down the SLOG file… and deleted it.
And that works.  He opens his local file and all is right in the world.  Everyone else hops in and all is still well.  Revit generates a new SLOG file and people can get work done.

Read the rest (including disclaimers) at:
SLOG it Out – Cannot Find Central File � RVIT – Revit rants, tips, and junk

Note: you should be able to find the slog file under the _backup folder of the affected Central (order by Date modified):

Steve’s post recently reminded me of something I have done in the past – using multiple pseudo usernames to access the same Central File in different instances of Revit.

Let’s say that you wanted to render a certain scene in Revit, and then save the resultant image to the Project (a Central File).  As this render could take 10 minutes, you want to keep working on something useful in the same Central File.  What to do?

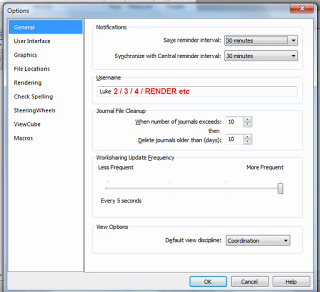
You just need to open a new instance of Revit and change the Username, then open a Local Copy of the Central as per usual.  You now have 2 instances of the same Central model open, and you can work in and Synchronize from both of them … obviously you are going to need some decent hardware if you are working on a large central file with links.  Set the first instance to render, and work in the second instance while that is happening (keep in mind that local renders in Revit can use multiple cores, so you may want to think about manually adjusting core affinity).

The username can be changed in the Revit Options dialog:

From Steve’s post:
You can however change your username anytime you want when you work in a central file. It isn’t a great idea to actually work this way, switching usernames as you go. It is however a way to clear out users that have not relinquished worksets properly though. When nobody else is working on the project you can open a central file and pretend to be the ill mannered users that haven’t relinquished elements properly. It’s another reason you might consider working in a central file, even though it is generally frowned upon.

Read more at:
Revit OpEd: Changing a Username

Daryl Gregoire posted about this recently and I found his post very helpful.  In the past, if the checkbox was grayed out to ‘Create New Local’, I would just manually copy the file to my C: drive, append my username to it, and then open it that way.  This is ‘old school’ Revit, before the automated local file creation became available.  However, Daryl’s fix is better than my workaround…

Why is the checkbox not available?
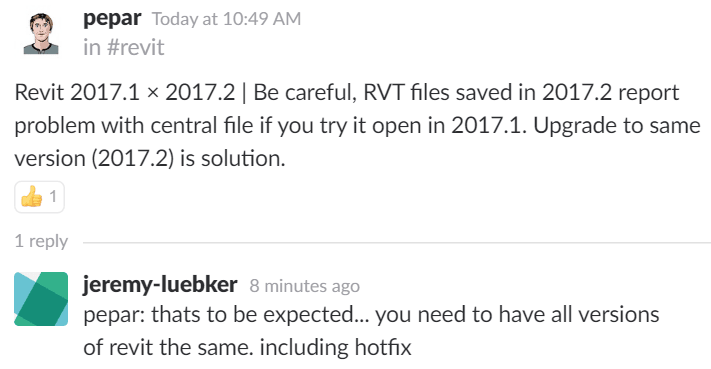
you are NOT using the same version of REVIT that was used to create the Central file

How to fix it properly?
open the file, upgrade it to your version of REVIT (done automatic) then ‘save as’ the file and click the ‘Option‘ button in the Save dialog box and tick the option for ‘Make this a central file after save‘.

Read more:
REVIT Rocks !: REVIT – My Create New Local is Greyed Out

EDITSteve posted about another cause for this problem, and he gives some wise advice along the lines of “before you upgrade, think about the consequences…”  Check out his post:
Revit OpEd: Can’t Alter Create New Local Selection