Phil recently posted a link for Zoom To Awesome at:
http://t.co/h645Tg2AEM

If you haven’t heard of it before, Zoom To Awesome instantly zooms the active window in Revit to the selected objects. Combined with Select by ID and COINS Auto-Section Box, you can find and correct almost any error or warning in your model…

Tested and working on Revit 2013, 2014 and 2015. The Screencast below also shows how to add a keyboard shortcut to the Zoom To Awesome command.

via this tweet:

You probably won’t find Autodesk 360 Desktop sync install package for download online, but you can install it “standalone”.

  1. Find some Autodesk install media
  2. Look for a subfolder named Cloudsync (make sure it is beneath x64 or x86 as appropriate for your system)
  3. Copy this folder to USB or a network location
  4. Run the file AdSync.msi on the PC you want to install Autodesk 360 on
  5. After install, you will need to restart
  6. After restarting, you may need to sign in using your Autodesk ID

I have previously described how to use Autodesk 360 as a cloud storage location for Revit (and any application) here:
Access Autodesk 360 files in any application, including Revit

Some paths that may assist – these were from BDSU2015:
Building_Design_Suite_Ultimate_2015_English_Win_64-32bit_dlmx64ComponentsCloudsync

Building_Design_Suite_Ultimate_2015_English_Win_64-32bit_dlmx64ComponentsCloudsyncAdSync.msi

I received the following list of links and resources from a helpful Building Performance Analyst at Autodesk:
· Autodesk FormIt Product Page: 3D Conceptual Design. Any time. Anywhere.
· Building Performance Analysis Blog: Read all updates on BPA tools on this blog.
· Revit 2014 Automatic Energy Analytical model Creation and Analysis. · Autodesk Project Solon Dashboard for Revit.

Get more information about Lighting Analysis for Revit from the following places.
· Lighting Analysis for Revit Product Page
· Lighting Analysis for Revit Students Page
· USGBC Reference Page

This latest version 1.23 has the following updates and new features:
· Analysis options now include LEED v4 EQ credit 7 option 2 in the Run Analysis dialog
· New Analysis Display Styles are added for LEED v4 and other styles
· Schedules are created using field id’s instead of text to fix bugs with some foreign language installs
· Schedule names are changed to include “_” in front so they are organized better in the Project Browser
· AVF view settings (9am vs. 3pm) are preserved when clicking Generate Results
· Analysis Display Styles are preserved except if type of analysis changed, and then a corresponding analysis display style will be selected automatically
· Phase filter is set automatically for view plans (unless override flag is unset in config file)
· View templates are turned off when _Lighting views are created (unless override flag is unset in config file)

Other reference material:
· Revit BPA Help – Lighting Analysis help topic
· Blog Intro – Includes video with older but still relevant workflows.
· Video0 – First instructional video on the release 1.0
· Video1 – Hour long video including Rendering Illuminance and Lighting Analysis workflows. · Article – Revit community overview article.

Interestingly, this hotfix comes in the form of a macro to clean up your files. The issue as stated on the Autodesk Knowledge Network is:
In Revit 2015 the performance of some file is very slow. This means that
opening material browser may take an extremely long time or Revit will
hang. Typically you cannot execute the “Purge unused elements” command
as well, because Revit will freeze. 


Every time you edit a family and load it back in > overwrite > the
number of materials will grow substantially. For example after 5 or so
subsequent reloads in our sample file it jumps from 15551 to 186623
materials.

We have seen this most commonly when editing titleblock familes in the German and Japanese version of Revit. 


Download the macro:
DeleteStandardMaterials.zip

Please go through the process below to clear out the extra materials:

  1. Close Revit.
  2. Extract the zip file: It will contain a DeleteStandardMaterials folder with two subfolders (AddIn + Source).
  3. Copy the AddIn + Source folders on the following path:
    C:ProgramDataAutodeskRevitMacros2015RevitAppHookupDeleteStandardMaterials
  4. Start Revit.
  5. Open the file.
  6. Open Manage/ Macro Manager/ Application Tab: The macro should
    show up in the Macro manager under application > macros as
    “DeleteStandardMaterials”.
  7. Select here “Execute” and start the command “Run” > This will delete Standard Materials.

After these steps use Save As to save the file with a new name.

Here are 2 videos showing the steps:
https://screencast.autodesk.com/Main/Details/5bfa2fff-3443-45e0-a156-4c530c594c28
https://screencast.autodesk.com/Main/Details/fb7eaa0a-b529-47b7-9e35-7d42c3944a0b

Main page:
File performance problem in Revit 2015 | Search | Autodesk Knowledge Network

Heads-up:
Be Revit – Do Family Planning: Revit streikt / Datei wird immer größer und reagiert nicht mehr?

Short version:

  1. Edit View Title Family
  2. Turn on the reference planes in the Visibility / Graphic Overrides, select all three items. 
  3. Rotate these items opposite of what you think to offset the rotation of the view. So if you are rotating the view on the sheet 90 degrees counterclockwise, you have to create a view title with these three items rotated 90 degrees Clockwise. 
  4. uncheck “Keep Readable” under the instance properties of the text labels or Revit will try to make the text read up the page, not down.
  5. Save View Title family and apply it to Viewport Type in project

Long / original version, this idea and steps above taken from this post by IMAGINiT:
View Titles for Views Rotated on the Sheet – IMAGINiT Building Solutions Blog

I’ll be the first to admit that this is a bit clunky, but it does work:

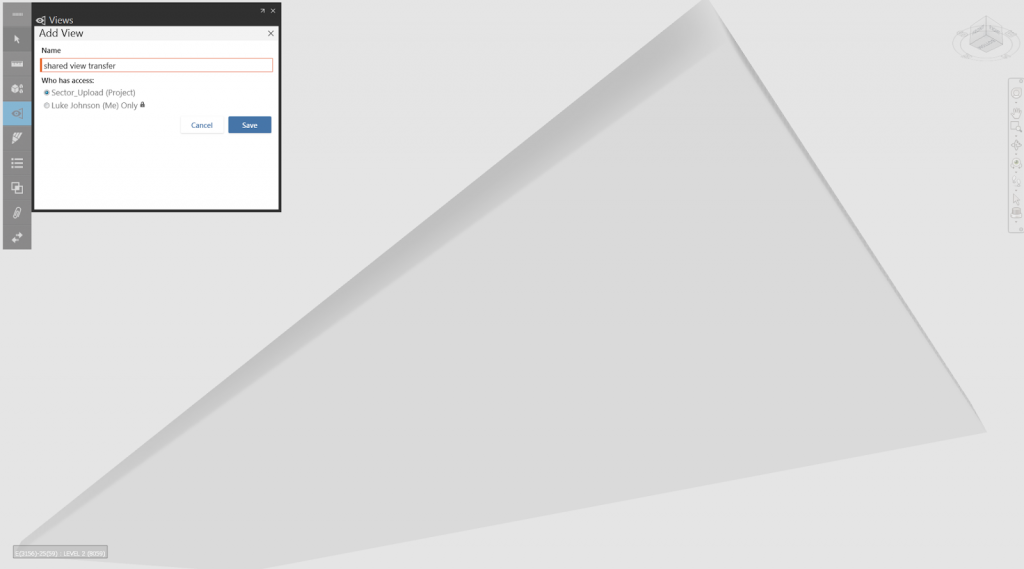
  1. Go to the Navisworks viewpoint you want, and isolate a single element (hide everything else) that approximates the view extent
  2. Click nearest ViewCube corner that approximates the viewpoint you were just using
  3. Deselect everything and press Page Down to zoom extents
  4. Export to DWF and re-append
  5. Delete everything but this new DWF (with a single item in it)
  6. Glue this using the addin for Navisworks
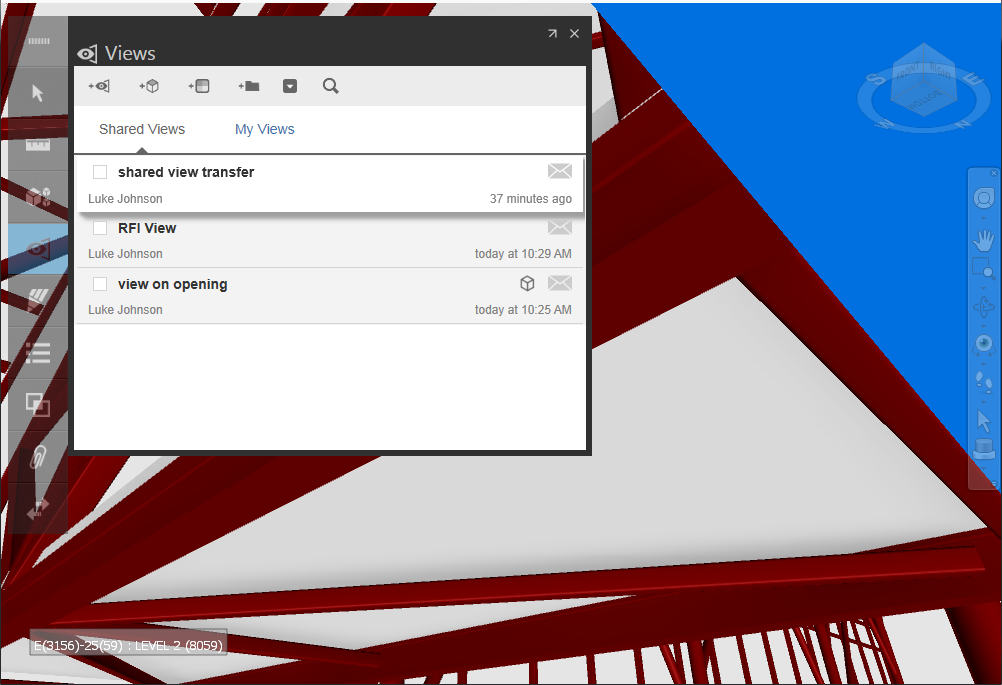
  7. After Gluing, open this model, click the same ViewCube corner as in step 2, and immediately save the view as a shared view.
  8. Make a new Merged Model with this “view” model
  9. You now can view that viewpoint from Navisworks in your Merged BIM 360 Glue model 

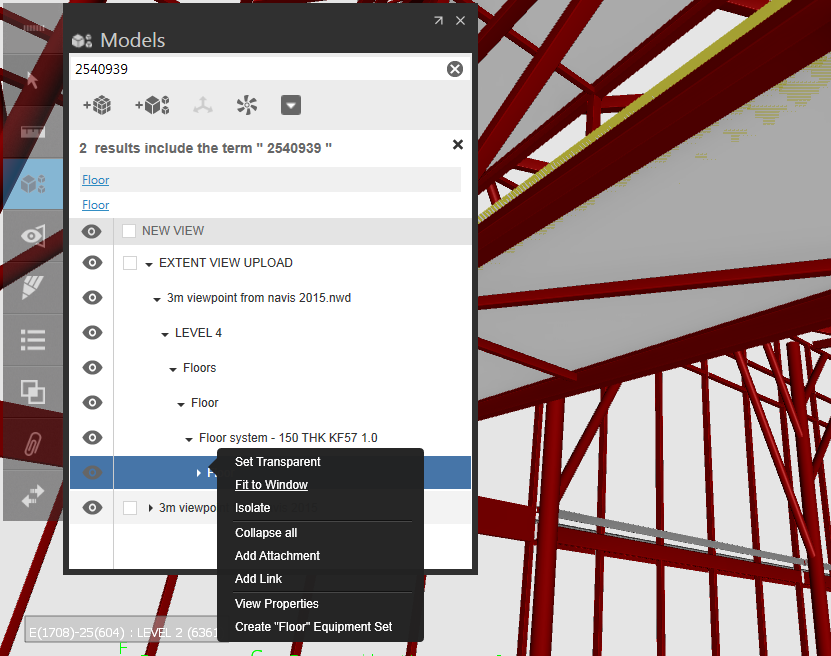
Another option using Element ID, may suit your workflow better:

  1. Copy Element ID from Navisworks
  2. Paste the ID into BIM 360 Glue in the Model Search box
  3. Right-click and Fit to Window
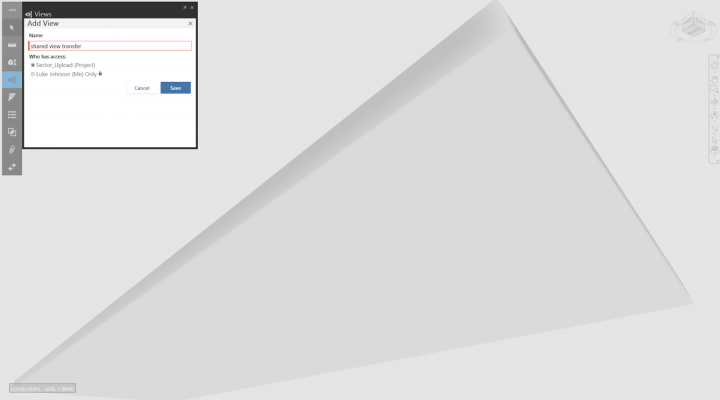
  4. Save the View

I am moved to join ADN and get into the Glue API, more on that later…

From MRUG:
You can download the back catalog of video Revit tips and tricks from both the Manchester and Midlands (now wound up) Revit user groups from prior to meeting 8. After meeting 8, tips and tricks are uploaded on an individual meeting basis. Videos are not narrated
Tips and tricks archive download (586mb)

There is lots more good stuff, videos and presentations on many Revit topics including Adaptives, Revit Standards, Revit and Construction and more at the main events page:
Manchester Revit User Group – MRUG

Heads-up via @BarbosaMCJ and @BenPMalone
https://twitter.com/BarbosaMCJ/status/491899892671856640

Direct Dropbox links and other links (for download manager etc):
https://www.dropbox.com/s/31hf3msqzfscv0o/Revit%20Tips%20and%20Tricks.zip
https://www.dropbox.com/s/q5yhekhgvpm7ihn/M11%20Adaptive%20Components.pptx
https://www.dropbox.com/s/aknwnkmqsy77r4k/MRUG%20The%20COBieNATOR.pdf
https://www.dropbox.com/s/o6bom0zk6754d2s/M11%20Tips%20and%20Tricks%201.pptx
https://www.dropbox.com/s/549accch2wyys3j/John%20McDermott%20-%20MRUG%20REVIT%20PRESENTATION.pdf
https://www.dropbox.com/s/zzajdrwafp8w8l1/BIM%20Coordination%20for%20Real.pptx
https://www.dropbox.com/s/hl5221kosncqoq3/CI1934-P%20-%20Civil%20and%20Building%20BIM%20Coordination%20for%20Real%20Handout.pdf
https://www.dropbox.com/s/w85nnsx14s9wgee/M10%20Tips%20and%20Tricks.pptx
https://www.dropbox.com/s/29lyovnfkyqv2lh/002-131110%20AH%20MRUG%2009%20Revit%20%26%20DfMA_APW.pptx
https://www.dropbox.com/s/y70xwhuynbqrrkh/003-MRUGBIMmaturity.ppsx
https://www.dropbox.com/s/yx1pv4alcf3zqqq/004-Content%20Creation%20Standards%20Management.pdf
https://www.dropbox.com/s/8257r34s9b7tiiv/M9%20Tips%20and%20tricks.pptx
https://www.dropbox.com/s/5u7q4p2fo1pu6al/BIM4Real%20MRUG.ppt
http://www.bim4real.co.uk/Downloads/e1/BIM4Real%20Summary%20v1.0.pdf
https://www.dropbox.com/s/gw68asu9itqhhyd/20130321_BIM_CASE.ppsx
https://www.dropbox.com/s/w6xww7te3can7ov/MRUG_-_The_I_in_BIM.pdf
https://www.dropbox.com/s/razz66dm3sz932r/MRUG_Virtual_Orangery_12-12-12.pdf
https://www.dropbox.com/s/jxyfoeb6nphdy71/M4%20-%20Ramboll%20LAM%20Showcase.wmv
https://www.dropbox.com/s/vwfq89oa5euz96a/M4%20-%20Soluis_DesignVisSamples_12_.pdf
https://www.dropbox.com/s/m0y2u09hduxwhk4/M4%20-%20MRUG%20Python.zip
https://www.dropbox.com/s/p4ng8wl83s9kwe4/MRUG.ppt
https://www.dropbox.com/s/1jcz37bz9qsi1h0/Uponor%20MRUG%20Presentation.pptx
https://www.dropbox.com/s/a0ncez4szoap54i/Revit%20Coordinate%20Systems.ppt
https://www.dropbox.com/s/53yivsesqivle8s/M2%20-%20Salford%20Uni%20Demo.pptx
https://www.dropbox.com/s/fy5msgbwi4fwkqb/M2%20-%20111109-Presentation_space.pdf