One of my most liked posts on the Ideastation is this one, where I request the ability to share viewpoints between Navisworks and Glue.

This functionality has finally been provided in Service Pack 3 for Navisworks Manage 2016.

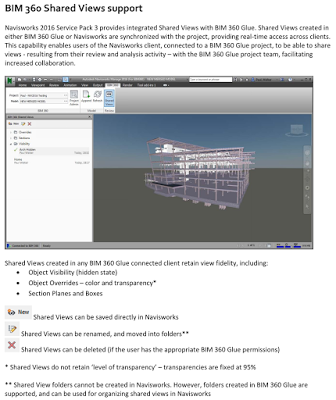
It is officially called “Shared Views”, as per the above details from the SP3 feature readme.

How does it work?

  1. In Navisworks 2016, connect with a BIM360 Glue project and model
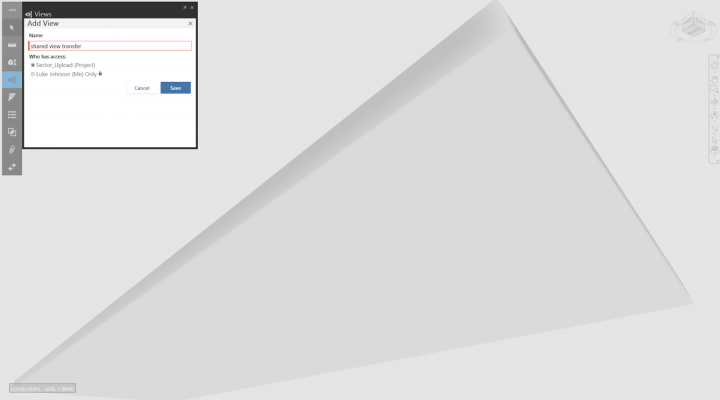
  2. Navigate in Navisworks to a view you would like to save
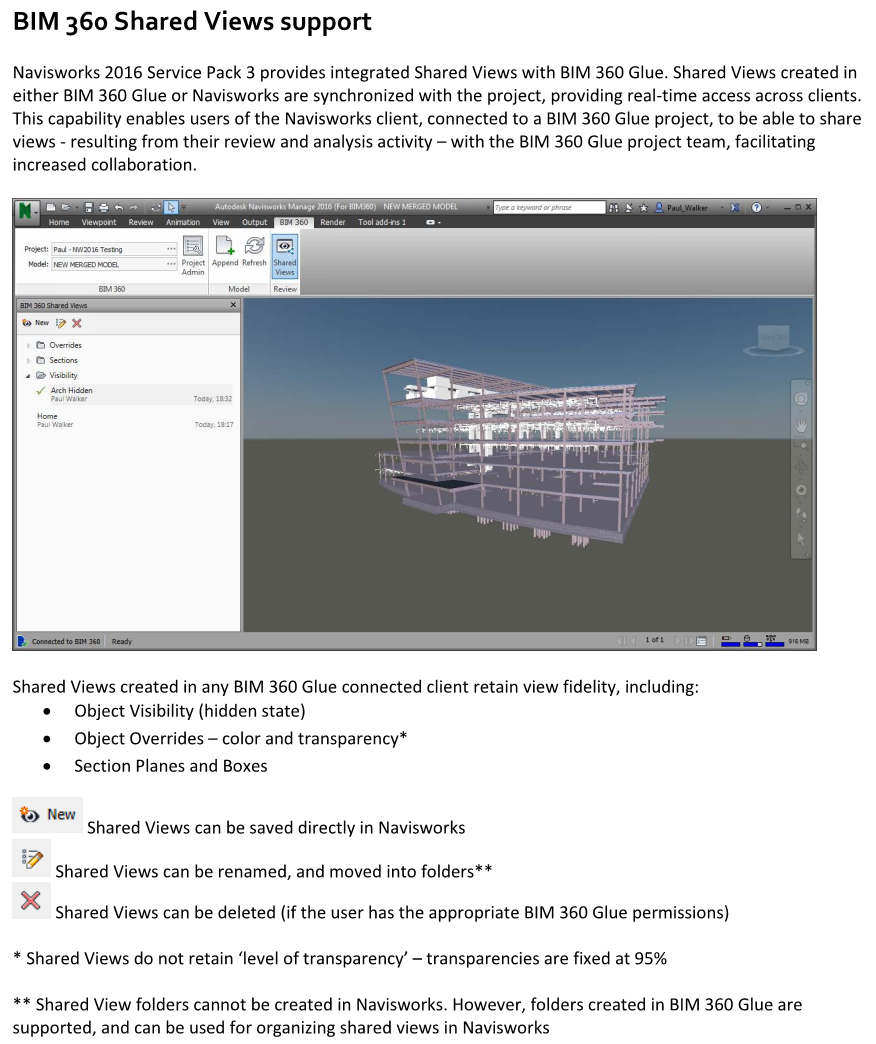
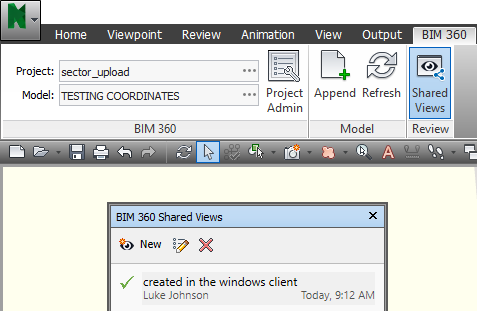
  3. On the BIM 360 ribbon, open the Shared Views pane and then click New
  4. Name the view

After creating this view in Navisworks, you can open the Glue Windows client and open that model, and the view will appear in the Shared Views list:

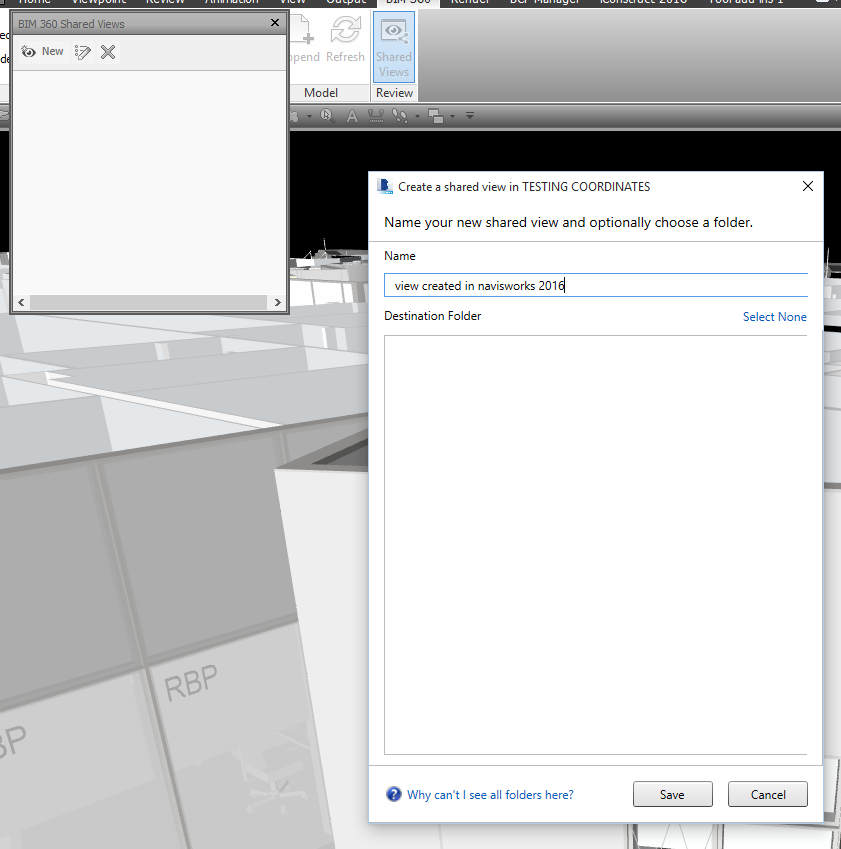
Similarly, in the Glue web client you can now access this view:

 And, in the Windows client we can easily make and organize Shared Views. To see them in Navisworks, just click Refresh and they will show up in the Shared Views pane:

This update is a great advancement for Autodesk BIM interoperability, and combined with Switchback it now allows bidirectional viewpoint sharing between Navisworks, Glue and Revit. Very cool 🙂

I’ll be the first to admit that this is a bit clunky, but it does work:

  1. Go to the Navisworks viewpoint you want, and isolate a single element (hide everything else) that approximates the view extent
  2. Click nearest ViewCube corner that approximates the viewpoint you were just using
  3. Deselect everything and press Page Down to zoom extents
  4. Export to DWF and re-append
  5. Delete everything but this new DWF (with a single item in it)
  6. Glue this using the addin for Navisworks
  7. After Gluing, open this model, click the same ViewCube corner as in step 2, and immediately save the view as a shared view.
  8. Make a new Merged Model with this “view” model
  9. You now can view that viewpoint from Navisworks in your Merged BIM 360 Glue model 

Another option using Element ID, may suit your workflow better:

  1. Copy Element ID from Navisworks
  2. Paste the ID into BIM 360 Glue in the Model Search box
  3. Right-click and Fit to Window
  4. Save the View

I am moved to join ADN and get into the Glue API, more on that later…

Firstly, export the Viewpoints you want to rename to XML.

Open the XML in Notepad++.  Now we are going to use Search – Replace to append something to the view name in the XML file.  Once we get the Find syntax correct (I used view name=”View), you can just use a backslash 1 in the Replace box to signify the Find result, and then add whatever you like after that.  See the image:

 (make sure you pick the Regular Expression radio button)

Click Replace All, then save the XML (make sure you just click save, and don’t click Save As).  Now, import it back into your Saved Viewpoints in Navisworks.

 This is what it looks like in Navisworks after re-importing the XML:

Keep in mind that the import / export process will result in your Hide/Required and Override Material boxes becoming unticked for each imported view.

This is another good reason that you should be using Appearance Profiler by now… Have you noticed Presenter has now been completely replaced by Autodesk Rendering in Navisworks 2015?

More on Notepad++ renaming:
regex – How do you do a Find and Insert in Notepad instead of a replace, while using regular expression? – Stack Overflow