I’m looking into ways to batch initialize Revit models onto the new BIM 360 Docs (Document Management) platform. It is a work in progress at the moment – in Revit 2018, I think that there is limited ability to use newer API features for creating a Cloud ModelPath for batch processing. But more on that later…
For now, I wanted to replicate a folder structure from a local network onto the BIM 360 Docs platform. To do this, you just need the Desktop Connector + Preview installed, and then you copy and paste the data.
Here are the steps:
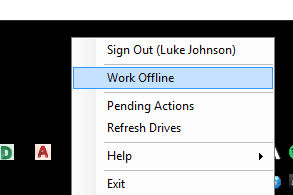
Clear Pending Actions on Desktop Connector for BIM 360 (recommended, use with care)
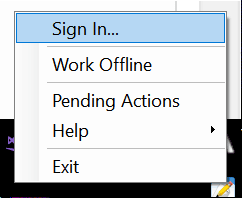
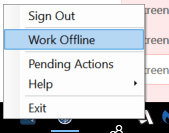
Work Offline(recommended). Folders will appear blue in Windows Explorer.
Set the folder path in the and create a CMD script using code below. It populates each subdirectory with a text file indicating the contents of the directory.
@echo off
chcp 65001 >nul
for /r "C:\Your\Folder\Path\Here" %%d in (.) do dir /a:-d "%%~fd" > "%%~dpnd\DirectoryFilePlaceholder.txt"
Run the script on your target directory (the local directory that you want to mirror into BIM 360 Document Management platform)
Run a FreeFileSync task with filters to include only the ‘DirectoryFilePlaceholder.txt‘ as a mechanism of building the file structure. This task copies those txt documents to the BIM 360 using the local Desktop Connector path, as shown here:
Then, disable ‘Work Offline’, so the sync to cloud should begin.
Wait for ‘Processing’ to complete
To force the sync you may have to toggle the ‘Offline’ status in the tray.
You can review sync state with the ‘Pending Actions’ link from the system tray:
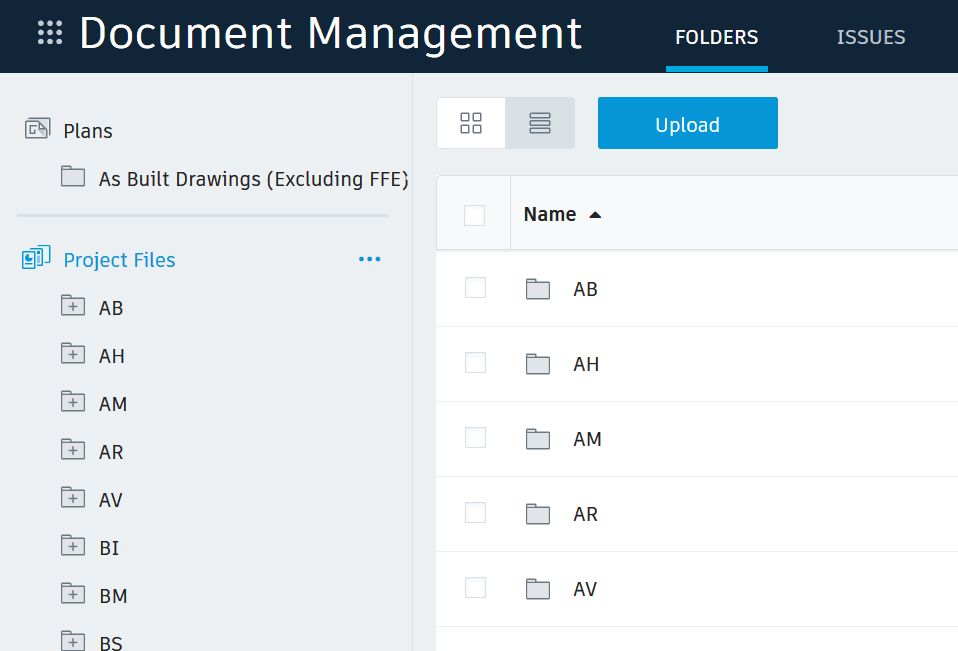
After the file structure is copied and synced, you will be able to see it in BIM360 Docs.
You can then proceed with adding Permissions or uploading other files.
Install beta version of a plugin for Desktop connector that allows access to BIM 360 Docs under a separate link
From the help:
This plugin is a connector that establishes BIM 360 Docs as a recognized data source for the Desktop Connector – making it available in your desktop folder and file structure for easy file management.
As with Desktop Connector, this means your BIM 360 Docs files are replicated in a connected drive. You can manage files in BIM 360 Docs through the connected drive, just as you would any other folder on your machine. Changes made on the desktop are automatically uploaded to BIM 360 Docs.
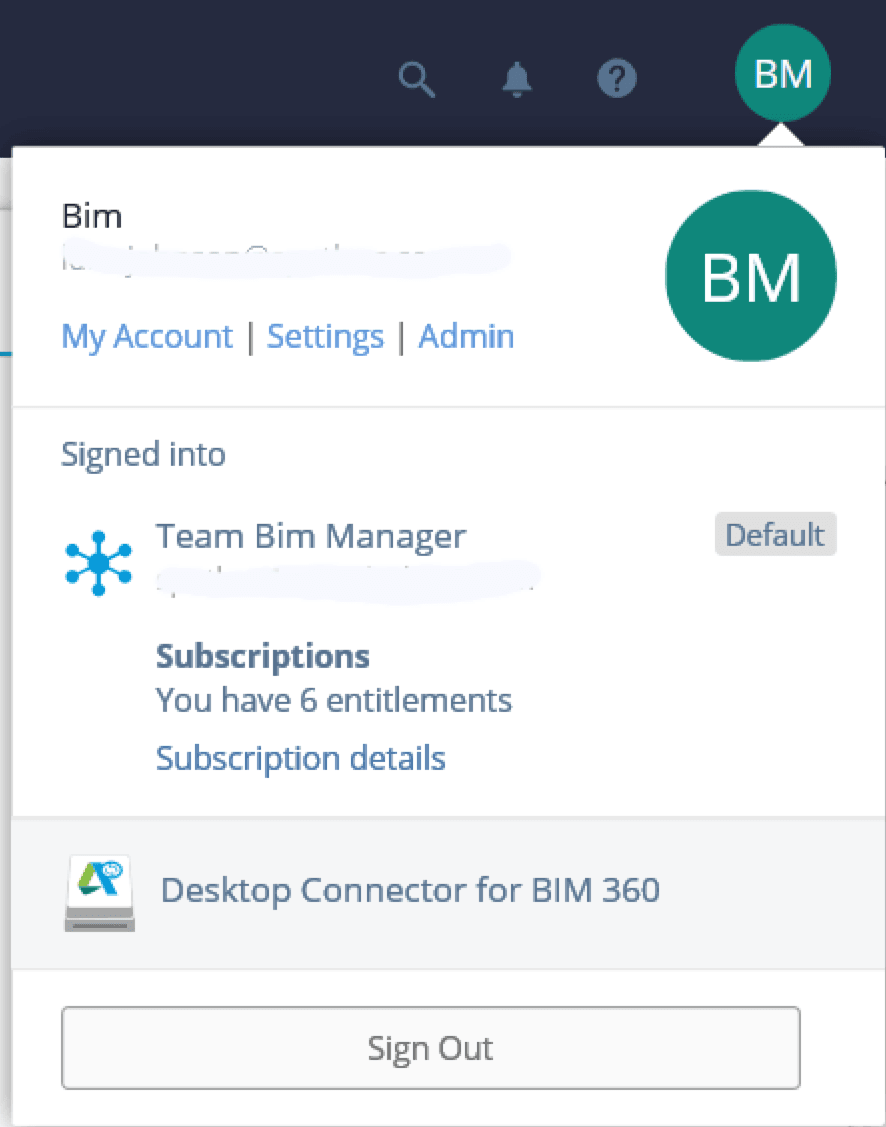
If you are already a C4R user, for a while you can keep working as you are. But the entire platform is shifting from C4R to B3D (BIM 360 Docs), and you will eventually have to make the leap. In the long run, it will allow for more control, like folder-level permissions, so for big projects it is going to make a lot of sense. For now, there is some confusion out there (like in this Twitter thread), so here are some basic steps to activate a new BIM 360 Docs account, setup a Project, and then invite some collaborators into the project.
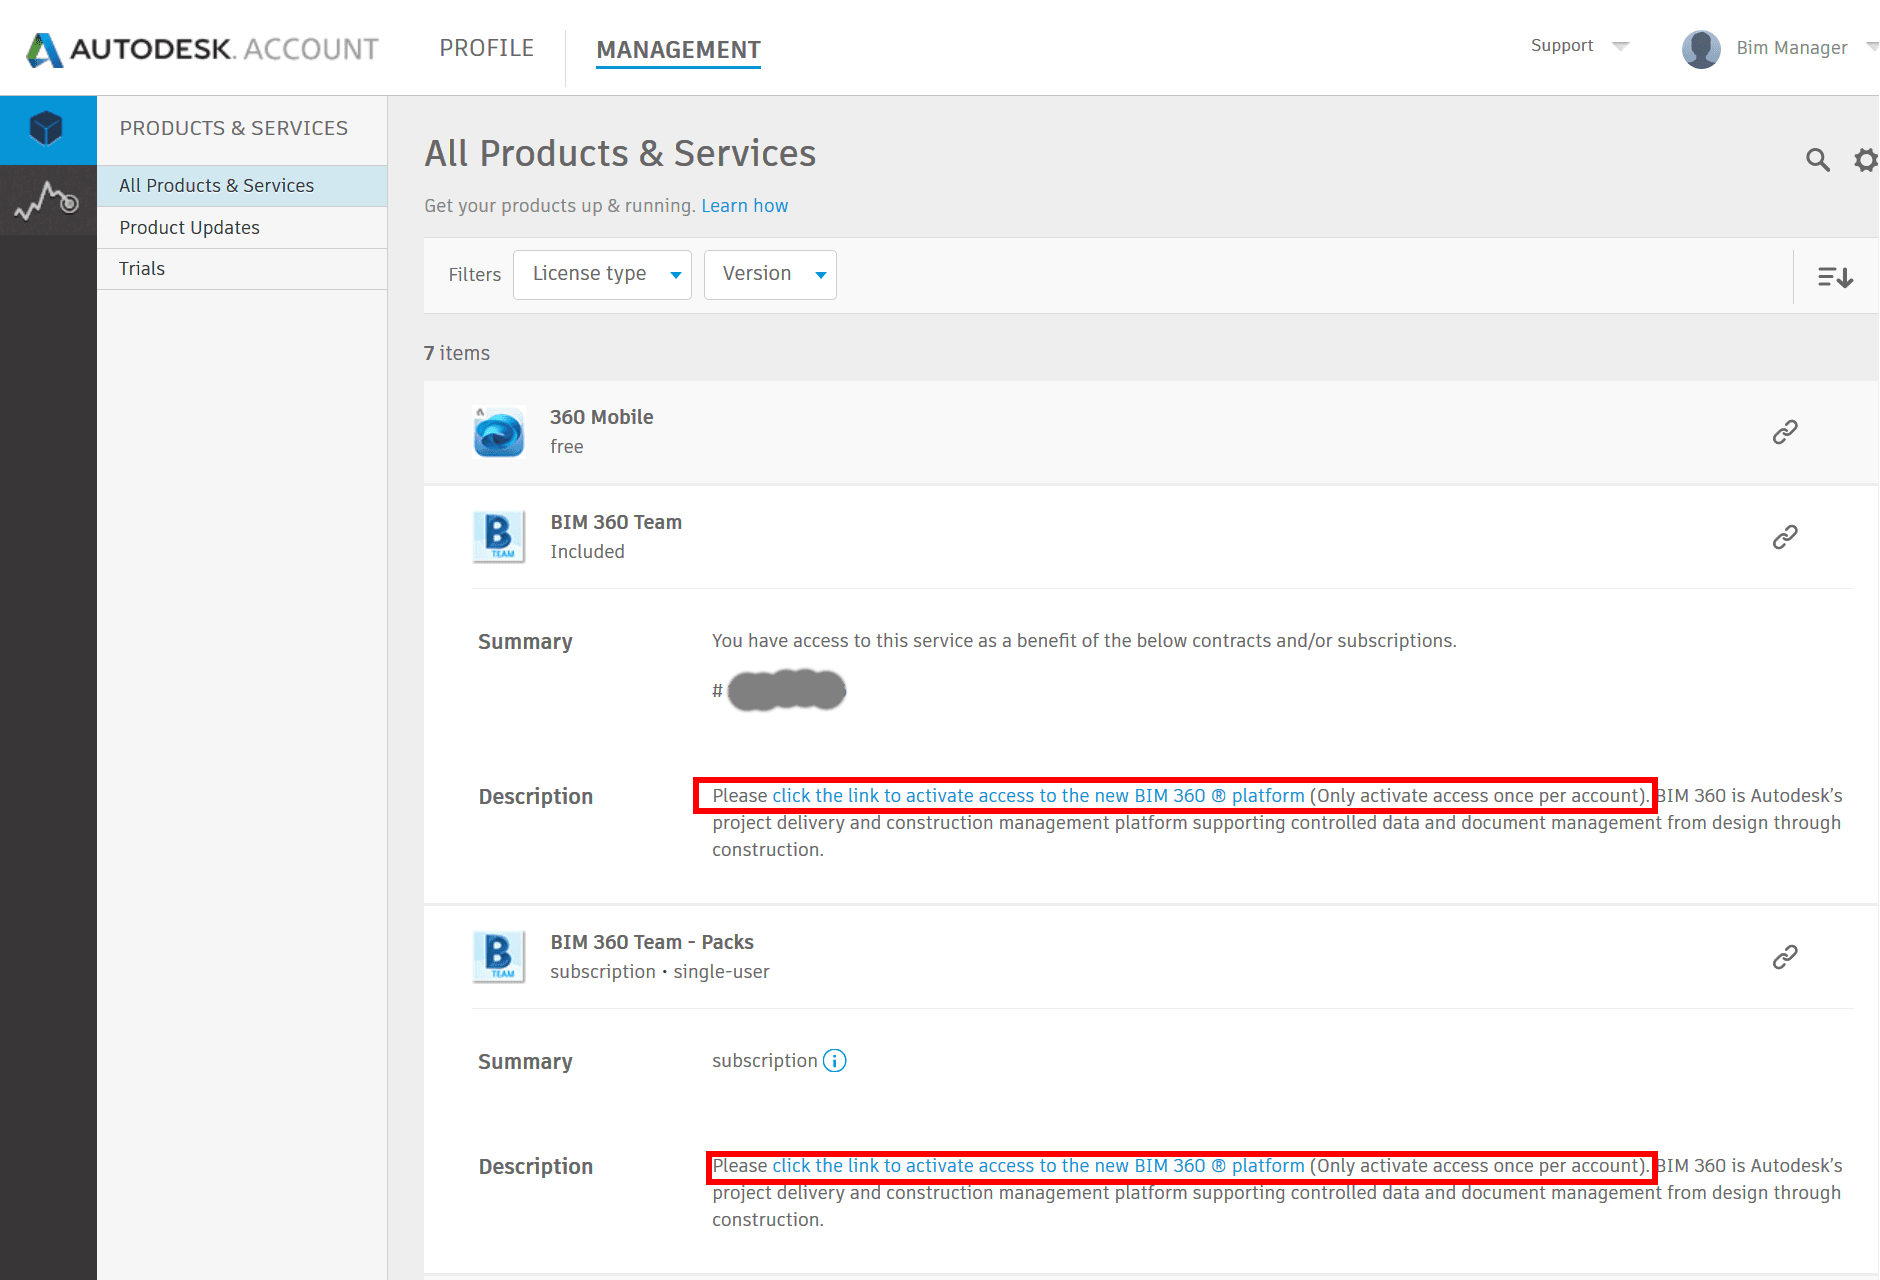
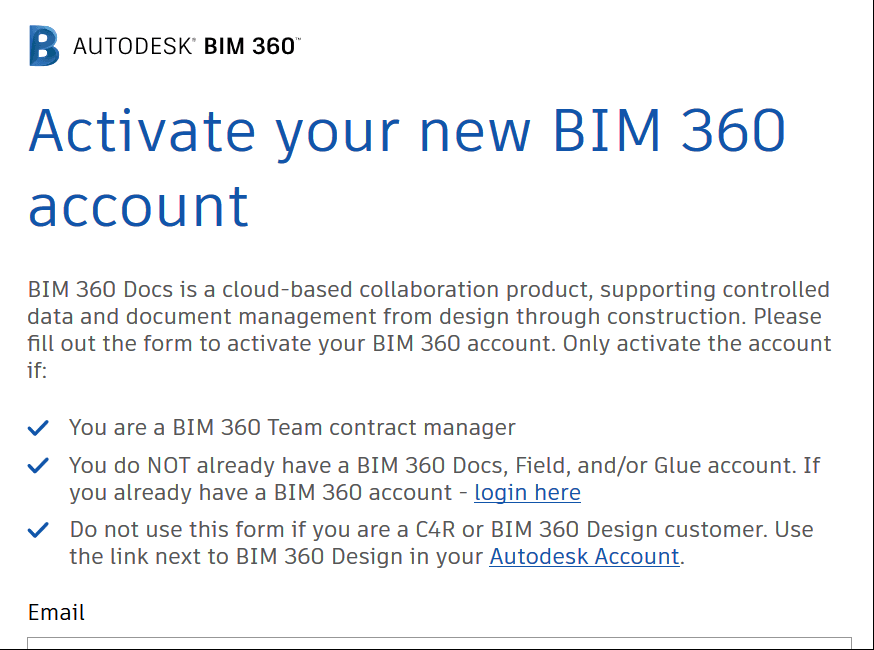
First, you can go to your account and use the special link to create a new BIM 360 Docs workspace. That is, if you are starting fresh in the new platform.
Here is the activation form notes (read carefully). Note: the links are different depending on how you activate it. For example, if you have an existing C4R account and you want to ‘transition’, you would use the relevant activation link for existing C4R customers :
New BIM 360 workspace
Transitioning from C4R
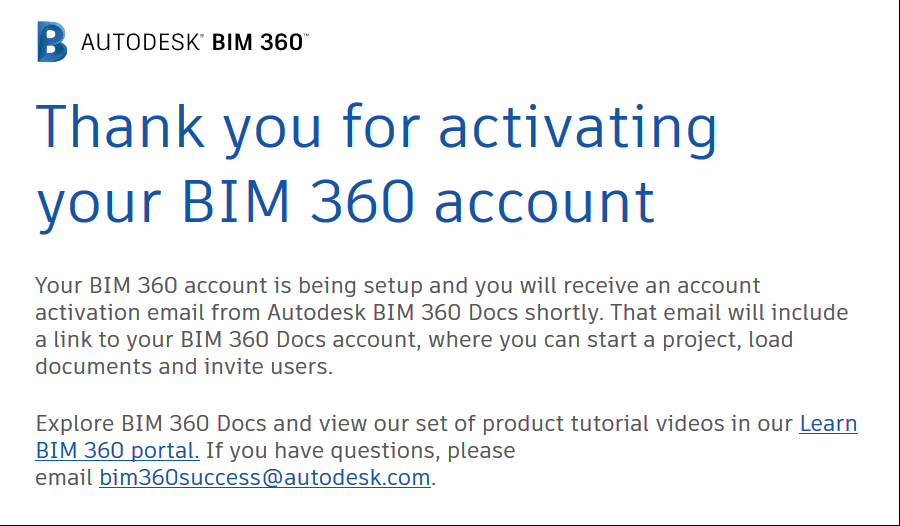
Once done, you should have a new BIM 360 account:
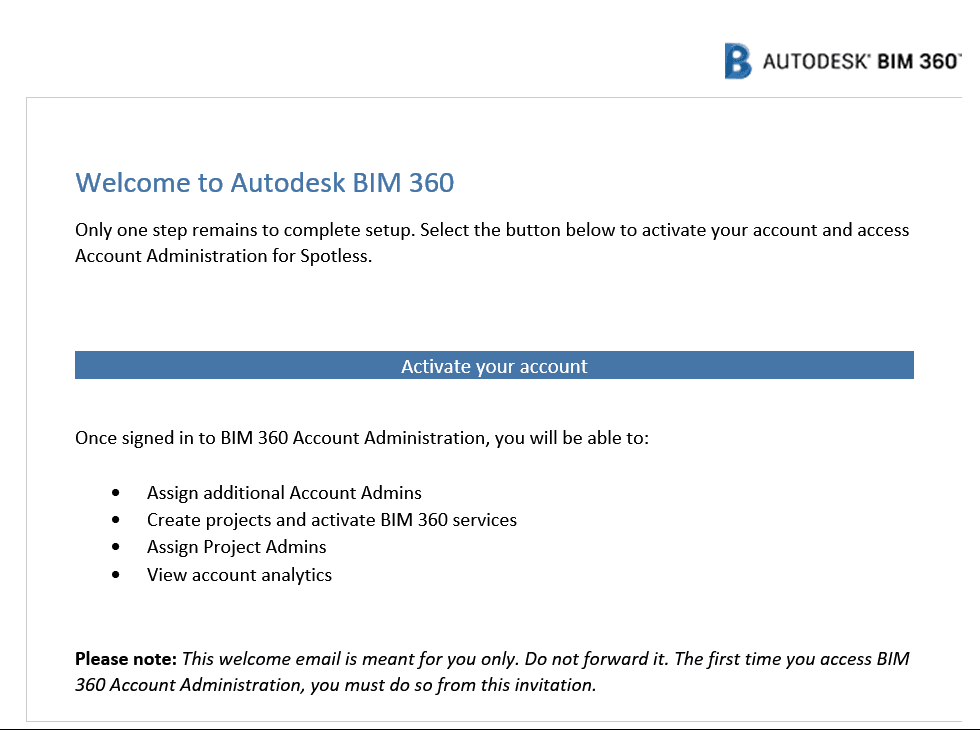
And you just have to click the activate link in your email:
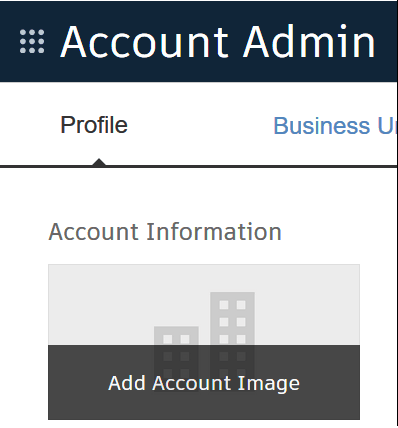
After that, you should be able to login to your BIM 360 workspace and start setting up some company settings, like adding a Logo and Business Units:
BIM 360 has just changed in a fundamental way. The trust environment is now more controlled, and it is sharing base technology with BIM 360 Docs. So instead of talking about C4R bolted onto A360 or BIM360, we will now be talking about ‘Revit files in this Docs module in this Team Project on BIM 360 Design’ (I think).
Revit 2018.3 is required and direct download link can be found here.
I’ll follow up with some more detailed information in the coming weeks.
All,
I wanted to welcome you, on behalf of the team here at Autodesk, to the Design Collaboration forum. This forum exists for conversations about the design collaboration workflows possible in the BIM 360 Design product, which released today. We look forward to the conversation. First though, I’ll try to answer some likely questions you all have.
What’s BIM 360 Design?
BIM 360 Design is the next generation of Collaboration for Revit (C4R). It enables the cloud worksharing you’ve come to love in C4R, but connected to the next generation BIM 360 platform. You can learn more about it here on our new product center, and below is an image that captures what comes with it.
You can see that within BIM 360 Design there are 2 next gen modules that are included, Design Collaboration and Document Management. Together with cloud worksharing, they represent the most seamless way to collaborate on Revit data across the globe. We’ll talk more about the new workflow in subsequent targeted posts.
What Happened to C4R?
C4R just became BIM 360 Design as of today. If you’re an existing subscriber, you’ll see the branding update in manage.autodesk.com shortly. If you have existing projects in-progress, working against BIM 360 Team (aka Classic), nothing really changes aside from the branding you see in the account portal. You can continue to work on those projects, and new subscriptions to BIM 360 Design can be allocated to new team members, who can then start to work on those existing projects. More detail can be found in this FAQ.
What Can I Do With BIM 360 Design?
With BIM 360 Design, BIM authoring teams can say goodbye to “high trust” as the only way to work, and hello to flexible dynamics between multi-discipline BIM authoring teams. Along with those improved access controls comes a whole new web and mobile experience delivered by Next Gen BIM 360. Across Document Management and the new Design Collaboration module, teams can:
Quickly and easily set up teams and define the data spaces they will work in.
Easily understand the current state of the project, with an aggregated view of the project data that can be navigated the way they think about it, not how our beloved authoring tools structure it.
Exchange data between teams in a controlled way, on the back of our new currency for data exchanges: Packages. These are like transmittals on steroids, allowing teams to curate the versions of Models, 2D Sheets, and 3D Views needed to communicate process.
Understand how data has changed over time. Change visualization can be enabled with the touch of a button on any BIM artifact contained in a Package. No more hunting for revision clouds or exporting the 3rd party tools.
Provide feedback on those BIM artifacts, with Markups and closed loop Issues created in Document Management (Issues are on their way to Design Collaboration).
Use the Preview version of Desktop Connector to collaborate on non-Revit project data, centralizing the data platform used for all Work in Progress (WIP) project data.
Use those BIM artifacts downstream for construction workflows across the Field Management, Project Management, and Model Coordination modules.
How Do I Get Started with BIM 360 Design?
If you’d like to start a new Project in this new way to work, you need to:
Get a BIM 360 Account
If you have an existing next gen BIM 360 account, you should automatically get the Design Collaboration module enabled tonight (April 9th US time zone)
If you don’t have an existing account, your Contract Manager should receive an email shortly with instructions on how to get one created.
Install the Revit 2018.3 Update
This update released today, and should be available in the Autodesk Desktop app. A direct download link can be found here. This is required for Revit 2018 to know how to communicate with next gen BIM 360.
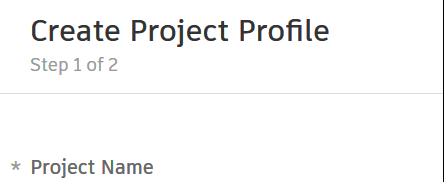
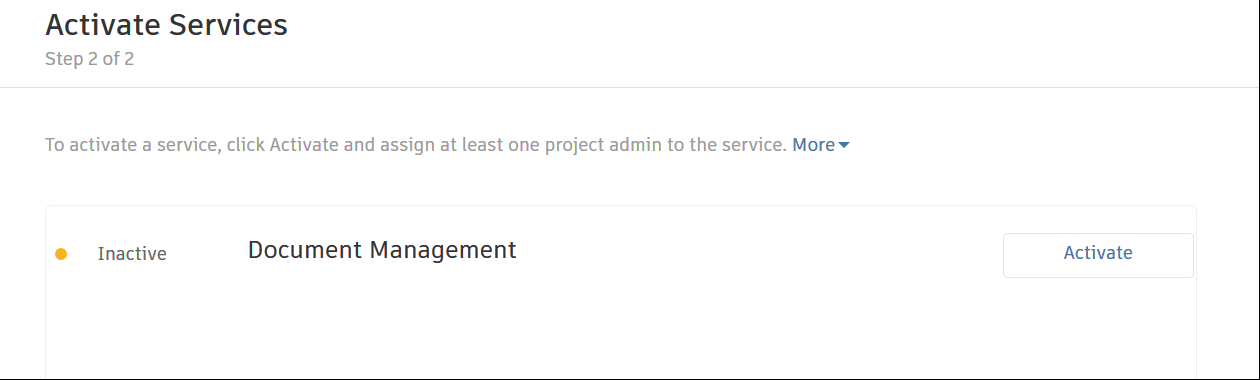
Start a New Project and Enable Document Management + Design Collaboration
With these two modules enabled, along with the latest update of Revit, you have what you need to get started. We’ll have a separate thread that walks through the process to get up in running in more detail.
Hopefully, you all are as excited about this as we are. We’re biased though; we’ve worked hard based on lots of feedback and customer engagement to deliver this new way to work, and your continued feedback and engagement will make sure that we deliver on the needs you all have. Look out for subsequent discussions on specific parts of the overall product experience, and we look forward to hearing from there. Post here in this thread with general questions.
Cheers,
Kyle & the Team
Kyle Bernhardt
Product Line Manager
BIM Project Delivery
Autodesk, Inc.
I have been chatting with one or two industry insiders over at Autodesk recently, and there are some pretty big changes coming to the BIM360 fraternity of products. For the most part, it seems like these will be very welcome improvements. However, it may have an impact on how you run projects through BIM360, and so it might be advisable to check out the upcoming BIM360 webinar (link). Details below:
Stay up to date with everything new in BIM 360. Each month, join us and the BIM 360 Product Team to find out how you can take advantage of the most recent and upcoming product updates. • Learn how BIM 360 can help you improve project delivery • Stay up to date with the newest features • Get early insights into what’s coming in the next updates • Participate in Q&A with the BIM 360 Product Team • Get the resources you need to be successful
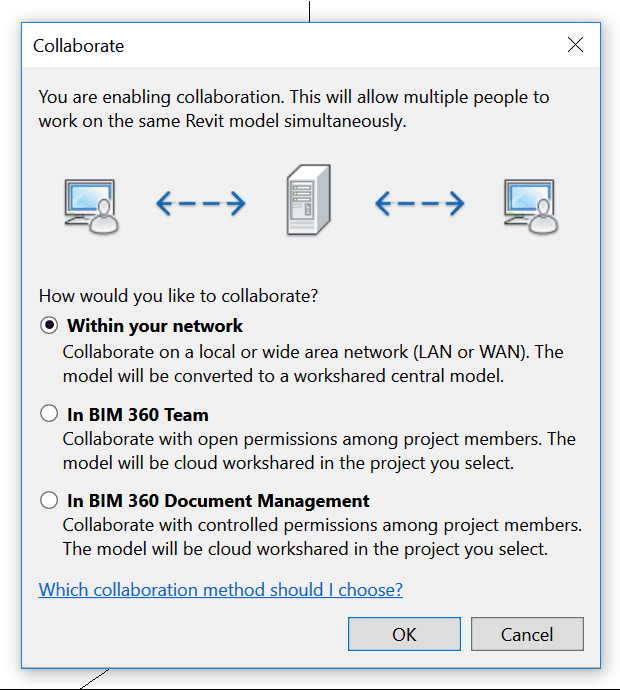
The whole C4R thing with link files is a bit of a challenge at the moment. It will get better, but for now, there are at least two things that don’t match typical desired project delivery:
We essentially have a ‘high trust’ environment, which applies to everyone who is invited to a C4R project. High trust in this context means anyone can edit anything, if they have Editor permissions for the project.
Also, we don’t have folder structures for Revit files that have been initiated on C4R – they are all in the root folder. However, we can store Revit files in subfolders as a kind of dumb link file (not a collaborative model).
So, until it does get better… how do we use the Desktop Connector to link files from a non-C4R folder structure, into a C4R initiated file?
Basically, you take these steps:
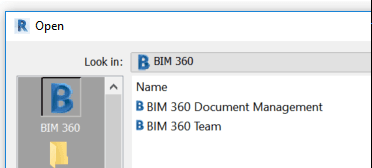
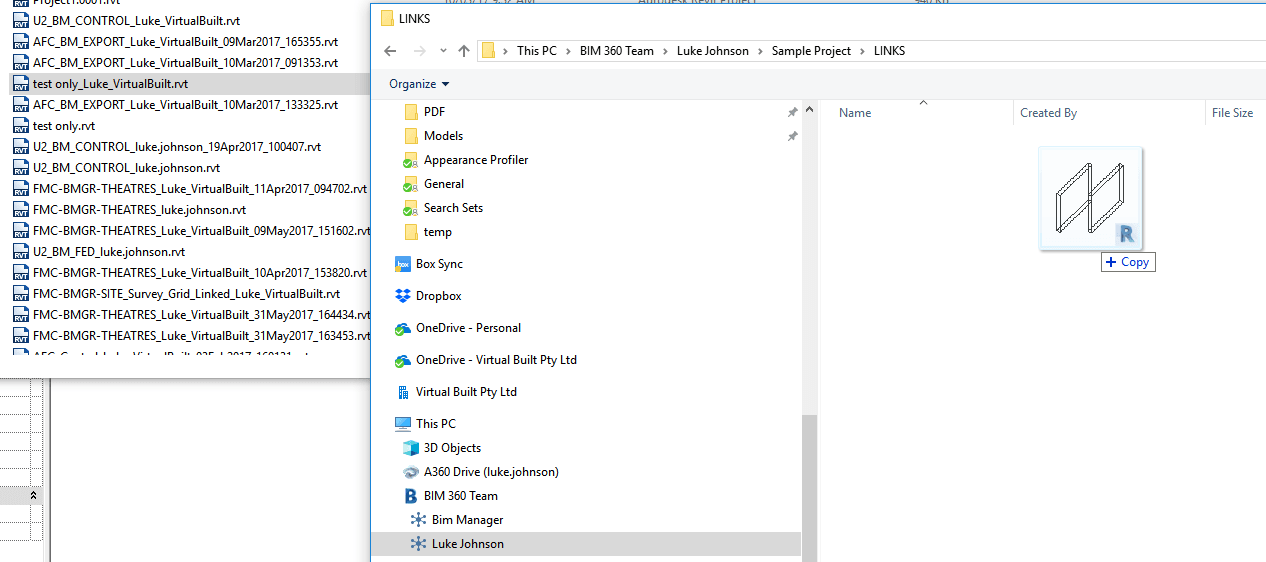
Use Windows Explorer and the Autodesk Desktop Connector to manage your files and folder structure. Navigate to your BIM 360 Team project, add folders, and drag and drop Revit files into those folders.
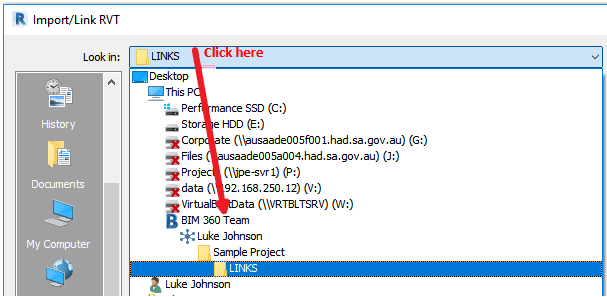
Then, in Revit, in the Import / Link dialog, you can select the ‘BIM 360 Team’ link from the drop down list. You will notice some special things happening after you link one of these files.
Finally, you can observe the new ‘cloud’ pathed Revit models in the Manage Links dialog box. The saved path should start with Autodesk Drive:// and the Path Type is Cloud.
What does this all mean? Really, it just means the workarounds are getting slightly better. We don’t need to maintain a separate cloud storage repository for Revit models (like Box) just for the link files. And we shouldn’t need to go through too much pain to update the link models. Just drag-and-drop the new Revit link model into the correct folder in the Desktop Connector to update the link for everyone in the team.
This feature also works with things other than Revit files. So you can use the same process to store DWG files on BIM 360 Team and link them into your Revit model.
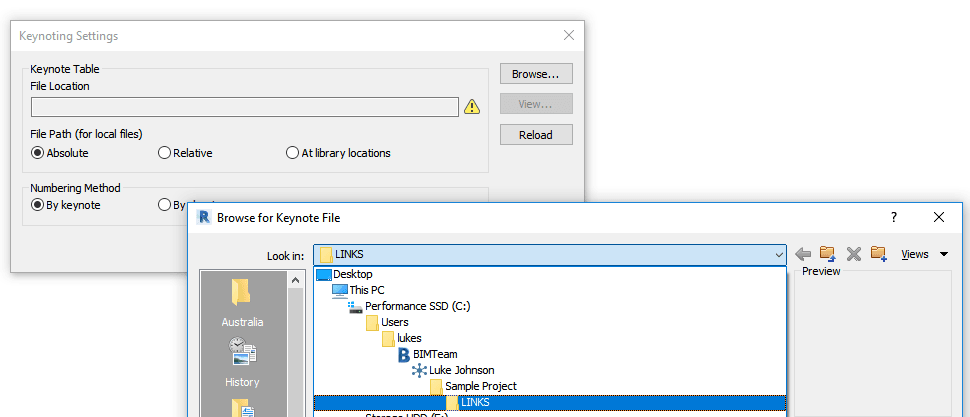
And the same process can be used for things like:
Keynoting Settings
Shared Parameter files
Assembly Code Settings
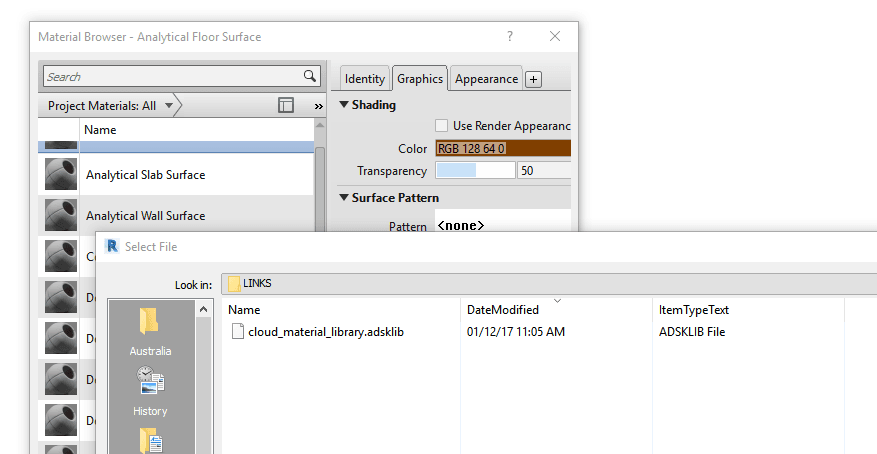
Material Libraries
Pretty much any project-linked resource can now be stored in the cloud, shared with a team, and linked into Revit.
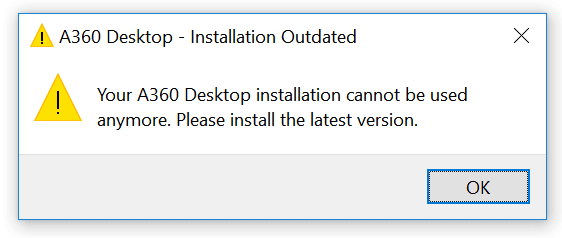
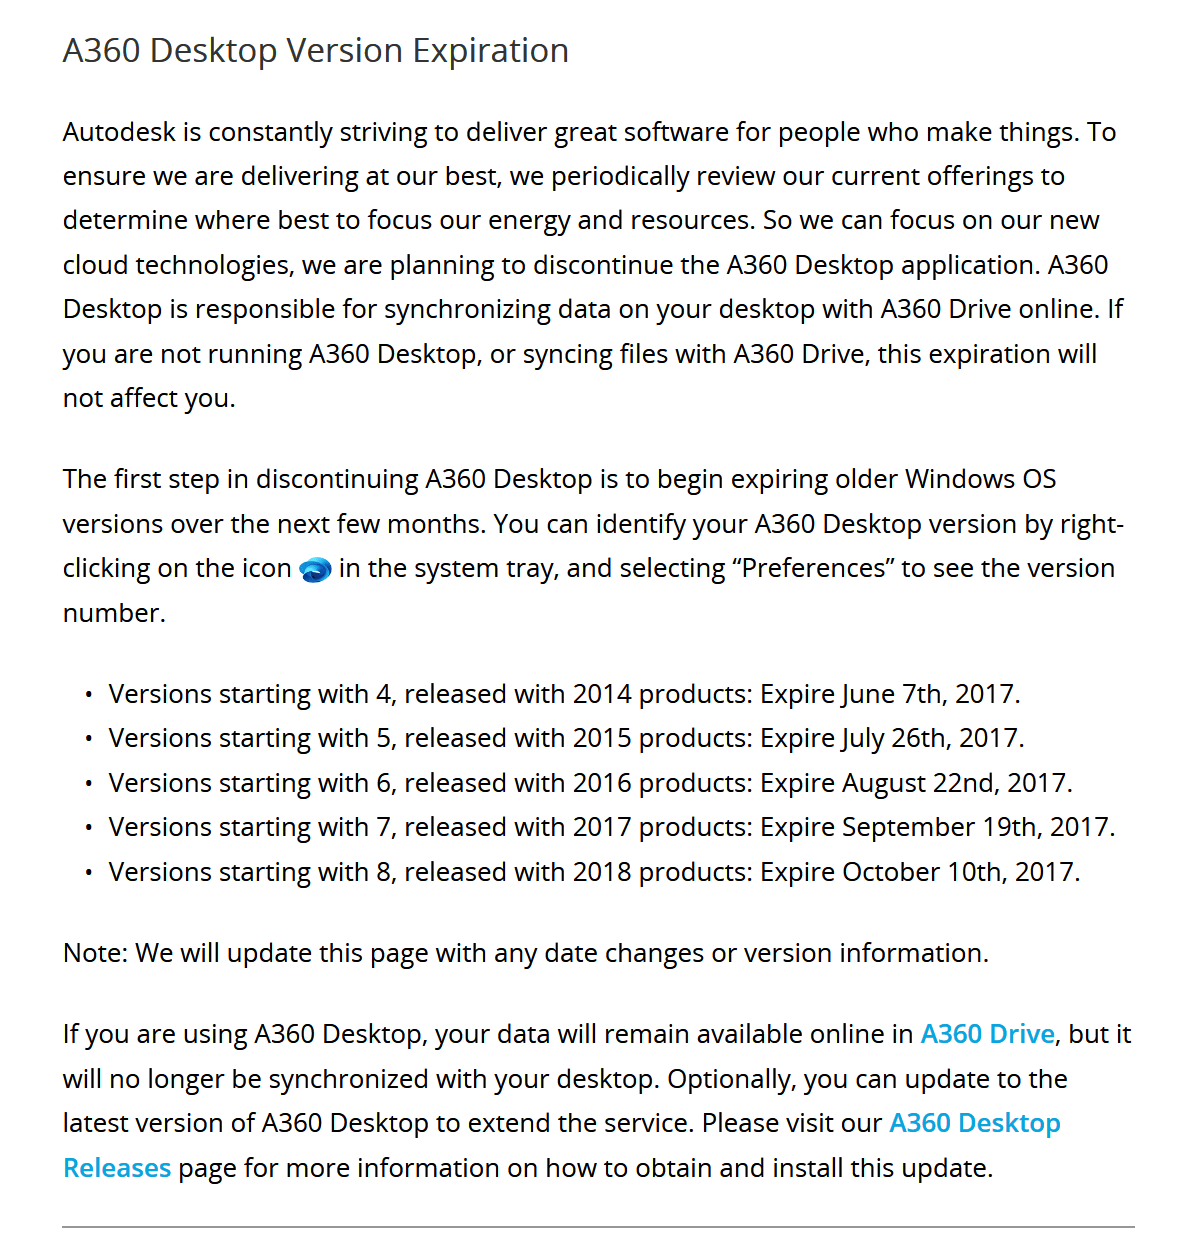
Over the years, Autodesk has provided various means for us to access, sync, backup and share files. Most recently we used “A360 Desktop” (see end of this post) and more recently “A360 Drive“. Autodesk recently released the Autodesk Desktop Connector, which allows you to:
Manage remote files from your desktop
Connect to Team Hubs
Work offline or online
Desktop Connector gives you access to your production A360 data. Using Desktop Connector to modify files that reside in production A360 will automatically sync changes, updating your production file in A360.
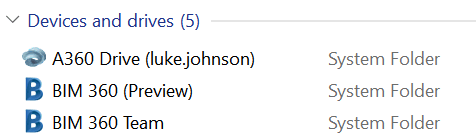
You will see a link on your BIM 360 Team hub like this:
Recently I had an issue sharing colour overrides from Navisworks to BIM 360 Glue. This has been ok for a while, but something broke. After some investigation, it turns out that one of the sub-Models in the Glue merged model was causing the problem.
I typically convert IFCs using the Link method, which results in DirectShape objects. It seems that one of the Architectural files that I converted this way from ArchiCAD to Revit and then to BIM 360 Glue was stopping the colours from getting baked into the BIM 360 Shared View.
To workaround this issue:
Determine what problem model/s you have (possibly those converted from IFC)
Open your Merged Model in Navisworks for BIM360
Hide these problem models in Navisworks scene
Run Appearance Profiler or otherwise apply colour overrides
In the BIM 360 Shared Views pane, click New to make a new Shared View on BIM 360 Glue with the colours ‘baked in’
Go to Glue desktop app and confirm the colours are working
Then, Unhide the problem model here…
And then make a new view in the desktop app
This new view should have all models you want showing, and the colour overrides working ok.
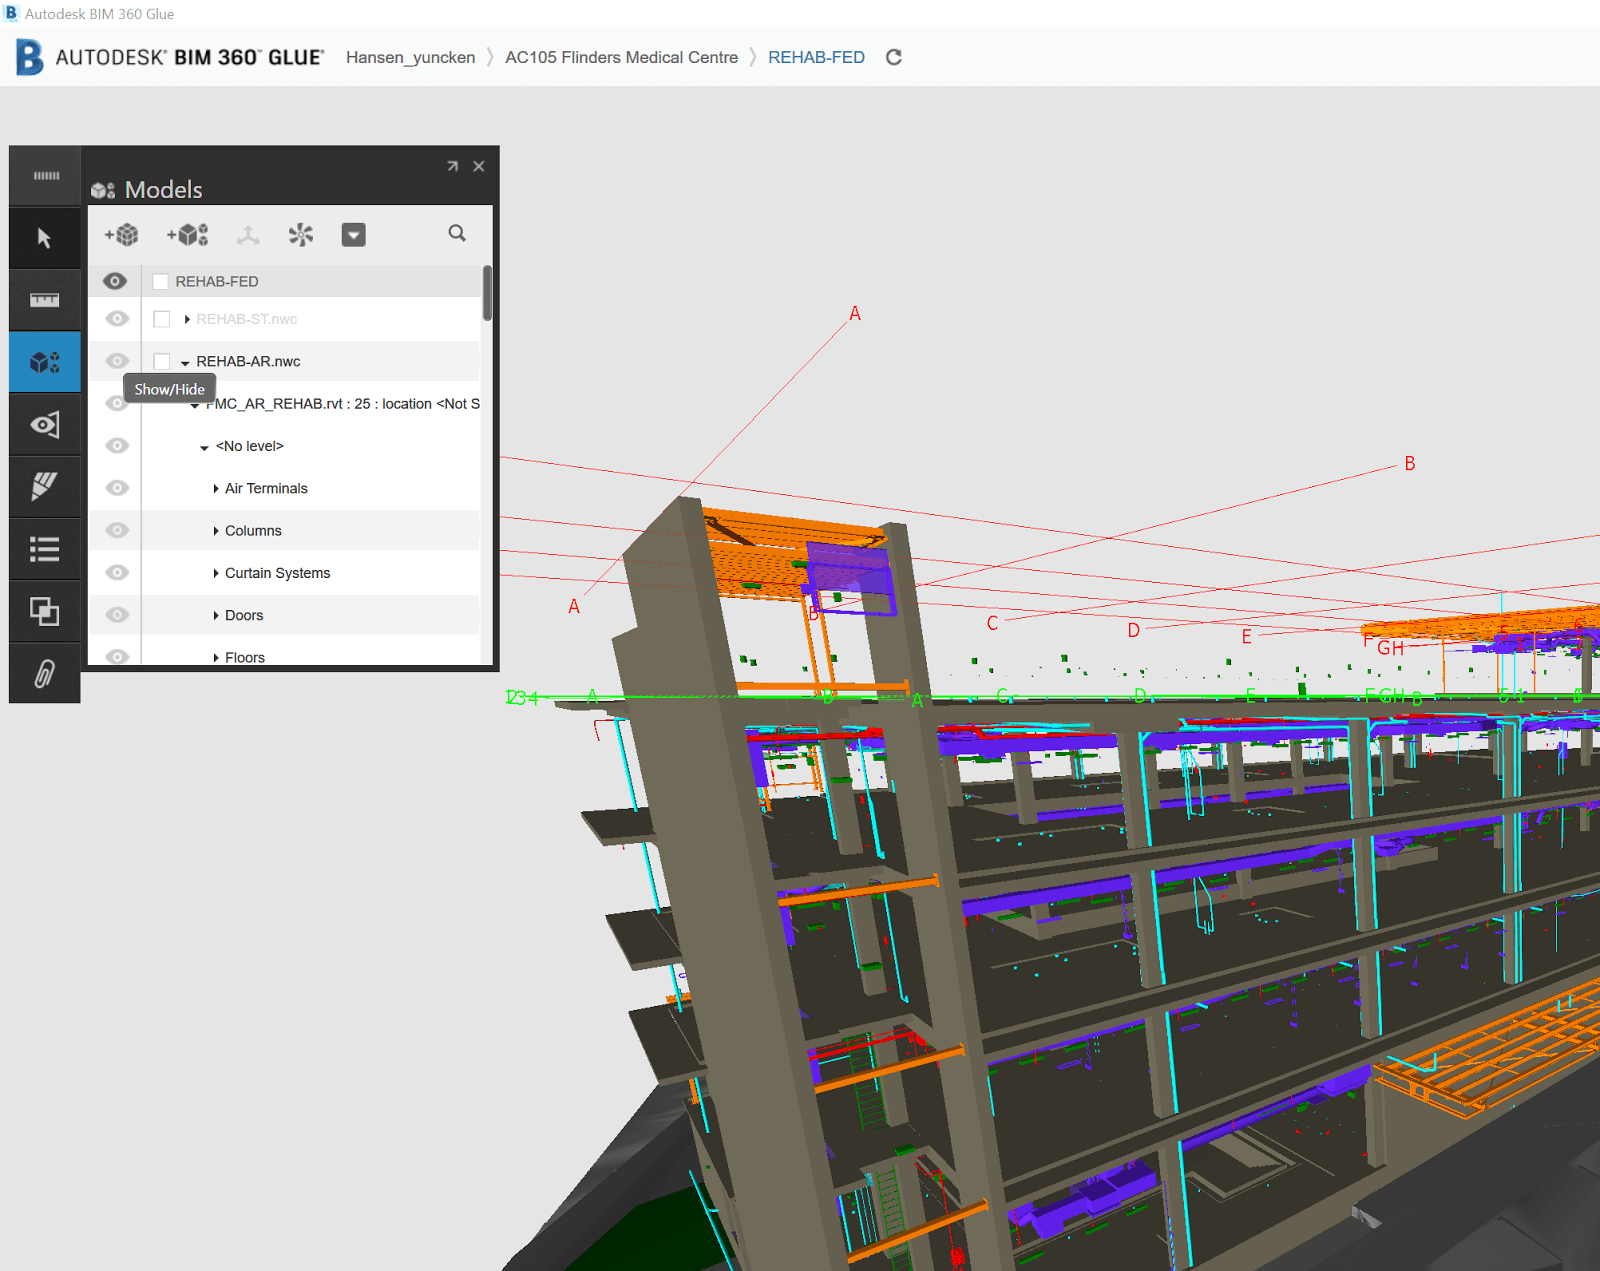
On a related note, you may have seen this warning:
View in model is still processing and some items may not be overridden
It seems that this might put your Glue merged model in a dirty state? Try deleting all views with this message before trying to create Shared Views from Navisworks with colour overrides.
The fact that I’m posting about it means that it probably isn’t really that easy, right? There are a few challenging pieces of the puzzle that all need to come together to get C4R or Collaboration for Revit working on a real project. I just went through this process with a mechanical firm so it is all pretty fresh in my mind.
Firstly, note that A360 Team has been rebranded as BIM 360 Team and will be migrated, more details at this post.
Secondly, Autodesk really wants your whole team (like everyone, every consultant, every Revit link) on Collaboration for Revit. However, out in the real world it is just happening bit-by-bit, and in the meantime some hacks and workarounds can make the process a little bit easier.
A Quick Overview
Ok, so Collaboration for Revit runs on top of BIM 360 Team. What this means is that you need to have an active BIM 360 Team license if you wish to run projects. Then, you need a Collaboration for Revit license for each Revit user who will be connecting to that BIM 360 Team site. You still with me? This also means that persons outside of your firm may connect to your projects, provided they have their own Collaboration for Revit entitlement applied to their Autodesk account.
Once you have the BIM 360 Team license, and the Collaboration for Revit licenses, you then need to “Assign” the Collaboration for Revit licenses out to the users (using their Autodesk login details).
Finally, you need to actually do some stuff, like:
make a BIM 360 Team project,
invite the users,
initiate Revit models, and
get the links working.
Its a lot to take in, so you can see that the blog title is actually a half-joke 🙂 However, we were able to get all this up and running in about 4 hours for one firm, so you can too. Hopefully. Something that will help
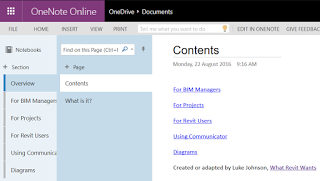
Given that there are a lot of moving pieces, I turned to my favourite research and documentation tool, OneNote. I have created a public notebook that you can view at this link: Revit Collaboration Public Help
Basically all of the steps involved in getting the licensing setup, inviting users, installing the addin, and initiating models onto Collaboration for Revit are in the notebook linked above. I will continue to update and add to this over time.
Any Questions?
Just comment to this post and I will endeavour to answer your question in the notebook, or point you toward the answer.
Now, here are a few other bits and pieces that may be useful, if the notebook doesn’t answer your questions…
Sometimes in Glue addin for Revit will fail with the message “Oneormoregluingerrorsoccurred“.
You may be able to workaround this problem by following these steps:
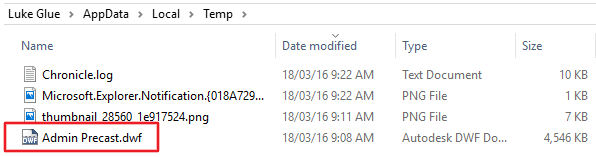
After receiving the error, immediately browse to your Temp directory. To do this, open Windows Explorer and type %TEMP% in the address bar.
Sort by Date Modified
Look for a DWF or NWC that matches the View Name that failed to Glue in Revit
Grab that file, and remove the suffix (usually a few digits) so that the DWF Filename = View Name = Glue Model name
Using the Glue desktop app, upload that model manually
Renamed model ready for upload
This process opens up an interesting possibility… usually when exporting a DWF using plain Revit, it will always use Project Internal coordinates. However, the Glue addin can actually export DWFs with Shared Coordinates (if you choose that in the Glue export More Options dialog).
Using the above steps 1-5, you can ‘find’ this DWF with Shared Coordinates and use it wherever you please… such as in Navisworks.