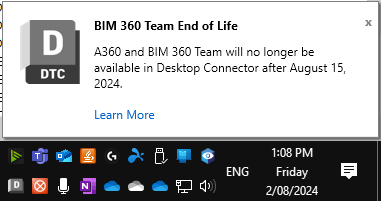
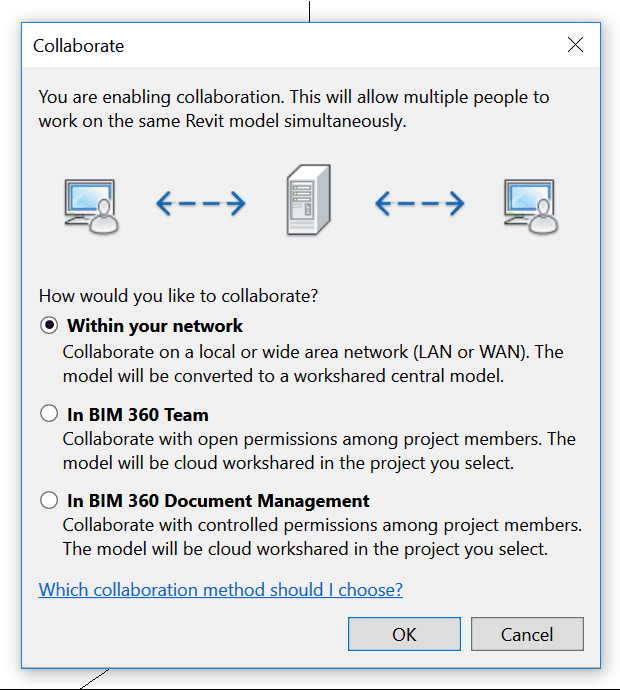
Sometimes you have to say goodbye to old technology to welcome in new ways of doing things. This is the case as BIM 360 Team basically almost dies in 2 weeks…
The key message here is:
A360 and BIM 360 Team will no longer be available in Desktop Connector after August 15, 2024.
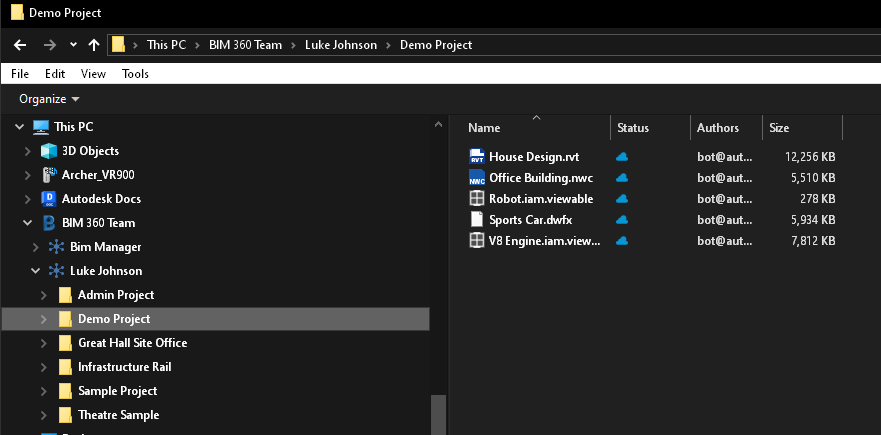
What does this mean? To easily backup files now, while you can, you should:
login to Autodesk Desktop Connector,
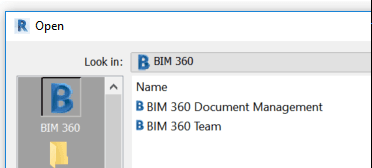
browse to BIM 360 Team, and
drag-drop any files you would like to save onto your local PC somewhere.
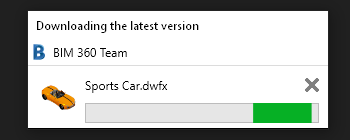
The dialog should pop up as each file copies over:
Following the integration of Revizto with Procore and Box, starting today you can also connect Revizto to BIM 360 Docs and BIM 360 Team. This will allow you to browse BIM 360 hosted files within Revizto, attach them to issues, and convert hosted PDFs to sheets that you can easily markup.
Upload PDFs from your project into BIM 360 Docs, and then automatically sync and convert those sheets to Revizto 2D sheets. You can then markup these sheets with the Revizto issue tracker. You could even use the extremely fast ‘viewport sync’ from the Revizto Revit addin to actually enable those PDFs for 2D to 3D overlay. This potentially provides a massive performance enhancement to the existing Revizto to Revit sheet export process.
Store commissioning documents, specifications, and other project documents on BIM360, and then attach those live documents to issues in the Issue Tracker
Take the BIM 360 Docs offline to your device using Revizto, including on our iPad app. In this way, you can take the 3D model, drawings, and Documents offline to the device and take them onsite easily. All interactions with the issue tracker will ‘sync’ when an internet connection becomes available.
How Do You Enable the Revizto BIM 360 Docs Integration?
Prerequisites:
you should be a BIM 360 Account Admin to install the Revizto BIM 360 app
if you wish to install this integration for BIM 360 Docs / Document Management, you must have access to the Apps tab in BIM 360 Account Admin. From Autodesk website: Note: If you are on an enterprise plan and the Apps or Custom Integration features are not enabled, send an email to bim360appsactivations@autodesk.com to request access. You can also contact support for further help and information.
Install the new version of Revizto (4.10)
Login to BIM360 in your browser to confirm you are a BIM 360 Account Admin
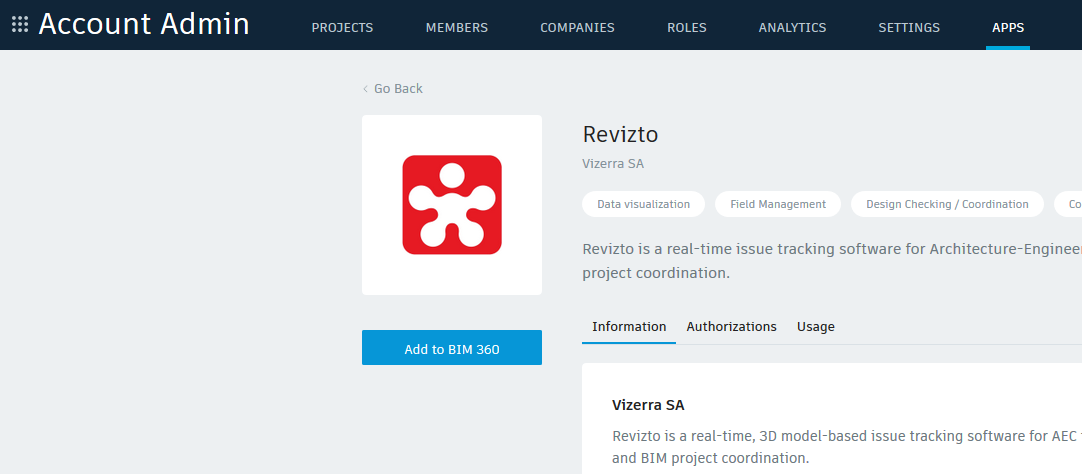
Install Revizto BIM 360 app here – go to Apps tab > Select Revizto> Click Add to BIM 360
> Authorise
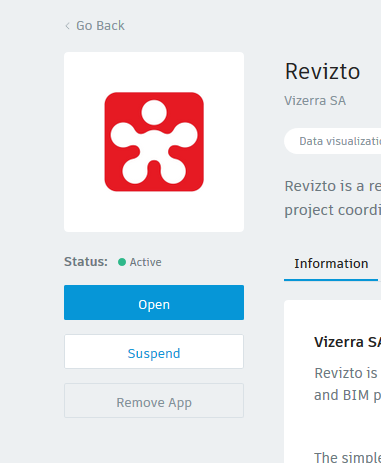
> The app should now be Active
Open Revizto and login to Revizto if necessary
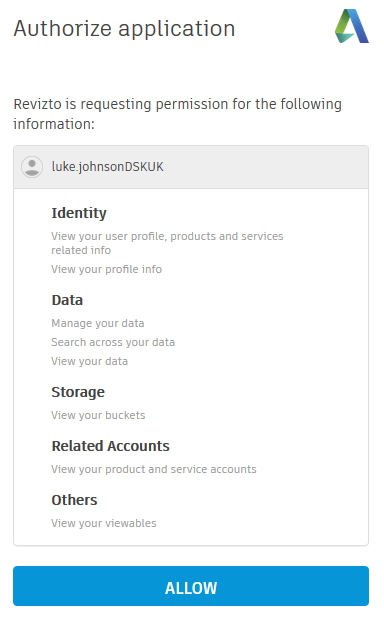
Go to Docs in Revizto and Connect Project to BIM 360: Follow prompts in Web browser:
Allow Access:
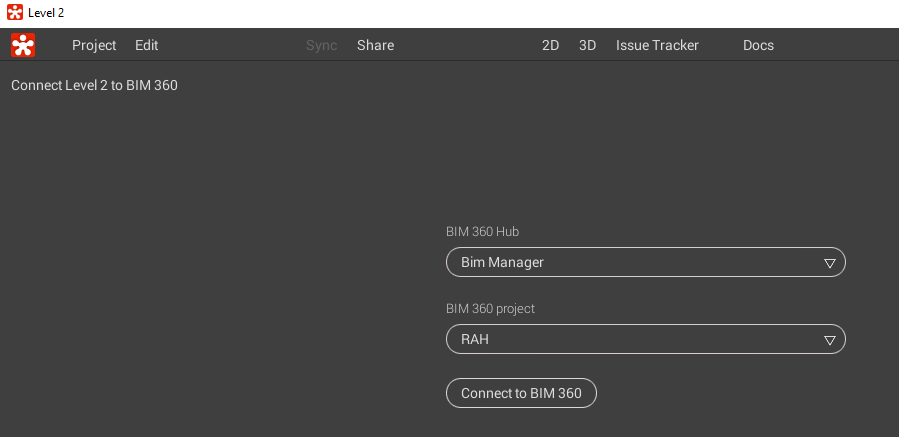
Select your Hub and Project (if you didn’t enable the BIM 360 Docs app, you will only see BIM 360 Teams hubs here):
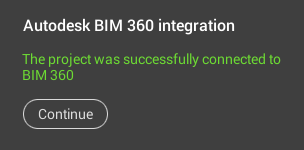
You should receive this message:
Your BIM 360 Docs connection to Revizto should now be active!
There are some other nice enhancements in Revizto 4.10, you see the full Release Notes below.
Release Notes:
Version : 4.10.51843
Revizto app
– New integration with BIM 360 Docs and BIM 360 Team for Revizto Documents. It includes the ability to browse BIM 360 hosted files within Revizto, attach them to issues, convert hosted PDFs to sheets.
– 2D gallery: visual indicators for sheets hosted on Box/Procore/BIM 360.
– 2D gallery: new sheet filter by the number of total issues.
– Image viewer in Issue Tracker attachments and Docs: ability to open any image as 360 panorama.
– Docs: checkboxes for group operations moved to the left side + some other visual tweaks.
– New setting in Cache Management: ability to set max file size for issue attachments downloaded using “Download for field” button.
– Terminology change: Revizto Revisions renamed to Versions to eliminate ambiguity with Revit sheet Revisions. Project -> Revisions dialog is now called Project -> Versions.
– Tooltips in the UI will now show up quicker.
Navisworks plugin
– Export Scheduler now has an option to choose between 2 types of Navisworks licenses: AdLM and BIM 360. Scheduled task will run Navisworks in selected licensing mode.
– Removed the ability to export sheets from Navisworks.
All Revizto products
– Stability improvements and bug fixes.
Other Notes:
Emails sent to Autodesk to get BIM 360 Apps enabled:
I am Account Admin for XYZ – please enable the Apps and Custom Integrations panels as per: Note: If you are on an enterprise plan and the Apps or Custom Integration features are not enabled, send an email to bim360appsactivations@autodesk.com to request access. You can also contact support for further help and information.
Response:
Hi Luke,
I have enabled your Developer Account; you’re all set! – you should now see the APPs & Custom Integrations tabs in BIM 360 Account Admin.
Would you mind sharing which integration is of interest? Or perhaps you’re planning to build a new custom integration? – It’s helpful for us to know what folks are trying to build/solve. – You can explore our existing partner integrations here, or in the APPs tab.
For technical questions about Forge APIs, feel free to reach out to the Forge Team.
Please let me know if you have any other questions.
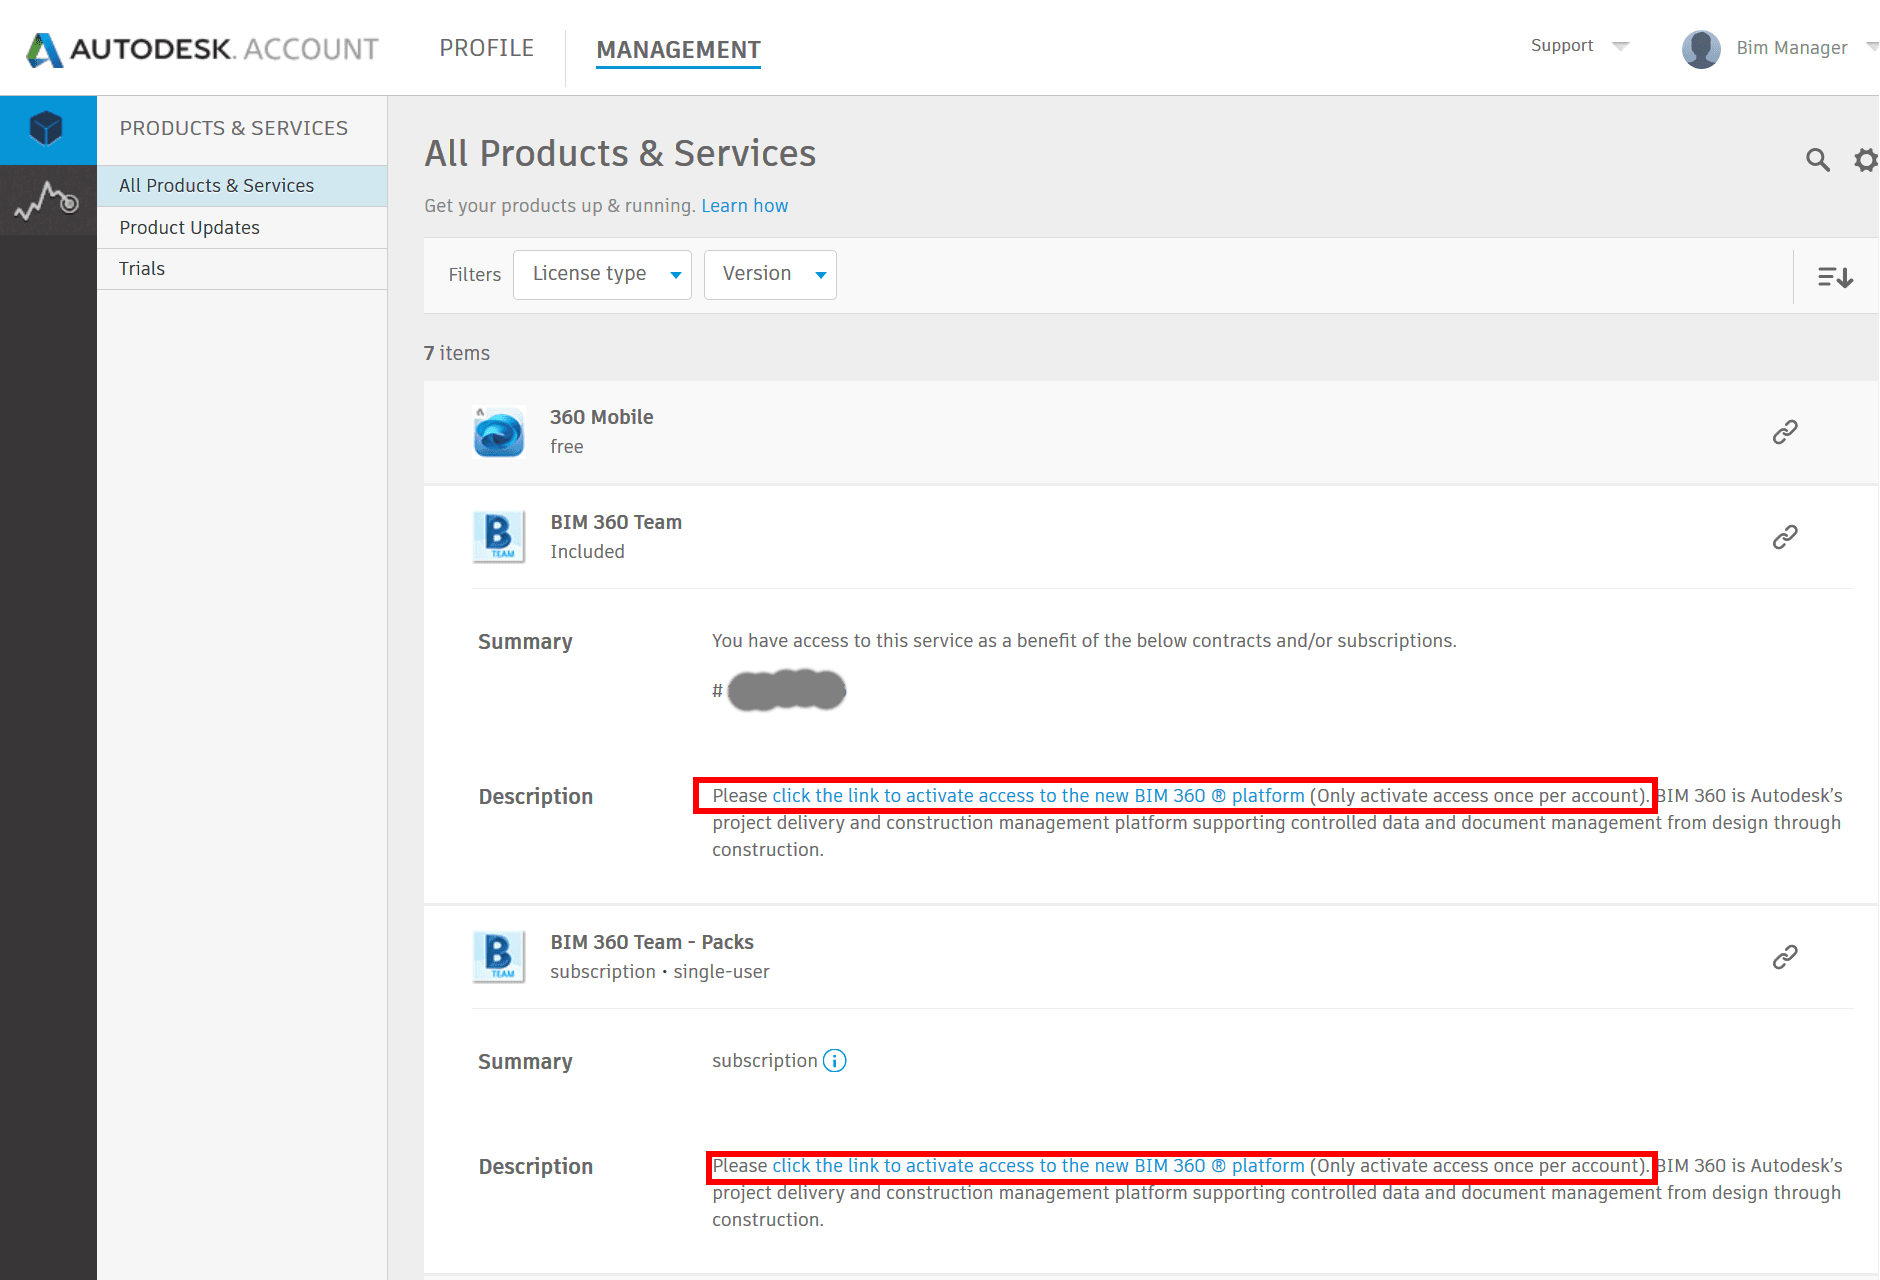
If you are already a C4R user, for a while you can keep working as you are. But the entire platform is shifting from C4R to B3D (BIM 360 Docs), and you will eventually have to make the leap. In the long run, it will allow for more control, like folder-level permissions, so for big projects it is going to make a lot of sense. For now, there is some confusion out there (like in this Twitter thread), so here are some basic steps to activate a new BIM 360 Docs account, setup a Project, and then invite some collaborators into the project.
First, you can go to your account and use the special link to create a new BIM 360 Docs workspace. That is, if you are starting fresh in the new platform.
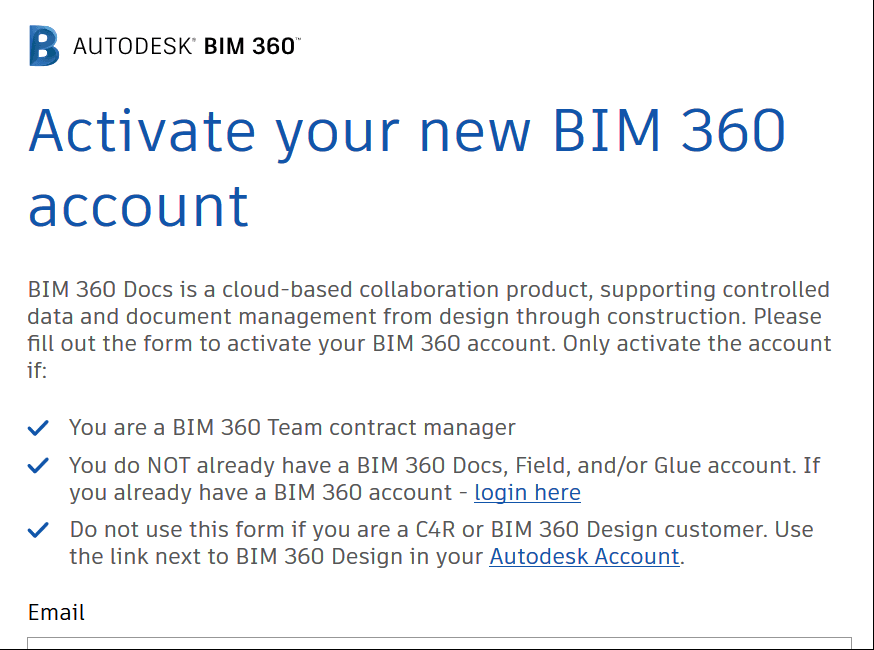
Here is the activation form notes (read carefully). Note: the links are different depending on how you activate it. For example, if you have an existing C4R account and you want to ‘transition’, you would use the relevant activation link for existing C4R customers :
New BIM 360 workspace
Transitioning from C4R
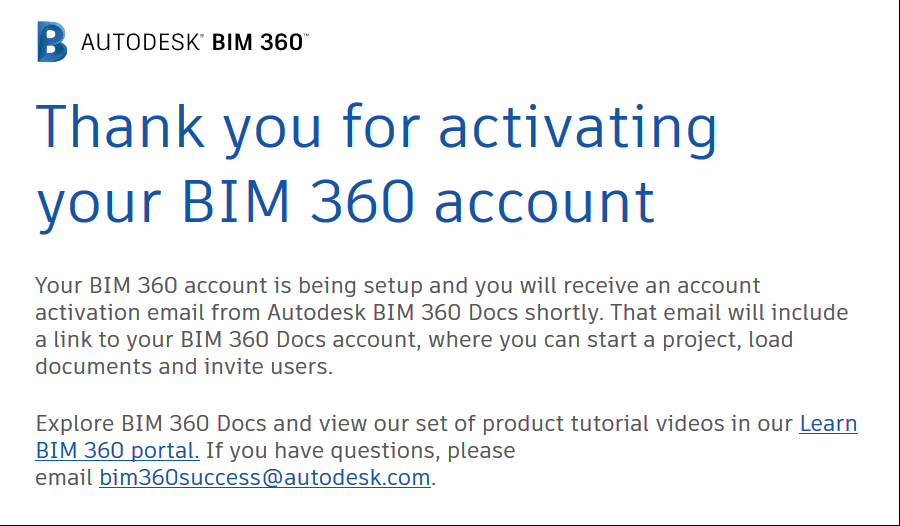
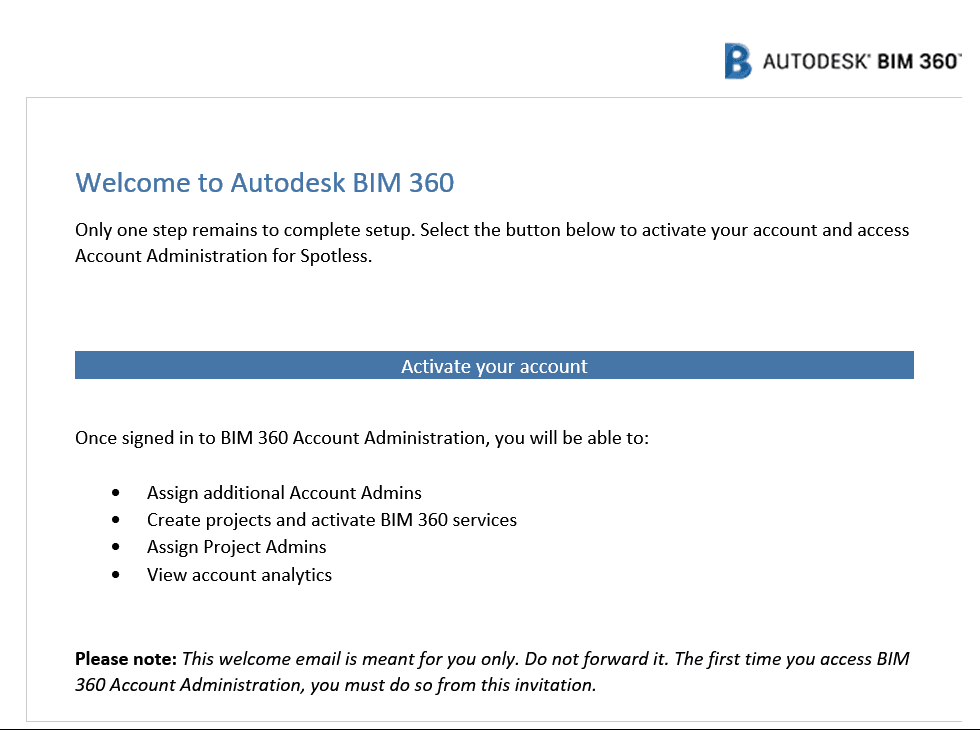
Once done, you should have a new BIM 360 account:
And you just have to click the activate link in your email:
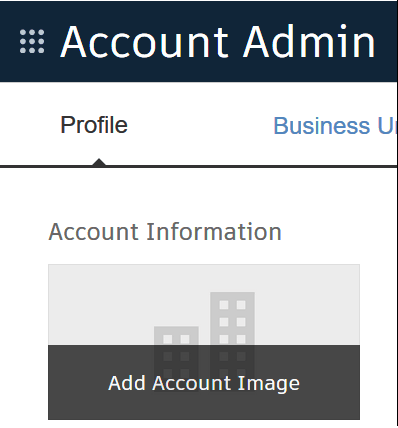
After that, you should be able to login to your BIM 360 workspace and start setting up some company settings, like adding a Logo and Business Units: