I’ll start:

Can’t post without mentioning Revitlookup – I know its free, but you’ll be surprised what you can do with it.
What Revit Wants

I’ll start:
Can’t post without mentioning Revitlookup – I know its free, but you’ll be surprised what you can do with it.
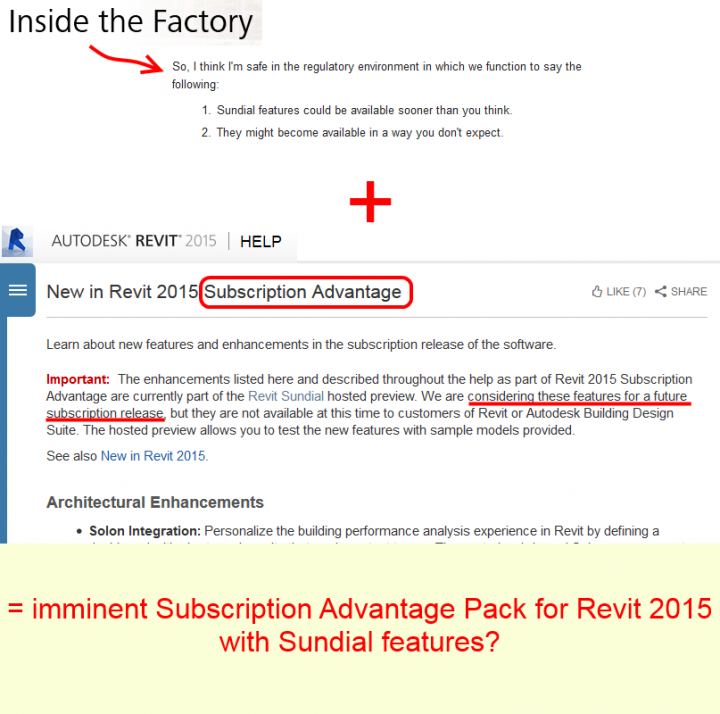
Pure speculation here, but all signs point to a Subscription Advantage Pack for Revit 2015 with some awesome Sundial features:

Sources:
Inside the Factory: So, When’s Sundial Coming Out?
and
Help: New in Revit 2015 Subscription Advantage
You probably won’t find Autodesk 360 Desktop sync install package for download online, but you can install it “standalone”.
I have previously described how to use Autodesk 360 as a cloud storage location for Revit (and any application) here:
Access Autodesk 360 files in any application, including Revit
Some paths that may assist – these were from BDSU2015:
Building_Design_Suite_Ultimate_2015_English_Win_64-32bit_dlmx64ComponentsCloudsync
Building_Design_Suite_Ultimate_2015_English_Win_64-32bit_dlmx64ComponentsCloudsyncAdSync.msi
Charlotte Pipe content for Revit:
http://www.charlottepipe.com/revit.aspx
“If you need a complete line of Charlotte Pipe Products, they have been grouped for download…”
Could also try:
https://www.mepcontent.eu/Product/localization=1-_discipline=9-P
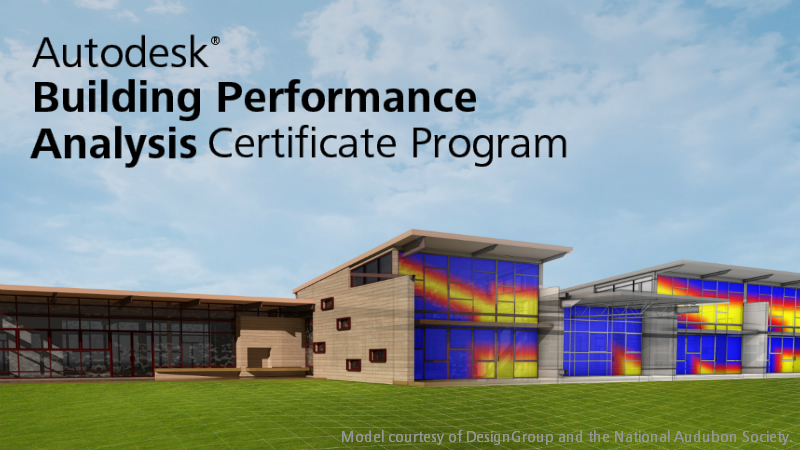
I received the following list of links and resources from a helpful Building Performance Analyst at Autodesk:
· Autodesk FormIt Product Page: 3D Conceptual Design. Any time. Anywhere.
· Building Performance Analysis Blog: Read all updates on BPA tools on this blog.
· Revit 2014 Automatic Energy Analytical model Creation and Analysis. · Autodesk Project Solon Dashboard for Revit.
Get more information about Lighting Analysis for Revit from the following places.
· Lighting Analysis for Revit Product Page
· Lighting Analysis for Revit Students Page
· USGBC Reference Page
This latest version 1.23 has the following updates and new features:
· Analysis options now include LEED v4 EQ credit 7 option 2 in the Run Analysis dialog
· New Analysis Display Styles are added for LEED v4 and other styles
· Schedules are created using field id’s instead of text to fix bugs with some foreign language installs
· Schedule names are changed to include “_” in front so they are organized better in the Project Browser
· AVF view settings (9am vs. 3pm) are preserved when clicking Generate Results
· Analysis Display Styles are preserved except if type of analysis changed, and then a corresponding analysis display style will be selected automatically
· Phase filter is set automatically for view plans (unless override flag is unset in config file)
· View templates are turned off when _Lighting views are created (unless override flag is unset in config file)
Other reference material:
· Revit BPA Help – Lighting Analysis help topic
· Blog Intro – Includes video with older but still relevant workflows.
· Video0 – First instructional video on the release 1.0
· Video1 – Hour long video including Rendering Illuminance and Lighting Analysis workflows. · Article – Revit community overview article.
Interestingly, this hotfix comes in the form of a macro to clean up your files. The issue as stated on the Autodesk Knowledge Network is:
In Revit 2015 the performance of some file is very slow. This means that
opening material browser may take an extremely long time or Revit will
hang. Typically you cannot execute the “Purge unused elements” command
as well, because Revit will freeze.
…
Every time you edit a family and load it back in > overwrite > the
number of materials will grow substantially. For example after 5 or so
subsequent reloads in our sample file it jumps from 15551 to 186623
materials.
…
We have seen this most commonly when editing titleblock familes in the German and Japanese version of Revit.
Download the macro:
DeleteStandardMaterials.zip
Please go through the process below to clear out the extra materials:
After these steps use Save As to save the file with a new name.
Here are 2 videos showing the steps:
https://screencast.autodesk.com/Main/Details/5bfa2fff-3443-45e0-a156-4c530c594c28
https://screencast.autodesk.com/Main/Details/fb7eaa0a-b529-47b7-9e35-7d42c3944a0b
Main page:
File performance problem in Revit 2015 | Search | Autodesk Knowledge Network
Heads-up:
Be Revit – Do Family Planning: Revit streikt / Datei wird immer größer und reagiert nicht mehr?
Short version:
Long / original version, this idea and steps above taken from this post by IMAGINiT:
View Titles for Views Rotated on the Sheet – IMAGINiT Building Solutions Blog
I’ll be the first to admit that this is a bit clunky, but it does work:
Another option using Element ID, may suit your workflow better:
I am moved to join ADN and get into the Glue API, more on that later…
From MRUG:
You can download the back catalog of video Revit tips and tricks from both the Manchester and Midlands (now wound up) Revit user groups from prior to meeting 8. After meeting 8, tips and tricks are uploaded on an individual meeting basis. Videos are not narrated
Tips and tricks archive download (586mb)
There is lots more good stuff, videos and presentations on many Revit topics including Adaptives, Revit Standards, Revit and Construction and more at the main events page:
Manchester Revit User Group – MRUG
Heads-up via @BarbosaMCJ and @BenPMalone
https://twitter.com/BarbosaMCJ/status/491899892671856640
Direct Dropbox links and other links (for download manager etc):
https://www.dropbox.com/s/31hf3msqzfscv0o/Revit%20Tips%20and%20Tricks.zip
https://www.dropbox.com/s/q5yhekhgvpm7ihn/M11%20Adaptive%20Components.pptx
https://www.dropbox.com/s/aknwnkmqsy77r4k/MRUG%20The%20COBieNATOR.pdf
https://www.dropbox.com/s/o6bom0zk6754d2s/M11%20Tips%20and%20Tricks%201.pptx
https://www.dropbox.com/s/549accch2wyys3j/John%20McDermott%20-%20MRUG%20REVIT%20PRESENTATION.pdf
https://www.dropbox.com/s/zzajdrwafp8w8l1/BIM%20Coordination%20for%20Real.pptx
https://www.dropbox.com/s/hl5221kosncqoq3/CI1934-P%20-%20Civil%20and%20Building%20BIM%20Coordination%20for%20Real%20Handout.pdf
https://www.dropbox.com/s/w85nnsx14s9wgee/M10%20Tips%20and%20Tricks.pptx
https://www.dropbox.com/s/29lyovnfkyqv2lh/002-131110%20AH%20MRUG%2009%20Revit%20%26%20DfMA_APW.pptx
https://www.dropbox.com/s/y70xwhuynbqrrkh/003-MRUGBIMmaturity.ppsx
https://www.dropbox.com/s/yx1pv4alcf3zqqq/004-Content%20Creation%20Standards%20Management.pdf
https://www.dropbox.com/s/8257r34s9b7tiiv/M9%20Tips%20and%20tricks.pptx
https://www.dropbox.com/s/5u7q4p2fo1pu6al/BIM4Real%20MRUG.ppt
http://www.bim4real.co.uk/Downloads/e1/BIM4Real%20Summary%20v1.0.pdf
https://www.dropbox.com/s/gw68asu9itqhhyd/20130321_BIM_CASE.ppsx
https://www.dropbox.com/s/w6xww7te3can7ov/MRUG_-_The_I_in_BIM.pdf
https://www.dropbox.com/s/razz66dm3sz932r/MRUG_Virtual_Orangery_12-12-12.pdf
https://www.dropbox.com/s/jxyfoeb6nphdy71/M4%20-%20Ramboll%20LAM%20Showcase.wmv
https://www.dropbox.com/s/vwfq89oa5euz96a/M4%20-%20Soluis_DesignVisSamples_12_.pdf
https://www.dropbox.com/s/m0y2u09hduxwhk4/M4%20-%20MRUG%20Python.zip
https://www.dropbox.com/s/p4ng8wl83s9kwe4/MRUG.ppt
https://www.dropbox.com/s/1jcz37bz9qsi1h0/Uponor%20MRUG%20Presentation.pptx
https://www.dropbox.com/s/a0ncez4szoap54i/Revit%20Coordinate%20Systems.ppt
https://www.dropbox.com/s/53yivsesqivle8s/M2%20-%20Salford%20Uni%20Demo.pptx
https://www.dropbox.com/s/fy5msgbwi4fwkqb/M2%20-%20111109-Presentation_space.pdf
Have you ever tried getting thumbnail images to show up for Entourage families? After reading a few tweets on this recently… I’ll admit, using a Journal “script” to open family, switch to Elevation View, enable Realistic mode and save the thumbnail is not too shabby (by Aaron Maller):
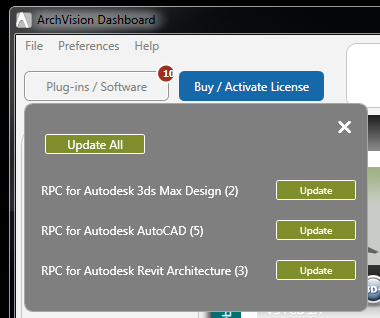
While the above method is definitely cool, it still relies on you having a good RPC Entourage library in the first place. So, are you looking for a plug-and-play software solution to manage all of your Entourage and RPC content? And do you want to be able to preview the RPC, and then use it in Revit or Photoshop?
Then you may want to check out the latest update released for Archvision Dashboard. I’ve posted recently about how easy the RPC creation is now – it is literally drag and drop, and pretty much automatic, meaning that your potential for generating custom RPCs is virtually unlimited. Now with the preview mode and Photoshop drag-and-drop integration, Archvision Dashboard is starting to feel like one of those things that just “makes sense” if you are doing any kind of rendering and presentation work in Revit (and / or Photoshop).
Here’s a video of the new Viewport feature:
Download it from this page
The next time you fire up your ArchVision Dashboard you should see a prompt to update to the latest version (v 2.1) which includes the new Viewport viewing mode.
Viewport for Dashboard not only lets you preview and spin around any 3D or 3D+ RPC but you can also drag & drop directly into applications like Photoshop! Just hit the Render button and drag the thumbnail into Photoshop. Viewport for Dashboard improves the workflow for using RPCs in Photoshop and does away with the need for the Photoshop Viewport plug-in.
This new version of Dashboard also include a new Filters feature which works hand-in-hand with Channels letting you drill down to the right content in just a few clicks.
…
via email
Previewing RPCs and using them in Photoshop just got easier! We’ve added a new viewing mode within Dashboard called Viewport. Not only can you preview and spin around any 3D or 3D+ RPC but you can also drag & drop directly from Viewport into applications like Photoshop! Just hit the Render button and drag the thumbnail into Photoshop.
…via email
Link:
Archvision Dashboard
In case you missed it:
Autodesk 360 Rendering Support Enabled for ArchVision RPCs http://t.co/KZm5FpxjhL #revit #bim #cloudrendering #autodesk
— ArchVision (@ArchVision) May 21, 2014
also:
Drag and Drop updated build of ArchVision Dashboard available that just came out as a ‘pull’ update. This includes the admin license panel tools and also has Drag & Drop enabled for Revit 2013 and later / 3ds Max / AutoCad. We expect to deploy a new RPC creation feature at the end of April, where you will be able to take any 2D image with an alpha channel, drag it into our creation tool, assign a name and height and have an RPC available to use immediately in any supported application.
You may also be interested in my previous posts about Archvision:
https://wrw.is/search/label/archvision