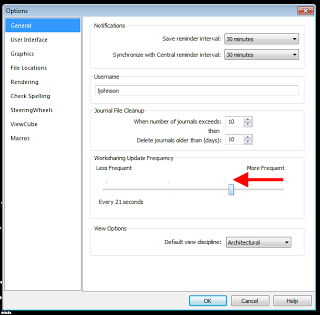
When working with a large project, you may often close all or most Worksets for performance reasons.

Secret #1

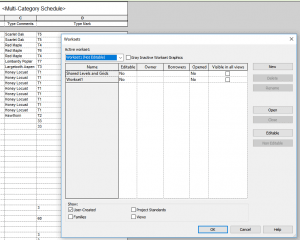
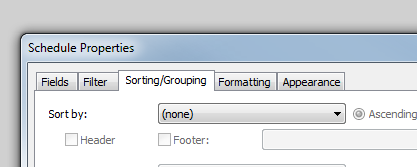
Did you know that objects still show in Schedules when the Workset is closed? And even if the Visible in all views checkbox is unticked?

Additionally, the Schedules dialog does not give us an easy method to filter by Workset. Sometimes this results in some weird workarounds like using Dynamo to copy the Workset name to a parameter in each element (yes, I have seen this on real projects).

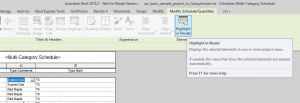
But what happens if we try Highlight in Model now, with these elements on closed worksets?

Secret #2

Interestingly, Revit will immediately and transparently open the Workset that the object resides on. This happens even if Revit can’t find the object in a view (such as because the Workset is set to be invisible in all views). You will not be warned or asked about this ‘open Workset’ action.

This automatic action does not create an entry in the Undo list, and therefore you must manually open the Worksets dialog and close the Workset yourself.

I’ll leave it up to you to decide if this is desired functionality or not? But it is definitely something to be aware of when working with Revit Schedules, Closed Worksets, and the Highlight in Model button.

When working in Revit with linked files and worksets, it can be pretty exciting / maddening to figure out where an element actually is. I’m not talking about the 33 Reasons Something Might be Hidden (and here), the Order of Linework Overrides, Places to Hide Things, or even the View Discipline.  I’m talking about whether or not an object is actually even loaded into the Revit session for viewing purposes…

Consider this hierarchy and let me know what you think:

“I can’t find this object, is it loaded?”

  • If the current model is non-workshared:
    1. Does the object reside in a link?
    2. Is the link loaded?
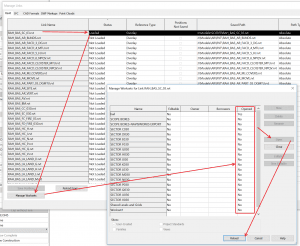
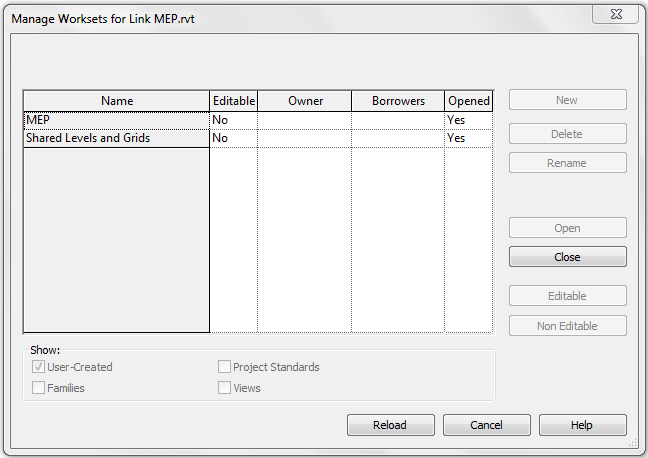
    3. In Manage Worksets for the link, is the relevant Workset open?
  • If the current model is workshared:
    1. Is the object in the current model?
      • If yes, is the Workset it resides on open?
    2. Does the object reside in a link? If yes:
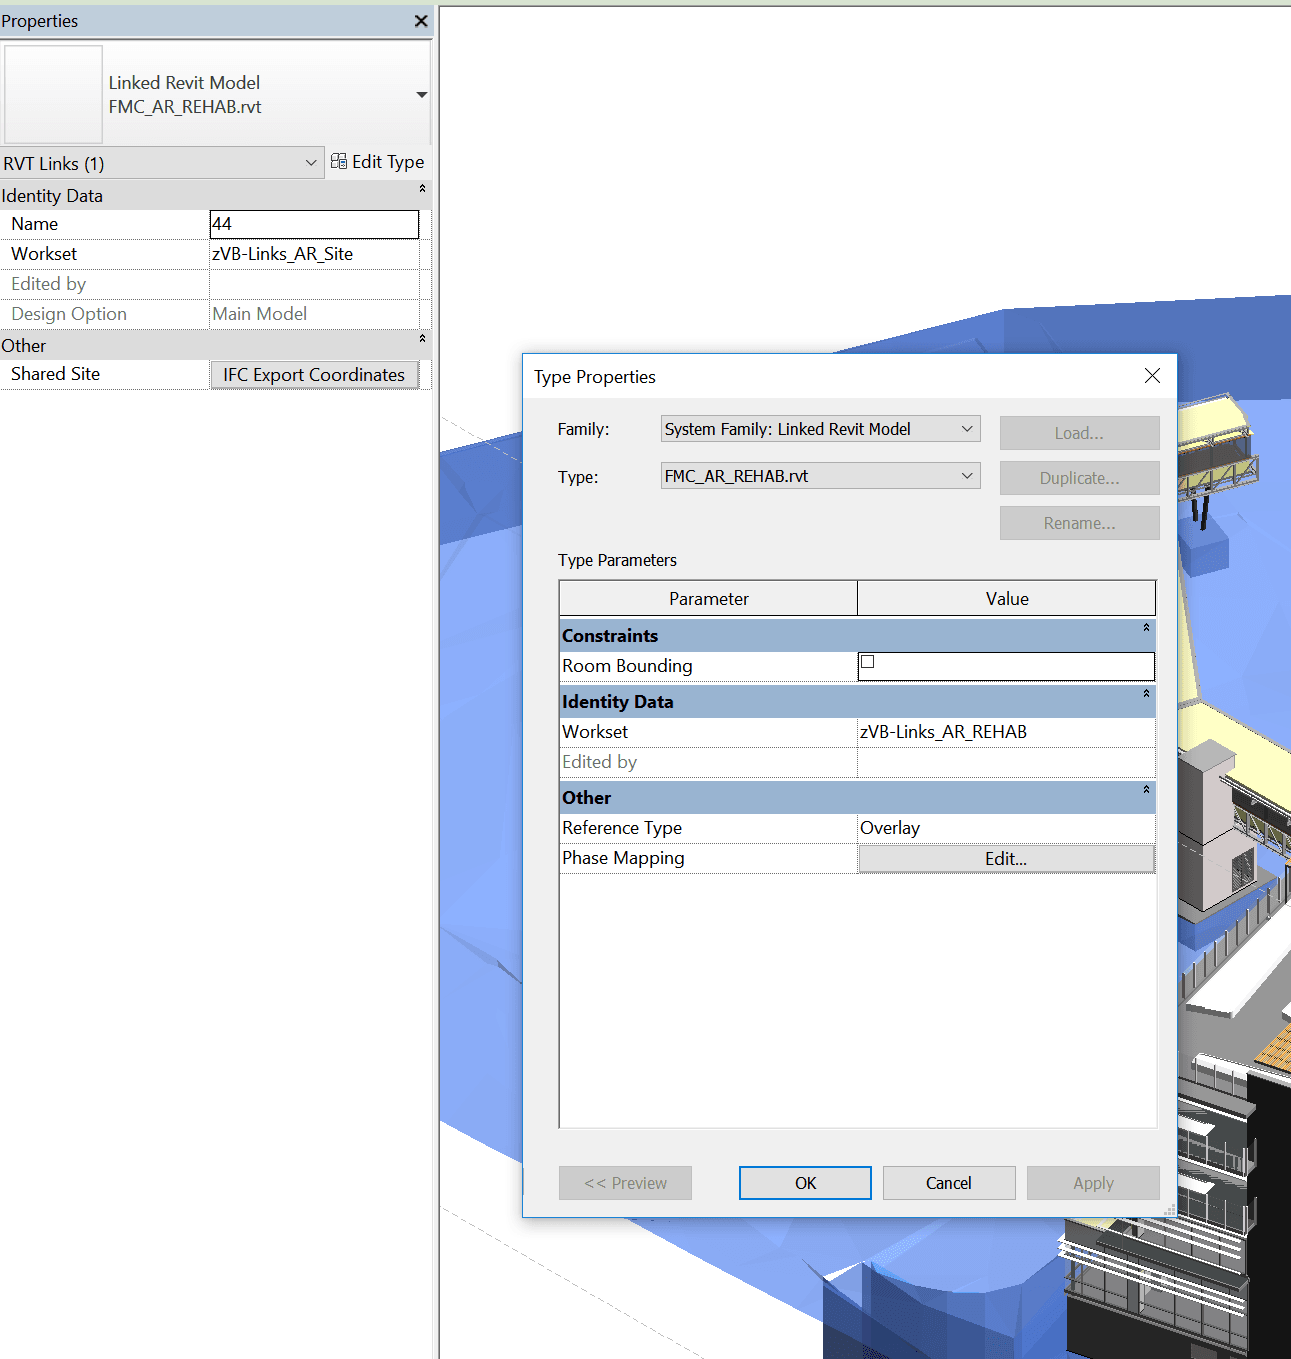
      • Is the Link Type Workset Open?
      • Is the Link Instance Workset Open?
      • Is the Link loaded in Manage Links?
        • In Manage Worksets for the link, is the relevant Workset open?

The above does not even consider the next level of nesting (Attached Links to a Link loaded in the current Host Revit model).

Enjoy Revit everyone 🙂

In Revit, each Link is bound to both a Type and an Instance. So you can have one Link ‘Type’ – relating to a single RVT file that is linked into the project. But it can be placed multiple times in the project, thus having multiple instances. In workshared projects, the Type and the Instance can belong to different Worksets.

Did you know you can use Linked Views to display two identical copies of the same linked model in different ways?

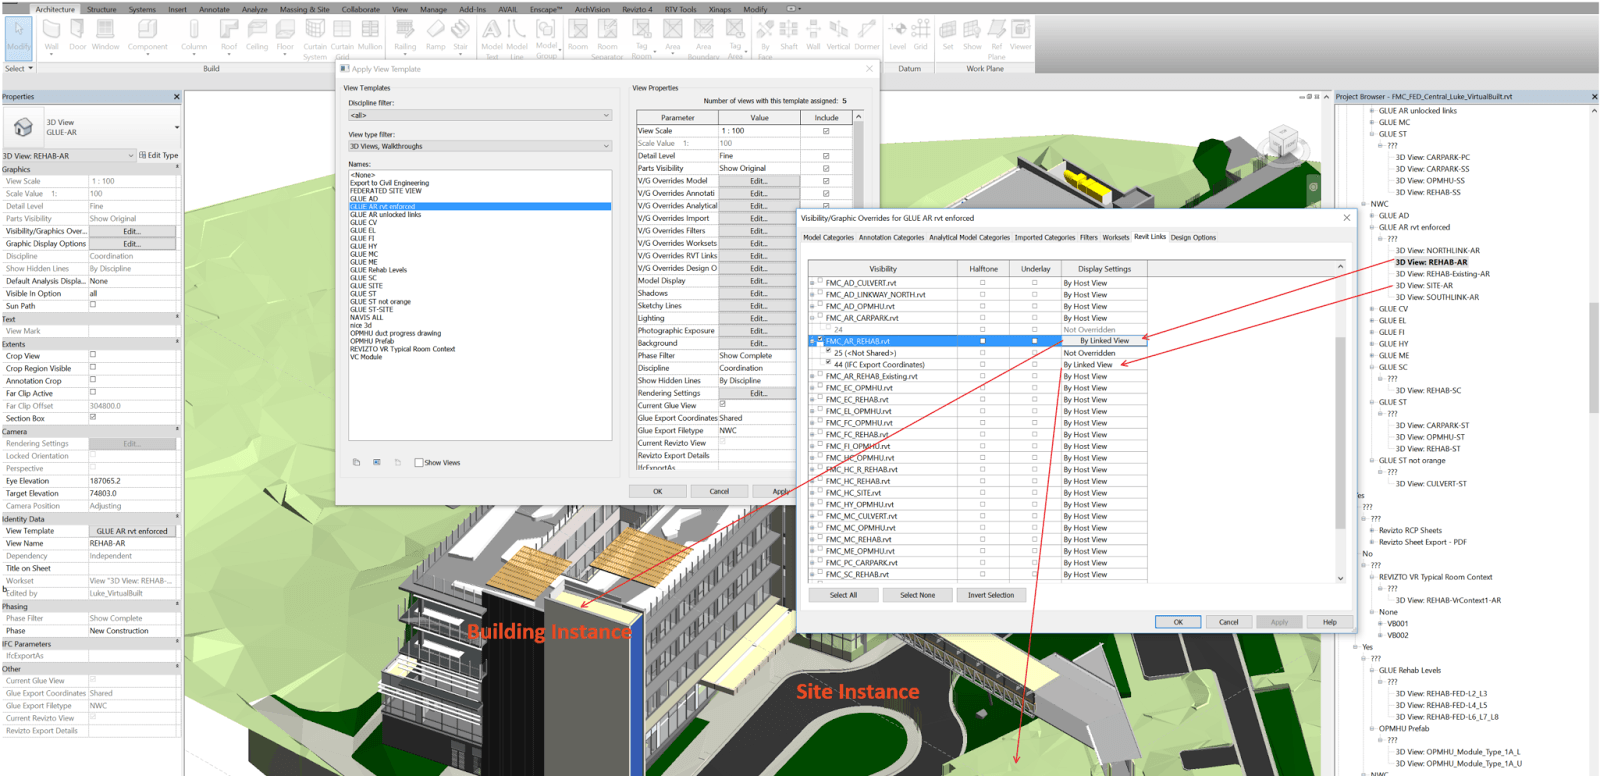
To add control, you should create 3 worksets – 1 for the Type, and 1 for each Instance, as shown below:

Then, set up two different Linked Views in that linked model. In this particular case, I want to use a model converted from ArchiCAD to a single Revit file. But I want to be able to separately load and display the Site objects, and the Building objects. So I have an Link Instance for each, and linked views for each. The whole rig can be seen in the image below.

Using the worksets, I can separately Load / Unload each Instance (closing a Workset unloads any Link instances on that Workset from memory). And using the Linked Views and Overrides for the Instance, I can display each instance as I like. I can also load both instances and show both in a ‘combined’ view.

Final note: Link Instances can be located in different positions in the Host model, and they can have different Shared Coordinates. Using the methods above, you have a lot of flexibility to be able to use a single linked Revit model in many different ways…

There is no immediately easy way to override the colour of an entire Revit Link. Of course, you can set up a View Template and override all of the individual subcategories, but that can get time consuming when working with many links…

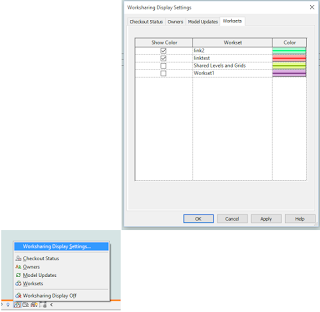
Worksharing Display Mode gives us a quick way of visualising Worksets. What if we put each Revit Link on its own Workset? Then if we set Worksharing Display Mode to Worksets, these Links are overridden with the Workset colours selected in the dialog:

Unfortunately, the Worksharing Display Mode setting is a temporary override (notice the border around the view?), and it will be switched off when we close and open the file. However, the colour choices will be retained. Is there a way we can quickly ‘turn on’ the Worksharing Display Mode for all views in the document? Perhaps this could be done just prior to printing, or at the start of an editing session?

Enter… you guessed it… Dynamo.

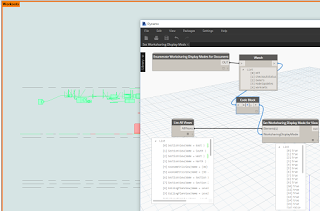
I made a node to Enumerate Worksharing Display Modes available, and another one to Set Worksharing Display Mode for View. Finally, I adapted the archi-lab Get All Views node into a List All Views node. Now, we can set them in one click:

And a Screencast:

Each time you print, you will be prompted to “Leave the mode on and print…“, but the colour override will print fine 🙂

Update:
Colours will transfer using Transfer Project Standards, as per:
Transfer Project Standards

If you populate a project with the desired worksets, usernames, and colors you can automatically transfer most of this data over to another project.  Under Manage > Transfer Project Standards, there is a new option for Worksharing Display Settings.

Keep in mind this will not transfer over workset names from one project to another. 

It will however transfer over workset colors, should the same name workset appear in both projects.

Each category has a Show Color column with a checkbox; these are project specific and do not transfer.
Revit 2012 Worksharing Display Modes and Transfer Project Standards – The Revit Clinic

It is pretty difficult to change the Workset of Pipe Insulation. The Properties Palette allows you to change them one at a time (but not multiple), while the method I posted about previously can change multiple Pipe Insulations to a different Workset, but it didn’t have a nice filtering mechanism.

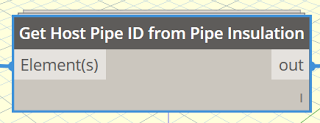
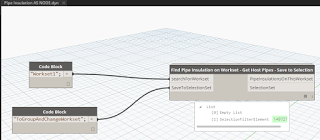
Enter Dynamo… I made a custom node that takes a list of Pipe Insulations and gives you the Host Pipe element:

Then, I packaged this up in another node that collects all Pipe Insulations, checks their Workset, finds their Host Pipe, and then saves those Pipes to a SelectionSet:

So, if you have Pipe Insulations on the wrong workset:
1.    Install Bakery package in Dynamo
2.    Run definition as in image above
3.    Close Dynamo
4.    Load the Saved Selection
5.    Group these Pipes (which groups the Insulations too)
6.    Change workset (it will have already adopted the current workset)
7.    Ungroup
8.    Done

Thanks to Konrad and Andreas for archi-lab and Clockwork packages respectively. I get a few comments about my Bakery package having a lot of dependencies, but I like the fact that I just need to install Bakery and I get archi-lab, Clockwork, Lunchbox etc. Its like a rough and ready deployment solution…

Oh, one more thing. You may notice in recent versions (like 0.8.2 RC) that there is now some custom path management for Dynamo resources:

Good stuff!

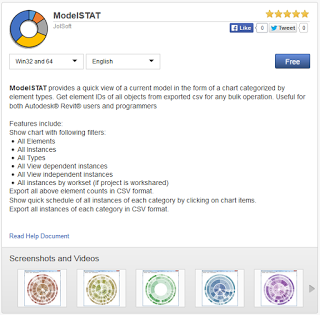
With this free addin, you can view a graphical representation or summary of all the elements in your Revit model, based on various different filters. You can then also export a CSV of that data.

We can use this for workset validation, like “are any elements are on the wrong workset?”

Here’s how:

  1. Start Jolsoft ModelSTAT
  2. Click Elements – Workset
  3. The resulting graph will show you how many elements on each workset
  4. Click Export – CSV
  5. Open the CSV
  6. You will see a list of workset names, along with a count of how many items exist on each workset

Now, if you actually want to do more specific model interrogation, like finding those elements on the wrong workset, you can use one of these methods:

  1.  My Copy Workset Name to Target Parameter node in Bakery Dynamo package. Copy Workset name to a target parameter and then view it in a Revit Schedule
  2. Use Kiwicodes Bonus Tools, 3d Views for Worksets tool. If you double click on a workset row, it will show a list of elements on that workset
  3. Make your own Dynamo node to get the answer you want

Download modelSTAT at:
ModelSTAT | Autodesk Revit | Autodesk Exchange Apps

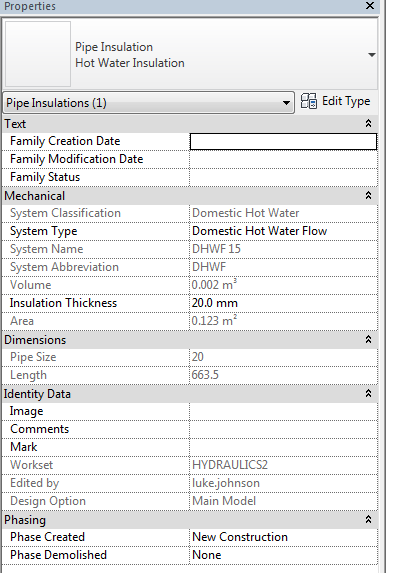
Insulation in Revit can be incredibly difficult to work with. It can be difficult to select the insulation individually, but you can select them by using a specific schedule (ie. Pipe Insulation Schedule) and then using the Highlight in Model ribbon button. However, once selected, you still can’t change the Workset (it is grayed out). And it seems that the Workset is set by whatever Workset was current when the Pipe Insulation was created (this issue seems to affect upgraded models, but it may occur in other situations). Some people have ‘solved’ this by going through and removing and then remaking all of the Insulation! But that is not What Revit Wants, not by a long way…

So, you might think “we can Group them and then change the Workset“. Also not possible – you can’t group Pipe Insulation without selecting its host Pipe. But guess what? When you select a host pipe and Group it, it will automatically add the insulation to the group too…

See where we are heading? If we want to change all Pipes and Pipe Insulations to one specific Workset, let’s do it this way:

  1. Make a Pipe Schedule
  2. Select all Pipes with Highlight in Model
  3. Group them (takes a while on 10000+ items). Now we have a massive group, let’s…
  4. Change the Workset of the Group
  5. Finally, Ungroup the massive group. Done!
    (Note: you will observe that the members of the group include Pipe Insulation, even though you didn’t explicitly add them)


Warning: be wary of the impact of grouping and ungrouping items in your particular project model. In most cases, it shouldn’t hurt too many things, but it would be advisable to test this process on a smaller set of your sample data first.

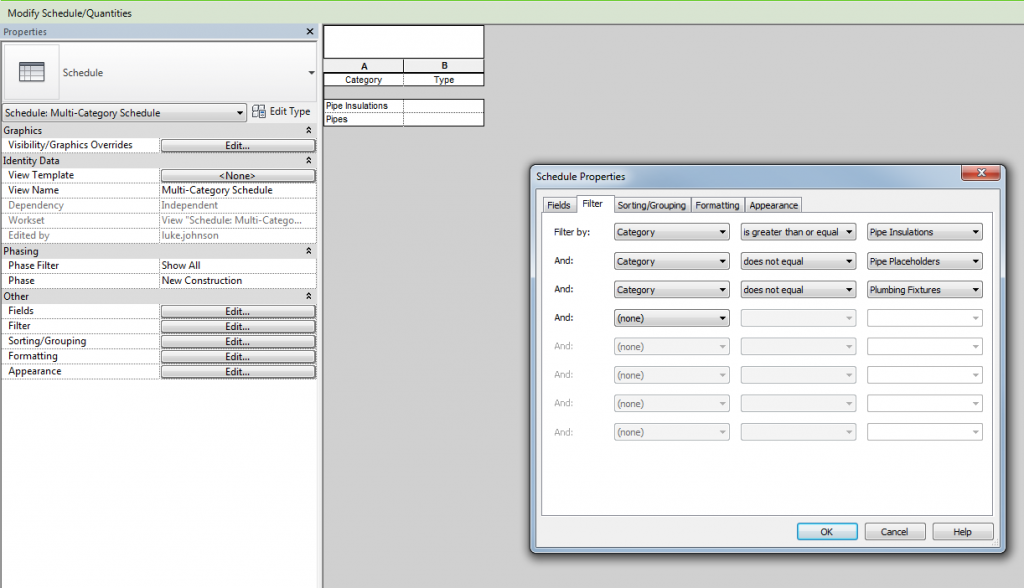
Slightly related tip – You can use Multicategory Schedules to Select Objects on Certain Categories
Let’s make a Multicategory Schedule, and then filter it to show only Pipes and Pipe Insulation (using some ‘greater than’ and ‘does not equal’ filters). Then, Select them all with Highlight in Model.


dp Stuff have updated their very cool Revit addins to work with Revit 2015, and happily I have three prizes to giveaway:

  1. Free Revit Utils 2015 and Randomizer 2015 pack
  2. Half-price Revit Utils 2015 and Randomizer 2015 pack
  3. 25% off Revit Utils 2015 and Randomizer 2015 pack

To enter the competition, scroll down to the Comments on this post and write your response to this question (don’t worry if your entry doesn’t appear straight away, it will 🙂 …

Name one challenge you have faced while using Revit.
How did you overcome it?

The deadline for this competition is Tuesday 10 March 2015. After this date, I will review the comments and then give the prizes to the entries that I think are the most original, thought-provoking, outside-of-the-box and interesting 🙂 Results will be announced in a comment on 11 March, and I will reply to the winners individually.

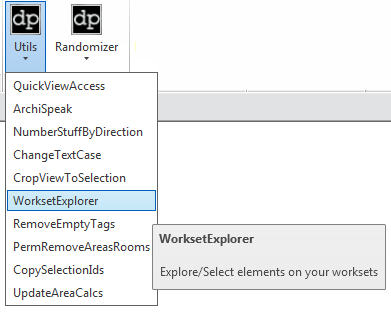
I have posted about Dima Chiriacov’s dp Stuff addins several times over the years, including this random tree generator post and this one about his Workset Explorer (which is now included in the “Revit Utils” pack).

Here are the links to the updated 2015 dp Stuff addins:
Revit Utils 2015
Randomizer 2015

Dima’s post:
Revit 2015 Addins Update – Revit Utils 2015 – dp Stuff

It is very easy to buy from the site, just

  • Add to Cart, 
  • Checkout,
  • Apply any discount codes
  • Fill out your details
  • Accept the terms
  • Proceed to download

When working with multiple linked files, you can utilize the ability of Revit to close Worksets in Linked Files, and in some cases this is a good visibility shortcut. Along these lines Simon over at BIM42 has written “a few line of code for set up every Scope Box, and Reference plane to the correct workset…”

See the code at:

Managing linked worksets | BIM 42