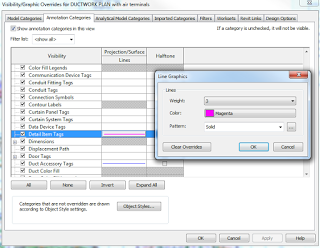
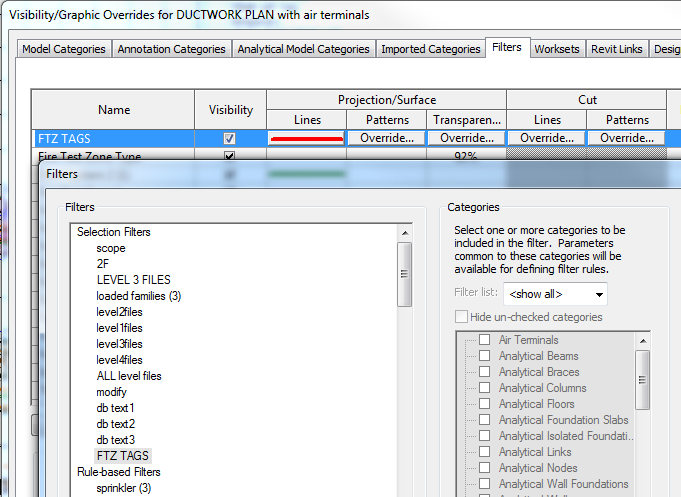
There is no immediately easy way to override the colour of an entire Revit Link. Of course, you can set up a View Template and override all of the individual subcategories, but that can get time consuming when working with many links…

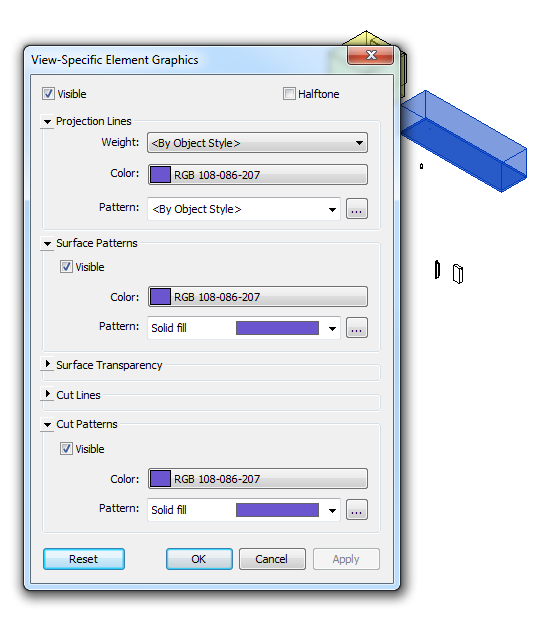
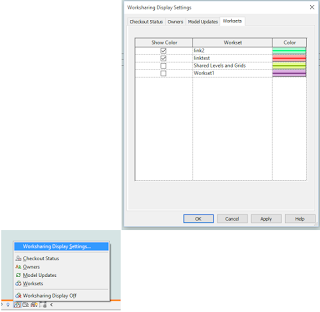
Worksharing Display Mode gives us a quick way of visualising Worksets. What if we put each Revit Link on its own Workset? Then if we set Worksharing Display Mode to Worksets, these Links are overridden with the Workset colours selected in the dialog:

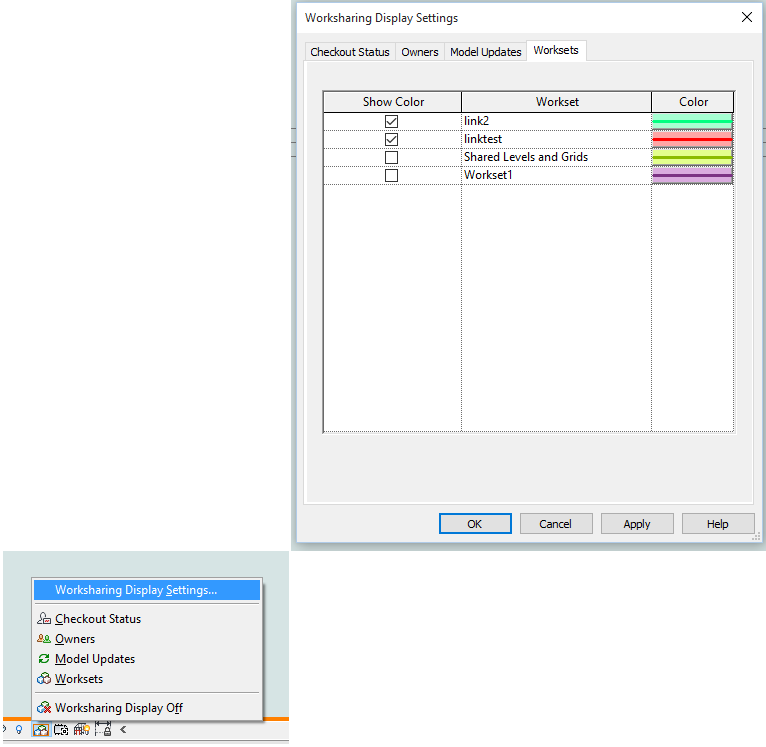
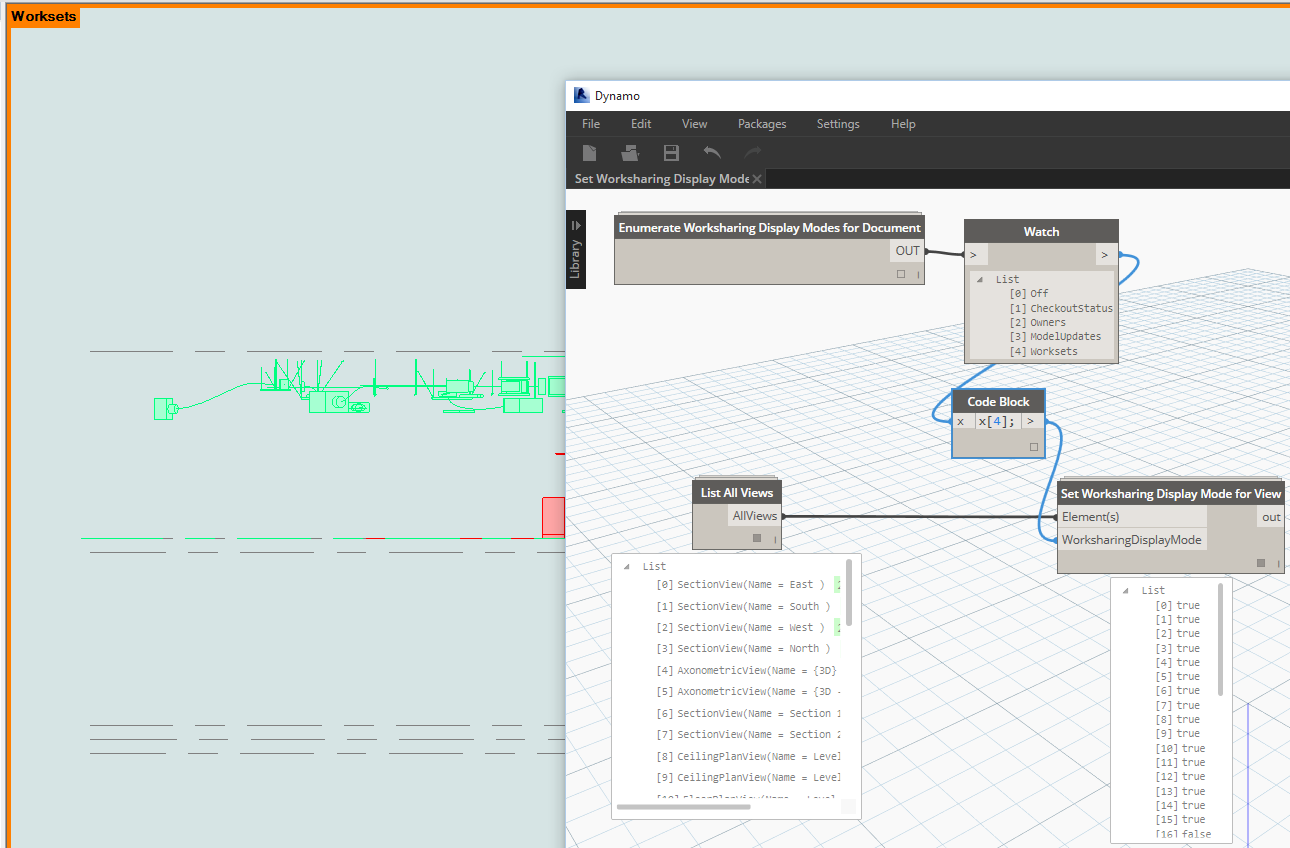
Unfortunately, the Worksharing Display Mode setting is a temporary override (notice the border around the view?), and it will be switched off when we close and open the file. However, the colour choices will be retained. Is there a way we can quickly ‘turn on’ the Worksharing Display Mode for all views in the document? Perhaps this could be done just prior to printing, or at the start of an editing session?

Enter… you guessed it… Dynamo.

I made a node to Enumerate Worksharing Display Modes available, and another one to Set Worksharing Display Mode for View. Finally, I adapted the archi-lab Get All Views node into a List All Views node. Now, we can set them in one click:

And a Screencast:

Each time you print, you will be prompted to “Leave the mode on and print…“, but the colour override will print fine 🙂

Update:
Colours will transfer using Transfer Project Standards, as per:
Transfer Project Standards

If you populate a project with the desired worksets, usernames, and colors you can automatically transfer most of this data over to another project.  Under Manage > Transfer Project Standards, there is a new option for Worksharing Display Settings.

Keep in mind this will not transfer over workset names from one project to another. 

It will however transfer over workset colors, should the same name workset appear in both projects.

Each category has a Show Color column with a checkbox; these are project specific and do not transfer.
Revit 2012 Worksharing Display Modes and Transfer Project Standards – The Revit Clinic

Did you know you can override the lineweights and colors of a Generic Annotation or Tag and its Leaders in Revit? You can use Visibility / Graphics annotation tab like this:

But what if you have two Tags that are of the same category, say Detail Item Tags, but you want to override them differently? You can’t use a normal model-based filter, as these generally do not act on annotations. However, you can use a selection-based filter…

Just:

  1. Ensure you are using a unique Type of Tag, then right-click, Select All Instances, In Entire Project
  2. Save Selection, and choose an obvious name
  3. Go to your view filters (in the relevant View Template if necessary) and add the Filter you named in step 2
  4. You can now freely override those Tag elements separately to any existing overrides

Now, keep in mind that you need to manually update this selection-based filter. You might make it part of your printing workflow to do steps 1 and 2 above immediately prior to printing, thus updating the saved selection set to be in line with the current status of your model.

BIM One have released a new automatic color filter addin for Revit. It is very simple to use, and its free:

  1. Install the addin using the install tool (refer here for steps on using the addin manager)
  2. Open a Revit project
  3. Go to BIM One ribbon
  4. Click on Color Splasher
  5. Click on a Category
  6. Click on a Parameter
  7. A color set is automatically generated
  8. Click on Apply color set

If we check the element VG, we can see that this addin basically runs through and applies a By Element override to each element in the view:

Note: a nice added bonus to the above functionality is that if you open Color Splasher and click “Clear Set”, every Element visibility override in the current view will be removed. Might be handy for QA and model management?

They have also provided a Element GUID tool. It works like the Select by ID tool in Revit, but instead of using the Element ID, it works on the GUID parameter inherent in all Revit elements:

I previously posted about the BIM One NWC Batch Exporter here:
NWC Batch Export from Revit – multiple Revit views to multiple NWCs with one click

via
http://us8.campaign-archive2.com/?u=f58c55b9516e3ecd984b6ff84&id=95df102b3a&e=3729ed9af6

In ye olde AutoCAD days, there were a plethora of ways to mess with your fellow users.  The sheer amount of obscure yet powerful system variables gave endless opportunities for frivolity.

In Revit, not so much.  The system works.  It seems Revit does not want you to prank your coworkers, right?  Here is a little story …

We were having trouble finding a particular Revit link, or more specifically, the walls in a particular Revit link.  So we drew a roof, and the view looked like this:

Ok, so the answer seems easy.  Walls are overriden, right?  Let’s have a look in the View Template:

According to the Visibility / Graphics of Model in the View Template, everything seems cool.  Walls aren’t overridden.  All of the cells look the same, in their default state.

Or are they?

Let’s select the Walls row:

A tiny, almost invisible sliver of white appears under the Project Lines column, while all of the other columns show Override (indicating they are not overridden).

So what exactly is happening?  Let’s click on the Projection Lines override for Walls:

We get very little feedback from Revit as to what is happening until we select the actual row.  Why?  Because the override is set to white!

This is certainly a trap for new, or old, Revit players.  If you read this blog, you are prepared.

If you don’t, you may be pranked by some White Line overrides in the very near future 🙂  Let the shenanigans begin…

In Revit 2012, right-click Override Category in View put you into the VG dialog, and you had to scroll to find what you were after – annoying!  Revit 2013 is heaps better – it simply provides a dialog similar to that used for Override Element in View.  This allows for a much improved workflow.  See the 25 second video below:

A great list showing the Visibility/Graphics priority, thanks to Revit Fix.  From most powerful to least powerful:

  1. Line Work Tool
  2. Override graphics in view by elements
  3. Filters
  4. View Depth -Beyond system line type (plan views only)
  5. Phasing graphic overrides
  6. Advanced model graphics – silhouette edges.
  7. Visibility / Graphic overrides – Halftone
  8. Visibility / Graphic overrides – Override host layers (Cut line styles)
  9. Visibility / Graphic overrides – (projection & cut lines)
  10. Project object styles

Revit Fix: Battle of the “line” overrides