A federated Revit model is a model containing many Revit links, and they can be quite slow to work with. There are a few steps you can take to speed things up, and one of them is creating a set of fast view types and a related view template.

Here’s how:

  1. Make a View Template called “No Model” and untick all the Model categories in that Template
  2. Make a set of View Types called “Fast Plan“, “Fast Section” and so on
  3. Set the View Template for those Types to the “No Model” template you created

Now, when cutting sections or making new floor plans using these ‘fast’ view types, the view will generate quickly without any model elements. Then, you can decide if you want to switch view templates / types to something more useful for coordination or documentation.

(insert obligatory Revit 2017 blog post here…)

The annual Revit release schedule can become very tiring. Also challenging is the fact that you will probably not start running real, big, live Revit 2017 projects for around 6 months, so all of this new features noise will be a distant memory by then. However, it is good to be aware of the new abilities in the software, so that you can (possibly) stop using outdated workarounds and start using the software in the way Revit 2017 Wants.

By now, we should all be focusing on getting more useful data into our models. In accord with that aim, these are my top 3 new features:
1) Keynote Legends are better – Use Keynotes!
When a keynote legend is set to By Sheet, Revit takes into account whether a keynote is visible in the view as a result of View Range settings, Design Option settings, or Depth Clipping/Far Clipping settings.

2) Combined parameters in Schedules – Use the Data you Have!
Combine parameters in a schedule to display the values in a single cell. You can specify a prefix, suffix, sample value, and separator to display with each parameter. See Combine Parameters in a Schedule.

3) Schedule view templates – Templates are Good Revit
View templates for schedules and assembly views: To simplify the reuse of schedules, create a schedule view template. Schedule view templates include parameters for Fields, Filter, Sorting/Grouping, Formatting, Appearance, and Phase Filter. If the model contains RVT links or design options, Visibility/Graphics Overrides parameters are also available. See About Schedule View Templates and Create Assembly Views and Sheets.

The Help file:
Help: New in Revit 2017

The 1 minute video:

The playlist:
https://www.youtube.com/playlist?list=PLY-ggSrSwbZo26bEbxXCXJzSGjjutm5PY

Steve’s big post:
Revit OpEd: Revit 2017 – New Features and Enhancements

Top 5 from Sean David Burke:
Five Standout Features from Autodesk Revit 2017 | Architect Magazine | Software, BIM, Construction Software, Design Workflow, Architecture, Autodesk

The Revit Kid Top 3:
Revit 2017 – My 3 Favorite new Features | TheRevitKid.com! – Tutorials, Tips, Products, and Information on all things Revit / BIM

Tim Waldock’s Revit 2017 posts (very thorough as usual):
http://revitcat.blogspot.com.au/2016/04/whats-new-in-revit-2017.html
http://revitcat.blogspot.com.au/2016/04/installing-revit-2017.html
http://revitcat.blogspot.com.au/2016/04/elevation-depth-cueing-in-revit-2017.html

—–
Problems (these are the Not So Good Things) so far:

—–
Licensing, and the ability to switch from Network to Standalone after installation:

licensing.png

via Autodesk 2017: Changing From Standalone to Network | Microsol Resources Blog

Other posts:

Navisworks 2017 New Features are summed up here:
BIM 360 Glue + Navisworks 2017: Reinforcing Construction Collaboration

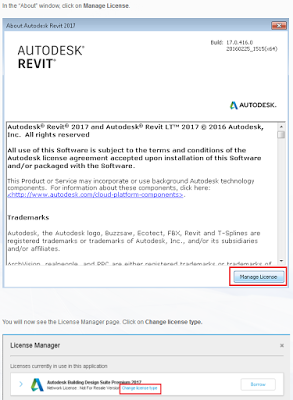
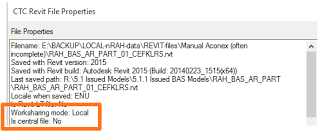
Revit Wants you to transmit ‘detached copies’ of Central files for linking into other models. If you ignore this and transmit your Local copy instead, Revit always remembers where that instance of the Local file was saved, and it causes havoc in a federated model situation. You can use the free CTC explorer extension to quickly check this:

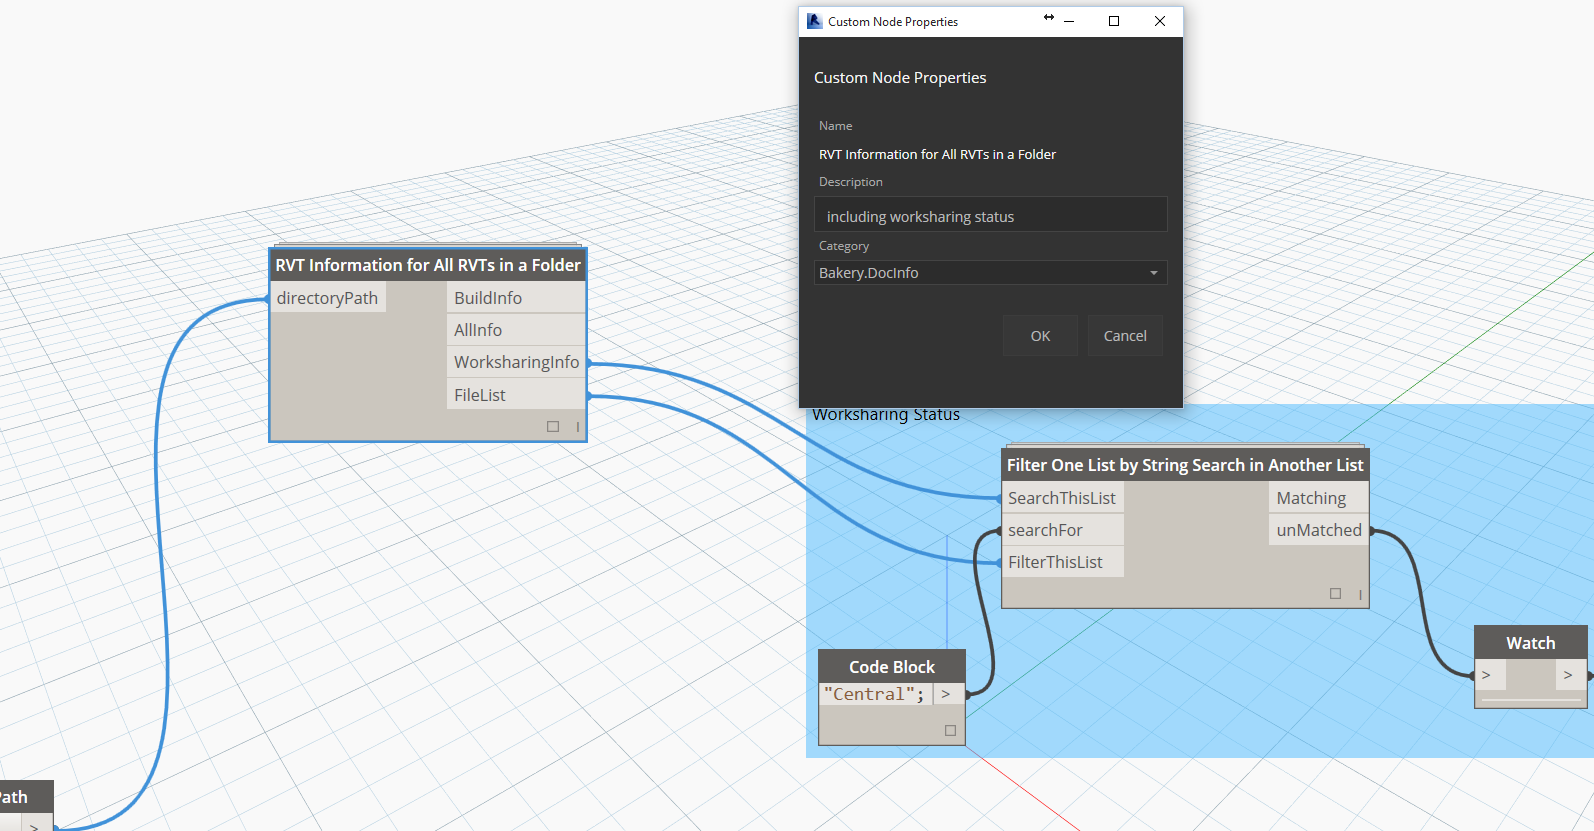
Or you could use Dynamo with my Bakery package:

 Hypothetically, let’s say you have received a file from a consultant, and after reloading you realise it was a Local file, not a Central. Now, your federated model may already have changed the name of the file to match whatever the local was called. Let’s say this problem has caused another problem: multiple instances of that same model have been loaded into this file.

If you are using View Templates, only one of these instances will be the point-of-truth for your View Template Revit Link Overrides. Time to get out your magnifying glass and investigate. Firstly, we will create multiple copies of the RVT file with different names, and then use Reload From (in Manage Links) to get these loaded into the current Revit session. This will create a Local alias:

Now, only one of these is the historical, correct link in the context of this federated model. How do we know which one to keep and which ones to remove?

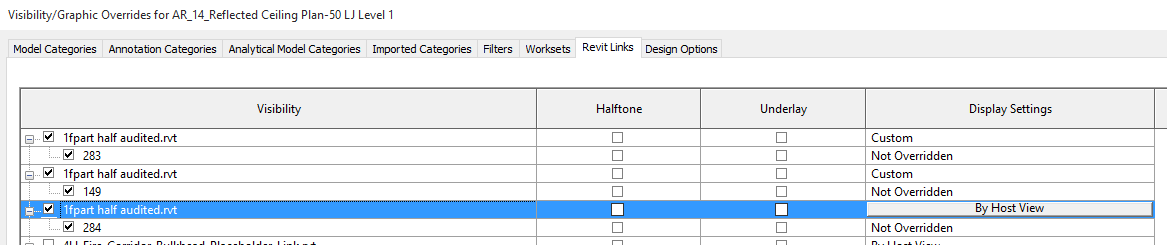
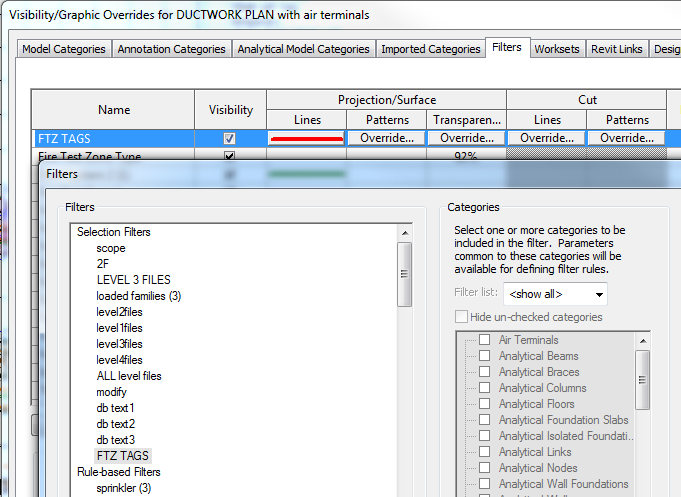
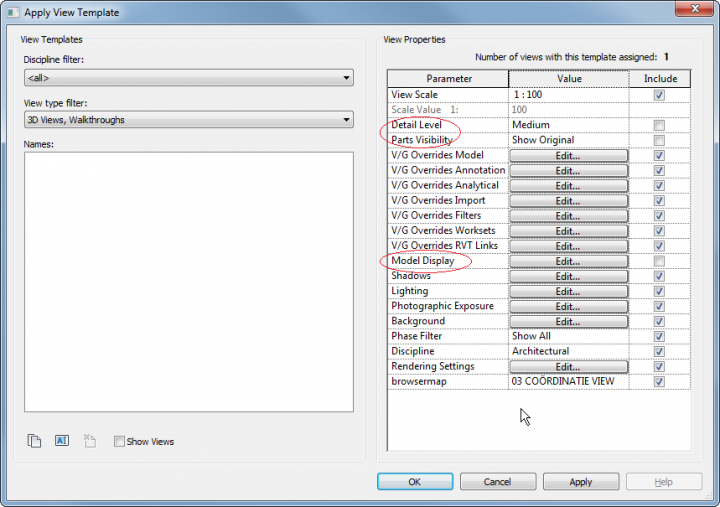
We can use our View Template Revit Link Overrides to tell us… after all, they are the reason we are going through this process, right? We want Revit to ‘remember’ the overrides we have made in those templates. So let’s have a look at the View Template and see what it tells us.

Basically, by reviewing the Custom overrides here, I was able to determine which version of the Link to keep. It just so happens that the correct historical link had:

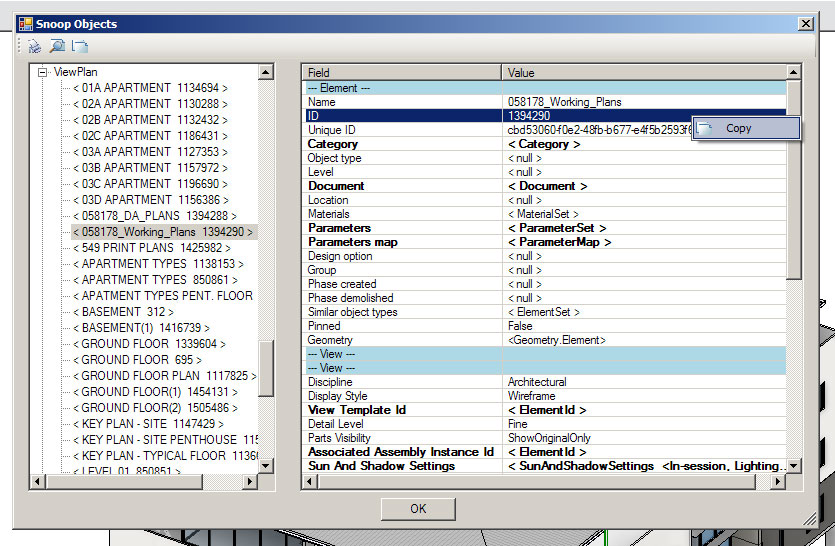
  • a lower number as its instance name (shown above as 149), and
  • a lower number as its element ID (450048 compared to 1288492). I found this by using Project Browser, Select All Instances – In Entire Project and then Manage – IDs of Selection

The above two ‘numerical’ investigative methods are probably not 100% reliable, but they may give you a good idea of which link instance is older in terms of this project.

Now, simply Remove the wrong links using the Manage Links dialog, and be aware of not re-linking multiple new instances if you just so happen to get a Local copy from someone in the project team. And remember…

What does Revit Want? Central copies for linking purposes.

Let’s say you have some linked RVT files and you are using ‘By Linked View’ for visibility. What if you just want to hide off a single type of Filled Region from that Linked View? Is it possible? Yep, here’s how:

  1. Make a new View Filter for Detail Items that looks like the below, using Family Name equals Filled Region, and the relevant Type as properties:
  2. Add this View Filter to your View or View Template
  3. In the visibility properties for that Link, make sure you set Filters to By Host View…

Done!

    Did you know you can override the lineweights and colors of a Generic Annotation or Tag and its Leaders in Revit? You can use Visibility / Graphics annotation tab like this:

    But what if you have two Tags that are of the same category, say Detail Item Tags, but you want to override them differently? You can’t use a normal model-based filter, as these generally do not act on annotations. However, you can use a selection-based filter…

    Just:

    1. Ensure you are using a unique Type of Tag, then right-click, Select All Instances, In Entire Project
    2. Save Selection, and choose an obvious name
    3. Go to your view filters (in the relevant View Template if necessary) and add the Filter you named in step 2
    4. You can now freely override those Tag elements separately to any existing overrides

    Now, keep in mind that you need to manually update this selection-based filter. You might make it part of your printing workflow to do steps 1 and 2 above immediately prior to printing, thus updating the saved selection set to be in line with the current status of your model.

    … is not easy.  Revit prefers that you don’t clog up your drawing with View Templates rather than trying to clean them out later.  You can use various methods to transfer just one Template from project to project, such as this example.

    I would assume there is an add-in somewhere that finds unused View Templates and allows you to delete them, but it must be done manually with vanilla Revit.

    Further reading:
    Deleting a View Template – WikiHelp

    View Filters & View Templates – Revit

    Revit Beginners: Additive Views vs. Subtractive Views

    Purging Unused Views – Sheets | BD Mackey Consulting | The Revit Geek Blog

    This is using XP 64-bit with Revit 2013 Update 3, but similar principles will apply to other OS and software versions:

    1. Install Revit 2013 SDK if you don’t have it already, from here
    2. Install RevitAddinManager from SDKAdd-In Manager folder
    3. Open Sharpdevelop, you should be able to find it at:
      C:Program FilesAutodeskRevit Architecture 2013ProgramSDAbin
    4. Drag and drop RevitLookup.csproj to the Projects panel on the left
    5. Compile Revitlookup.  Make sure to Add Reference Path (project / properties) to your Revit 2013 Program folder.  Then click Build, Build Solution.  I received a bunch of Warnings about obsolete classes and properties, but no errors.
    6. Open Revit and any project
    7. External Tools – Add-in Manager (automatic)
    8. Load the compiled RevitLookup.dll and then use the Save to Add-ins folder option
    9. Restart Revit
    Now, to use RevitLookup to find the Element ID of a View Template and copy it to another project:
    1. Open a Project
    2. Add-Ins, Revit Lookup, Snoop DB…
    3. Scroll down and select the appropriate View reference, ie. ViewPlan for a Template that was created from / for a Plan View
    4. When you select it, the Element ID will be shown on the right and you can copy it to Clipboard
    5. Select By ID, Paste
    6. Ctrl+C
    7. Switch to another project
    8. Paste – Aligned to Selected Level
    9. Done 🙂