Quick fix for Revit 2012:

  1. Close Revit
  2. Go here, download and extract ZIP
  3. Go to Revit 2012 Program folder and rename AdWindows.dll to AdWindows.dll_OLD
  4. Copy AdWindows.dll from the extracted folder to the Revit 2012 Program folder
  5. Open Revit Architecture 2012 – your ribbon problems should be fixed

For Revit 2013 links, see below:
Ribbon behavior problems occur in Revit 2012 and 2013 after the installation of Microsoft .NET 4.5, which is one of the pre-requisite for Revit 2014. This is why this problem is typically encountered after Revit 2014 is installed side-by-side with a previous version of Revit. For those using Revit 2012, the Autodesk Revit 2012 – Ribbon behavior due to .Net 4.5 installation hotfix will resolve this problem. And for Revit 2013 users, the fix is included in the latest update releases, which are available from the following links: Revit Architecture, Revit MEP, Revit Structure, andRevit.

Tony Michniewicz
Autodesk Revit QA

Related forum thread:
http://forums.autodesk.com/t5/Revit-Architecture/Revit-2014-Corrupts-Revit-2012-and-2013-Ribbon-Menu/td-p/3876942/page/2

We found that on one project, the Materials Browser would load very slowly when the ‘Appearance’ tab was activated.  If the dialog was closed and re-opened with the ‘Materials’ tab activated, there was no lag.

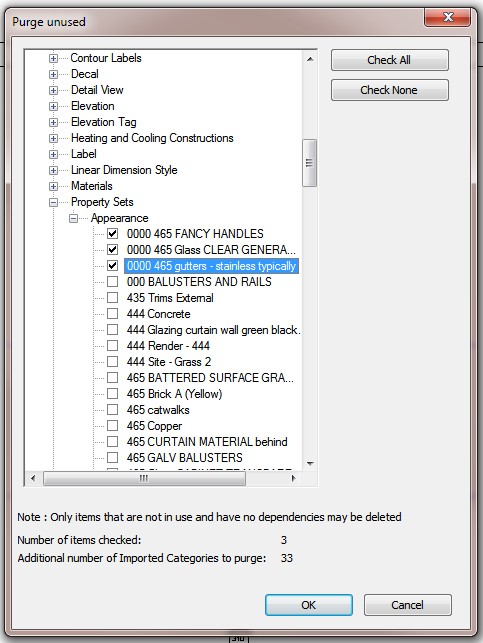
The Solution?  Purge your Render Appearance Property Sets (make sure you know the implications of this).

After purging these, the lag went away.  However, and it is a big ‘however‘ – this resulted in some of our renders no longer working correctly.

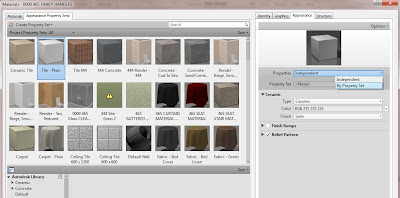
If I first went into the few materials that used property sets and set them to ‘By Property Set’ and not ‘Independent’, Revit did not purge the necessary data and the renders were still ok.

This hotfix restores the ability to apply material family parameters to faces of family elements using the Paint tool.

Make sure that Update Release 2 has been applied prior to adding the hotfix. Verify that the build number of Revit 2012 is 20110916_2132.

The Readme contains the latest information regarding the installation and use of this update. It is strongly recommended that you read the entire document before you apply the update to your product. For your reference, you should save the Readme to your hard drive or print a copy.

revit_2012_material_hotfix.zip (zip – 4430Kb)
Readme (htm – 87Kb)

via
Autodesk – Autodesk Revit Architecture Services & Support – Hotfix – Autodesk Revit 2012 – Apply material family parameters using the Paint tool

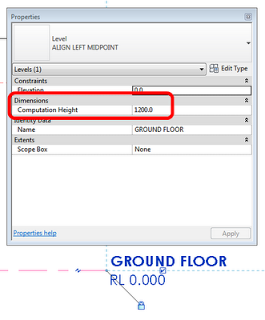
I can’t believe I had not come across this change until today. In Revit 2012, the Room Computation Height is no longer a Type Property of the Level – it is now an Instance Property.

Some of the impacts of this when upgrading are described in the Revitez post below:

This eliminates the need to create a kind of different level for adjusting the heights of the different calculation levels.

When your old projects, where you took the trouble to create these types of additional levels, your types still exist, but they no longer control the height and therefore not used to anything if their purpose was the control of this value.

The value is copied into the parameter of occurrence. All is well, just be careful if you need to change height calculation, there is no need to change the type as you did in the 2011 version, this will have absolutely no effect.

via
Google Translate of Revitez post

New free tool available on Labs for Revit!  It basically allows you to bundle up a project for easy transmission to another party.

Here is the description from the Labs page:
eTransmit for Revit is a technology preview of an add-in application for Autodesk® Revit® Architecture 2012, Autodesk® Revit® Structure 2012, and Autodesk® Revit® MEP 2012 software.


For best results, installing Revit 2012 Web Update 1 is recommended. // more


With eTransmit for Revit, you can:


Copy and detach a Revit model and associated files to a single folder for internet transmission. This removes the typical error messages when you copy central files using the operating system.


Locate dependent files automatically and include them in the transmittal folder, reducing the possibility of error. All dependent files are automatically converted to use relative paths to ensure that the dependent files can be located by the model.


Choose to include related dependent files such as linked Revit models, CAD files, DWF markups, decal images, and external keynote files. You can transmit any Revit (.rvt) model that has been upgraded to Revit Release 2012.


Transmit models that are using file-based worksharing or server-based worksharing. eTransmit for Revit will also work with non-workshared Revit models.

Some of the new features in Revit 2012 start to fit into place now (such as the ability to Import Linked CAD files).

Here is the link again:
Autodesk Labs Utilities eTransmit for Revit

And here is some more info from the Labs page.

menu View the eTransmit dialog box.
Download the known issues document (PDF).

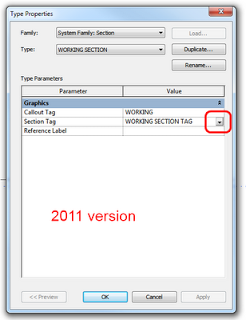
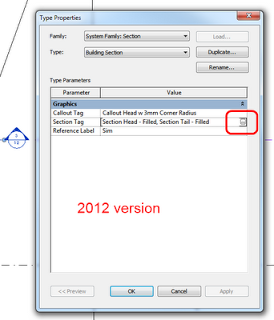
This is a subtle change that you may have missed.  In Revit 2011, we had to access the ‘Section Tag’ properties through the Manage tab on the Ribbon (which was a bit annoying).

However, in Revit 2012 we can access the Section Tag properties directly from the properties of any Section that we have selected!  See images below:

The old way

Click on the ‘dots’ to access the Section Tag properties

This definitely allows for an improved workflow.  It is a faster and more intuitive way to change the properties of Section Tags.

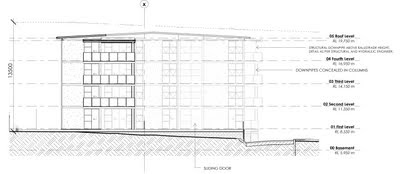
In previous versions of Revit, a common workaround to generate some ‘depth’ in elevation views was to use transparent mass planes.  This created an effect like this:

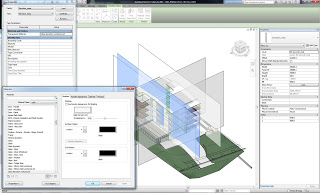
Here is what was actually happening behind the scenes:

However, something has been changed in Revit 2012.  This no longer works properly.  In fact, you CAN open up a 2011 file that has the effect in 2012 – and the effect will remain.  However, if you purge the file, it simply disappears!  See example video of this ‘Disappearing Act’ and file download link below:

Example file download link

The only way I have been able to retrospectively ‘add’ the effect to 2012 is:

  1. Open a 2011 file that has the effect.
  2. Rename any relevant masses or materials in the 2012 file so that you can cleanly ‘paste’ the 2011 mass.
  3. Copy one of the mass planes from the 2011 file and paste it into the 2012 file.
  4. This ‘might’ work for you…
  5. You can’t EVER purge this file in 2012, or the effect will break.

If you want to follow the discussions on this issue, here are some forum links:
http://forums.augi.com/showpost.php?p=1130343&postcount=41

http://revitforum.org/showthread.php/1958-2012-Kills-the-Elevation-Mass-Transparency-Workaround

Let me know if you have any comments or workarounds for this.