Nice tip + addin coming from Trevor Taylor via Jeremy Tammik – it shows how to rename Interior Elevation views by the Room that they reside in.
Download: Here is a complete sample project including a test model in case you’d like to check it out yourself. Many thanks to Trevor for this useful tool, his research, implementation, and generous sharing.
I rarely advertise for paid programs. In this case, the program is still useful in Trial mode, so I’ll make an exception.
Basically, download the trial and install it. Then open Help and go to Geometric rectification. Follow the steps and guess what? You can use a single photo of a building as a scaled, rectified background to help you model an existing elevation.
Unlike Photofly / 123D Catch, you don’t need a stack of images to make this happen, just one.
You can then use Export button to export a DXF file with a PNG linked in – all at the correct scale. To bring this into Revit, I just drafted some lines in AutoCAD around the image frame in the DXF and exported those 4 lines to a DWG. This was linked / imported into a Revit view. Then, I placed the PNG in the same Revit view and used the 4 lines to scale the image appropriately.
The only real caveat with the Trial version is that it watermarks the image severely – but if you just want to use it as a reference, it is fine.
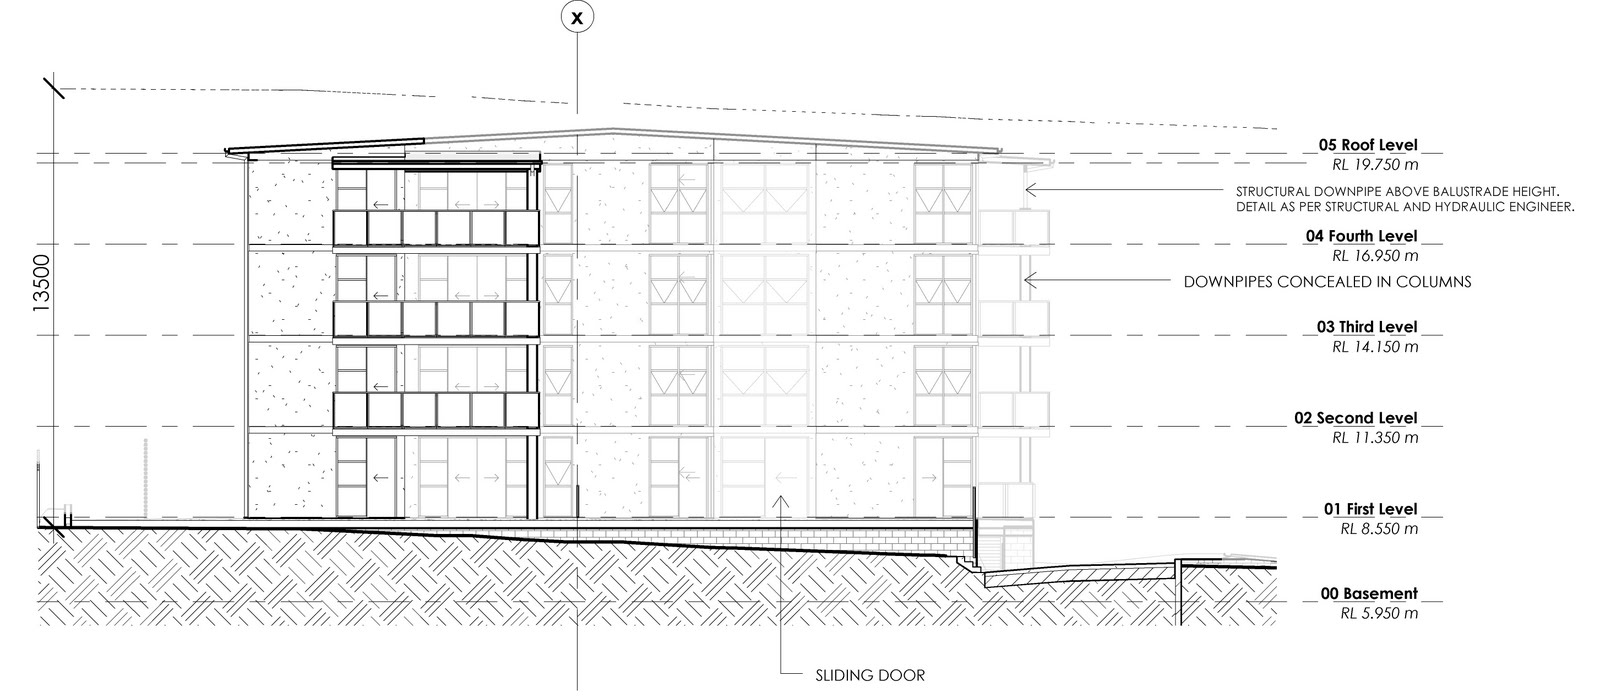
In previous versions of Revit, a common workaround to generate some ‘depth’ in elevation views was to use transparent mass planes. This created an effect like this:
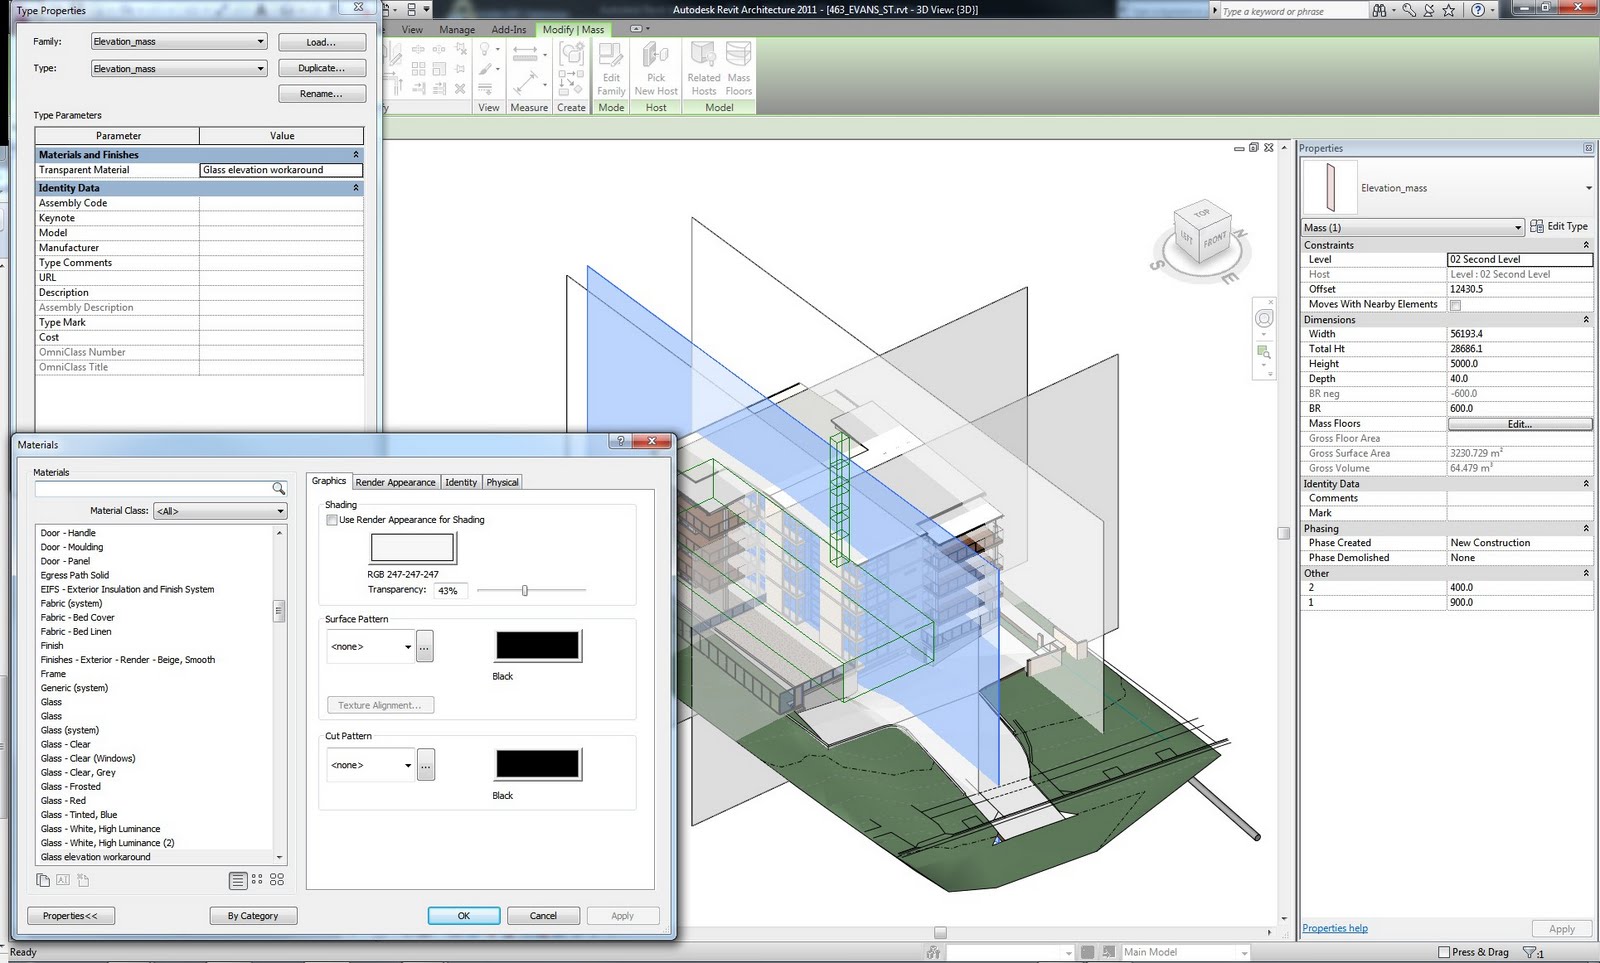
Here is what was actually happening behind the scenes:
However, something has been changed in Revit 2012. This no longer works properly. In fact, you CAN open up a 2011 file that has the effect in 2012 – and the effect will remain. However, if you purge the file, it simply disappears! See example video of this ‘Disappearing Act’ and file download link below:
We were given the ‘Slanted Column’ ability when some of the Structural tools were recently incorporated into Revit Architecture. If you have been pulling your hair out trying to place one of these slanted columns in a Plan view (where the tool is greyed out), the answer is simple. Go to a Section, Elevation or 3D View to place them!
You will likely need to set an appropriate workplane to ‘draw’ these slanted columns on.
The Brace tool is also quite cool – have a go at the ‘3D snapping’ capability in the Options bar (try it in a 3D view, obviously).
If you are interested in reading further, check out: