EDIT
More info and screenshots at:
http://support.nextlimit.com/display/maxwelldocs/Revit+-+The+Ribbon+Panel

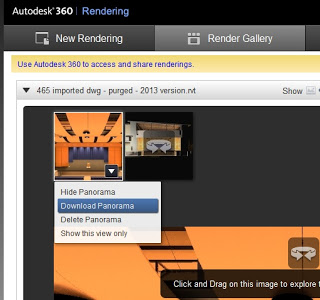
We knew that VEO was using Maxwell since way back in 2008.  Now there is a direct Revit plugin for current Maxwell users:

The Maxwell Render team are very excited to announce a brand new plugin for Revit!
Revit users can now enjoy this new comfortable and timesaving workflow for editing and rendering scenes, using Maxwell Render directly from the Revit interface. Here are a few of the highlights:

  • Compatibility with Revit 2012 and 2013 – any edition
  • Support for Revit lights including IES
  • Support for many built-in Revit materials
  • Ability to override scene materials with MXM files
  • Maxwell Grass
  • Multilight read-back: changes made to lights in Multilight can be imported back into the Revit scene
  • Easy access to the Maxwell material gallery directly from inside the Revit UI

 For full release notes and plugin user guide please refer to our support center here
 The Revit plugin is free to all of our customers and is available for download now from the customer gateway. If you cannot log-in or do not know your password please contact us here.

via
Maxwell Render Newsletter

More info on RFO at:
2012: Maxwell for Revit

Most of you already know that 360 Cloud Rendering will allow you to create a 360 degree panoramic view directly from Revit.  But did you know that you can download and view that interactive panorama offline?

Skip to the cool part of the video (embedded below).

Here’s how:

  1. In Revit 2013, Render in Cloud is on the View panel.  If you have lots of 3D views it can take a while to load the first dialog.
  2. Obviously, make sure you choose Interactive Panorama.  Use ‘Advanced’ Exposure (this may allow for more flexibility later).  Note: Set your DPI before choosing ‘Interactive’.  Small will match the views crop dimensions
  3. Once you have started the Render, it can take a long time to upload the data, but you will get an email telling you when it is ready.
  4. Download Panorama from http://rendering.360.autodesk.com/mygallery.aspx.  Mine came as a jpg.
  5. Download the offline viewer – http://advsys.net/ken/kube/kubegl.exe
  6. Run kubegl.exe
  7. It will prompt you to open something – choose the panorama jpg.
  8. Once loaded, you will be in a full-screen viewing mode.  You can use your mouse to ‘look around’.  Use UP and DOWN arrow keys to zoom in / out and LEFT and RIGHT arrow keys to pan.

Pretty cool huh?

Step by step video:

Heads-up via
Google Translate of http://bimblog.typepad.com/autodesk_bim_blog/2013/01/autodesk-360-panoramabilder-offline-ansehen.html

After writing most of this post, I found a related LinkedIn thread about kubegl at:
http://www.linkedin.com/groups/Autodesk-360-panorama-rendering-is-68075.S.131414706

I couldn’t find a simple way to embed or share the 360 interactive rendering (see feature request here), but here is the source jpg:

A few notes:

“not down-loadable”??
Test: Cloud Rendering in Revit 2012 « microsolresources

Some thoughts on exposure settings:
http://feedback.autodesk.com/cloudservices/topics/adjust_exposure_settings_from_revit

http://advsys.net/ken/kube/kube.htm

Steve’s post recently reminded me of something I have done in the past – using multiple pseudo usernames to access the same Central File in different instances of Revit.

Let’s say that you wanted to render a certain scene in Revit, and then save the resultant image to the Project (a Central File).  As this render could take 10 minutes, you want to keep working on something useful in the same Central File.  What to do?

You just need to open a new instance of Revit and change the Username, then open a Local Copy of the Central as per usual.  You now have 2 instances of the same Central model open, and you can work in and Synchronize from both of them … obviously you are going to need some decent hardware if you are working on a large central file with links.  Set the first instance to render, and work in the second instance while that is happening (keep in mind that local renders in Revit can use multiple cores, so you may want to think about manually adjusting core affinity).

The username can be changed in the Revit Options dialog:

From Steve’s post:
You can however change your username anytime you want when you work in a central file. It isn’t a great idea to actually work this way, switching usernames as you go. It is however a way to clear out users that have not relinquished worksets properly though. When nobody else is working on the project you can open a central file and pretend to be the ill mannered users that haven’t relinquished elements properly. It’s another reason you might consider working in a central file, even though it is generally frowned upon.

Read more at:
Revit OpEd: Changing a Username

Borissofff strikes again – many of you may already be aware of this, but you can get an interesting exterior rendering effect in Revit if you set the time to somewhere near or during the night, and then adjust the Exposure to a suitably pleasing level.

Translated:
But what if you set in the Preferences of the sun, while at the hour of the night (or so), we obtain precisely the situation where there is no source of direct light, the sky!

If you turn Reneder, we completely black picture!

But! Adjusting the exposure, especially of its magnitude, reducing it to about 3-4 units (you can see the other values), you can get the desired renderer without harsh shadows!
via
Google translate
of
http://borissofff.blogspot.com.au/2012/07/revit_13.html

I have previously posted about the future of real-time visualization tools.  Lumion appears to be developing a bit of a following.  Have you used it?  How did you implement it?

If you haven’t seen what it does before, there is a set of videos at this link:
Revit Landscape – Urban Design: Lumion 3D

Promo video:

If you want to see a project go from Revit to Lumion (also this thread):

A free version for non-commercial use is available from this page.  The free version will apparently be updated to version 2 in January 2012 (only a few days of that month to go…)

The company line:
Lumion® is a real-time 3D visualization tool for architects, urban planners and designers.
It’s perfectly suited for creating videos, still renderings and live demonstrations with a quick turnaround.
Lumion offers excellent graphics in combination with a fast and efficient workflow, saving you time, effort and money.
It is in fact so easy to create awesome still renderings and videos with Lumion® that it almost feels like cheating.

The Revit Kid demonstrated today that PNG files exported from a Revit render have no background.

In the spirit of one-up-man-ship, I recommend that you use TIF if you want to keep the background, but quickly separate it from the model elements.  When you export as TIF, you get a bonus Alpha channel that you can use to create a selection area and move the background to a new layer.

In simple terms:

  1. Export Revit render as TIF
  2. Open in Photoshop
  3. Isolate the Alpha channel
  4. Use Magic Wand to pick everything that is ‘white’
  5. Turn the color channels back on
  6. Invert the Selection
  7. Convert the background to a true layer
  8. Edit – Cut
  9. New Layer
  10. Edit – Paste
  11. Done!

Now you can manipulate the model elements and the background separately.

Here is a video:

 
Of course, you can also do this easily by:

  1. Doing two separate renders, 
  2. one of them with Model Elements turned off (which will just show the background) – Export this to any format except PNG
  3. and one of them with Model Elements on (export this to PNG)
  4. Copy and paste these two images to separate layers in Photoshop

 The TIF method is probably quicker and easier in most instances.

Here is a link to the aforementioned PNG post:
The Revit Kid.com!: Revit Tip – Export Rendered Images Without a Background

Technology Preview of the the Project Pandora Liveview design review tool, a cloud rendering research collaboration from Autodesk & Nvidia.
This video demonstrates how the Project Pandora Liveview collaborative design tool allows users to share access to renders online, in order to quickly review and iterate projects with clients and colleagues.

at
Project Pandora Liveview Design Review – YouTube

via
http://datechpt.blogspot.com/2011/11/projecto-pandora-o-futuro-da-renderiza.html

The overall premise of the book is to learn Revit Architecture while developing the interior of a two story law office. The reader is provided an architectural model with established columns, beams, exterior walls, minimal interior walls and roofs in which to work. This allows more emphasis to be placed on interior design rather than primary architectural elements. The chapters chronology generally follows the typical design process.

Download sample chapter (the sample chapter is chapter 4 – Revit Materials):
978-1-58503-664-6-4.pdf (application/pdf Object)

Link to main book webpage

Heads-up via http://bim.sandvik.bz/2011/11/12/ny-revitartikkel-new-book-for-revit-and-interior-design/

To become a true master of Revit is to know What Revit Wants.  You need to have the right Revitude.

When you know what Revit wants, you can combine your skills and work effectively.  You can use the software to create something both functional and beautiful.

In every field, knowing just one specialty or having just one good workflow is usually not enough.  You must apply the knowledge and experience you have gained after years of trial-and-error, peer assistance, reading, and doing.

For example:

I recently put together a large rendered walkthrough.  I had to combine a number of skills and workflows to make this happen:

  • I had to accurately apply materials to objects in the model.  Using physical paint samples, I had to generate accurate Revit colours – and this technique helped me.
  • When I wanted to quickly duplicate materials between different objects, I used this technique.
  • Because the walkthrough rendering was going to be very resource heavy, I used this method to distribute the rendering between different PCs in the office (without having to use Max)
  • Once I had a bunch of BMP files, I used this tool to rename them appropriately, then
  • This method to join the BMP files into an AVI file
  • Because I wanted to make the most of this walkthrough, I opted to extend it by introducing extra ‘computed’ frames.  I used this method.  Doing this meant less rendering time for more overall impact.
  • To compress the AVI sufficiently to upload to Youtube, I could have use this method, but I used a 3rd party tool instead.

The result of combining all these skills?  See below:

To find out more about this project, check out the link below:
Dimond Architects – Theatre and Performance Centre