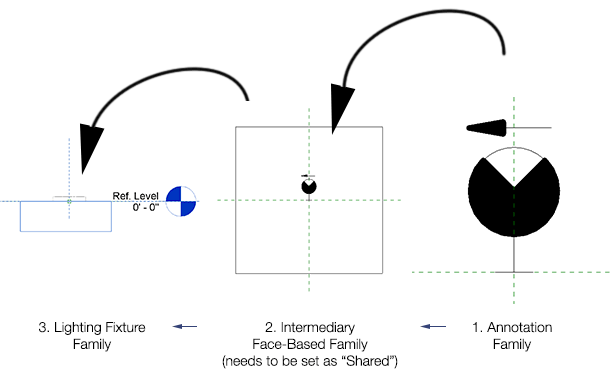
Very cool and advanced workaround by Jose Fandos over at Andekan: We will route around this limitation by first inserting the annotation family into another face-based family, and using this intermediary face-based family to place the annotation the way we want into the final Lighting Fixture. via Symbols for Lighting Fixtures Showing in Plan – Andekan � Blog
He also demonstrates that some Lighting Fixtures will display the Maintain Annotation Orientation checkbox, but some will not, and how to work around this.
We had a set of Detail Plan Views that had a graphic stutter, or jerkiness when zooming. Basically, if you went one click on your mouse wheel, it would take a few seconds to zoom in and regenerate the view.
In the end, it turned out to be some shape edited floors, far outside the crop boundary, that were causing the problem. Once I had added these to a saved Selection Set and then hidden it off, the zooming was smooth again.
A little story about Diagnosing the problem:
Checked in other plan views – these seemed to zoom ok
Changed View Templates
Changed View Type
Switched off Worksets until the problem was corrected – thus found that problem elements were in Workset1
Turned off all Model Categories – problem corrected. Now, which category is causing the problem?
Turn on about 10 categories at a time – when the problem reappears, you just need to narrow it down a bit further
Problem category was Found – Floors
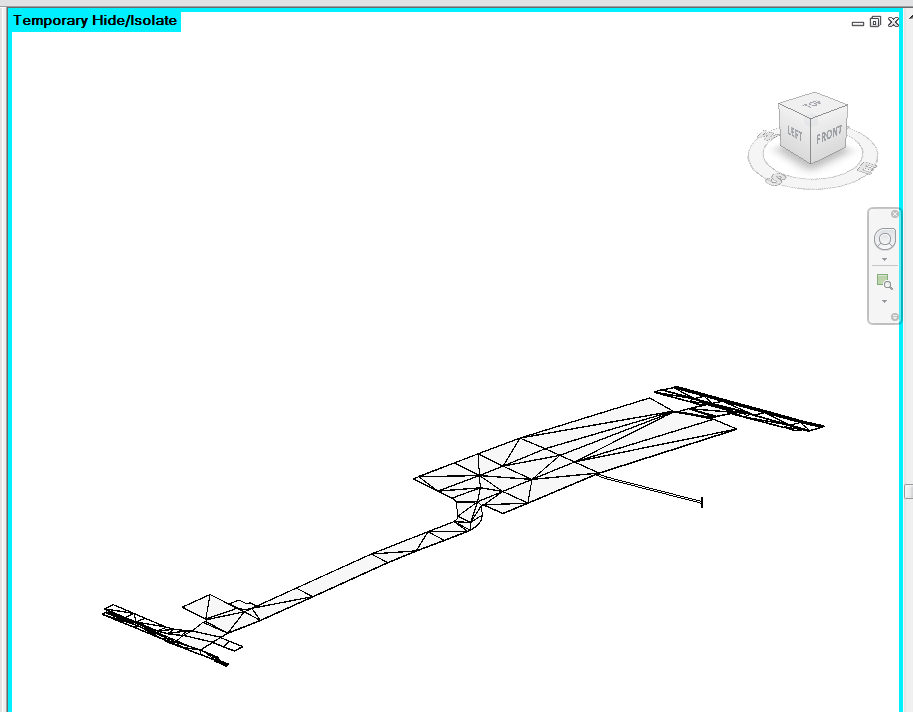
Now, go to a 3D view, isolate Floors and try to figure out which element is causing the problem. In my case, I could safely hide off all of the shape edited floors.
I couldn’t decide whether to call this “Yet Another Way to make a 3D PDF” or “Adobe Acrobat 11 and adding 3D objects“, so I went with a more descriptive title … here we go.
Almost none of our clients use DWF, almost all of them use PDF. Its just a simple fact.
PDF inherently supports the embedding of 3D data. I have previously posted two methods of going from Revit to a 3D PDF for free:
Actually, the method below does require Acrobat … you can download a trial.
After going on a mission to find yet another way to make a 3D PDF from Revit for free, here is how I got there: This post led me to DAZ Studio. Failing to get an FBX import (exported from Revit or Max) to show materials in DAZ led me towards using the OBJ format. Running up against brick walls when trying to get materials from Revit to Max to OBJ, led me to the OBJ exporter from The Building Coder, which doesn’t have materials, but it does have coloured approximations.
Ok, Luke, tell me how to do it!
First, let’s export a clean OBJ file from Revit:
Setup a 3D view and put it on a sheet. Make a View Template from it.
Group and then Save out the elements you want in the 3D OBJ (untick Exclude options and do a Right-to-Left selection to get everything you want). The reason we do this – the OBJ Exporter does not respect visibility settings related to Design Options.
Transfer Project Standards (all, overwrite) to the Group
Apply the View Template from step 1 to a 3D view.
Download and then compile this add-in from The Building Coder. Put the .add-in and other files (.dll and .pdb) in the appropriate add-in folders. You basically just have to open the SLN (solution) file and then add the appropriate Revit 2013 Program directory to the referenced folders, and then Build.
Restart Revit
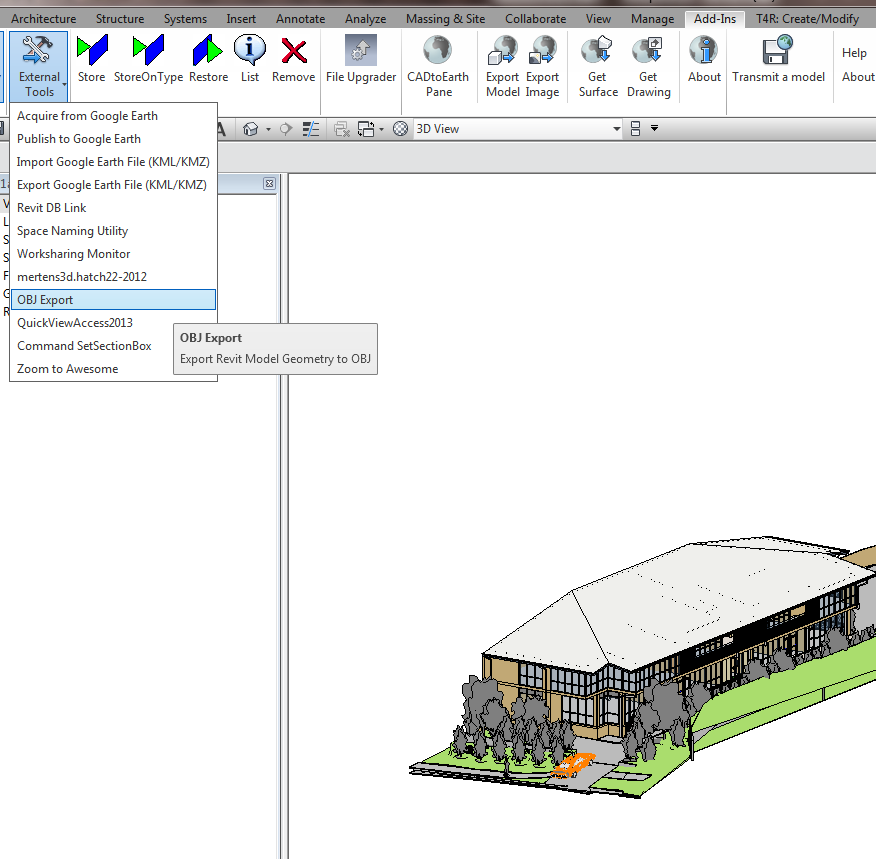
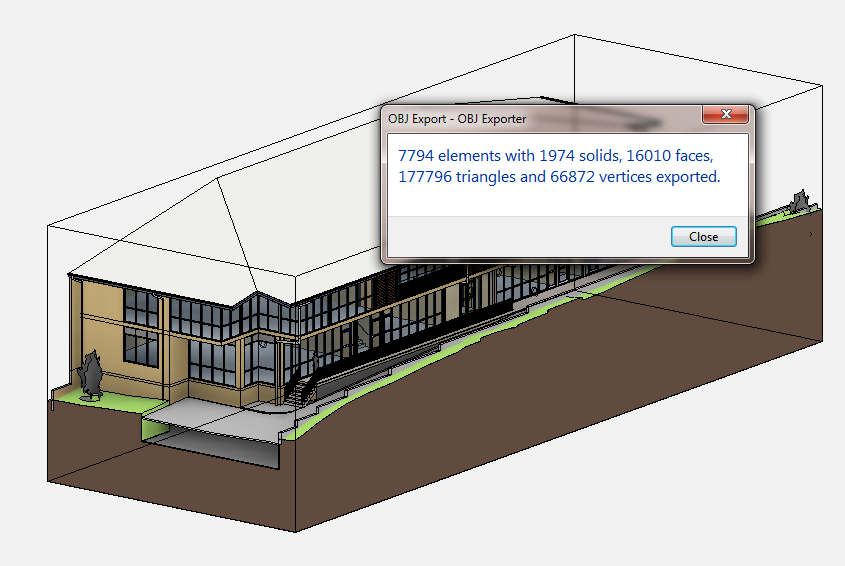
Run the OBJ export add-in
This tool is blisteringly fast. You will get a dialog like this:
Then, download and install DAZ Studio. Register and login to their site. ‘Buy’ DAZ Studio Pro 4.5 for free from the site, checkout, and you will get the serial number under My Serials on the My Account page. Open DAZ Studio and put your serial number in.
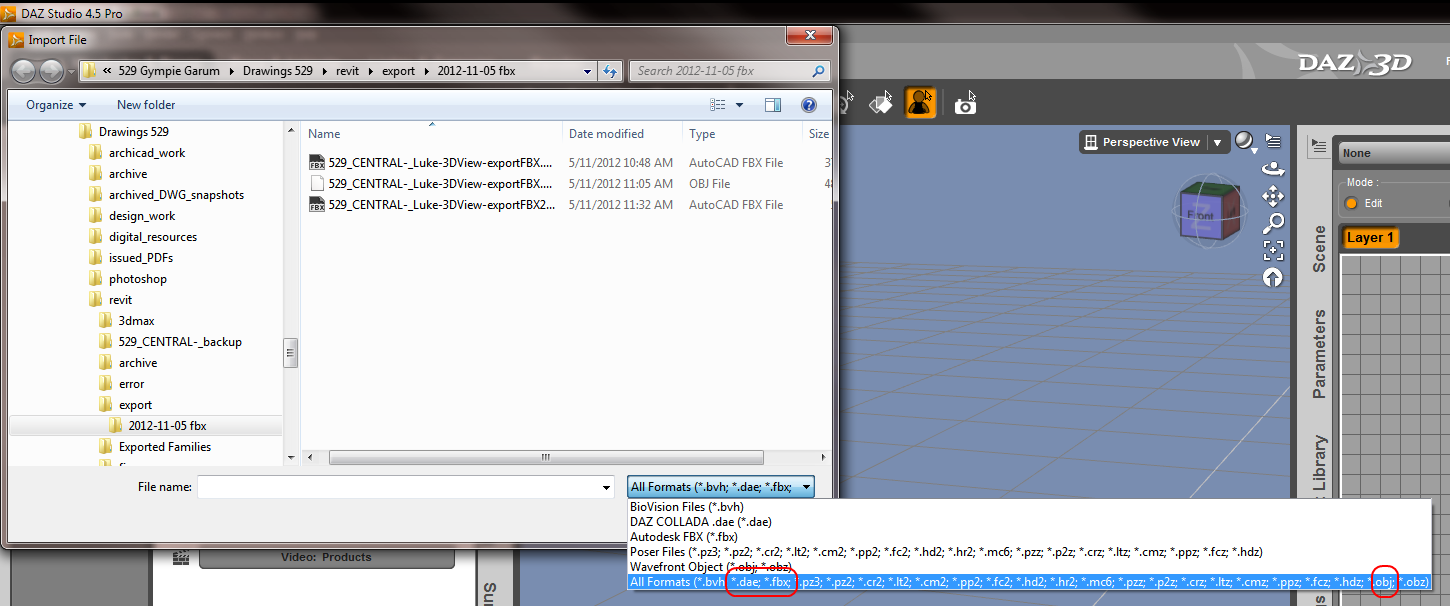
File – Import. You have a nice range to import from, see image below:
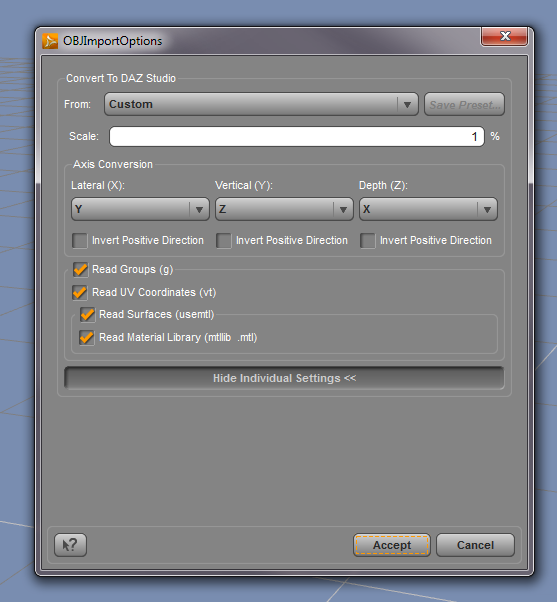
Choose the OBJ you exported from Revit. I used these XYZ settings to get things oriented properly:
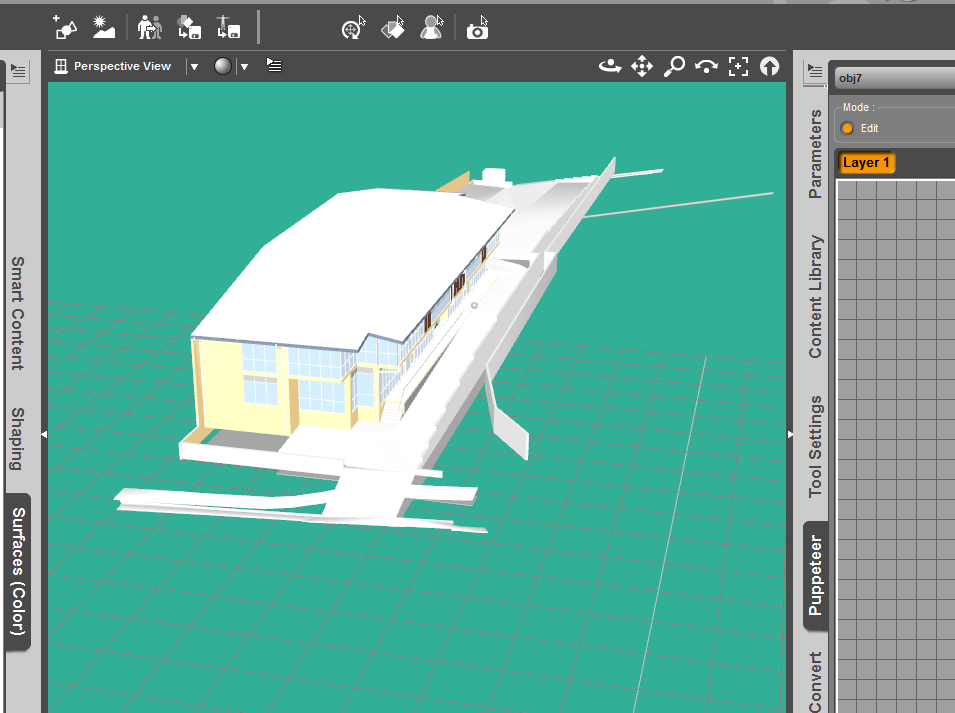
You will end up with something that looks like this:
Now, you can using File – Export – Universal 3D (.U3D) file
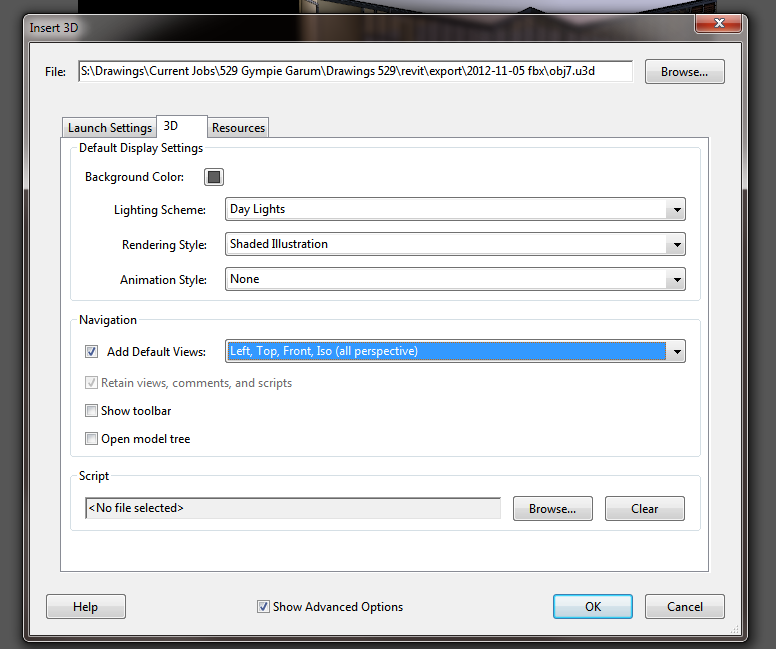
Then, Create a PDF in Acrobat IX Pro. Select the U3D file you just exported from DAZ Studio 4.5
These are some settings that I used:
Finally, here is the 3D model in Acrobat, from Revit via OBJ then U3D:
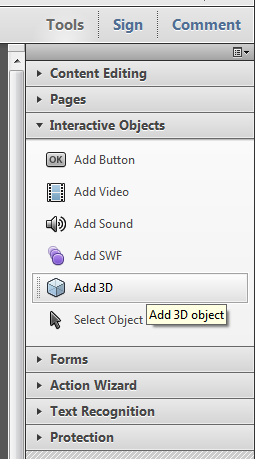
You can also Add the 3D file to an existing document using the Interactive Objects tool pane in Acrobat:
I guess this is a ‘proof of concept’ that not a lot of people will choose to employ, but hey, I love a challenge! Hope some of you found this interesting… there are some more links below if you want to keep reading.
Transfer files from one file format to another quickly and easily with the FBX Converter. This utility enables you to convert OBJ, DXF™, DAE, and 3DS files to or from multiple versions of the FBX format. New tools are now available with the FBX Converter 2012.1. You can view FBX animation files in real time with the FBX Viewer, explore and compare FBX file contents with the FBX Explorer, and manage animation takes with the FBX Take Manager.
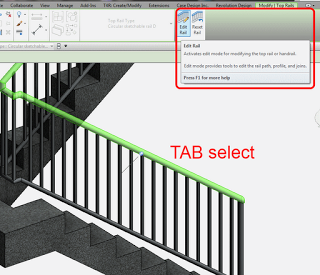
I recently downloaded the Revit (railing) files from Moddex Systems. If you want to access them, go to the following page and follow the links to register: Moddex – CAD Support (you can also go direct to this registration page)
These files do not yet take advantage of some of the advances made in Revit 2013, that I posted about last week. However, Moddex are “looking into fast tracking the upgrade”.
Don’t forget to check out the online ‘master list’ of Revit content at Links to Revit Content online. If something is missing, please register and add it to the page.
One recent post about Section Boxes included two great tips:
In a 3D view, you can re-orient the view, adjust the Section Box, and then use Rewind on the Steering Wheel to get back to a previous orientation (the Section Box remains as you modified it)
When you use Orient to View to grab a section cut plane from a Section view and apply it to a 3D view, you can then re-orient the 3D view (by using ViewCube etc) and the Section Box remains.
I saw some information on this Project a while back – it looked very cool indeed. Essentially it allows you to record and replay a tutorial or workflow in extreme detail. For Autodesk products, it may likely replace tools like Camstudio, Hypercam, Screencast and SnagIt.
From the Labs site: Project Chronicle is a free technology preview from Autodesk Research that makes it extremely convenient and easy for users to capture, share, and learn from software workflows. Project Chronicle consists of a recording utility to capture recordings, and a website that displays the recordings as Chronicles, interactive video tutorials. The Chronicle Recording Utility allows users to capture workflows from within Autodesk products. The utility records a continuous video screen capture and optionally voice narration. What makes Chronicle unique is that is also records the timing and details of workflow information, such as the tools, settings, and dialog boxes that are used during the workflow. Captured data is then uploaded to the Chronicle Website where other users can view a video of the workflow. Additionally, the captured workflow events are displayed on an interactive timeline, enhancing the viewing and learning experience. In essence, Project Chronicle will allow software experts to showcase their expertise and will allow other users to view and learn from their real-world expert examples. Please visit the Project Chronicle Website: https://chronicle.autodesk.com.