Ok, first of all, this is probably a bug. But in some ways, it is quite cool. Do this:
Make a Railing in Revit 2013 with either a Top Rail or a Hand Rail (see here)
Tab select one of the Rails and enter the Edit Path mode.
While in this mode, enter Visibility / Graphics and turn on all Analytical Categories. You will see various paths and nodes appear on the other Railings in the project.
Now, exit all of the editing modes by pressing Green Tick.
Now, strangely, you can simply select and edit all of the paths on all of these Railings!
A few things:
normally, Edit Path only allows you to adjust the end extensions, so this ‘bug’ allows increased functionality
I’m sure there could be some scary issues from using this in a widespread fashion
Reversing the steps on some other handrail can enable the nodes on the original Path (from step 2)
I don’t know how to turn this mode ‘off’ apart from closing the file and opening it back up again…
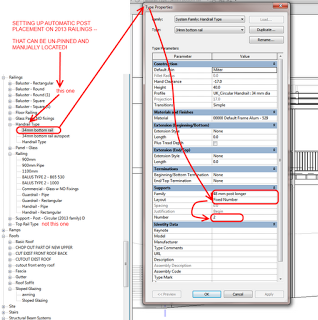
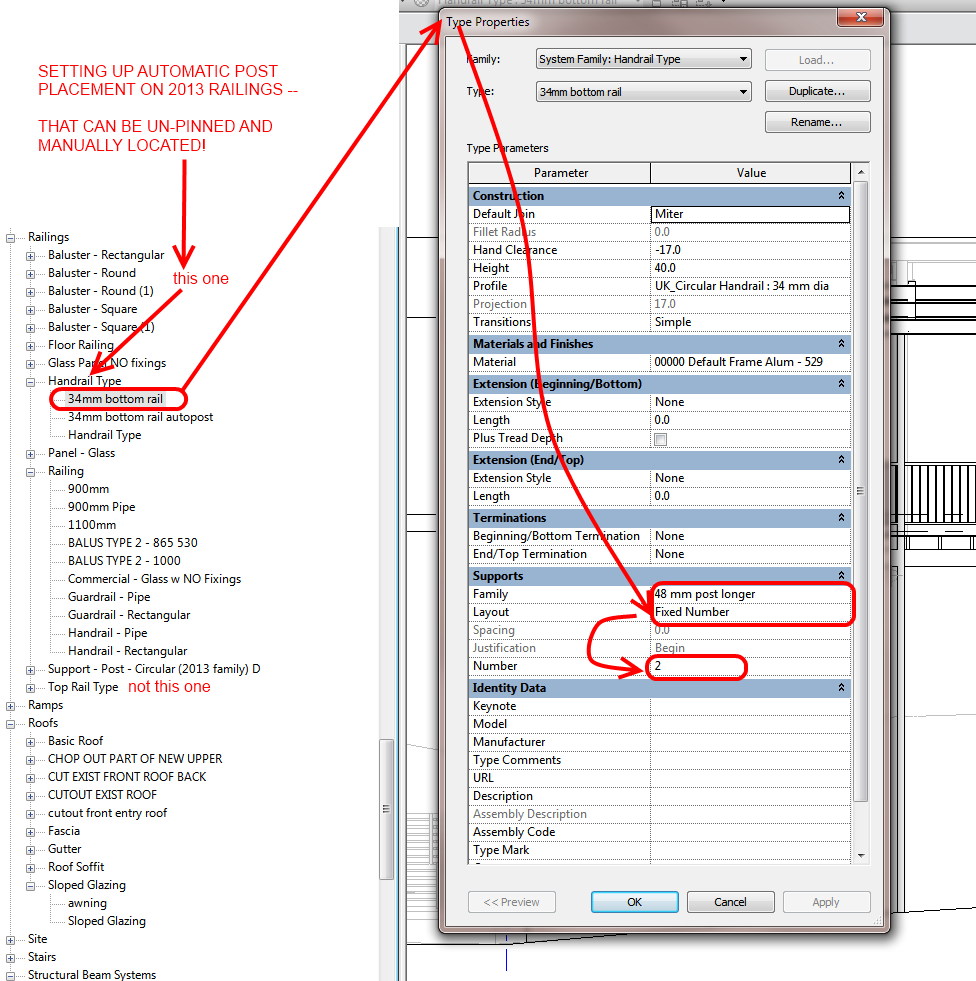
In Revit 2013, with Component Railings, you can unpin certain elements and modify them. For example, you can unpin a selected component Railing (Top Rail Type or Hand Rail Type) and swap it out for a different type. Similarly, you can unpin and swap out posts. However, you can also MOVE component posts after you unpin them. Some of this functionality is beginning to resemble Curtain Walls…
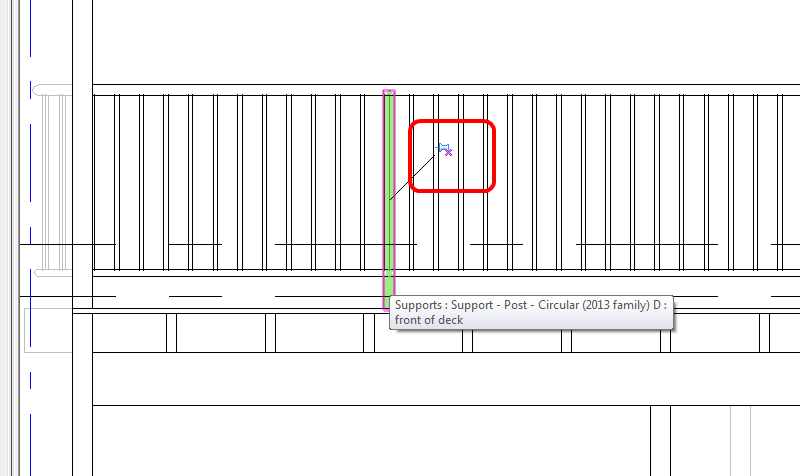
A word on terminology: pre-2013 we had Balusters. These appeared as a top level element under the Railings category in the Project Browser. In Edit Family mode, the Family Category and Parameters dialog did not tell you ‘this is a Baluster’. You could look in the Properties Palette and it would say Family: Balusters. In Revit 2013, the above condition still exists for Balusters (backward compatibility). However, the new component Posts are termed “Supports” and Supports is a proper sub-category of Railings (properties in Family Editor shows Family: Supports). Confused yet? If you want to dig a little deeper, check out the diagram on this page.
Ok, back to unpinning the posts (supports)–
What you need:
A 2013 Handrail Type with Supports set to Fixed Number
A Supports family applied to the above type
What you do:
Draw the railing
The fixed number of posts will be auto spaced along each segment of Railing
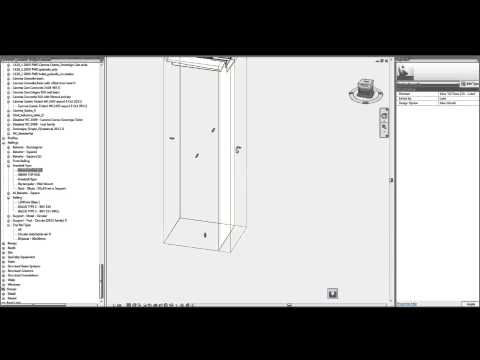
Select each post, unpin it and then either Drag (with mouse) or Nudge (with arrow keys) into position.
I have created a Supports family which allows resizing at both top and bottom – so I can create new types for various situations, unpin and then swap.
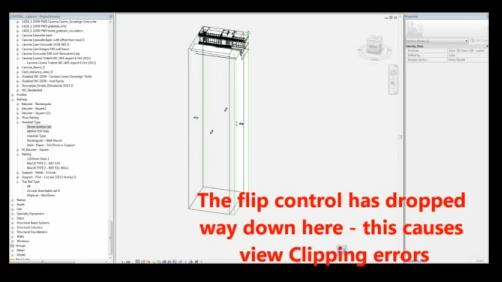
Basically, when all the balusters are removed from a Railing definition in Revit 2013, I have observed that the ‘flip control’ moves far away from the Railing itself, leading to view clipping errors.
I recently downloaded the Revit (railing) files from Moddex Systems. If you want to access them, go to the following page and follow the links to register: Moddex – CAD Support (you can also go direct to this registration page)
These files do not yet take advantage of some of the advances made in Revit 2013, that I posted about last week. However, Moddex are “looking into fast tracking the upgrade”.
Don’t forget to check out the online ‘master list’ of Revit content at Links to Revit Content online. If something is missing, please register and add it to the page.
To be quite honest, I haven’t really used the new 2013 features for Railings, perhaps because my recent work has been more on a master planning level rather than construction documentation. In any case, there are plenty of resources out there to get you started.
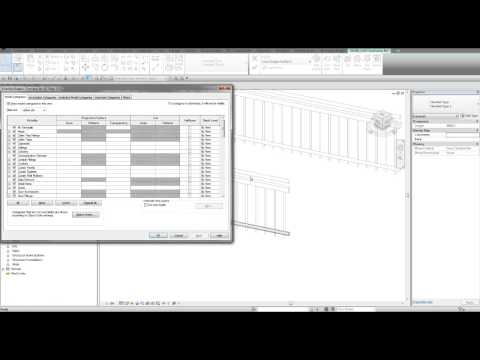
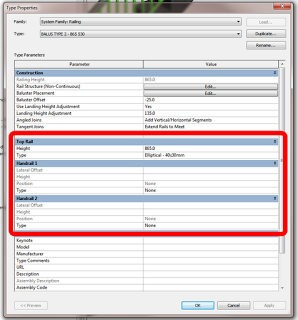
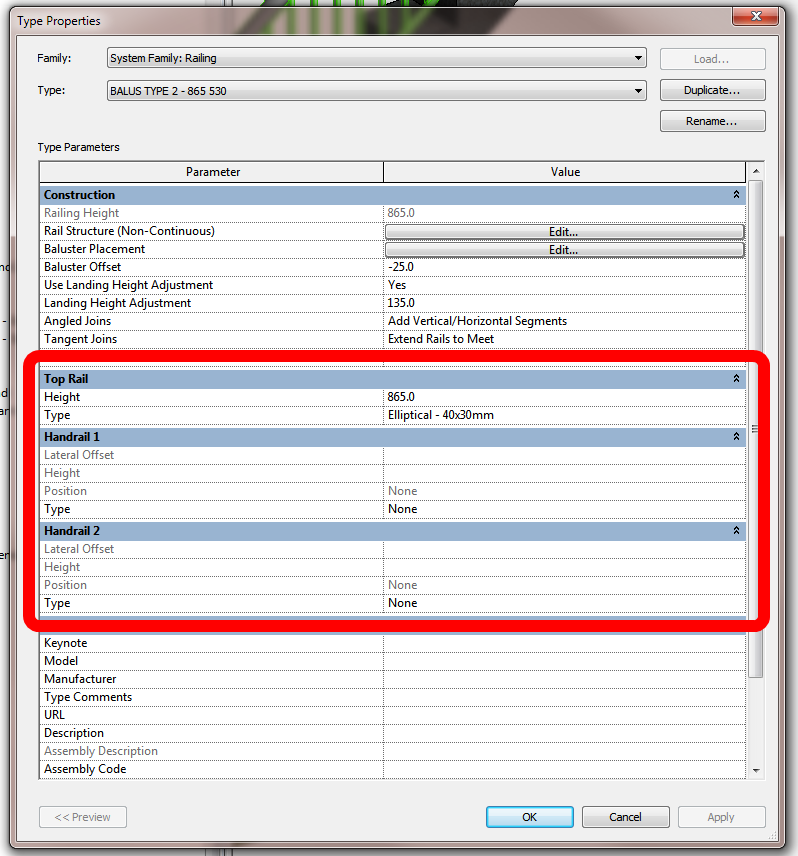
Here is a quick crash course – in the Type Properties for Railings in Revit 2013, you will see new options for ‘Top Rail’, ‘Handrail 1’ and ‘Handrail 2’. You can set the Type and Height of these.
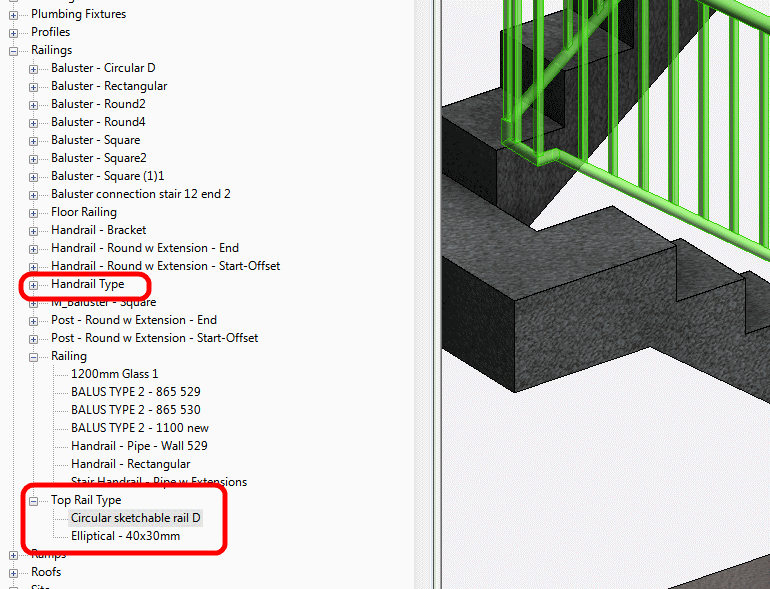
To make new Types, go to the Project Browser under Families -> Railings and you will see nodes for Handrail Type and Top Rail Type. Duplicate and edit the type definitions you see here to make new 2013 ‘continuous’ railing types.
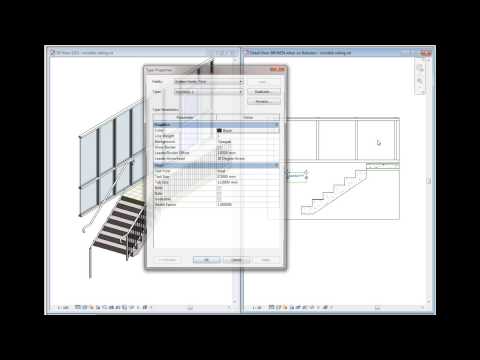
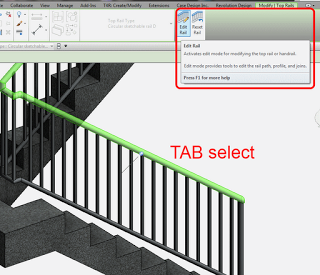
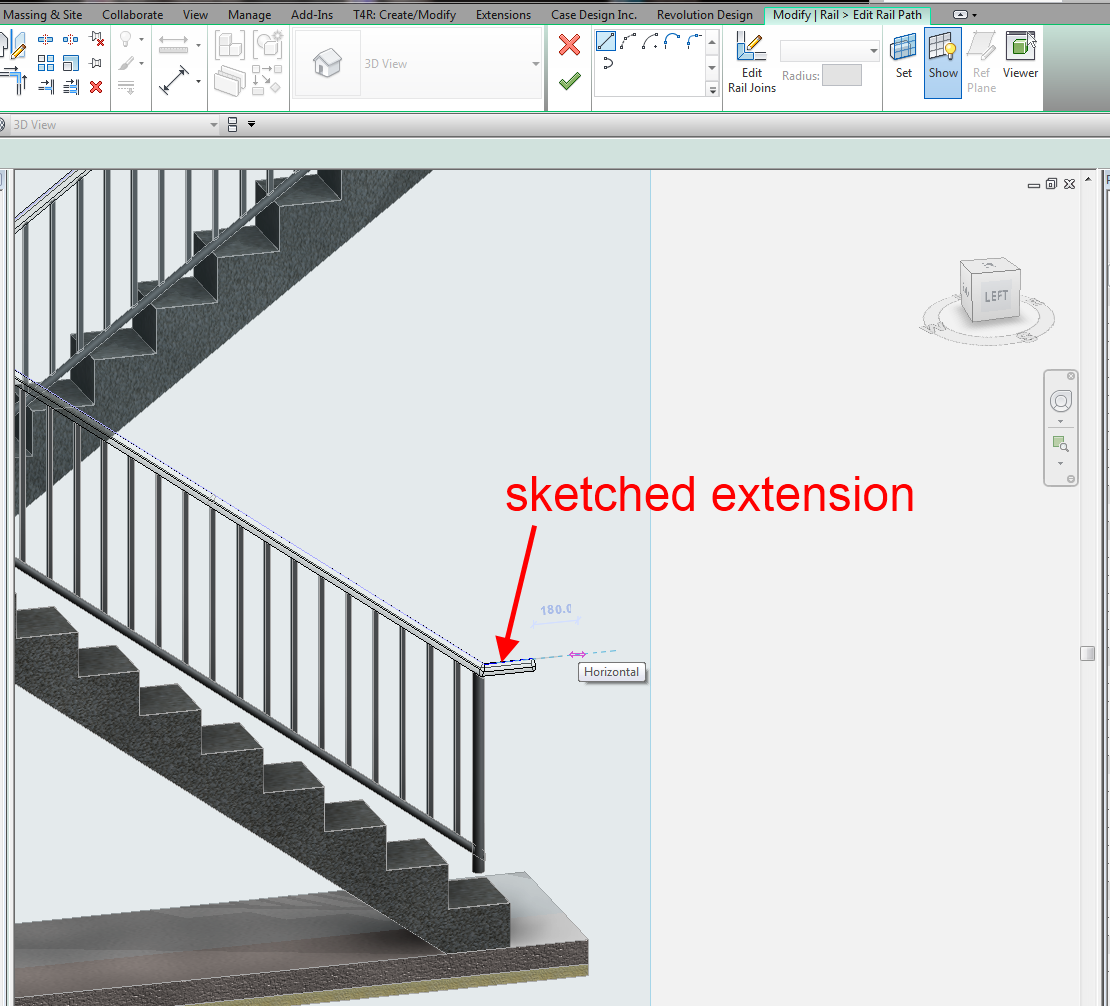
Once you have applied a Top Rail Type to a Railing Type definition, you can now Tab to select the Top Rail! It is basically separating the Top Rail out as a component so that you can perform advanced edits to it. From here, you can access the real awesomeness of Revit 2013 Railings – a sketch mode to extend and adjust the Railing …
Click Edit Rail and you are in business. It will look something like this:
So, if you haven’t used this feature in the past 7 months, hopefully this post will help you get started with it.
I also found the audio interview linked below quite insightful. It describes the reason railings are undergoing upgrade, including the requirement of railing extensions for accessibility. For me, this has probably caused the most pain with regard to railings in pre-2013 versions.
Also, this interview gives the following ‘insight’ into Revit 2014 and future versions: Railing features would be upgraded over several Revit releases
Railings: Hear Jean Foster, Senior Interaction Designer, speak about railing enhancements. Jean describes how the top rail and hand rail elements have been changed to better accommodate continuous conditions. She explains how additional controls allow you to add extensions and different types of extensions to a railing, and how making components within the railing system makes the system more flexible as a whole.