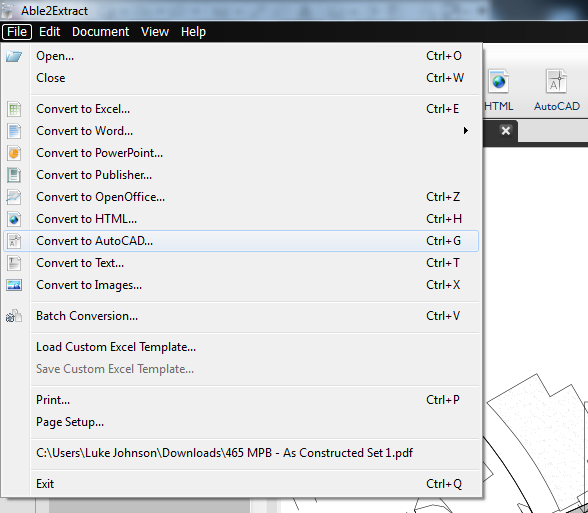
Able2Extract can export a pdf to various formats:

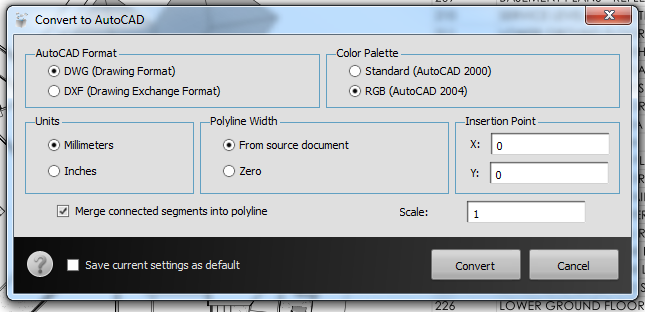
In my testing, I opened a 97mb pdf file in Bluebeam and extracted one page to a separate pdf file for conversion. I opened this pdf in Able2Extract and tested exporting to DWG and DXF with various export options. My results are shown below.

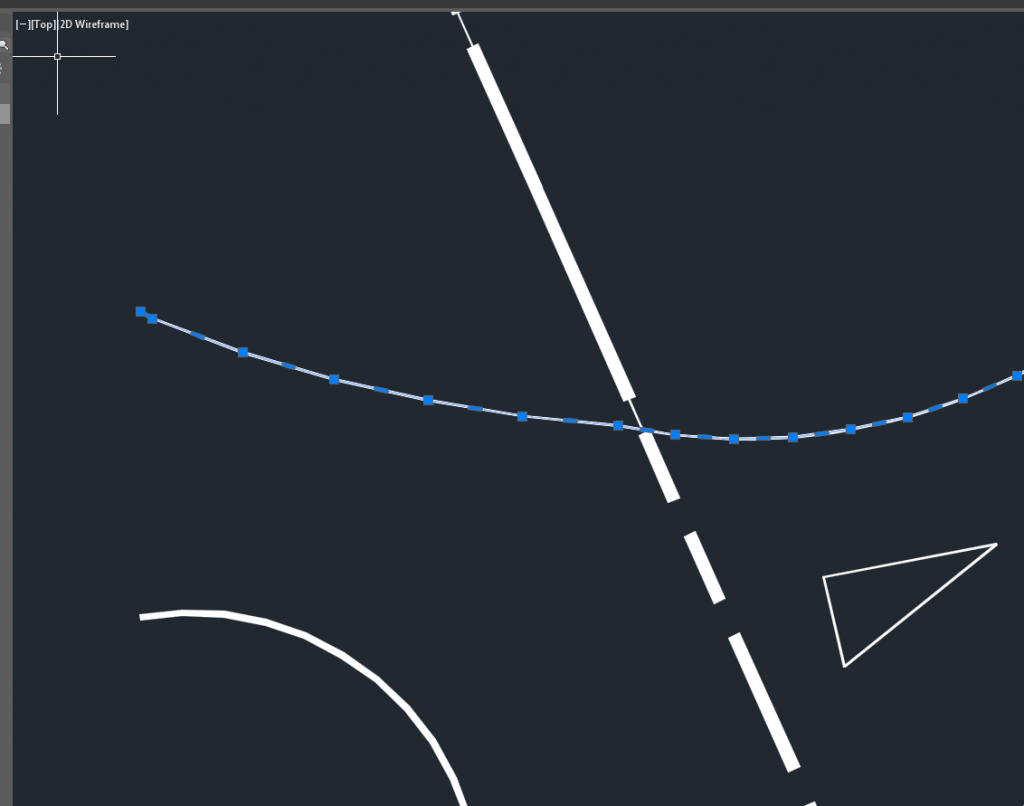
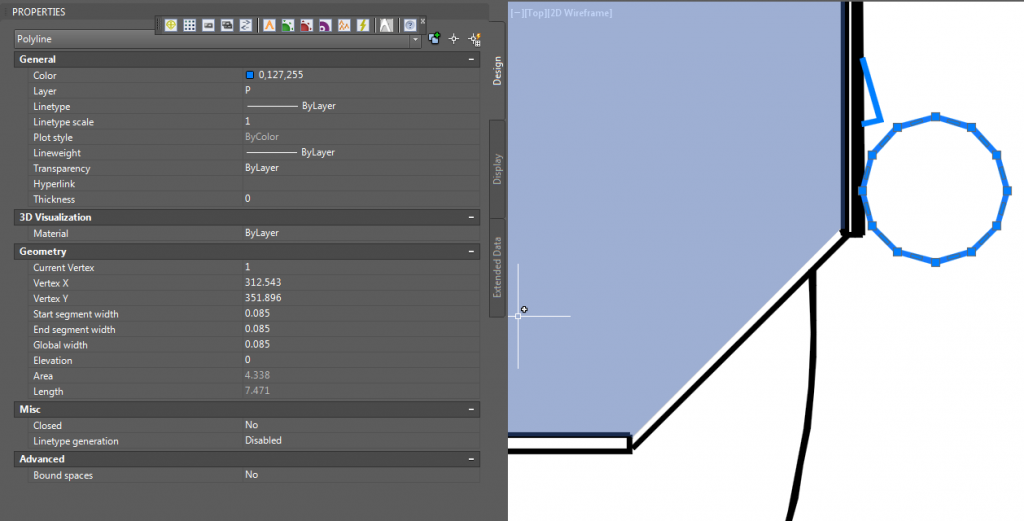
Polyline width detection: Good

Connected segments into polyline: Good

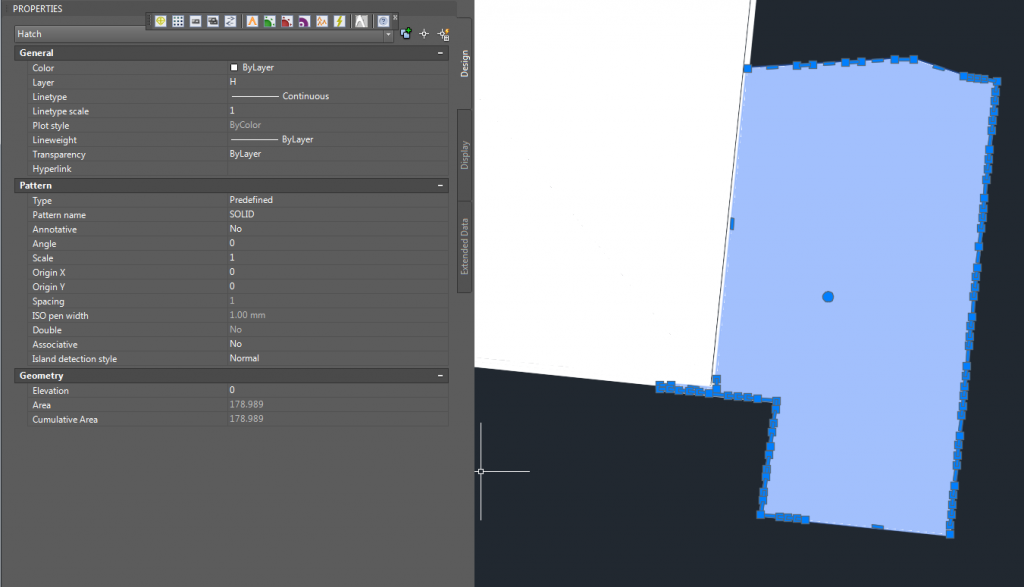
Hatch creation: Good, with colours when RGB ticked on export

Scale:
Good, probably best to export 1:1 then scale in AutoCAD using commands SC and ALL for selection (can also use scale export option)

Text detection: Not good
EDIT: Explanation “The PDF you used contains 4 embedded fonts with custom encoding (File>Properties>Fonts in Acrobat Reader). “Embedded” means that the PDF contains all necessary info to draw them correctly. But, according to PDF Standard 1.5 (http://partners.adobe.com/public/developer/pdf/index_reference.html), page 427: 5.8 Embedded Font Programs…

Font programs are subject to copyright, and the copyright owner may impose conditions under which a font program can be used. These permissions are recorded either in the font program itself or as part of a separate license. A font program may allow embedding for the sole purpose of viewing and printing the document, but not for creating new or modified text using the font (in either the same document or other documents); the latter operation would require the user performing the operation to have a licensed copy of the font program, not a copy extracted from the PDF file.

It means that we can extract from the PDF its content, but not fonts.”

Now, the real question: is it worth it? I think the ease of use is good, and the overall functionality also seems compelling for the US99.95 price tag. This is obviously a lot cheaper than buying a full standalone license of Adobe Illustrator. However, the lack of text support when converting to DWG / DXF is unfortunate. If you plan on extracting the vector information out of PDFs for tracing or use in Revit, and you don’t really need the text, Able2Extract could be worth a look…

How you can get it:
Direct link to 7 day trial for Windows

Main download page here and help page for DWG conversion here

I have previously posted how to convert pdfs to vector information using free tools and using Adobe Illustrator (with video).

I have also provided a guide on converting a raster image to vector information for use in CAD and BIM in this post:
Raster to Vector to DXF for use in AutoCAD, Revit or Navisworks (with video)

Limitations:
I loaded a 97 mb, 208 page architectural set into Able2Extract. It opened up quickly, but then it crashed before I could initiate a conversion.
via Jim Reis on LinkedIn

Source video page:
TSI User Group 2014 Making the Switch CADmep to Revit with SysQue – YouTube

Video description

Customer Presentation: Making the Switch: Jumping from Fabrication CADmep to Revit with SysQue

Tom’s presentation will cover PCI Skanska’s implementation of SysQue, the transition from CADmep, the challenges and benefits of this progression, and its potential benefit to a large-scale and diversely located company such as Skanska USA.
After attending this session, attendees will be able to:
• Recognize the benefits of working in Revit
•See the big picture Revit setup: 

-Workshared project template
-Overview of shared parameters for a company 

 -Library creation of details and schedules
• Understand pipe systems setup for a company
• See what a contractor could expect from a Revit model
• Leverage the data in a Revit Model
 

Speaker: Tom Fuller

Sometimes Google Drive isn’t happy when you have it syncing large folders of often-changing files (sounds like a BIM environment, yeah?) But usually, all it needs is to restart the googledrivesync process to get things back in order. Here is one way you can do that:

1) Copy the following to a text document and save as BAT or CMD:
TASKKILL /F /IM googledrivesync.exe
START “” “C:Program Files (x86)GoogleDrivegoogledrivesync.exe” –noshow_confirmation_dialog_on_delete

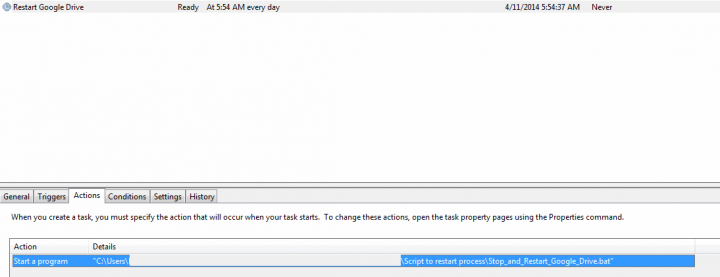
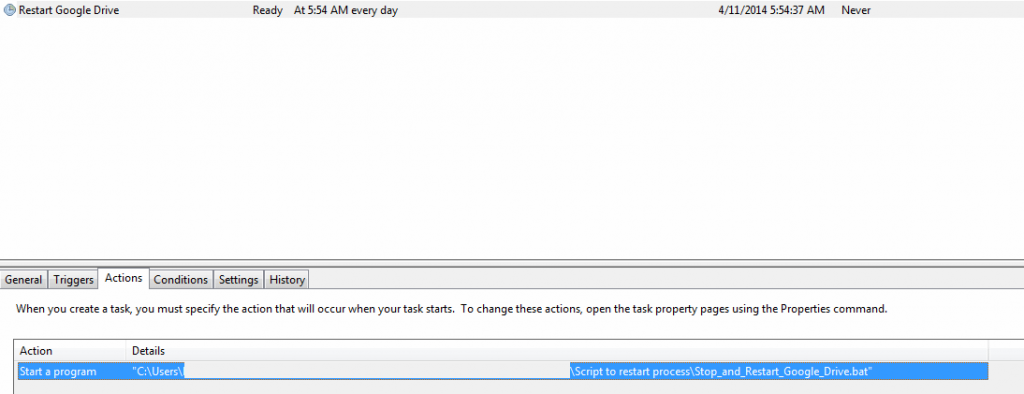
2) Once you have the batch file ready, you can create a basic Windows task that runs daily (before you come into work) to restart Google Drive and ensure it is in sync.

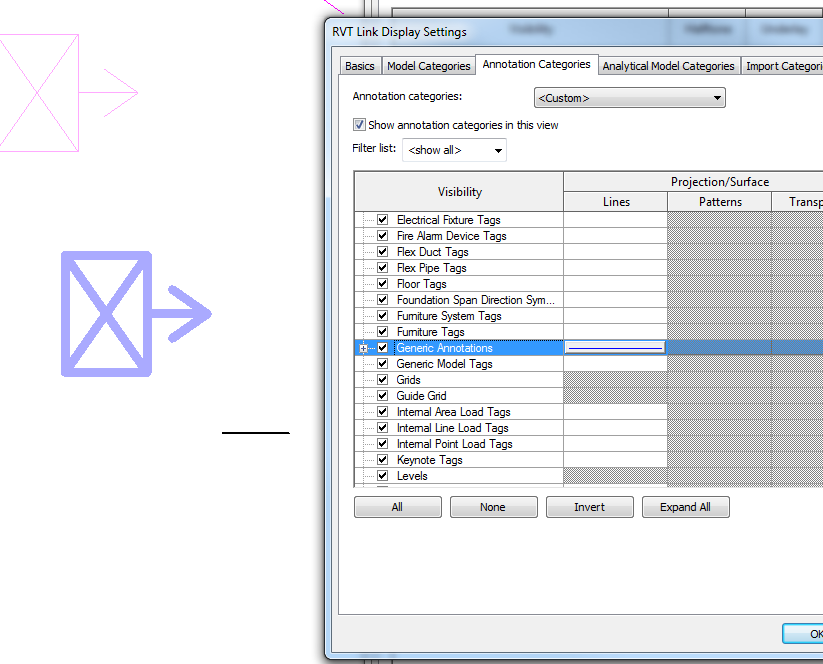
Oh wait, you can’t… put more simply, you cannot override the lineweight of Generic Annotations for a linked file. In fact, it turns out you can’t override lineweights for anything, including Model elements in a linked file… you are stuck with them. You can Transfer Project Standards into the link but that is a painful workaround.

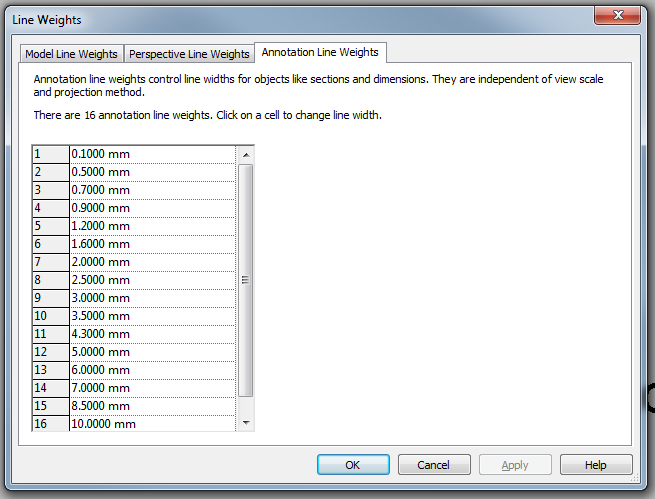
You can override the colour and linetype, no problem. But no matter what you try: Object Styles, Visibility Graphics, Revit Link Visibility overrides, none of this overrides the actual Lineweight of Generic Annotations in the linked file. It is using the value from the Line Weight settings, Annotation Line Weights tab IN THE LINKED file to draw these items in the host file. If Pen 1 is set to 0.3mm in the Link, you will never be able to get a lighter pen weight override in the Host.

To me, this is a bug. If the Revit Link visibility is set to Object Styles – By Host File, annotation line weights should be overriden to match the applied pens.

Unfortunately, this is not the case. Here is a video showing the problem:

Upon further investigation, nested Annotations in Component families that live in a Linked File can’t really be overridden by Visibility/Graphics, unless you edit the Revit Link visibility. Even then, you can set line weights and colours but they will still reference the Linked File Annotation Line Weights.

Fairly nasty stuff, particularly if you are working with linked files from consultants / contractors that extensively use nested Generic Annotations inside their families (sidenote: I’m pretty sure this always a bad idea. Model in 3D, use tags for text, if you have to have text in the family use Model Lines or Model Text or some other method so that you don’t have nested Generic Annotations. They scale wildly around and become a crutch for not modelling in real world scale).

Ok, so we have a problem. I discovered that there is one master switch that works in the Host file to get around this.

1) Set the Family Category to Halftone, this will override the linked, nested Generic Annotation

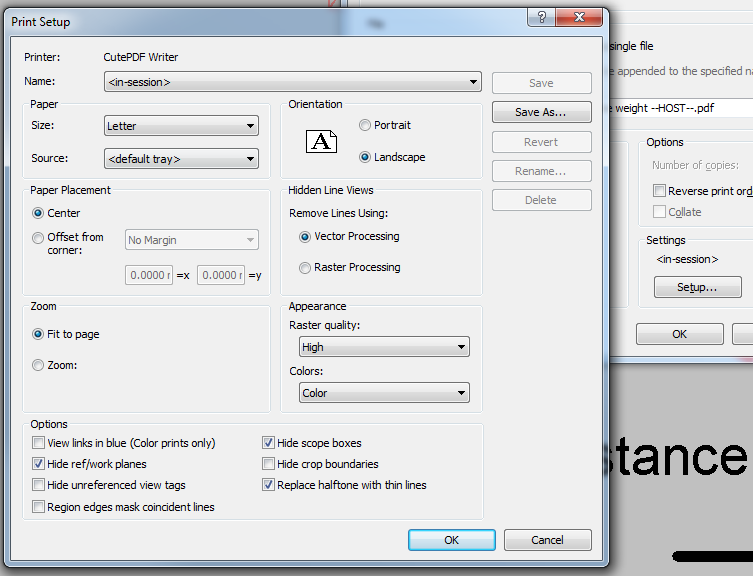
2) When printing, tick the “Replace halftone with thin lines” box in Print Setup

I realise that this is not WYSIWYG, and I really don’t like that. But it does work. Here is a video:

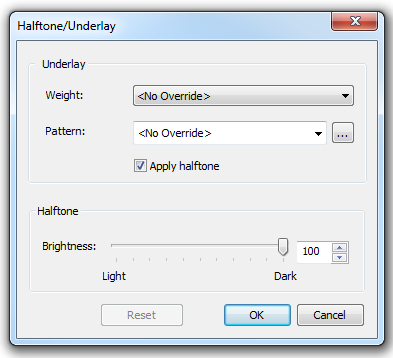
But wait, there’s more. We can actually make it closer to WYSIWYG (is that a thing?), if we adjust the Manage – Additional Settings – Halftone/Underlay to 100. The lineweight will still display incorrectly, but it will print correctly, and there will be no halftone effect.

Some further reading:
Linked File Line Weights – The Revit Clinic

Konrad and Mostapha are working on something, and the functionality does not look shrimpy at all. Check it out:

“Mantis Shrimp is a Dynamo (Revit) and Grasshopper (Rhino) interoperability project that allows you to read Rhino’s native *.3dm file type as well as export geometry from Grasshopper. It is written in Python in form of a user objects (on Grasshopper side for exporting) and custom Python nodes (on Dynamo side for importing). It’s an OPEN SOURCE project with all of the source code available on GitHub. At the moment it’s a collaboration project between myself and Mostapha Sadeghipour.

I decided to make this project an open source for multitude of reasons but most importantly because it was written on top of Dynamo (an open source project) using OpenNurbs (an open source project) and inspired by Rhynamo (an open source project to be in December 2014), and finally I was helped along the way by Mostapha who’s almost never written anything that he didn’t like to share. I think i got the “bug” – not Ladybug – for sharing from him.

Here’s how to get started with Mantis Shrimp…”

Read the rest at:
mantis shrimp – getting started… | archi-lab

Most of you would be aware of keyboardshortcuts.xml in Revit. However, did you know about RoamerCommands.xml? This file lives in the Layout folder under you Navisworks install, and it can be edited to modify keyboard shortcuts in Navisworks.

Note: This process is very risky, so this file should be backed up before editing it. During experimentation, I had a lot of crashes and often had to restore this file to fix the issues.

  1. Backup RoamerCommands.xml (rename the backup or copy it somewhere, like this)
  2. Edit it in a text editor like Notepad++ or Sublime Text
  3. Look for something you want to change / add
  4. Modify the file
  5. Make sure there are no duplicate entries, like this
  6. Save it
  7. Restart Navisworks
  8. If Navis crashes on opening, restore the old file from Step 1 and start again
  9. If it doesn’t crash, see if your keyboard shortcut works

I was able to change the keyboard shortcut for File Open as shown below:

Video showing that my modified RoamerCommands.xml worked:

File location on my system:
“C:Program FilesAutodeskNavisworks Manage 2015LayoutRoamerCommands.xml”

There is a good list of the vanilla shortcuts at this post (this is also where Lee mentions RoamerCommands):
Keyboard Shortcuts (Hotkeys) for Autodesk Navisworks – Beyond Design: the Construction and BIM blog

Quote:
Finally, a few links, details and instructions for those of you who want to get rolling with the tools.  The nodes are available in Dynamo’s package manager, using a recent daily build of Dynamo.  We expect an official release with this functionality by the end of October, but in the meantime you can use a daily build to use the tools. 

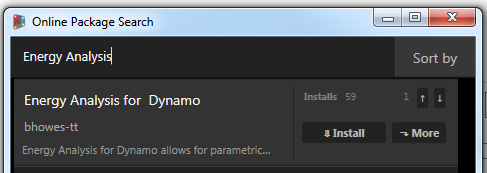
To install the package, search for the name in the Dynamo package manager – Dynamo > Packages > Search for a package > ‘Energy Analysis for Dynamo – and install the package.  Once the package is installed, you’ll likely want to check out our sample files in the package’s ‘extra’ folder, and watch our first round of tutorial videos (1,2). 

We should also note that some analytical information (constructions, schedules, etc.) can only be analyzed using Dynamo on top of Vasari. The source code is available on Github under an Apache v2 license – it is open for anyone to use and modify.

via Energy Analysis for Dynamo – Open Beta Release! | CORE studio

The github page is here

Full credit goes to Adam Sheather for all his hard work on this. Basically, it is a Dynamo package that can talk to Navisworks. I think he has started something pretty special here…

How to get DynaWorks 15:

  1. Download and install Dynamo version 0.7.2
  2. Launch it from the Start Menu ie. DynamoSandbox.exe 
  3. You can download DynaWorks directly from http://dynamopackages.com/
  4. or to use Dynamo package manager: Open Dynamo from the start menu, Packages, Search for a Package, wait to synchronize package list, then click to install DynaWorks
  5. Install GetClashIDs too if you want
  6. Mine installed itself to this location:
    C:UsersLuke JohnsonAppDataRoamingDynamo.7packagesDynaWorks15bin
  7. To get my install to work, I had to copy missing XML files from step 2, and then used Import Library and chose DynaWorks15.dll from the path above to ‘refresh’ the install and display the extra nodes (you might not have this problem)
  8. To test it is working, grab the runClashTests definition from this folder,
  9. Open it in Dynamo, point it at one of your Navisworks files by modifying the String property,
  10. Click Run in Dynamo, and it will automatically open the file and run all the Clash Tests.

The above steps should get you up and running… but there is so much more capability here that it deserves more than one post. As Adam mentions in his post, you can use DynaWorks to run Navisworks in hidden mode. I’m looking forward to seeing how others use this … particularly in getting Navisworks to communicate with Revit more effectively.

Heads-up:

Adam’s video:
 

Adam Sheather:
#Dynamo #DynaWorks #BIM is released!! Check here http://t.co/jT7KjiKqwI for installation details or herer http://t.co/t9EvdfJxws for demo.
https://twitter.com/Gytaco/status/517624124986761216

The github page:
https://github.com/Gytaco/DynaWorks

More info at:
Stuff and BIMs: DynaWorks is here!! The Navisworks library for Dynamo