Office Lens is an amazing app for scanning documents or even whiteboard images directly to images, PDFs, even OneDrive and Office documents. The smoothest way is straight to OneNote. However, it doesn’t run natively on a Surface Pro 3, partly because the Surface Pro 3 just has a fixed focus camera so it doesn’t offer great fidelity when taking a photo of a document.
However, many Windows Phones have great cameras (I use a Lumia 930, with 20-megapixel 1/3” PureView sensor with Carl Zeiss optics). And obviously, they do run the Office Lens app. So, how do we scan a document and get it across to the Surface Pro 3? Well, if we have easy internet access we could just use the integrated OneDrive or OneNote cloud storage. But what if we don’t want to use our mobile data plan?
Here’s one way:
- Using Bluetooth, pair your Windows Phone with your Surface device
- On the Windows Phone device, start Office Lens and scan the document
- Click share this image…
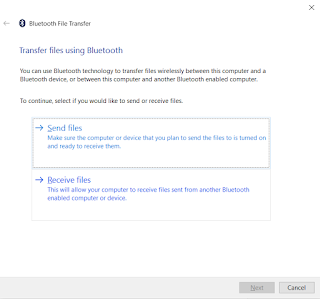
- On the Surface device, use Windows+R (Run), then type fsquirt
- Click Receive files…
- The Surface is now waiting
- Back on the Windows Phone, choose Bluetooth
- Select the computer name of the Surface device
- The image should transfer as a JPG, and you will be prompted to save it
The limitation with this particular method is you have to do one image at a time, it doesn’t transfer multi-page documents as one file. For that, you will probably have to use the OneDrive or OneNote integration… and your data plan or wifi.