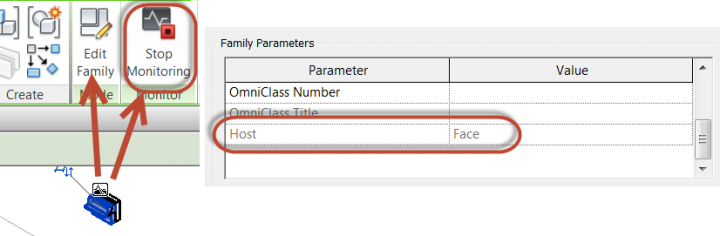
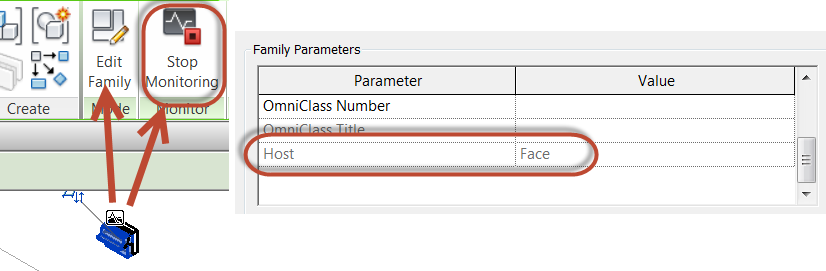
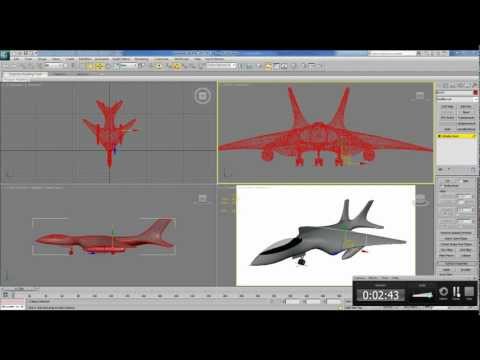
Have you created a heap of wall based families that you would like convert to face based? Jarod Schultz provides a nice workaround for this. Essentially, you Link and then Copy/Monitor the elements, then when you use the Edit Family button, Revit swaps them to Face based for you!
“Get into a 3D view so it is easier to see your linked file and the lighting fixture. We are now going to use the “Copy/Monitor -> Select Link” tool to “Copy” in the light fixture.”
This workflow can be used to convert any hosted Family to a Workplane based or unhosted versions, as David describes here:
Place an instance of the family you want to hack in the drawing area. You can insert multiple ones at the same time;
Save the file and close it;
Open a new Revit file from no template. This ensures it is completely empty and Revit will thus create this hacked copy when we do step #6;
Link the previously saved model into this new file;
Go to the Collaborate Tab>Copy/Monitor>Select Link and pick the linked file. Once in C/M mode, click Coordination Settings and make sure that the family types you want to hack are set to “Copy Type”;
Click the Copy button and pick the families you want to hack;
Secondly, did you realise that Revit 2014 comes with a tool to convert gbXML data into a dwfx file? Look in your Revit program folder for a file called gbXML2dwfx.exe
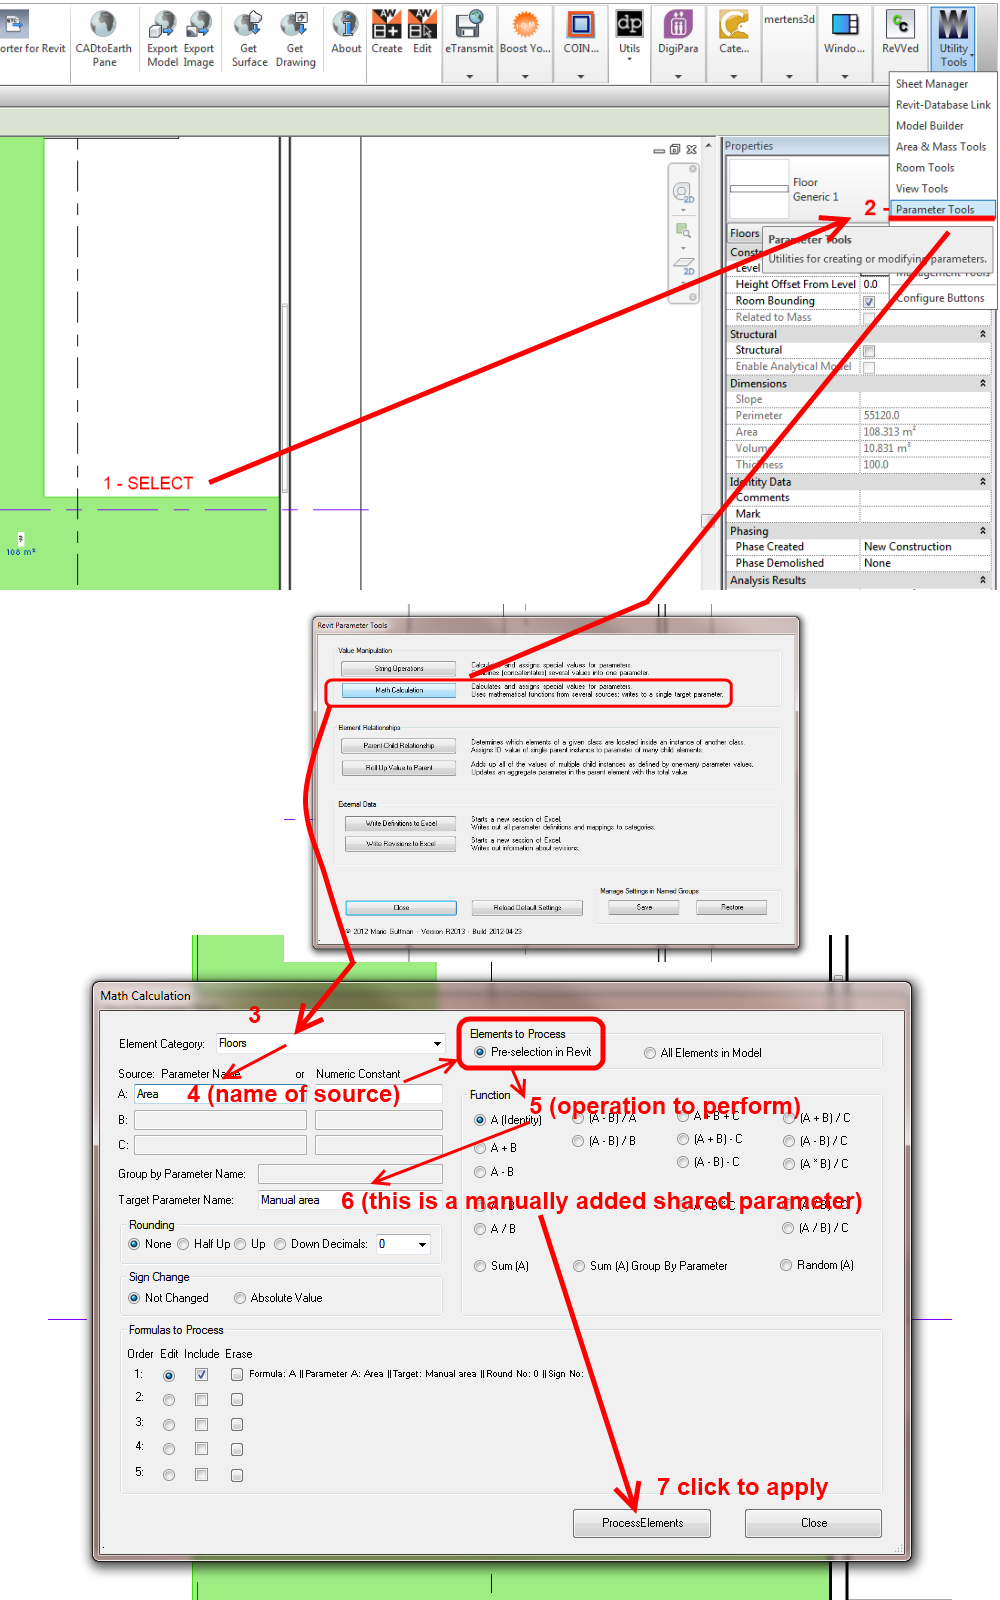
In the image below, I show the basic process used to drive a Floor Area parameter into a manually added shared parameter. Obviously, this scenario is not ideal – the data link isn’t dynamic, so we have essentially created a mini-silo (that’s what I’m going to call “in-software unlinked BIM”) right inside Revit.
In any case, here is how you can quickly do it with Whitefeet tools (start at 1 and follow the arrows):
This is a great post / video from pedroeron on RFO. It essentially shows you how to hide the edges of imported geometry (such as from Sketchup), so that when it imports into Revit, you only see the shaded surfaces – not the ugly triangulated surface edges. Nice!
Also, this video shows that it is possible to Link a DWG into an inplace Component family – some interesting possibilities arise from that.
In 3dsMax, Use ProOptimizer Modifier to get your model to less than 32000 faces (so that it can be exported to DXF)
Convert to Editable Mesh
Use Mesh Selection – Edge tool
Select all Edges and change to invisible
Make one or two triangles visible (so that you can select the model in Revit)
Export to DXF 2007 version
Import into Revit
Note – you can also go Export to 3DS, then import to AutoCAD (using 3DSIN command) and divide object by Material (creating a new layer for each material), then go to Revit from there. You may experience some geometry issues through this multi-handling of the data.
Here is the fix: If you unload the material library from the template, save it, close Revit, reopen, create a project from your template and add the Material Library there: not a problem. It’s all there.
Now getting back to answer number one: it stays there. The above workflow is a definitive solution to the problem. Once loaded into the project you can reload the Material Library in your template. Then and when you create a new project from that template there won’t be a problem. It’s like the entire problem never existed.
It may not be immediately obvious how you can quickly transfer Project Parameters or Area Schemes between linked models (to allow scheduling of linked RVT data in a host project).
Turns out the answer is pretty simple – just use Ctrl+C (Copy to Clipboard) to copy the required Schedules from one RVT to another.
Some of you probably already realise that Case Apps have released a suite of Subscription tools (in other words, these are not free).
One in particular caught my eye – Super Tag. It provides a “simple means for tagging specific family types by category using a specified tag on as many views as you choose.”
I can’t recall how many BIM document PDFs I have downloaded over the years. There are web indexes of the indexes of the lists of standards you can access…


