Update… v2 has been published in Bakery package as:
Create Floors From Rooms v2.dyf

All kinds of weirdness with Package Manager at the moment, so I am sharing my entire ‘packages’ folder including Bakery and dependencies for 0.8.2 at this link:
https://drive.google.com/open?id=0B1dGdRkpk2beekFydmdCZTVhc0k

It uses a two different methods to get Room Boundary outlines: first try is with a Clockwork node, next try is by Element.Geometry. It also sets the Room Number to the newly created Floor Comments parameter.

Just letting you all know that this new node has just been published in the Bakery package:
Create Floors From Rooms v1.dyf

The scope:
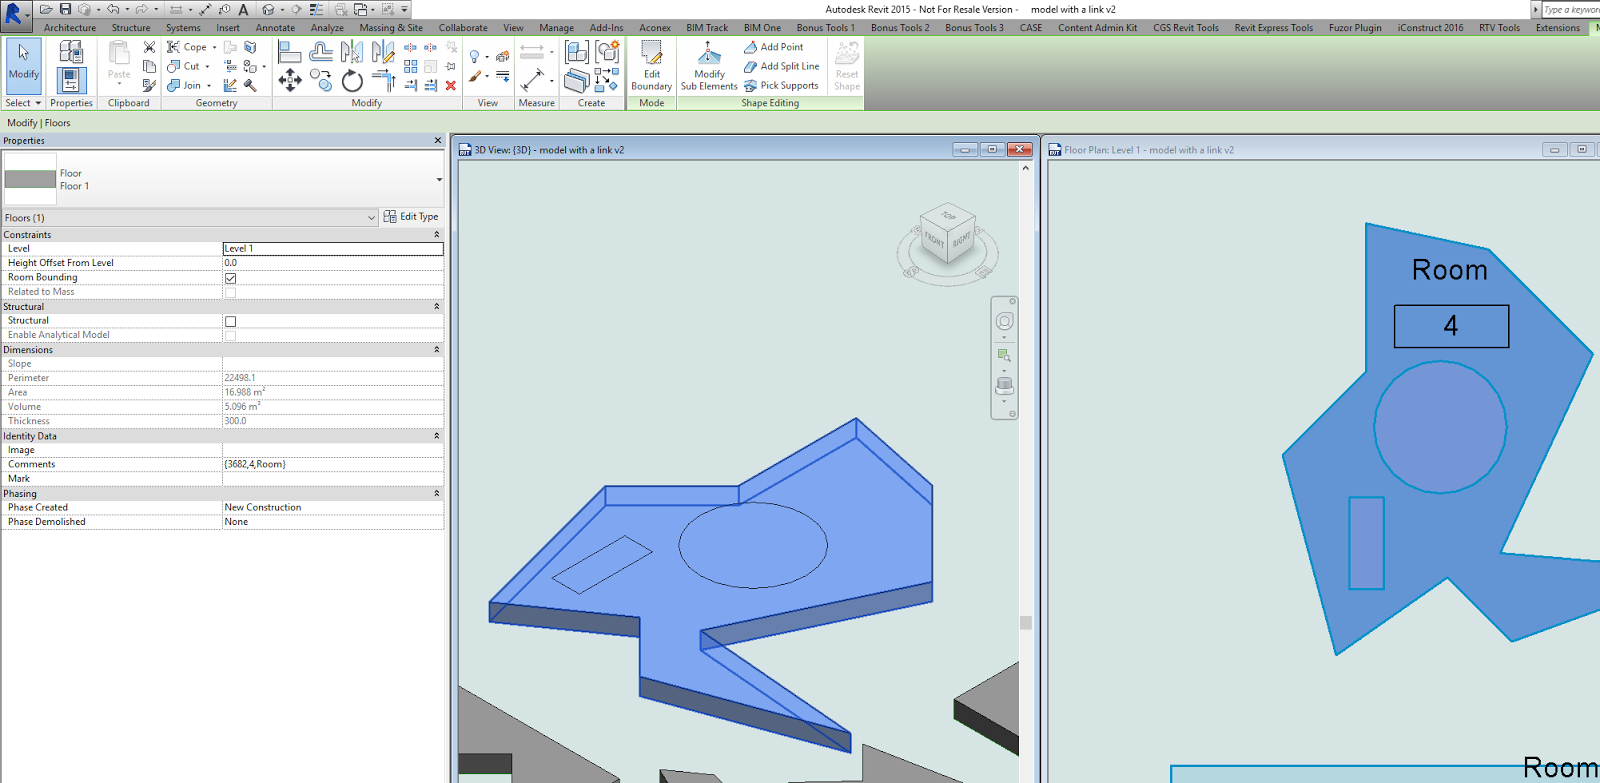
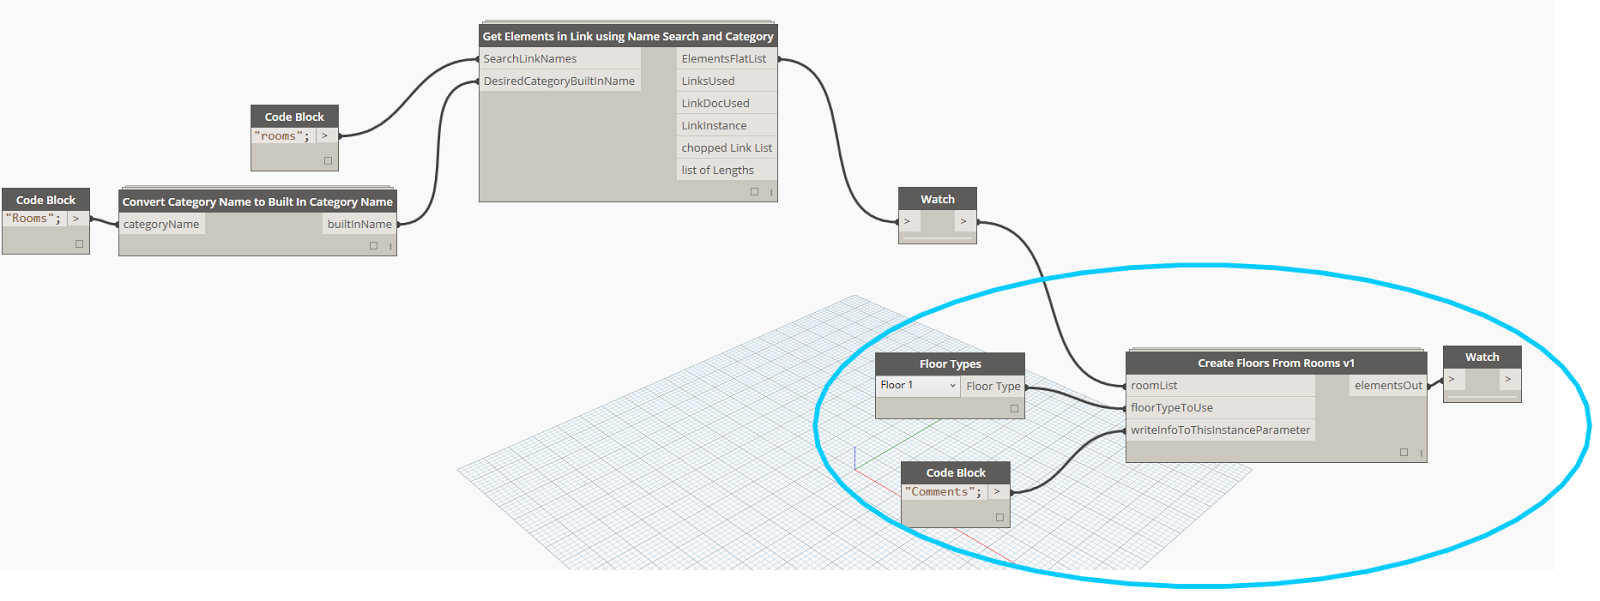
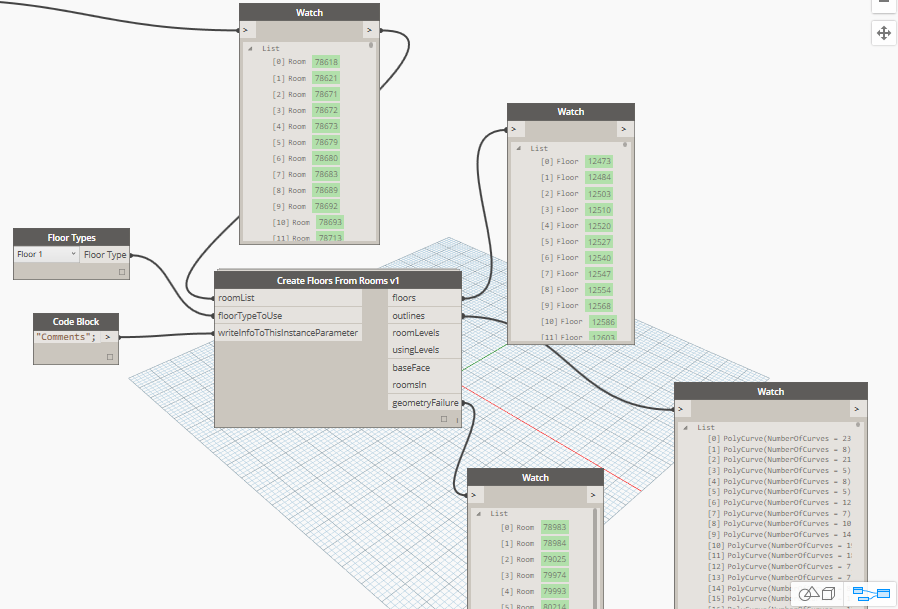
This ‘version 1’ node takes the Room elements, converts to Element.Geometry, grabs the face at the host level, gets the curves from the face, uses Konrad Sobon’s Group Curves node to assist with making the Polycurves, then matches the right Polycurve with the outer boundary using a bounding box method. Then, it feeds the outline to a Floor creation node (after matching link Level-host Level if necessary), and then sets Element Id, Room Number and Room Name as one string to the parameter you select.

You can use it across links with some other Bakery nodes too, which would look something like this:

Unfortunately, sometimes the builtin Element.Geometry node will fail to convert the Room to a solid. This warrants further investigation, but only affected about 15 rooms of 718 in this particular test. In the meantime, I simply report which rooms fail in the ‘geometry failure’ output:

Future improvements needed:

  • handle Element.Geometry failures with some other method
  • cut out Floor Openings where voids are present in the Room space
  • match Base Offsets by moving created floors to correct height
  • get approximate Room Height by Volume and drive or report desired Floor Thickness

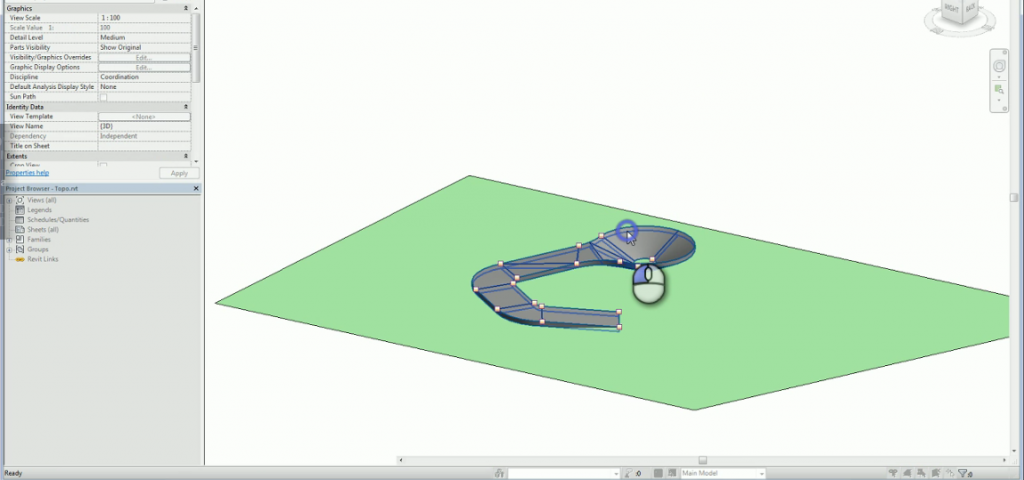
Here is the 1 minute demo:

And the dyn:
http://gdurl.com/cWYz

If you are on Dynamo 0.9 or newer, you may want to check out Marcello’s Direct Shape method over at:
Simply Complex: Create 3D Rooms in Revit Using DynamoBIM

Paolo has posted an interesting bit of code that basically allows you to pick a floor element, and it will add points to a topography so that the topo follows the “points” on the Floor.

A very interesting solution to a common problem, namely, the (currently) limited functionality of topo tools in vanilla Revit.

Download here
“Anyway here you can find the code I’ve used
via original post http://puntorevit.blogspot.com/2014/08/align-topo-macro-attempt.html

You can’t simply use a Floor Tag to tag the thickness of a Floor in Revit…

However, you can:
Convert the Floor to a Part, and use a Parts Tag

Parts tags can natively report thickness of the Part.

EDIT There is another method that comes via Kym Vdz on Facebook, it refers to this post on RFO (you will need to login to download).  I haven’t looked into this deeply yet, but it seems to basically use a Floor-based family with a shared Reporting parameter to pass the Floor Thickness into a nested Generic Annotation… there is always many ways to solve a problem in Revit!

Julien writes “you should try this family….hope you like it. it reports the slab thickness. just place it on a floor.

credits to: Revitez!: Utiliser les paramètres de rapport pour coter l’épaisseur d’une dalle dans un plan d’étage

Attached Files Attached Files

In the image below, I show the basic process used to drive a Floor Area parameter into a manually added shared parameter.  Obviously, this scenario is not ideal – the data link isn’t dynamic, so we have essentially created a mini-silo (that’s what I’m going to call “in-software unlinked BIM”) right inside Revit.

In any case, here is how you can quickly do it with Whitefeet tools (start at 1 and follow the arrows):


I previously posted another workaround for this – using a filtered schedule:
Tag Floor Area in Revit workaround

As you may have realised, you cannot add the Area parameter to a Floor Tag annotation.

Here is a workaround:

  1. Make a Floor Schedule with Area and Comments fields added.
  2. Filter By – Comments = the Comments of the Floor you want to tag (this needs to be a unique entry).
  3. Turn off Headers, Grids etc in the Schedule Appearance.
  4. Hide the Comments field in the Schedule.
  5. Rename the Schedule to something like:
    Floor TAG – Deck Area
  6. Drag and drop this Schedule a.k.a. Tag onto a Sheet, on top of the Floor in question.

OK, I understand that this is not the most manageable or elegant solution, but it may be useful in certain situations.

Revit does not want you to place a slab edge on part of a slab that is sloping (because it has been shape-edited).

However, you can ‘trick’ Revit into letting this happen by:

  1. Setting the edge you want the Slab Edge to go on to be ‘flat’ by temporarily point editing the slab.
  2. Then place the Slab Edge (Revit will allow you to, now that the edge is flat).
  3. Adjust the points back to how you want them.

The Slab Edge should happily follow the sloping edge now.

A bit of a workaround, but it does work…