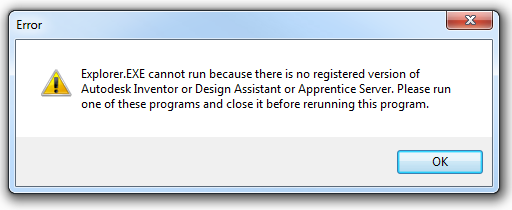
On latest R2 version of Revit 2015, with Navisworks 2015 SP3 and Navisworks Exporters R3, there remains a Navisworks export bug that affects some projects after upgrade from previous versions of Revit.

Error: documented at http://knowledge.autodesk.com/support/revit-products/troubleshooting/caas/sfdcarticles/sfdcarticles/Error-No-suitable-geometry-found-when-exporting-from-Revit-to-Navisworks-2015.html

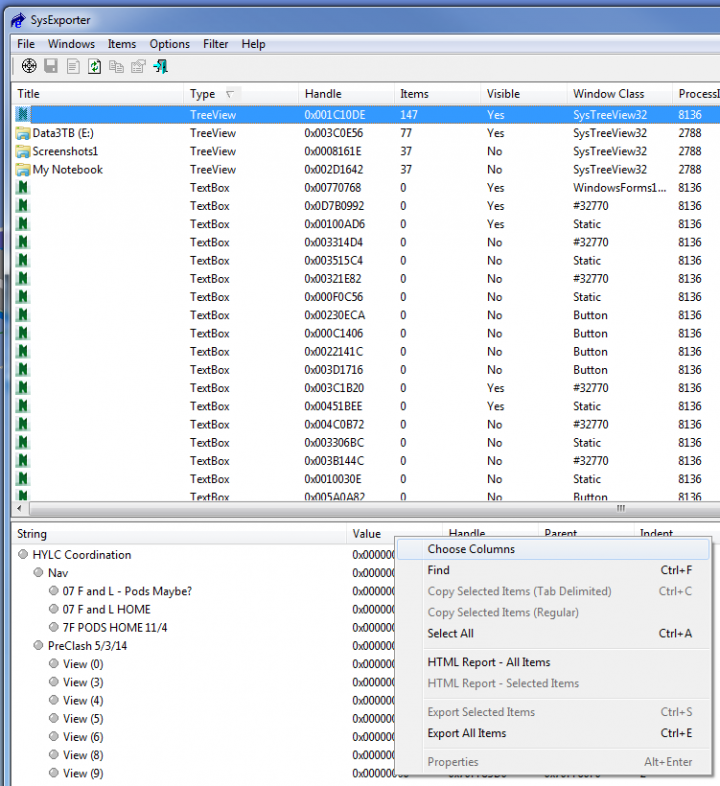
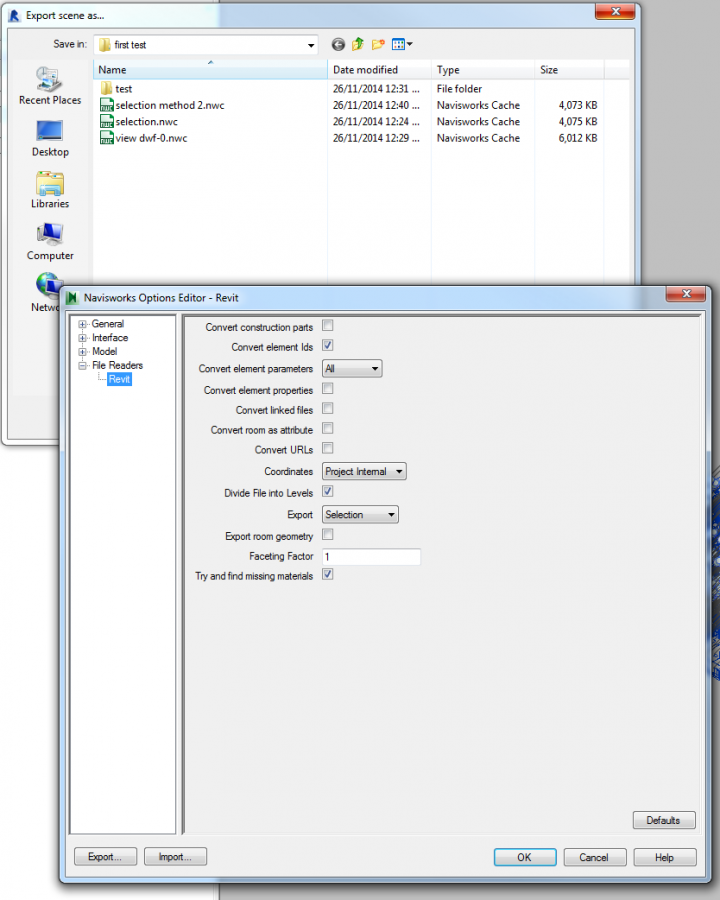
Workaround: You can use the selection method to Export and the error does not seem to occur:

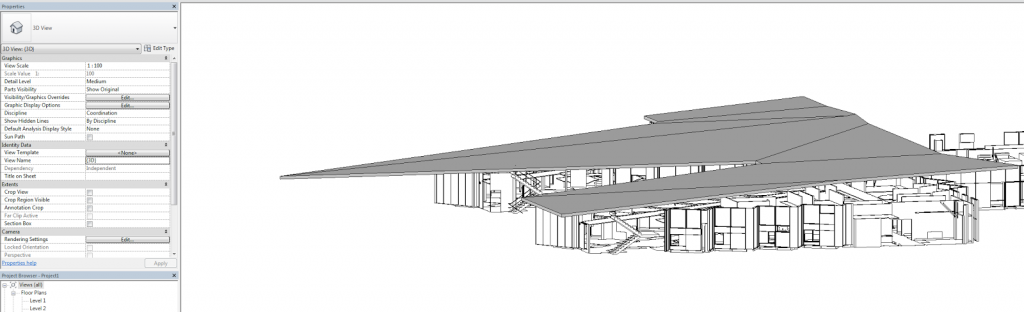
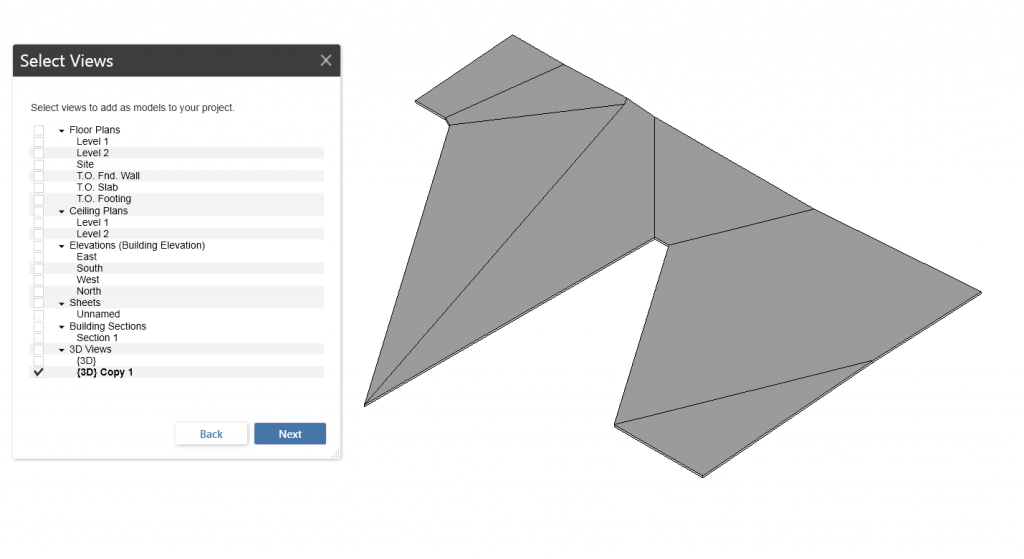
  1. Open the 3D view to export 
  2. Select all visible objects 
  3. Go to Addins ribbon, 
  4. choose External Tools – Navisworks 2015 (Exporter) 
  5. In the settings, choose “Selection” (see attached screenshot) 
  6. Name the file and export as usual

Other suggested workarounds (did not work in this instance):

  1. Turn off Detail Items
  2. Try exporting again

or

  1. Remove View Template
  2. Set Level of Detail of view to something other than Fine
  3. Set Level of Detail of categories in V/G to the setting you desire (can be Fine)
  4. Try exporting again 

or
Try turning off categories one at a time to find out which Category the problem geometry resides in.

or
using “uncut” in the Family Editor to uncut the voids from everything, and then using ‘cut’ to cut them again. after reloading back through into the project, this also allowed the export to continue.

or
some other way…

      The log file reports:
      Autodesk.Revit.Exceptions.ExternalApplicationException: Object reference not set to an instance of an object.
         at Autodesk.Revit.DB.CustomExporter.Export(View3D view)
         at NavisWorks12.LcIRevitBase.Export3DView(View3D view_3d, StateDictionary state_dict)
         at NavisWorks12.LcIRevitBase.ExportDocument(String& return_message, ElementSet elements, LcIRevitParameters* params)

      Related forum:
      v2015 – Navisworks Can’t Import Revit – Autodesk Community

      Now available in Application Manager, direct links:

      Autodesk_Navisworks_2015_Service_Pack_2_Multilingual_Freedom_64bit.msp (msp – 201Mb)
      Autodesk_Navisworks_2015_Service_Pack_2_Multilingual_Manage_64bit.msp (msp – 265Mb)
      Autodesk_Navisworks_2015_Service_Pack_2_Multilingual_Simulate_64bit.msp (msp – 265Mb)


      Service Pack 2 resolves an issue opening and appending multiple files in a single operation. The Service Pack also resolves issues identified in our Point Cloud support, Autodesk Rendering, Quantification, Clash Detective, and interoperability.

      Readme and install links:

      Main Autodesk page:
      Navisworks 2015 Service Pack 2 | Navisworks Products | Autodesk Knowledge Network

      Something popped up on Exchange recently, got tweeted, and then disappeared… but now its back!

      This addin allows simple import of PDFs directly into the Navisworks 2015 Project Browser as sheets that can be reviewed, marked up and quantified. Previously, to accomplish this you could open the PDF in Design Review with vector information, save as DWF and “Import Sheets and Models” to bring the DWF sheet into Navis. As you may know, the 2015 release introduced a lot more Quantification functionality for 2D, and I believe this new PDF importing tool will become a key part of that workflow.

      In short, it seems that the sheet import process for Navisworks 2D documets is about to get a lot easier!

      Link to PDF Reader download page (sign in with your Subscription account login on Exchange and then the Subscription only button will change to “Free” and you can download AutodeskNavisworks2015PDFReader.msi)

      Read the help document here

      The entire Navisworks App Exchange is here

      I hinted at the document aggregation possibilities in Navisworks back in this post.

      Firstly, make sure you have a model on Glue that you can access. Did you know that when you Glue something from Navisworks, it makes an NWD and puts it in a folder like this:
      “C:UsersLuke JohnsonAppDataLocalNavisworksPlugin63baac4b-76c8-4ff8-9039-d51645fd1ddc.nwd”

      Once you have a model on Glue that you would like to download and use as modelling context in Revit, make a new Navisworks file and:

      1. Append that model back to Navisworks from Glue (it will look like you opened an NWD, with Clashes, Search Sets and Viewpoints all appearing. This tells us that BIM 360 Glue stores all that information in the cloud, at least when the model “originated” in Navisworks.)
      2. Use this method to export FBX and import to AutoCAD at correct scale (Limit your Navis view to only the elements necessary for modelling context. For example, walls or facade only.)
      3. Save the DWG
      4. Make a new Revit file. I had problems using the Construction template – it seemed to break the coordinates somehow… In any case, when I just used “None” template, it worked fine.
      5. Link the DWG into Revit, Origin to Origin
      6. Do your Revit modelling (in the screenshots below, I modelled part of a roof)
      7. Glue the new roof directly from Revit (you may want to Hide the DWG file prior to Appending). This will create a new Model. On BIM 360 Glue, you now have the original model plus this new model from Revit.
      8. Go to Glue app in Windows and make a new Merged Model. Tick the boxes for the original model, and this new model from Revit.
      9. Back in Navisworks, we can either choose to Append the entire new merged model, or just the new “piece” that we modelled in Revit.

      If you have consistently used origin-to-origin “Revit zero” linking and project internal coordinates, you shouldn’t have any problems.

      Some screenshots:

      Notes:
      55mb NWD took about 20mins to Glue

      In this test, I used 2015 versions of Navisworks and Revit

      You could use NWCOUT, or…

      Steps:

      1. At the command line, type MENULOAD.
      2. Press Return.
      3. In the Load/Unload Customizations dialog box, click Browse.
      4. In the Select Customization File dialog box, change the Files of Type to Legacy Menu Template (*.mnu), and browse to the Autodesk Navisworks menu file.
        Note: For AutoCAD 20xx based applications, this file is located under C:Program FilesCommon FilesAutodesk SharedNavisworks2015NWExport20xxlwnw_export.mnu. So, for example, for AutoCAD 2015 based applications, this file is located under C:Program FilesCommon FilesAutodesk SharedNavisworks2015NWExport2015lwnw_export.mnu, and so on.
      5. Click Open.
      6. In the Load/Unload Customizations dialog box, click Load.
        The loaded menu is shown in the Loaded Customization Groups.
      7. Click Close.

      Note: you may have to load this from a trusted location to avoid security problems.

      From:
      Help: To Load the Autodesk Navisworks Export Menu in an AutoCAD-based Application

      Exporting Navisworks View Names Directly to Text:

      1. Download SysExporter
      2. Open a Navisworks project
      3. Open SysExporter
      4. Look for a TreeView Entry with same number of items as you have views
      5. Choose Columns – untick everything except String
      6. Select (using Shift) all of the view names you want to export in the list
      7. Right-click, Copy Selected Items (Tab Delimited)
      8. Paste into email or other software of choice

      Quickly deleting all of your Navisworks sets (search sets etc) without waiting to select all the Items:

      1. Left click on last item in Sets list
      2. Hold down Shift
      3. Right click on top item in Sets list
      4. Click Delete

      In Navisworks 2015, use Gourad Shader Style, Full Lights, Render set to Low:

      I experienced this error after installing Navisworks Manage 2015:

      Basically, a right-click shell extension for ZIP files was looking for Inventor and not finding it. I logged it with Autodesk and was notified that it was a genuine, repeatable issue.

      To fix it on my system, I did this:

      1. Download and install ShellExView
      2. Run it
      3. Click Options, Filter by Extension Type
      4. Only select Context Menu and click OK
      5. Look for the 5 results with Description “DtBridge”, all starting with Autodesk Inventor…
      6. Select them and right-click, Disable Selected Items
      7. Click Options, Restart Explorer

      The right-click menu for ZIP files no longer shows the error.