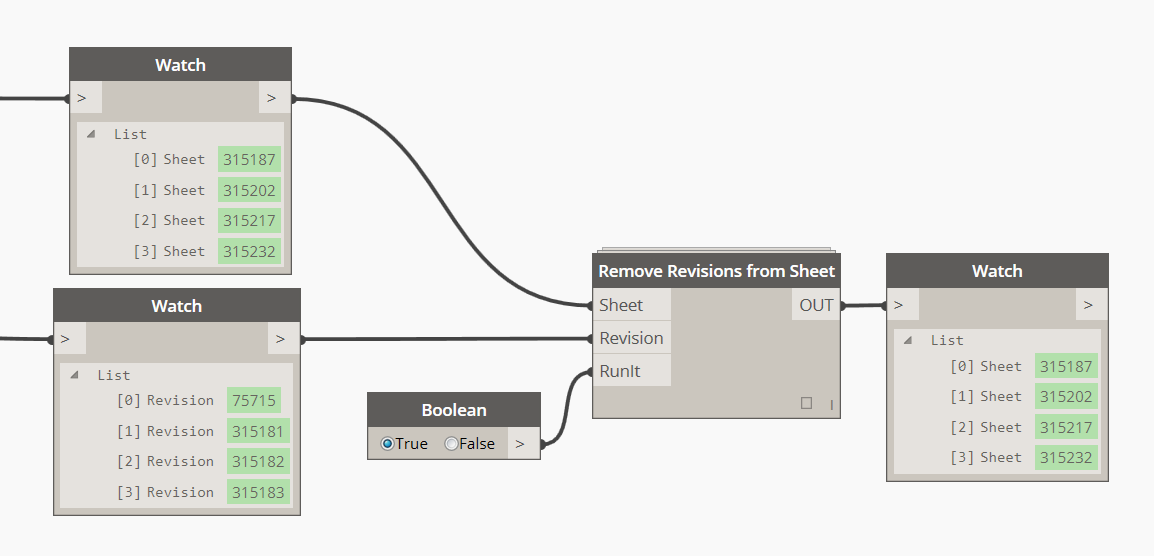
Konrad has put together some very handy nodes to work with Revisions in Dynamo and Revit. I have packaged up a simple implementation of these in my Bakery package that takes a list of sheets, gets the first revision from that sheet, and then removes it (ie. unticks the Revisions on Sheet parameter). It looks like this:

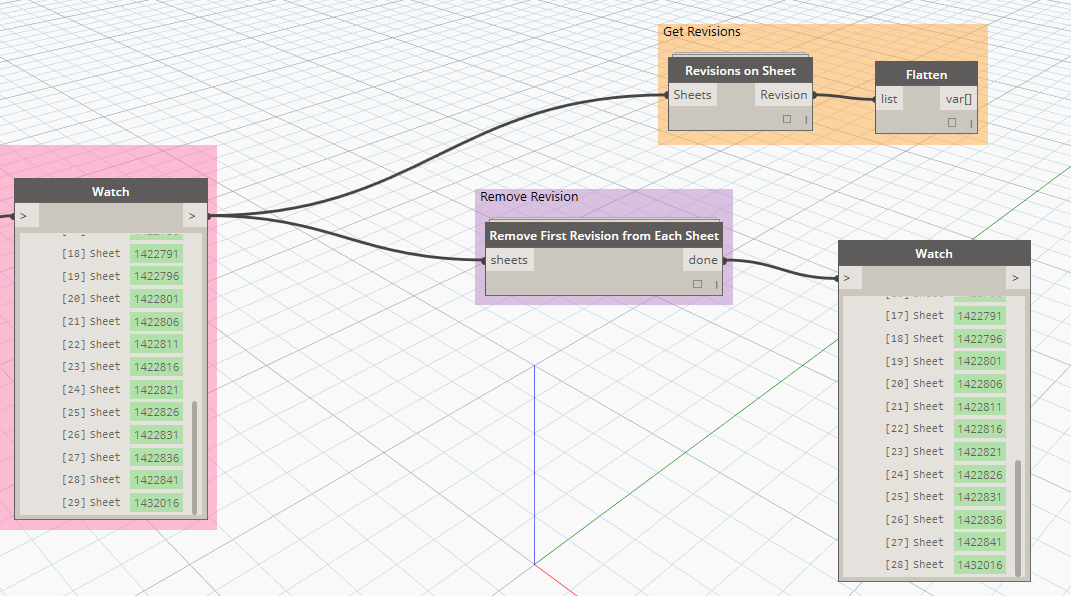
This is useful for when you have copied or inserted sheets into your model, and they have automatically adopted a revision. You want to clean them up? Use the above, but make sure you filter that list of sheets first.

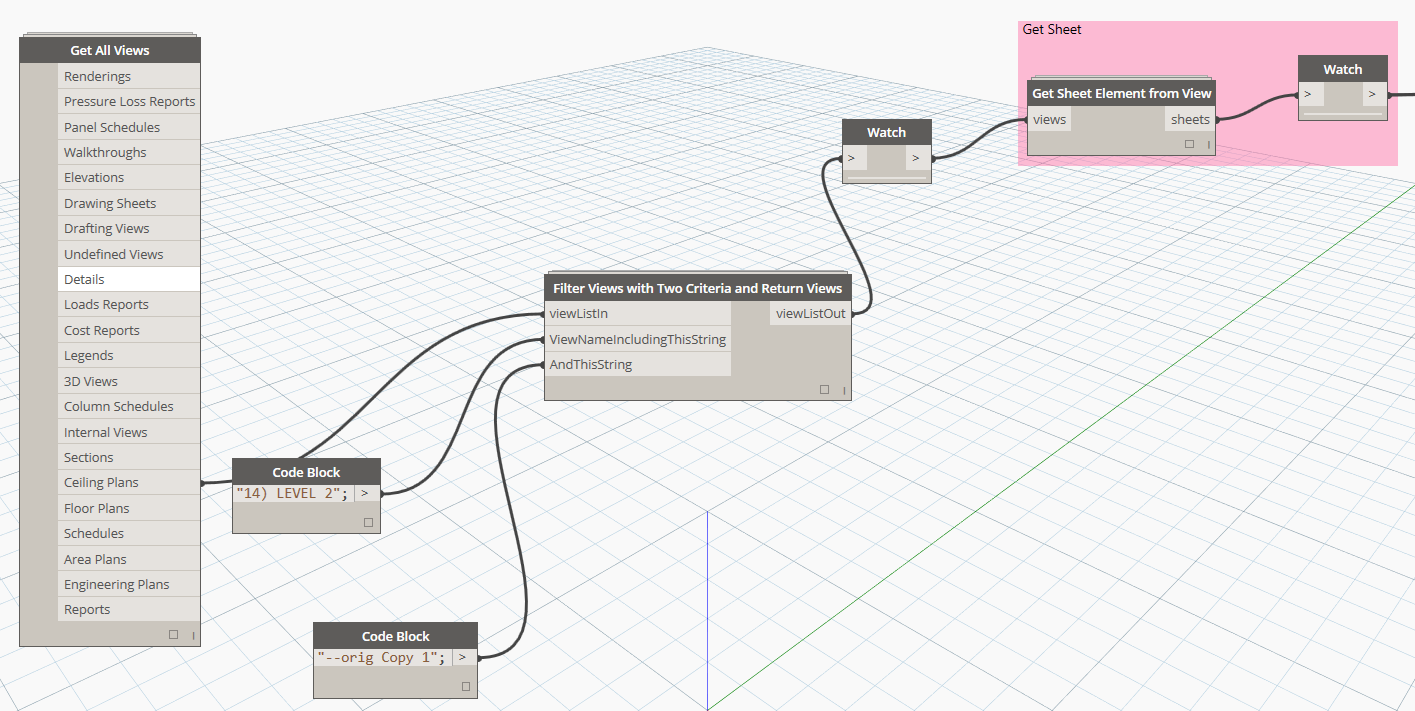
I use some a couple of these nodes from Bakery to grab views, filter them, then get the sheet from the view:

For more info:
revisions on sheet w/ dynamo | archi-lab

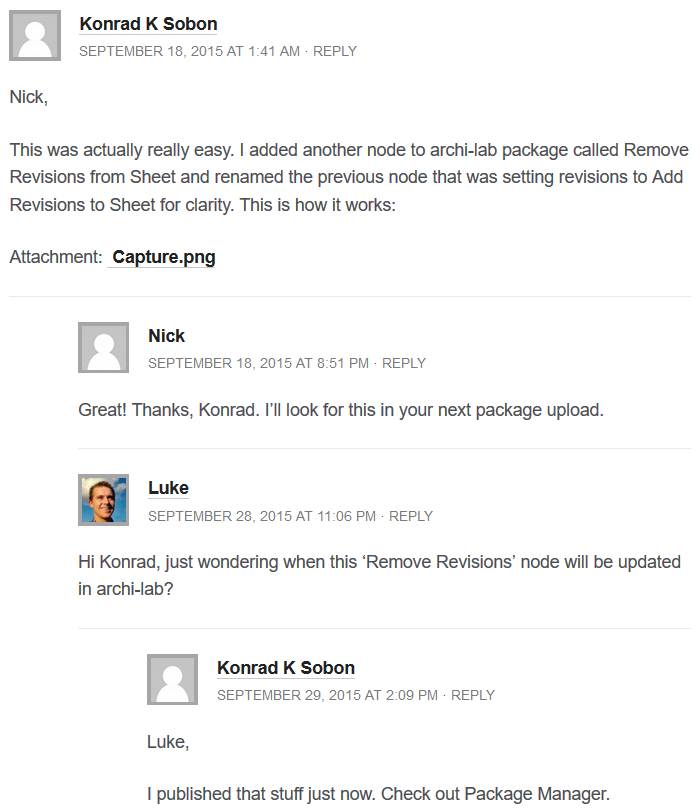
Quickly Deleting Revisions (graph from Konrad):

Also, for deleting revision entries from the Revision table:
I have an alternate version if you want to test it. I made one that splits off the list of revisions away from the first revision (otherwise you get an error – presumably because Revit needs at least Revision there).

You might need the custom node Eraser from the package manager.

I used the Eraser tool and a giant list.create to make a tool that deletes everything unwanted from incoming models (ie, sheets, views, tags, schedules, lines, etc) but I’m still testing it. Essentially the code is the same as the attached one.

As usual use this how you wish and post if you like.

Regards,
Troy

Do you want to create a shareable cloud-based resource for your Autodesk updates? Here is one way:

  1. Create a folder in one of your local cloud based mirror locations, for example:
    E:yourpathonedriveAUTODESK_UPDATES
    C:yourpathGoogle DriveAUTODESK_UPDATES
    C:UsersLuke JohnsonAppDataLocalAutodeskAutodesk SyncCloudluke.johnsonAUTODESK_UPDATES
    C:yourpathSharePointVirtual Built BIM Tools – DocumentsVirtual Built BIM ToolkitAUTODESK_UPDATES
    C:yourpathDropboxAUTODESK_UPDATES
  2. Share the folder with one of your local Windows users (could be your own username) by using Properties – Sharing.
  3. You will be able to access it in Windows explorer now as:
    yourPCnameAUTODESK_UPDATES
  4. Copy that address into your Autodesk Application Manager:
  5. Any future updates you install will be copied to that folder, and thus sync’ed up to the cloud folder. Now…
  6. On the PC you want to sync to, sync that shared Cloud folder down to a local location (usually this is using “Add to my OneDrive” or “Add to my Google Drive” feature)
  7. Do step 2 on this PC
  8. In Application Manager Manager, do step 4 on this PC
  9. Basically, for every pc you want to hook up just do steps 6-8.

You now have a bidirectional, self-hosted mirror in the cloud of any Autodesk updates that you do on any of the PCs you hook up in this way. This should make most of the updates you need auto-sync between your computers, meaning less waiting to download the same update multiple times 🙂

Here are the basic steps:

  1. Download Office Deployment Tool
  2. Modify the configuration xml to include Updates Enabled TRUE and Current Branch info, as well as Display Level Full. Looks something like this for 32bit ProPlus (but I forget the DisplayLevel setting below):
  3. Run the setup command to download, like this
  4. After, download of Office 2016 has completed, run the installation command to install:
    setup.exe /configure c:Officeconfiguration.xml

Got this from Jetze’s blog:
to upgrade Office 365 ProPlus on a single computer to, just follow this procedure.

  1. Download the Office Deployment Tool and extract the files to a temporary location, for instance C:Office.
    image
  2. Make a backup of the configuration.xml file and edit the contents to something similar to this:

    Note that the value for Branch is set to Current. Other valid values are Business or Validation (First Release).

  3. Execute .setup.exe /download c:Officeconfiguration.xml to download the Office files to your local computer, this may take a while.
  4. Next start the installation with .setup.exe /configure c:Officeconfiguration.xml

During the installation of Office you will be prompted to save your work and close any opened Office programs.

via
Jetze’s blog: Office 2016 update branches and how to force an upgrade for Office 365 ProPlus

If you are on Subscription, you can login to your Updates page and download Autodesk Shared Reference Point extension to connect coordinates in Revit with Civil3D.

For Revit 2016

http://download.autodesk.com/SWDLDDLM/Updates/RVT/2016/RVT_2016_SHARED_REFERENCE_ENG_64.exe

For Civil3D 2016:

http://download.autodesk.com/SWDLDDLM/Updates/CIV3D/2016/C3D_2016_SHARED_REFERENCE_ENG_64.exe

Readme:
Autodesk� Shared Reference Point for Autodesk� Revit 2016

Autodesk® Shared Reference Point consists of the following features:

  • Two individual installations for AutoCAD Civil 3D and Revit
  • Export coordinates and elevation from AutoCAD Civil 3D to external .xml file
  • Import .xml into Revit based on same known positions and create a ‘Shared Coordinate System’

Quote:
you can use RDP Wrapper which acts as a middleman between Terminal Services and Service Control Manager. This way you don’t need to touch termsrv.dll file…
Download and extract RDPWrap-v1.6.zip (or newer), then run install.bat as admin. After installation is completed, run RDPConfig.exe. If all items under Diagnostics are green, you should be good to go.

From:

Multiple RDP (Remote Desktop) sessions in Windows 10

Jon Buerg recently posted his ‘top tips’ for content on Shoegnome. Here are three I particularly liked:

  1. If you can actually afford to invest the labor and time into producing a complete library all in one shot without interruption, you’ll be rewarded with a lower overall investment cost and time frame.
  2. Future-proof your library… follow IFC protocols for embedding data, like manufacturer and model number, into your library element. Do this from the start…
  3.  visit 3D Warehouse (https://3dwarehouse.sketchup.com),
    BIMcomponents (https://bimcomponents.com),
    BIMobject (https://bimobject.com/en),
    NBS National BIM Library (http://www.nationalbimlibrary.com),
    Revit City (http://www.revitcity.com/index.php),
    KCL CADalog (http://www.kclcad.com), and
    SmartBIM Library (http://library.smartbim.com)

via
Building Better BIM Libraries – Shoegnome

Also, don’t forget I have a (somewhat old) content list at:
https://wrw.is/p/this-is-temporary-content-table-link.html

Here’s how:

  1. Open Quick Access in a new window
  2. Select All
  3. Copy
  4. Go to an empty folder
  5. Paste shortcut
  6. Your Quick Access items are now ‘normal’ shortcuts

You can quickly clear the auto-populated entries from Quick Access by using Clear File Explorer history after right-clicking on Quick Access and going to Options:

Finally, you can multi-select File Folders in Quick Access and Unpin them all at once from the right-click menu.

After upgrading to Windows 10, I decided to clear out my Quick Access using above steps, and then incrementally add items back by using the shortcut backup that I created.

    One of my most liked posts on the Ideastation is this one, where I request the ability to share viewpoints between Navisworks and Glue.

    This functionality has finally been provided in Service Pack 3 for Navisworks Manage 2016.

    It is officially called “Shared Views”, as per the above details from the SP3 feature readme.

    How does it work?

    1. In Navisworks 2016, connect with a BIM360 Glue project and model
    2. Navigate in Navisworks to a view you would like to save
    3. On the BIM 360 ribbon, open the Shared Views pane and then click New
    4. Name the view

    After creating this view in Navisworks, you can open the Glue Windows client and open that model, and the view will appear in the Shared Views list:

    Similarly, in the Glue web client you can now access this view:

     And, in the Windows client we can easily make and organize Shared Views. To see them in Navisworks, just click Refresh and they will show up in the Shared Views pane:

    This update is a great advancement for Autodesk BIM interoperability, and combined with Switchback it now allows bidirectional viewpoint sharing between Navisworks, Glue and Revit. Very cool 🙂

    Here is the Application Manager version of SP3 for Navisworks Manage 2016:
    http://download.autodesk.com/SWDLDDLM/Updates/NAVMAN/2016/Autodesk_Navisworks_2016_SP3_ML_Manage_64bit.msp

    Other links:

     Autodesk_Navisworks_2016_Service_Pack_3_Multilingual_Freedom_64bit.msp (msp – 101,280KB)
     Autodesk_Navisworks_2016_Service_Pack_3_Multilingual_Manage_64bit.msp (msp – 139,380KB)
     Autodesk_Navisworks_2016_Service_Pack_3_Multilingual_Simulate_64bit.msp (msp – 139,380KB)

     
    Readme

     Autodesk Navisworks 2016 Service Pack 3 Feature readme.pdf (pdf – 259Kb)
     Autodesk Navisworks 2016 Service Pack 3 Installation readme.pdf (pdf – 120Kb)

    Autodesk page:
    Navisworks 2016 Service Pack 3 | Navisworks Products | Autodesk Knowledge Network

     Here’s how you can get it:

    1. Go to https://beta.autodesk.com/callout/?callid=%7bA06CC6BE-3ADD-4789-AC64-CE5B1D9C8254%7d 
    2. Click Join Now
    3. From there you may have to login before you can go to the Download page
    4. Download and run installer (SeekForRevit150710Setup.exe)

    The next time you run Revit, you will have an Autodesk Seek ribbon…

    1. Click Browse Content
    2. Type something in the search bar
    3. Click ‘Revit Supported Files‘ and then
    4. Click ‘Load Family to Design‘ next to the relevant RFA

    Now is your opportunity to test this addin out and influence its development by providing feedback through the Beta site. As a simpler alternative to manually downloading, Loading and placing rfa files from Seek, it looks pretty good at this stage. What do you think?

    via
    Get the Autodesk Seek for Revit Plug-in | Autodesk 360