Cooking in the Bakery today:

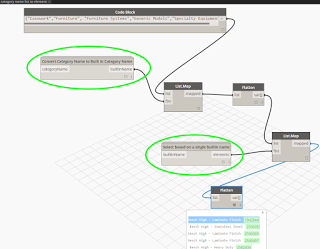
From here we could export a list of Element IDs to CSV, make a Selection Set by Elements using Clockwork, or use one of the Select in Revit nodes.

As you can see, to make a string list in a code block, you need to enclose list in curly brackets, divide with commas and use quotation marks around the entries themselves. More about code blocks at:
http://dynamobim.com/cbns-for-dummies/

Here’s how:

  1. Filter and group your Schedule so that it shows the elements you want on a particular row
  2. Select that Row and pick Highlight in Model
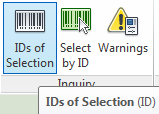
  3. After the elements are highlighed, you can start the “IDs of Selection” command. This will provide a text box with a list of every single element ID that was selected. You can then copy (Ctrl+C) and paste this into your desired application, like Excel or even a text file for consumption in Dynamo.
  4. Optional: Save the selection using typical Revit “Save Selection” option

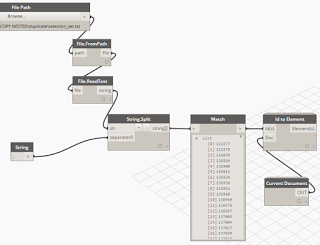
If you do copy the IDs to a text file, you can use a simple Dynamo definition like this to convert the Element IDs to actual elements. Obviously, once you have the element list in Dynamo, you can do lots of fun things with it.

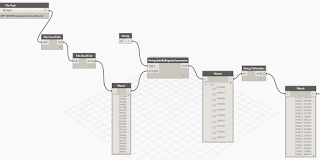
What if you have a list of line separated element IDs, like one per Excel row? You can use Dynamo to parse these to Elements, and even create a saved Selection Set too (thanks to Clockwork), like this:

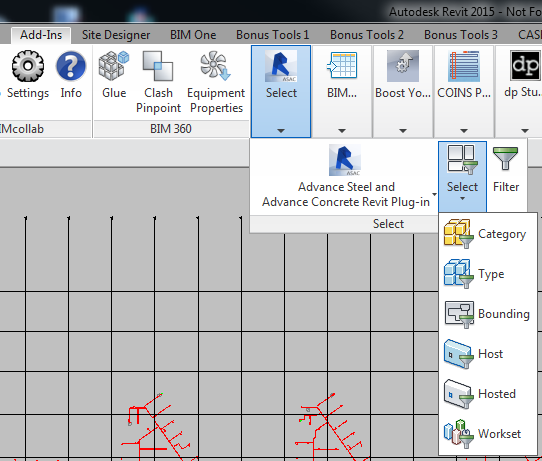
Did you ever notice this handy little selection toolset?

Pretty cool, huh?

Update: Dieter has correctly pointed out that these selection tools are part of the Bimits package:
http://www.bimits.eu/bimits-en/bimits-extensions.html

The Advance steel addin can be downloaded for free:
https://apps.exchange.autodesk.com/RVT/en/Detail/Index?id=appstore.exchange.autodesk.com%3Aadvancesteelandadvanceconcreterevitplug-in_windows64%3Aen

When building Revit addins, you may want to implement some specific selection filter. Here is some more good stuff via Alexander Buschmann and The Building Coder:
The zip file SelFilters.zip contains

  • the SelFilter class, 
  • the interface files, an 
  • example external command
    using some of the SelFilter functionality, an 
  • add-in manifest file for
    the example command and a 
  • small Revit project to test it in.

Source:
The Building Coder: SelFilter, a Powerful Generic Selection Filter Utility

To try it out:

  1. In Visual Studio (I use Express 2013 for Windows Desktop), make a new Class Library Project
  2. File – Save project as – RevitSelectionFilters.csproj
  3. Add RevitAPI.dll and RevitAPIUI.dll references (2014)
  4. Add – Existing Items. Choose all the .cs files from the zip
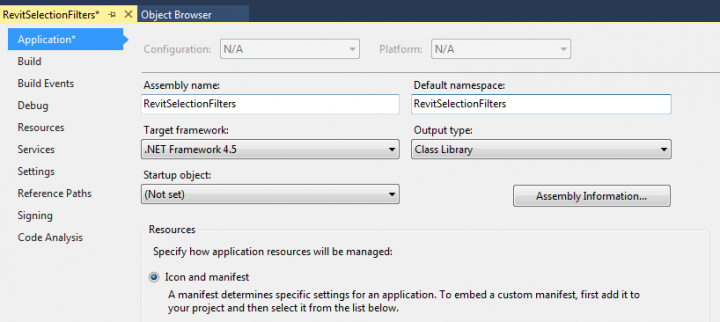
  5. Set project properties Assembly Name and Default namespace to RevitSelectionFilters
  6. Save All
  7. Build Solution
  8. Copy
    SelectionTest.addin and RevitSelectionFilters.dll
    to C:ProgramDataAutodeskRevitAddins2014

Related screenshots:

And screencast showing the examples:

Good intro to Revit customization:
http://help.autodesk.com.s3.amazonaws.com/sfdcarticles/kA230000000tiXXCAY/handout_2116_CM2116.pdf

From the help:
Help: External Commands

Setting up an External Command in Revit 2015:
EXTERNAL COMMAND IN 10 STEPS FOR REVIT 2015 API 

In the Revit 2015 Project Environment, you can access the tools to Manage Selections from the Manage Ribbon:

However, this Ribbon Panel is not available on the default Manage Ribbon in the Family Environment  (Build 20141119_0715(x64) Update Release 5). What to do? Well, we can just add these tools to the QAT (Quick Access Toolbar), so then at least we can use them while building families. There are a couple of ways we can do this, but here is how you can do it while staying in the Family Editor:

  1. In the Family Environment, select more than one element
  2. Right-click on the Save Selection button that appears in the contextual ribbon (the green one) and “Add to Quick Access Toolbar”
  3. Save a Selection
  4. Select more than one thing
  5. Right-click on the Load Selection button that appears in the contextual ribbon (the green one) and “Add to Quick Access Toolbar”

You can also just add these items from the Project Environment, and as the QAT is shared with both environments, they will show when you edit a family.

However, while you can add the “Edit Selection” button to the QAT, it will not work in the Family Environment 🙁

For good navigation performance when clashing large data sets, consider these tips:

  1. Set File Options – Frame Rate to 25
  2. Make sure Guarantee Frame Rate and Fill in Detail are on
  3. Group all Clashes straight after the clash test
  4. Use the “Hide Other” option in Clash View settings
  5. Use a 3dconnexion device in Walk mode to quickly review the ‘clashing elements’

Some other handy things to remember – tested on Navisworks Manage 2013:

  • To delete large Search Set folders without selecting them first (which can be time consuming or crashy), just right-click and Delete
  • If you have items grayed out in the right-click menu of your Search Sets pane, try right-clicking a folder, then right-clicking the item.  This successfully reveals them for me (things like Update and Duplicate).

Working with 2013 version Navisworks files in 2014:

The SP1 download includes the following important note:
After installing Autodesk Navisworks 2014 Service Pack 1, you must ensure that other users who share your Navisworks 2014 NWF files also install the same Service Pack. Failure to do so may mean that your Selection Set data becomes corrupted. This applies to Navisworks 2014 only. Navisworks 2014 NWF files shared with Navisworks 2013 and Navisworks 2012 users are not affected

via
http://forums.autodesk.com/t5/Navisworks-General/Navis-2014-Memory-Issue/m-p/4553037#M6381

    Making links relative (from dderoeck here):

    The links in Navisworks are absolute.

    To make those relative I have made a special procedure to clear that out.
    1. Put the linked document on a place on your PC or Network and make a shortcut of the docs in the same folder as your NW doc.
    2. put the the script (Rename ShortcutsDescriptions) here in attachment in the same folder of your Shortcuts and NW doc. (Change txt in vbs)
    3. Execute the script (This will change the property of all the LNK files (The Shortcuts) )
    4. Make the links in NW as follow: The URL name = The Link name (= The name of the shortcut and thus the name of the linked document.)

    Using this way you can put your linked documents anyware and still have the connection between NW and the docs.

    Make standard selection sets (not Search Sets) with Excel / Access, by dderoeck here:

    Analyze a XML and you will find a repetitive structure, so,

    I started an excel file with following cells:
    units SearchName mode disjoint test flags name2 internal SearchCriteria type locator Project

    Fill in this list with your Excel skills…
    SearchName, Name2, internal and Search Criteria are for me changeable, the rest is fix.

    Once this list is made, import it as a table in Access.

    Make a report in Access that creates the XML layout.

    Print the report as PDF file and copy the text to a text file, rename the txt to xml, import the xml in Navis Works. Done.

    Since you have the possibility to work with cells and formulas in Excel (Concatination, Replace,…)

    you can make very fast big listings of Search Sets.
    Sometimes the differences between using various Autodesk softwares can be very subtle.  For instance, selection in Navisworks – I have already posted about the unfortunate lack of a “Revit Tab selection / AutoCAD Ctrl+Space” substitute in Navisworks.

    Happily, Daniel Gijsbers describes some handy crossing window selection tips for Navisworks:

    • Hold down Spacebar and click-drag to activate the normal inclusive Selection Box tool (the same as the split button on the ribbon).  This only selects objects inside the box.
    • Hold down Shift and Spacebar and click-drag to activate the “crossing” window, selecting objects that are within and those that touch the window boundary!

    via
    danielgijsbers.blogspot.in/2013/01/navisworks-selections-methodes.html?m=1

    Sometimes you just need to hear an idea and you innately know “this is going to be useful…”

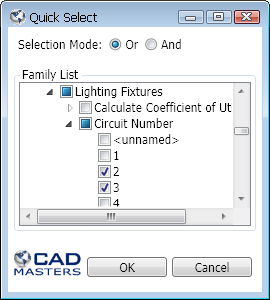
    Quick Select command for Autodesk® Revit® to select by element type and its properties. Expand the element or family type and select the properties that you wish to filter by. Click OK and all those elements will be selected. 

    • When in “Or” mode, the command will select all elements that match any of the properties. 
    • When in “And” mode, the command will only select elements that match all the selected properties. 

    Example of potential uses:

    • select all Casework on a particular Level – done
    • select all Filled Regions with a given area – done
    • select all Walls whose Top is Attached – done

    As with most addins I post about – its free.  Download on Exchange at:
    this link

    Heads-up via:

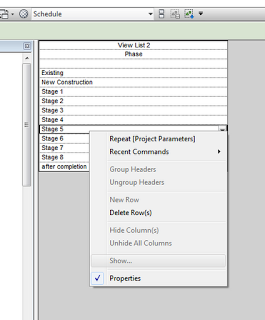
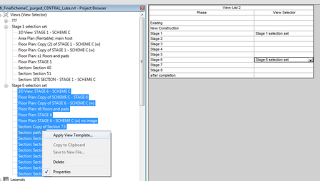
    In Revit, certain view properties are not schedulable.  Additionally, you cannot change Visibility / Graphics through a schedule.  However, let’s say you have a schedulable view property that allows you to form a group of a views that you would like to modify.  You can’t use the Show option in a View List (to multi-select Views):

    However, to multi-select views using a known property (in this simplistic and slightly pointless example, Phase), we can:

    1. Add a Text type Shared Parameter called View Selector to the View List, ticking ‘Add to all elements in the Category’
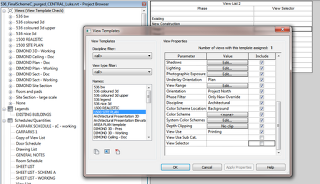
    2. Now, a little complication – to modify this property, you will have to untick it from every applied View Template that would possibly impact the View List.  I grouped my Project Browser by View Template so I could quickly see the ‘in-use’ View Templates, then went View – Manage View Templates and unticked View Selector in each of these.  Once this is done, we can now drive the View Selector parameter through the View List schedule.
    3. Now go to the Type Properties of the Project Browser and make a new type called View Selector.  You can either use folders and set them to View Selector, or Filter by View Select = whatever.
    4. Finally, select a bunch of views in the Browser and then adjust the Property you want to edit.  This method allows you to  modify certain parameters that you couldn’t get to from the View List itself.

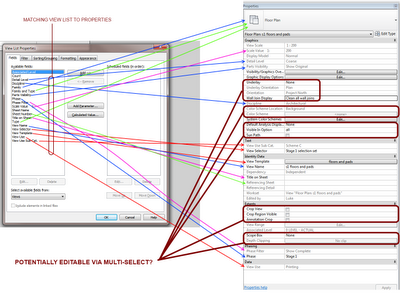
    Some of these parameters are View / Type specific (like Underlay for Plans).  When you multiselect them, Revit will tell you what the ‘common’ parameters are in the Properties Palette.

    The following diagram gives you an idea which View Properties can be ‘hacked into’ using this multi-select method:


      I was going to title this “Even Better Save Selection Workaround for Revit Architecture users”, but that wouldn’t really be accurate.

      I am posting about a work method that will allow you to select a group of objects and quickly re-select those same objects.  It will not allow you to use the View Filters like the true Save Selection feature would.

      Here’s how:

      1. Select the group of objects
      2. Manage – IDs of Selection
      3. Copy these IDs somewhere (for example, to Notepad or Excel)
      4. When you want to re-select those objects, go:
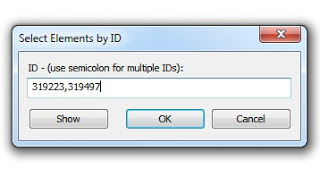
      5. Manage – Select by ID
      6. Paste the text from step 3 (including commas) and click OK
      7. Your ‘set’ has been selected!

      Tip – you could make a spreadsheet for each project that contained these ID selection sets.  One column could have a descriptive name for the selection set.

      Here is a quick video:

      Thanks to http://www.nazdi.cz/2011/11/pitvame-projekt.html for this heads-up (translated as):
      If you enter a list of numbers (separated by commas or semicolons), select the corresponding Revit several objects at once. 

      I previously posted about Save Selection here:
      What Revit Wants: Save Selection Workaround for Revit Architecture users

      And here:
      What Revit Wants: RAC Users – lets get the Save Selection feature now!