This recent post on Dynamo Nodes shows how a simple Navisworks Search Set can be built by Dynamo running inside of Revit:
Create Navisworks Search Set XML for Element Ids | Dynamo Nodes

In the first release, this node just uses Element Ids to build a long ‘orsearch set, but this basic idea could easily be extended and adapted to more closely connect Revit to Navisworks search workflows through Dynamo.

Here is a Screencast:

For good navigation performance when clashing large data sets, consider these tips:

  1. Set File Options – Frame Rate to 25
  2. Make sure Guarantee Frame Rate and Fill in Detail are on
  3. Group all Clashes straight after the clash test
  4. Use the “Hide Other” option in Clash View settings
  5. Use a 3dconnexion device in Walk mode to quickly review the ‘clashing elements’

Some other handy things to remember – tested on Navisworks Manage 2013:

  • To delete large Search Set folders without selecting them first (which can be time consuming or crashy), just right-click and Delete
  • If you have items grayed out in the right-click menu of your Search Sets pane, try right-clicking a folder, then right-clicking the item.  This successfully reveals them for me (things like Update and Duplicate).

Working with 2013 version Navisworks files in 2014:

The SP1 download includes the following important note:
After installing Autodesk Navisworks 2014 Service Pack 1, you must ensure that other users who share your Navisworks 2014 NWF files also install the same Service Pack. Failure to do so may mean that your Selection Set data becomes corrupted. This applies to Navisworks 2014 only. Navisworks 2014 NWF files shared with Navisworks 2013 and Navisworks 2012 users are not affected

via
http://forums.autodesk.com/t5/Navisworks-General/Navis-2014-Memory-Issue/m-p/4553037#M6381

    Making links relative (from dderoeck here):

    The links in Navisworks are absolute.

    To make those relative I have made a special procedure to clear that out.
    1. Put the linked document on a place on your PC or Network and make a shortcut of the docs in the same folder as your NW doc.
    2. put the the script (Rename ShortcutsDescriptions) here in attachment in the same folder of your Shortcuts and NW doc. (Change txt in vbs)
    3. Execute the script (This will change the property of all the LNK files (The Shortcuts) )
    4. Make the links in NW as follow: The URL name = The Link name (= The name of the shortcut and thus the name of the linked document.)

    Using this way you can put your linked documents anyware and still have the connection between NW and the docs.

    Make standard selection sets (not Search Sets) with Excel / Access, by dderoeck here:

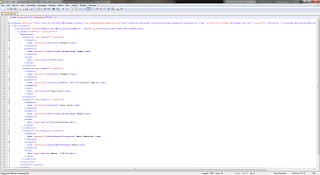
    Analyze a XML and you will find a repetitive structure, so,

    I started an excel file with following cells:
    units SearchName mode disjoint test flags name2 internal SearchCriteria type locator Project

    Fill in this list with your Excel skills…
    SearchName, Name2, internal and Search Criteria are for me changeable, the rest is fix.

    Once this list is made, import it as a table in Access.

    Make a report in Access that creates the XML layout.

    Print the report as PDF file and copy the text to a text file, rename the txt to xml, import the xml in Navis Works. Done.

    Since you have the possibility to work with cells and formulas in Excel (Concatination, Replace,…)

    you can make very fast big listings of Search Sets.

    Daniel Gijsbers uses Notepad++ to do some quick editing and creation of similar Navisworks search sets:


    “Let’s create a couple of searchsets that will find the same parts but on different levels.

    He notes that you should import-export-import to make sure GUIDs are not duplicated.

    Read the whole post:

    Daniel on Autodesk AEC software: Navisworks searchset creation
    Update:
    Copying historical post content here as the original link seems to have died:

    Navisworks searchset creation

    If your into planning with Navisworks you have most likely experience with creating searchsets. If you want to create a planning that build up your model per level over time you end up creating a whole lot of searchsets. Creating searchsets in Navisworks can be a bit of a tedious chore. I like to think I have a much faster solution for it. There is one small catch. Don’t panic at the site of xml code.

    First let’s take this model:

    01-8172334

    The exterior walls this model are compound walls and have been split up in parts. In the picture below I have zoomed in on a window.

    02-7385257

    We want a planning where the different parts appear at different times. Basically we want the concrete first, insulation next and masory last.

    First let’s make one searchset that finds all concrete parts from the compound wall

    03-9671259

    Select an element which you would like to find with a searchset and take a look at the properties. Take a look at the selection tree and see where you have something selected. Make sure it’s not geometry when you are working with revit files. There are much more interesting properties when you set the selection resolution to first or last object.

    I tend to find most interesting properties on the element tab of the property window. For this purpose the property by arrow 2 and 3 are good. I have put a blue arrow #4 at the property for base level. I recommend not using this one because an other one is much more usefull. I do need a property that has a value for base level just not this one. The ID number of the level screws up the searchsets. Instead go to the property tab: Base level. This tab also has a property called name but this value does not have the ID number of the level in it’s name. Later you’ll see why that’s better.

    04-9822103

    At arrow one you see the searchset definition: I have created 4 criteria  (technically you could probably do without criteria number 1)

    1. At arrow two I give the searchset a name. I tend to use the values of the criteria seperated by a # for the name. This should give you a rough idea of what the searchset is for.
    06-8713393

    Now we have our first searchset. Ofcourse you could use the interface, switch some properties of the previous searchset and save the new search. This gets tedious quiet quickly…

    On the sets window there is an export searchsets to xml button.
    Next go to http://notepad-plus-plus.org/download/
    If you don’t have install rights on your machine than you can also put this on a usb drive and run it from there. You’ll have to look around a bit on how to do that but it’s fairly simple.

    Let’s take a look at the xml code:
    Most likely you will be most interested in all the things that are coloured black!
    Also click on the words between < > they will highlight

    Notice the line numbers on the left:
    line 1 to 3 ignore those. leave them in.
    Line 4 is important. Notice the word selectionsetS
    Selectionsets can contain multiple selectionset (no S)
    Line 5 the selectionset stores it’s name from Navisworks here. This line is important
    Line 6 Defines where to search in which models in Navisworks

    07-7850998
    Let’s create a couple of searchsets that will find the same parts but on different levels.
    On line 55 you see that this selectionset ends.
    1. Put your cursor behind  and press enter.
    2. Put your cursors at the first position on line 56
    3. Start dragging a selection from line 56 to line 5
    4. ctrl c
    5. Put your cursor at the first position on line 56
    6. ctrl v as many times as you need
    7. Go to notepath++ menu view collapse level 4 or 3 ( I want the selection sets to look like this image below
    collapsing levels will let you rename the name of the searchsets quickly. You are dependant here on a decent naming scheme in revit….. I assume that there is some structure in your level names that should allow for quick changes
    09-1686064
    Next a find and replace
    10-5207418
    1. go to view
    2. search and replace
    3. put your cursor somewhere in the second searchset. (that’s between line 56 and 89)
    4. let it search for the value you want to replace
    5. click on replace
    After you click on replace it will jump to the next one. Change the replace value and do it again and again and again until your are done. If you would have used the property in Navisworks with the ID number stored you would have been in trouble here. You would have to find and match those.
    1. save as: Part#Basic Wall#plattegrond#Beton – C25/30
    2. save as: Part#Basic Wall#plattegrond#Isolatie
    3. Find and Replace the material names. You should be able to use replace all
    4. Save the file again
    Go to explorer and you should have at least two searchset xml files:
    11-3388948
    1. Go to Navisworks
    2. Delete the existing searchset
    3. Import the searchsets, one at the time… (same button)
    4. Create a folder structure of you liking. I tend to use Revit categories as folder names
    5. Put the searchsets in
    6. Export the searchsets again
    7. delete all searchsets
    8. Import the file you just exported, WHY?
    Why?
    With my methode you get searchsets that have the same guid… First when I started out doing this I would change the guids myself. That’s tedious. Recently I found out that when Navisworks exports searchsets it checks if the guids are the same and if they are it changes them for you. What’s the guid doing here? I have no idea. But’s probably better to have unique guids.
    Have fun. You’ll have tons of usefull searchsets in a little bit of time.