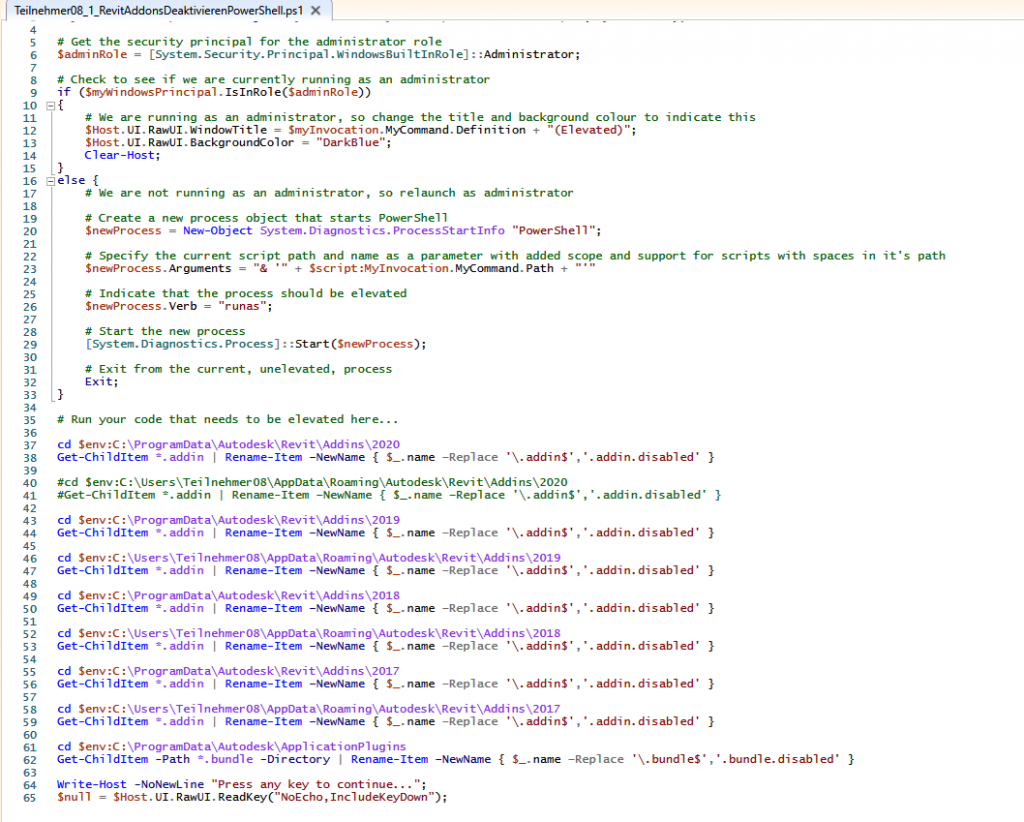
I love it when people take something I hacked together and make it even better! A while ago I posted a script to disable all Revit addins, and recently Thomas Vogt sent me some much improved versions.

  • Deactivate with Teilnehmer08_1_RevitAddonsDeaktivierenPowerShell.ps1
  • Activate with Teilnehmer08_2_RevitAddonsAktivierenPowerShell.ps1


You can download a ZIP file containing the Powershell scripts here:

Addin_Activate_Deactivate_2017-2020


Disclaimers (use at your own risk etc) and notes on how to use the scripts are as per previous post.


Here is the note from Thomas:

Hi Luke,
I have used your script from https://wrw.is/script-to-disable-all-revit-addins/ and I have adjusted it a bit. I have local users without admin rights (training center computers), so I go to the users computer, open the file with rightclick > Powershell and the Admin login is shown. I got also some problems with the allusersprofile and the appdata path variable, because as soon as I login as admin, the appdata path is not anymore the user path. Thus I have changed it to the path itself. The last 2 lines help to see the errors.

Thanks for your script, it helped me a lot! My scripts are attached if you want to use it on your blog =)

Thanks to Thomas Vogt for sharing his work on this!

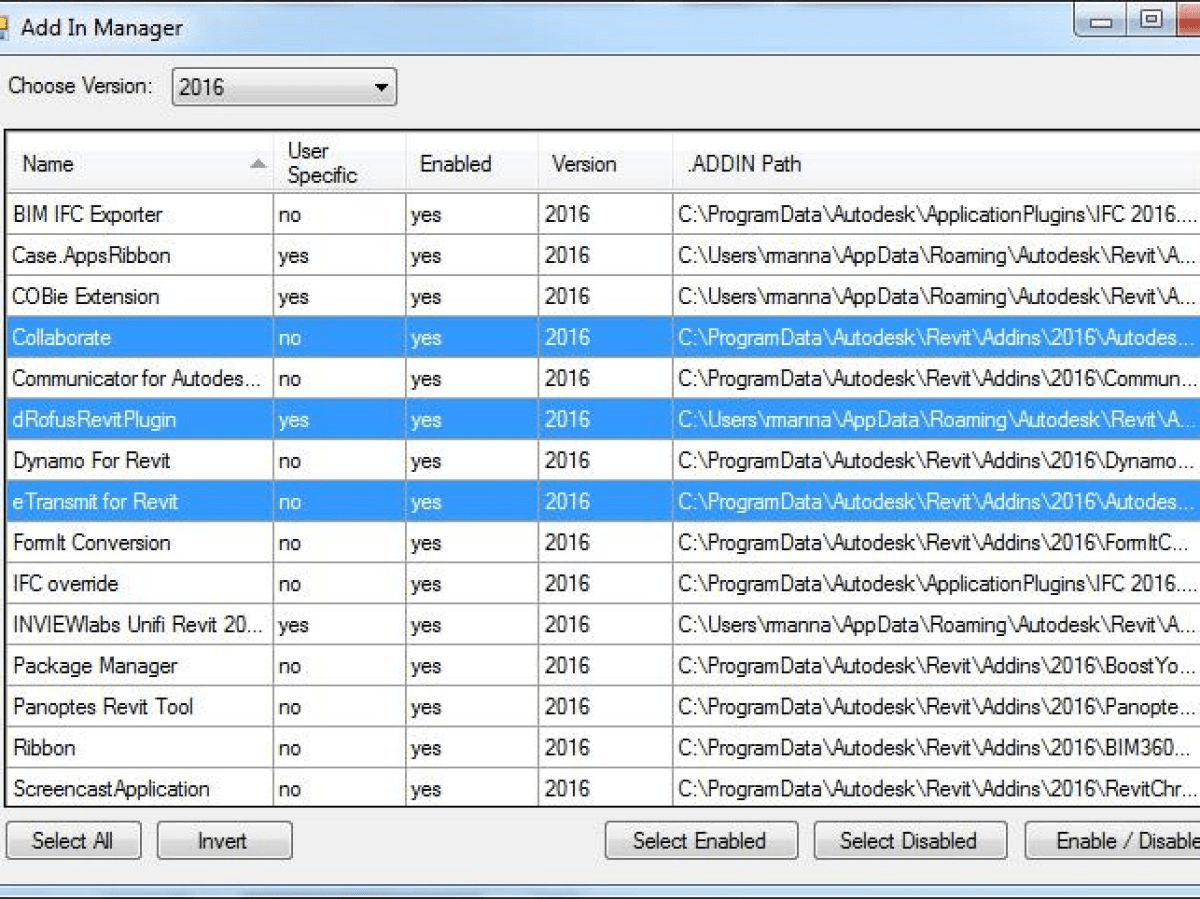
Back in March 2015, I posted a script that I had created to disable all Revit addins. That was put together in Powershell and was a pretty severe and somewhat ugly method to use. Happily, earlier this year Robert Manna developed and posted about a more refined tool that Stantec calls the Add-in Manager.

It requires no installation and allows you to selectively switch Revit addins on and off prior to launching Revit. Obviously, this is easier than manually renaming .addin files, and quicker than uninstalling / re-installing addins all the time 🙂

Interestingly, the Bitbucket site is under BoostYourBIM, so it looks like Harry Mattison (probably the best Revit API coder in the world) was involved in building this helpful little tool.

Here are the steps to install (copied from the original post):

  1. Download the tool from Bitbucket here.
  2. Find where you downloaded the zip file and unzip it.
  3. When unzipped, there will be a BIN folder; browse into the BIN folder then the Debug sub-folder.
  4. Run the tool by double-clicking on the exe file.
  5. In the window that opens, pick your version of Revit (or go with all if you like).
  6. The data grid will update to display all of the machine wide and the logged in user specific add-ins installed. You can pick and choose, invert, select all, then simply click on the “Enable/Disable” button to either enable or disable the selected add-ins.
  7. Once you’ve made your choices, start Revit in the normal manner. Simple and easy.

 Thanks for sharing Robert!

via email:
… updates to IFC for Revit 2015 and IFC for Revit 2016, which you can get to using the links below:

IFC for Revit 2015 (v15.5):
http://apps.exchange.autodesk.com/RVT/en/Detail/Index?id=appstore.exchange.autodesk.com%3aifc2015_windows32and64%3aen

IFC for Revit 2016 (v16.2):
http://apps.exchange.autodesk.com/RVT/en/Detail/Index?id=appstore.exchange.autodesk.com%3aifc2016_windows32and64%3aen

Updates from the previous version are listed below. Please upgrade to the newest version!

resized_6c20dfe8-5576-4f70-b2a8-d02ccb236397_-7776641

NOTES:
1. IFC Exporter for Revit 2013 and IFC Exporter for Revit 2014 will no longer be getting regular updates.
2. IFC for Revit 2015 and 2016 includes export, import and the alternate export UI. There is no need for separate installs of each.
3. This update will work for both Revit and Revit LT.

What’s new for IFC for Revit 2015 v15.5.0 and IFC for Revit 2016 v16.2.0:
General:

– This is the IFC2x3 Coordination View import certified version of Revit for Link IFC, as seen on http://www.buildingsmart.org/compliance/certified-software/. At the time of this writing, it incorrectly lists “Autodesk Revit Architecture” as being import certified instead of “Autodesk Revit”.

– Both Link and Export will use the IFC4 Addendum 1 schema instead of the IFC4 schema if the IFC4_ADD1.EXP is loaded in the EDM sub-folder of your Revit executable folder.

New Export Functionality:

– Allow setting of IfcBuildingStorey element composition type via IfcElementCompositionType shared parameter for levels.
– IFC4: handle elliptical edges for IFC4 Design Transfer View export.
– Support export of volumes as liters (a.k.a cubic decimeters)
– Support export of volumetric flow rates as liters per second (a.k.a. cubic decimeters per second).

New Export UI Functionality:

– Better progress messages in the status bar.
– Remove list of “Current Options” from the starting UI dialog; only display the IFC Schema and MVD as “IFC Version”
– Remove path from “Projects to Export” list; the path is now a tooltip.

Export Bug Fixes:

– Correctly toggle between SLIDING_TO_LEFT / SLIDING_TO_RIGHT for flipped doors.
– Use the element type “Function” parameter when setting the “IsExternal” common property for all element types, not just wall types.

New Import Functionality:

– Add “IfcElement HasPorts Name” and “IfcElement HasPorts IfcGUID” parameters to show port information for elements. There will be multiple shared parameters created if the element has multiple ports.
– Add support for more thermal transmittance units.
– Entities that are decomposed by IfcBuildingElementPart will now be visible if either the top level category or the Parts category is enabled by default.
– If attempting to create an IfcShellBasedSurfaceModel as a Solid results in any dropped faces, import it as a Mesh instead.
– (2016 only) If processing an IfcBooleanResult entity results in a failed Revit Boolean operation, try again by slightly shifting (by 1mm) the second of the two geometries in the operation.
– Improve import of IfcSweptDiskSolid when the geometric description of the entity would create a self-intersecting surface. In this case, create the minimum number of solids possible to import as much as the geometry as possible.
– Read in IfcSystems that aren’t associated to the building via a IfcRelServicesBuildings relation.
– Read in IfcPropertyBoundedValues (including support for IFC4 version).
– Support import of volumes as liters.
– Support import of volumetric flow rates as liters per second.

Import Bug Fixes:

– Add a message to the log file if we skip importing an IfcProduct that neither has geometry nor is decomposed by other entities.
– Fix a potential crash if a file contains a large number of elements in system joined by ports.
– Improve log message when an entity can’t be imported because it has no geometry.
– Improve log message when an entity can’t create all of the facets of its tessellated geometric representation.
– Move some MEP entities from Generic Models category to the appropriate categories by default.

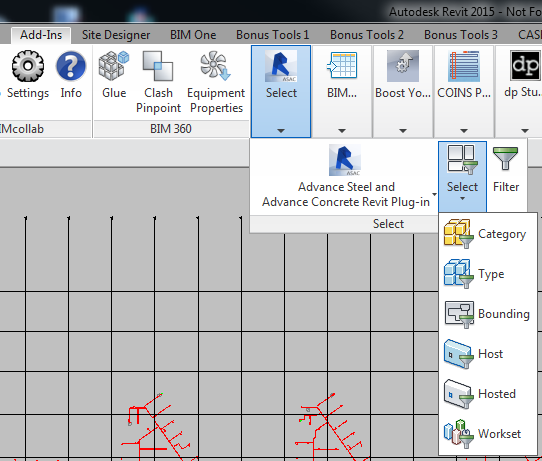
Did you ever notice this handy little selection toolset?

Pretty cool, huh?

Update: Dieter has correctly pointed out that these selection tools are part of the Bimits package:
http://www.bimits.eu/bimits-en/bimits-extensions.html

The Advance steel addin can be downloaded for free:
https://apps.exchange.autodesk.com/RVT/en/Detail/Index?id=appstore.exchange.autodesk.com%3Aadvancesteelandadvanceconcreterevitplug-in_windows64%3Aen

Warning: some have had unexpected results, use with care.
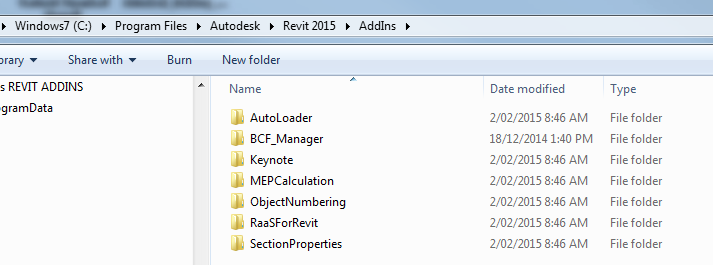
Update: one reader discovered that  C:Program FilesAutodeskRevit 2015AddIns is yet another path that Revit uses. The script below has not been modified to act on that path, but if you have problems after running the tool, perhaps moving the items out of this folder to a backup folder will help. This user had the following errors in the Journal:
“managed exception occurred” and “An item with the same key has already been added” and ExceptionCode=0xe0434352

… If you are experiencing a problem with Revit starting up, it could be due to a problem with one or more of your addins. As you probably know, Revit looks in a couple of key directories for *.addin files, and then it loads your addins based on what it finds. Also, in current versions of Revit it also looks in an ApplicationPlugins folder at the .bundle folders.

I created a Powershell script that looks in each of these three folders (for Revit 2015) and then renames the addin files and bundle folders, meaning that you can then open Revit 2015 in “addin-free mode”. The script requires that you are loading addins from the default AppData and ProgramData folders.

Important note: there are two scripts that are intended to work as a toggle, and for troubleshooting purposes only. After you run the Enable script, do not run it again. Make sure you run the Disable script next.

Here is the intended workflow:

  1. Download and unzip the ps1 files
  2. Ensure all Autodesk products are closed
  3. Run the 1_DisableRevitAddons.ps1 script to disable all Revit 2015 addins
  4. Start Revit
  5. If it starts, you know that some addin is causing your problem
  6. Close Revit
  7. Run the 2_EnableRevitAddons.ps1 script to restore the addin and bundle folder names

You can download both Powershell scripts here

Here is a quick Screencast showing it in action:

And some sample code for the disable script:

 cd $env:ALLUSERSPROFILEAutodeskRevitAddins2015  
Dir | Rename-Item –NewName { $_.name –replace “.addin“,”.addin.disabled” }
cd $env:ALLUSERSPROFILEAutodeskApplicationPlugins
Dir | Rename-Item –NewName { $_.name –replace “.bundle“,”.bundle.disabled” }
cd $env:APPDATAAutodeskRevitAddins2015
Dir | Rename-Item –NewName { $_.name –replace “.addin“,”.addin.disabled” }

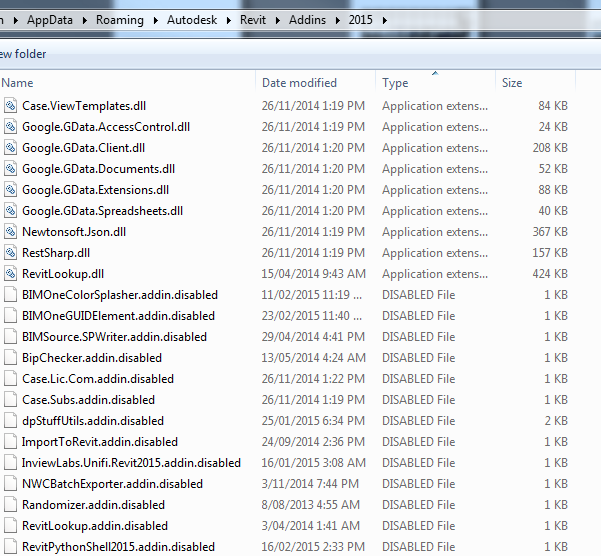
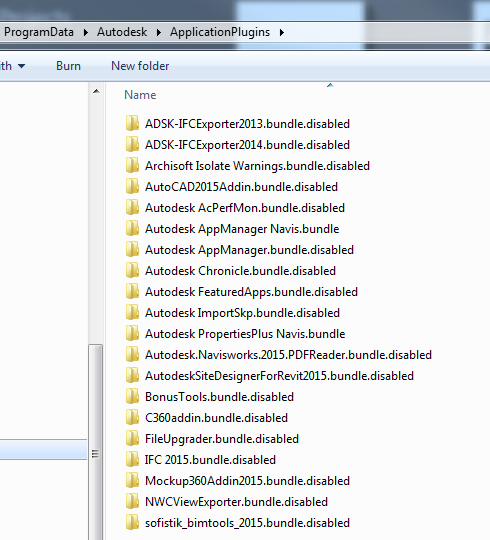
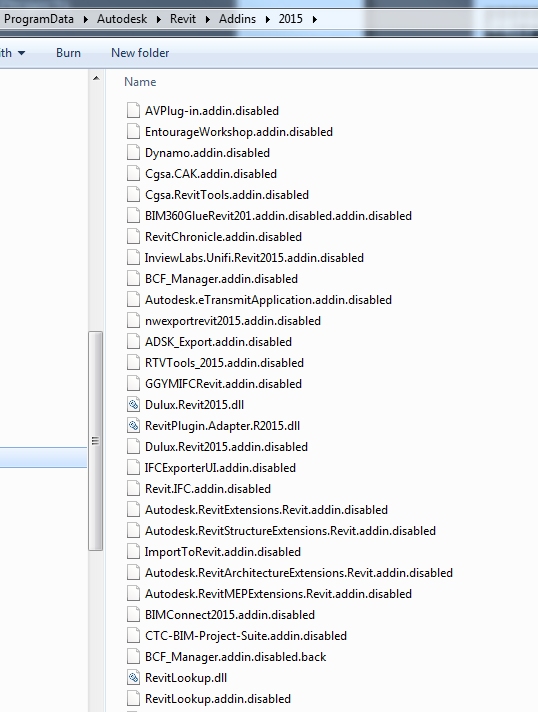
After running the Disable script, you will end up with something like this:

Important: This is an extreme troubleshooting measure, and should be used with great care. Use at your own risk!

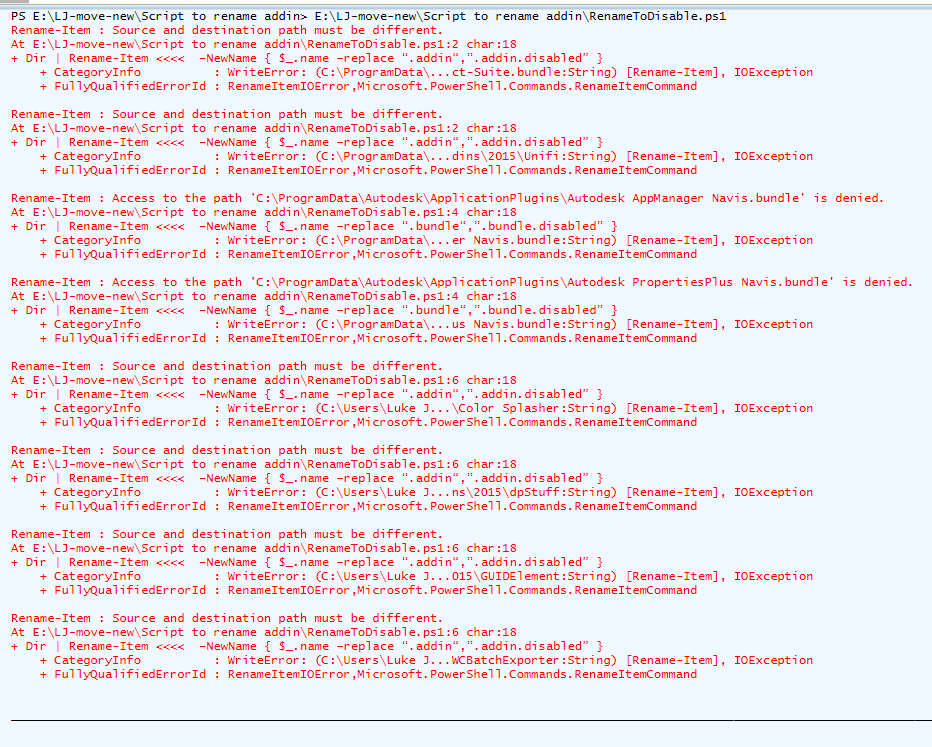
Here are some of the warnings / errors from the Powershell output. Some of these are due to the fact that I had Navisworks open and it could not rename those *.bundle folders. Various Autodesk products share the ApplicationPlugins folder, so it may have some unintended consequences on other products. Having said that, it seemed to work ok on my system.

When building Revit addins, you may want to implement some specific selection filter. Here is some more good stuff via Alexander Buschmann and The Building Coder:
The zip file SelFilters.zip contains

  • the SelFilter class, 
  • the interface files, an 
  • example external command
    using some of the SelFilter functionality, an 
  • add-in manifest file for
    the example command and a 
  • small Revit project to test it in.

Source:
The Building Coder: SelFilter, a Powerful Generic Selection Filter Utility

To try it out:

  1. In Visual Studio (I use Express 2013 for Windows Desktop), make a new Class Library Project
  2. File – Save project as – RevitSelectionFilters.csproj
  3. Add RevitAPI.dll and RevitAPIUI.dll references (2014)
  4. Add – Existing Items. Choose all the .cs files from the zip
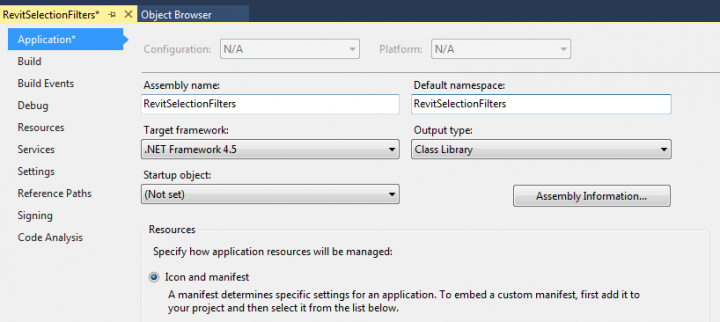
  5. Set project properties Assembly Name and Default namespace to RevitSelectionFilters
  6. Save All
  7. Build Solution
  8. Copy
    SelectionTest.addin and RevitSelectionFilters.dll
    to C:ProgramDataAutodeskRevitAddins2014

Related screenshots:

And screencast showing the examples:

Good intro to Revit customization:
http://help.autodesk.com.s3.amazonaws.com/sfdcarticles/kA230000000tiXXCAY/handout_2116_CM2116.pdf

From the help:
Help: External Commands

Setting up an External Command in Revit 2015:
EXTERNAL COMMAND IN 10 STEPS FOR REVIT 2015 API 

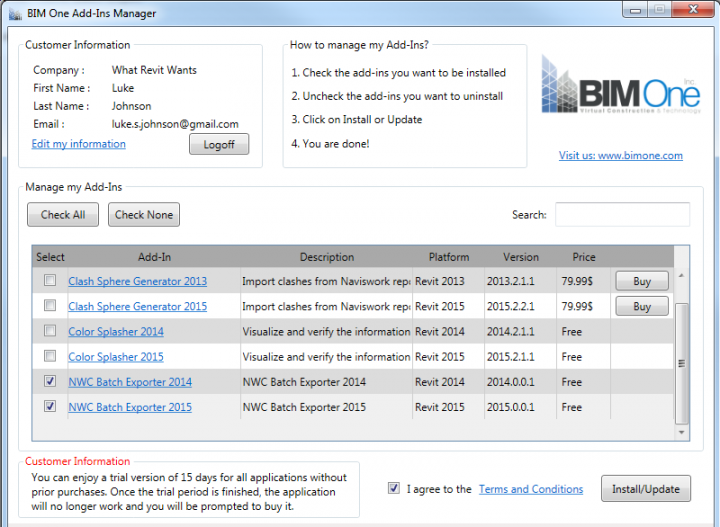
Have you seen the BIM One Batch NWC Exporter? Its a free little addin for Revit that allows you to select multiple views and export them to NWCs all in one go. It works well, but it doesn’t have all the power of a full featured export addin (like RTV Xporter Pro – full review coming soon).

Important: during the signup process, you will have to choose a BIM One key – like a password. This is what will allow you to activate the addin manager, and use the installer. So, make sure you choose a BIM One Key before pressing ‘Save’ on the registration page.

Here’s what the addin manager looks like:

Quick demo of using the addin in Revit 2015:

From the BIM One site: 
Here are the steps to install the application:

  • Sign up on our website: Sign Up
  • Download the Add-Ins Manager: bimone.com/addinsmanager/setup.exe
  • Open the Add-ins Manager and log in
  • Select the apps you want to install and click Install
  • Here is more information about the Add-Ins Manager: User Guide – 
    See more at: https://bimone.ca/Apps/Product?productId=8#sthash.vcuO5zSl.dpuf 

    via
    Virtual Construction and Technology BIM One Inc. – NWC Batch Export

    One of the most popular addins for Revit to date is the simple section box tool by Coins. But what about doing the same thing in 2D? Paolo has put together a macro (and shared the code) that crops a Plan view around a selection of elements. Nice job!

    From Punto Revit:

    I’ve been asked by a  reader if it is possible via Revit API to crop a plan view around a selection of objects, if there are no scope boxes associated it can be done in a fairly easy way.

    You can find the code here

    Original post:
    http://puntorevit.blogspot.com/2014/07/crop-view-by-selection-macro.html

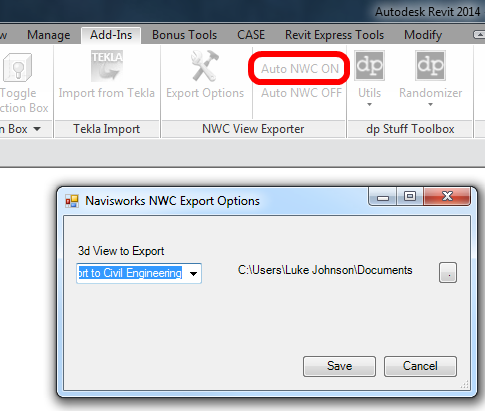
    In the past, some users have automated Revit to NWC export to happen overnight using customized journal files. Kyle Morin has now created an addin that monitors model changes and automatically keeps your NWC up to date, essentially in “real time”.

    You can download it for Revit 2014 here, and view / contribute on the open source page here.

    Check out his post at:
    Revit to Navisworks: Auto NWC View Exporter – kylemorin.co Blog

    via
    https://twitter.com/kylemorin/status/455437946330423296