Here’s how:

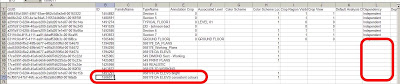
  1. Filter and group your Schedule so that it shows the elements you want on a particular row
  2. Select that Row and pick Highlight in Model
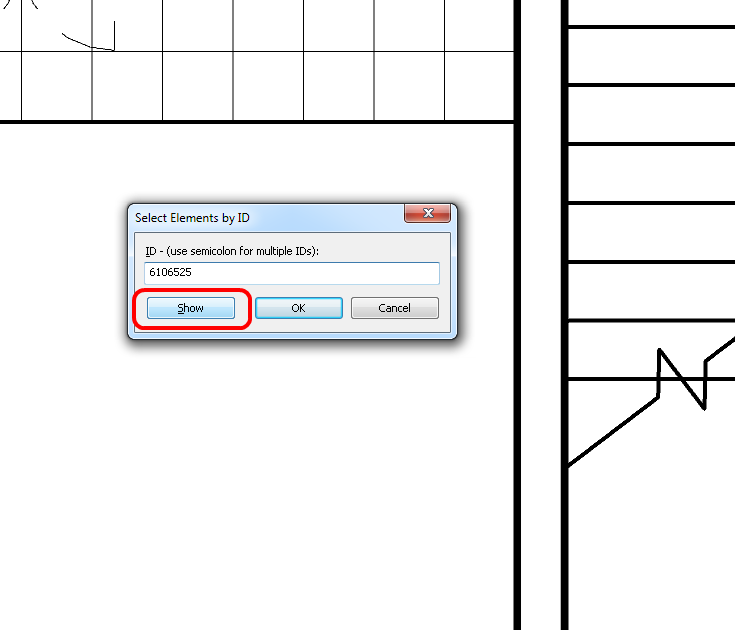
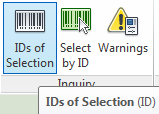
  3. After the elements are highlighed, you can start the “IDs of Selection” command. This will provide a text box with a list of every single element ID that was selected. You can then copy (Ctrl+C) and paste this into your desired application, like Excel or even a text file for consumption in Dynamo.
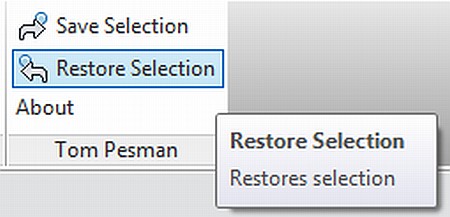
  4. Optional: Save the selection using typical Revit “Save Selection” option

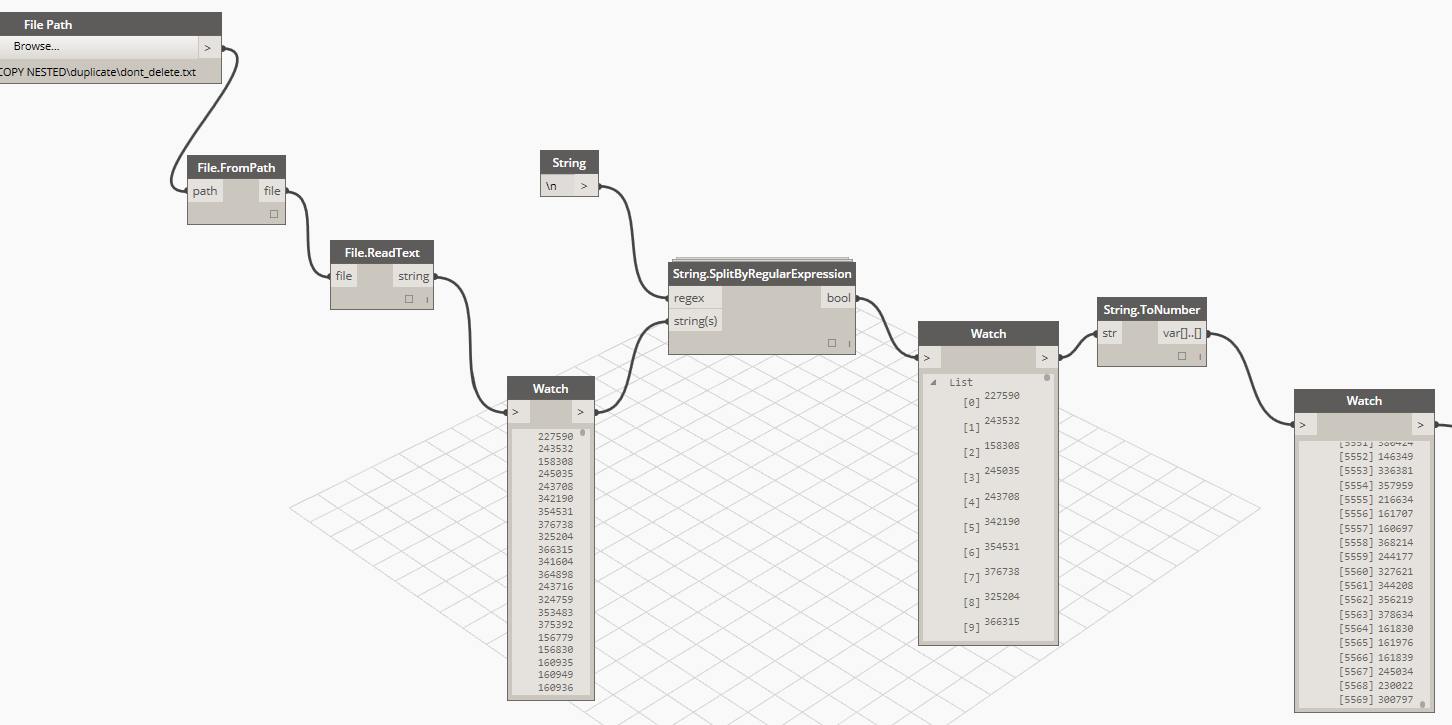
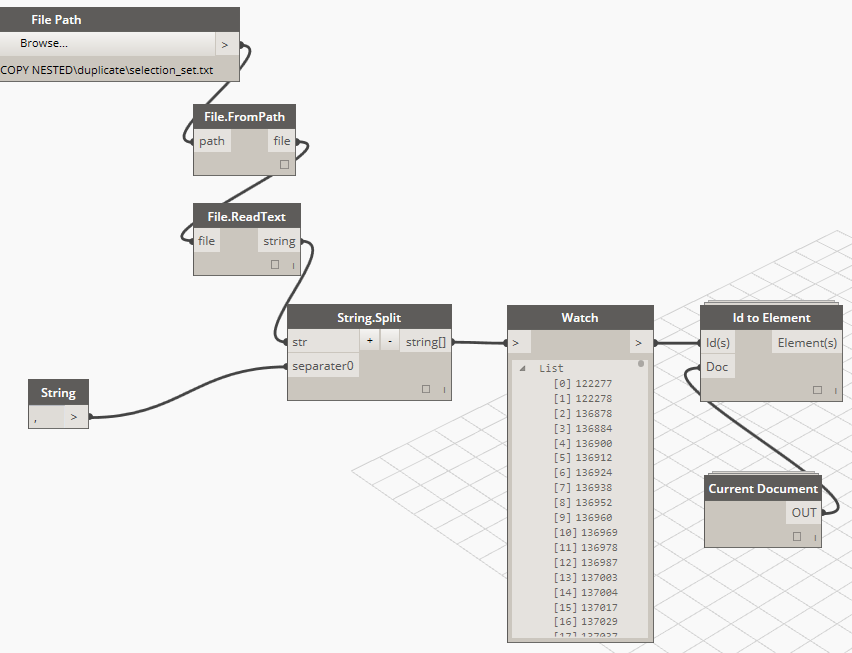
If you do copy the IDs to a text file, you can use a simple Dynamo definition like this to convert the Element IDs to actual elements. Obviously, once you have the element list in Dynamo, you can do lots of fun things with it.

What if you have a list of line separated element IDs, like one per Excel row? You can use Dynamo to parse these to Elements, and even create a saved Selection Set too (thanks to Clockwork), like this:

While you can use Highlight in Model from a Schedule, there is no similar command relating to a ‘current selection’.  If you have somehow selected an object and want to “find” it so you can actually see it, what can you do?

This:

  1. Select the object
  2. Manage – IDs of Selection
  3. Ctrl+C (copies the ID)
  4. Manage – Select by ID
  5. Ctrl+V (pastes the ID)
  6. Don’t press OK, instead
  7. Click Show.  You can cycle through various views by pressing Show multiple times.
To speed this process up, map some keyboard shortcuts to IDs of Selection and Select by ID.

I love it when an idea just works 🙂  Let’s say you have 100 view templates in a project, and you make a new one.  You want to transfer only that new template to another project (not the other 100 View Templates).  If you use Transfer Project Standards (on View Templates and Filters), you will get the lot.  How can we transfer just one of them?

Well, you need to think through the problem.  Everything in Revit has an Element ID.  View Templates are a special kind of view… So we need to get the Element ID of the View Template.  Then we should be able to Copy / Paste it.

Here’s how I did it:

  1. Using Whitefeet Tools, (Utility Tools — Schedule Tools), Write Category to Excel, and select Views.  (Make sure you press the ‘All Elements in Model’ radio button)
  2. Excel will open with all Views listed, including their Element IDs
  3. If you Sort Data in Excel by the ‘Dependency’ column, all of the View Templates will be grouped together as they do not have any data in this column
  4. Select the Cell containing the Element ID of the View Template you want to transfer
  5. In the source project — Select by ID, Paste that Element ID.  Once selected, Copy to Clipboard (Ctrl+C)
  6. In the target project — Modify ribbon, Paste, Aligned to Selected Levels, just pick a level at random
  7. The new View Template is now available in the target project.  Apply it to any view you like…
Note:  At step 6, a simple Ctrl+V would not work
You could also adapt this to copy a selected set of View Templates – just grab their element IDs at step 4, and create a list of them separated by commas.  Use this in the Copy / Paste operations at step 5 and 6.
This is a classic What Revit Wants scenario – if you know how the program works, you can think through the problem and devise a solution that is not readily apparent to the casual user.
PS – it would be nice to figure out a way to get the Element ID of a View Template without using any addins … does anyone have a good way of doing this?

EDIT2 For the add-in free method, use the macro provided by Harry Mattison at:
Transferring view templates, not in 2014 | Boost Your BIM – making Revit even better

EDIT1 I also posted a method using the free RevitLookup add-in at https://wrw.is/2013/07/compiling-and-using-revitlookup-for.html

In response to my post yesterday about using Selection IDs to save selections, Tom Pesman of tnux.net has created a free Revit add-in to automate the process.

At this stage, it only allows the you to save and restore one selection set.  However, it is very easy, very fast, and I’m sure some of you will find it useful:

DOWNLOAD PAGE for Revit Save Selection – Tom Pesman

Interestingly, his About box for this add-in states:
This is a very tiny add-in to demonstrate how usefull small add-ins can be. For more information visit my website (tnux.net).

I agree – I wish certain things were built-in to the program, but at times, these little add-ins can quickly and successfully satiate the common needs of users.

Here is Tom’s blog post on the subject:
Save Selection Add-in – Tom Pesman

Thanks Tom!

I was going to title this “Even Better Save Selection Workaround for Revit Architecture users”, but that wouldn’t really be accurate.

I am posting about a work method that will allow you to select a group of objects and quickly re-select those same objects.  It will not allow you to use the View Filters like the true Save Selection feature would.

Here’s how:

  1. Select the group of objects
  2. Manage – IDs of Selection
  3. Copy these IDs somewhere (for example, to Notepad or Excel)
  4. When you want to re-select those objects, go:
  5. Manage – Select by ID
  6. Paste the text from step 3 (including commas) and click OK
  7. Your ‘set’ has been selected!

Tip – you could make a spreadsheet for each project that contained these ID selection sets.  One column could have a descriptive name for the selection set.

Here is a quick video:

Thanks to http://www.nazdi.cz/2011/11/pitvame-projekt.html for this heads-up (translated as):
If you enter a list of numbers (separated by commas or semicolons), select the corresponding Revit several objects at once. 

I previously posted about Save Selection here:
What Revit Wants: Save Selection Workaround for Revit Architecture users

And here:
What Revit Wants: RAC Users – lets get the Save Selection feature now!