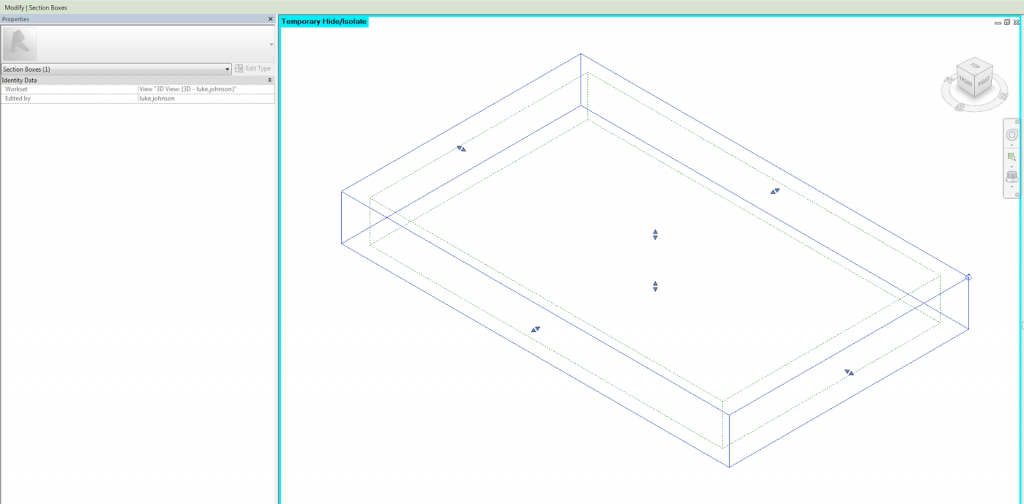
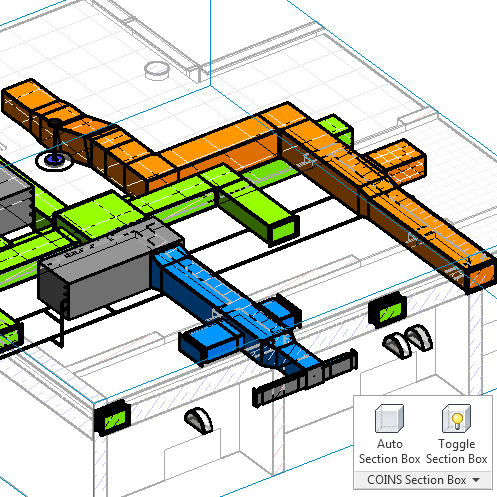
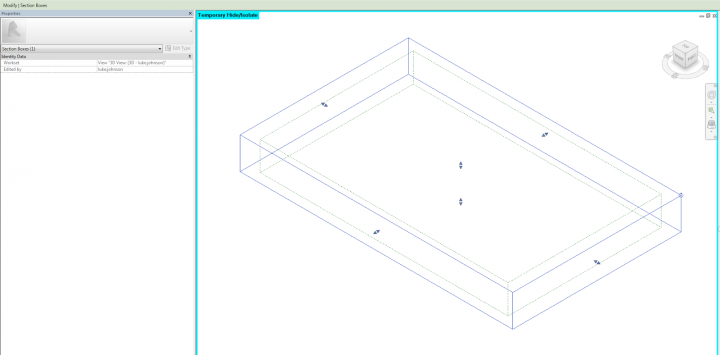
We have all used various autoSectionBox addins to adjust 3D View section boxes quickly. But if you want to quickly match a Section Box to a Scope Box without using an addin, try this:

  1. In a 3D view, select the Scope Box and the Section Box
  2. Sunglasses (ie. Temporary Hide/Isolate) – Isolate Element
  3. Turn the Section Box off
  4. Turn the Section Box back on

It will basically try to match whatever it sees in the view – in this case, the visible Scope Box. There is one pretty big catch, though… it doesn’t really work well if the Scope Box is not aligned to Project North. In this case, go back and use one of those addins 🙂

Tip via:
http://sixtysecondrevit.blogspot.com.au/2014/01/how-to-orient-3d-views-to-scope-boxes.html

Arguably the most useful free add-in for Revit, there are some great new features – the one that particularly grabbed my eye was the automatic alignment and rotation of section boxes to certain elements:

  • Works with elements in linked files (Revit 2014 only).
  • Works with grid lines and level lines.
  • Picking a single wall, beam, duct, or pipe will produce a section box aligned with it.
  • Picking an elevation marker that has a single view associated with it will create a section box from that view.
  • Allow picking of assemblies.
  • Fixed issue where routine would not work if the model contained multiple assemblies with identical view names.
  • Thousands of users are now investigating their models at “the speed of conversation”. Thank you all for making this app one of the highest ranked, most downloaded, and most commented apps on the Autodesk Revit Exchange store!

Download it from here

As you may know, Harry made a free Section Box add-in with automatic rotation to walls a while back:
3D Section Box crop add-in WITH automatic rotation – Boost Your BIM

After spending lots of time with Point Clouds lately, making heaps of section boxes and then manually rotating them to match walls, I finally decided to shoutout to the Twitterverse for some help…

Following a several-days-long Twitter exchange, Harry Mattison has created a cool add-in and provided it for download at:
http://gdurl.com/Hmdo/download

(also on Boost Your BIM product page)

And yes, it automatically rotates the Section Box!!  Essentially, this produces a box that is “aligned” to the Wall.  Conversely, the Coins version currently only produces aligned section boxes when you produce a section box around a scope box or around a section line.

This is arguably my favourite free add-in for Revit.  Check out the new features:
  •  Support for Revit 2014
  •  New “Toggle Section Box” command
  •  Ability to arrange the section box view side-by-side with the selected view
  •  Support for creating section boxes from view outlines, section lines, and scope boxes
  •  New “Quick Auto-Section” command
  •  Worry-free selections – automatic filtering of 2d and datum elements

Click here for a video showing the top 5 uses, including the new features.

Download at:
COINS Auto-Section Box | Autodesk Revit | Autodesk Exchange Apps

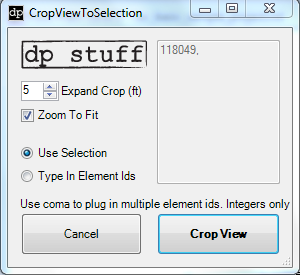
This one is by Dima Chiriacov, and you can download it at:
02-28-2013 CropViewToSelection2013 (for Revit 2013) 

The key difference is that this add-in allows you to physically type in Element IDs before the tool runs – I think that this could be very useful for tracking down your Revit Errors / Warnings.

Read more at:
dp Stuff: CropViewToSelection Add In for Revit 2013

This would be the fourth way to create a Section Box automatically that I have posted.  For the other three, check out this link.

  1. COINS Auto Section Box (download)
  2. QuickViewAccess2013 (2013 download) (2012 download)
  3. ZoomToAwesome (download)
  4. Palladio X BIM – WindowsLayout (download)
  5. Ok, its not a view addin, but – set a keyboard shortcut to Isolate Element, and another one to Zoom Extents.  When you want to find and zoom to a selected element, just type the two shortcuts one after the other … Isolate Element then Zoom Extents.

    Twitter led me to a new technology / Revit / BIM blog at http://www.jarodschultz.com/

    One recent post about Section Boxes included two great tips:

    • In a 3D view, you can re-orient the view, adjust the Section Box, and then use Rewind on the Steering Wheel to get back to a previous orientation (the Section Box remains as you modified it)
    • When you use Orient to View to grab a section cut plane from a Section view and apply it to a 3D view, you can then re-orient the 3D view (by using ViewCube etc) and the Section Box remains.

    Read more at:
    Jarod Schultz: Section Boxes in Orthographic/Perspective Views | Jarod Schultz

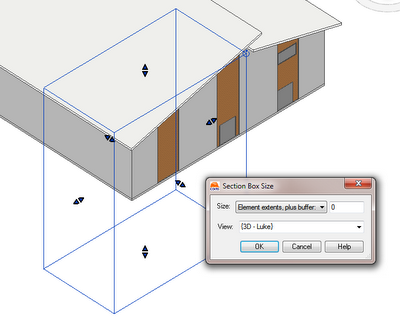
    I had one of those slap-your-head moments when this finally came to me … use Coins Auto Section Box!

    Step by step:

    1. Close Revit
    2. Install Coins Auto Section Box
    3. Open Revit
    4. Open a project
    5. Draw a Scope Box
    6. Go to a 3D view where you want to match the Scope Box
    7. Select the Scope Box
    8. Go to Add-Ins > Auto Section Box
    9. Set Element extents, plus buffer: to 0
    10. Hit OK!

    The 3D view now has a Section Box that matches the selected Scope Box.

    I previously tried to implement some sample code from The Building Code, but couldn’t make it work (see below the lines).  I’m sure this is due to my less-than-optimal API skills…

    How to compile code SLN for Revit (using Building Coder as example:)

    1. Download the ZIP
    2. Unzip it
    3. Double click SetSectionBox.sln and open it in Visual C# Express (or use SharpDevelop, see below)
    4. Click on the Reference Paths side-tab
    5. Using the … add your Program FilesAutodeskRevit 2013Program directory
      it is looking for RevitAPI.dll and RevitAPIUI.dll
    6. Right-click on the SetSectionBox node and press build
    7. Find the setsectionboxsrcSetSectionBoxSetSectionBoxbinRelease folder, and copy the SetSectionBox.dll
    8. Paste it into %AppData%AutodeskRevitAddins2013
    9. If it isn’t already there, paste SetSectionBox.addin into the same folder.

    Revit 2013 ships with the open source IDE SharpDevelop.

    If you want to use SharpDevelop:
    “yourdrive:Program FilesAutodeskRevit 2013ProgramSDAbinSharpDevelop.exe”

    Just drag and drop the solution file into the SharpDevelop window.

    Running the command, I get a couple of different errors.  One is:
    Revit encountered a Autodesk.Revit.Exceptions.ArgumentException: Box is
    empty
    Parameter name: box
    at Autodesk. Revit.DB.View3D.set_SectionBox(BoundingBoxXYZ section Box)
    at SetSectionBox.Command.Execute(ExternaiCommandData
    commandData, String& message, ElementSet elements)
    at apiManagedExecuteCommand(AString* assemblyName, AString*
    className, AString* vendorDescription, MFCApp* pMFCApp, DBView*
    pDBView, AString* message,
    Set< Elementldstd::less tnallc< Elementld> > • ids,
    Map tnallc > * data, AString*
    exceptionName, AString* exceptionMessage)

    Here is SetSectionBox.zip containing the complete source code, Visual Studio solution, and add-in manifest of this command. 
    via
    The Building Coder: Set View Section Box to Match Scope Box
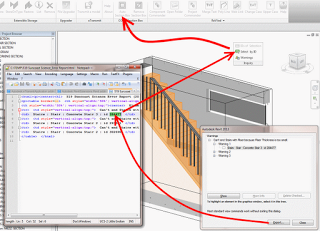
    You have a project with heaps of Warnings / Errors, but you are struggling to find the associated elements.  Here is a quick way:

    1. The first problem is that not all of us can remember 6 random digits easily, but we also can’t copy the element ID direct from the Warnings box (yet).  So… I use Notepad++ (you could easily use Firefox or IE – all of these programs all you to Reload the source error report HTML file when you re-export it).  
    2. Export your Error Report to some neutral location like C:TEMP  
    3. Open the Error Report in Notepad++ / Firefox / IE (you could also use this method if you prefer)
    4. Now you can simply copy the element ID to the Clipboard (Ctrl+C)
    5. Go to a 3D view in which the element will be visible (use the 33 reasons if you need to)
    6. Use Select by ID (tear it off the Ribbon if you like by holding Ctrl)
    7. Paste the Element ID (Ctrl+V)
    8. Use COINS Auto Section Box
    9. Your Warning / Error element will be visible and highlighted