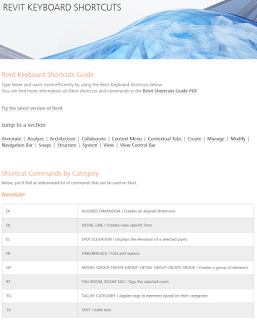
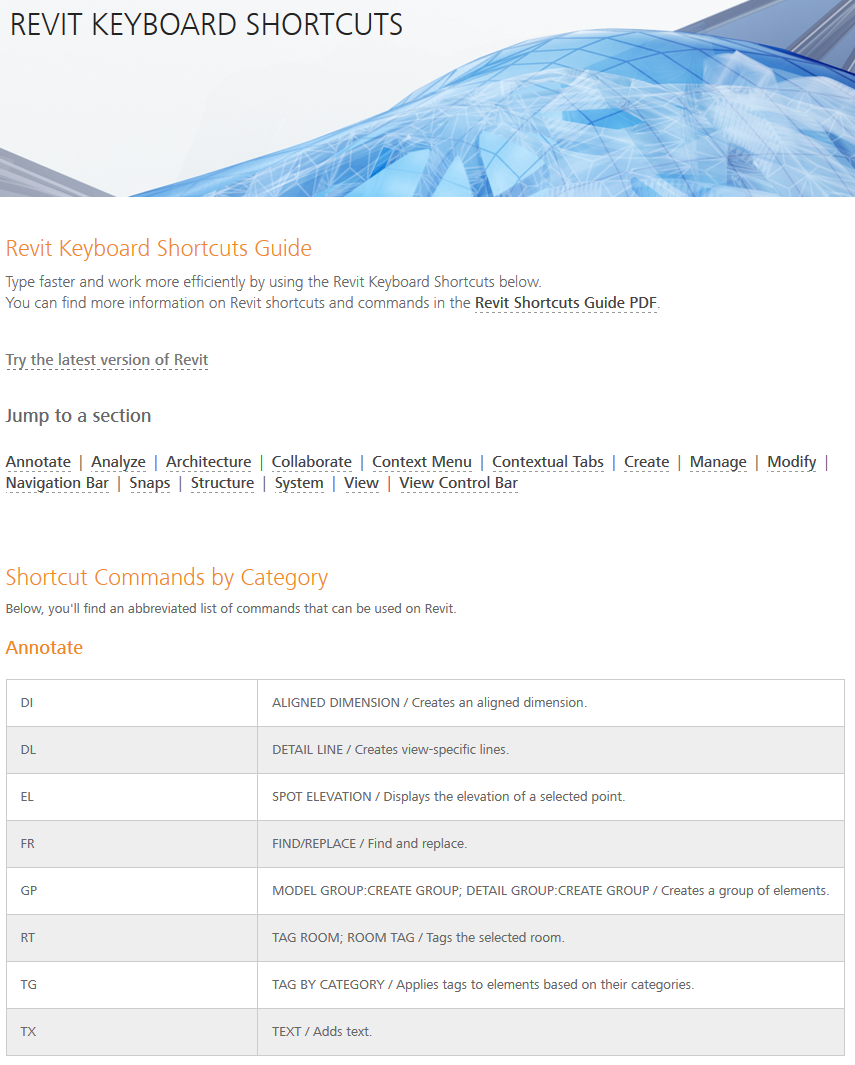
A couple of interesting new endeavors have appeared online recently that I wanted to share. The first is from Autodesk, and they are encouraging you to learn and use keyboard shortcuts. I have posted about keyboard shortcuts plenty of times in the past. I’m not sure this particular site will help me much, because over the years I have customized my Revit shortcuts and they don’t match up with the default anymore 🙂

Check it out at:
Revit Shortcuts | Keyboard Shortcuts and Commands | Autodesk

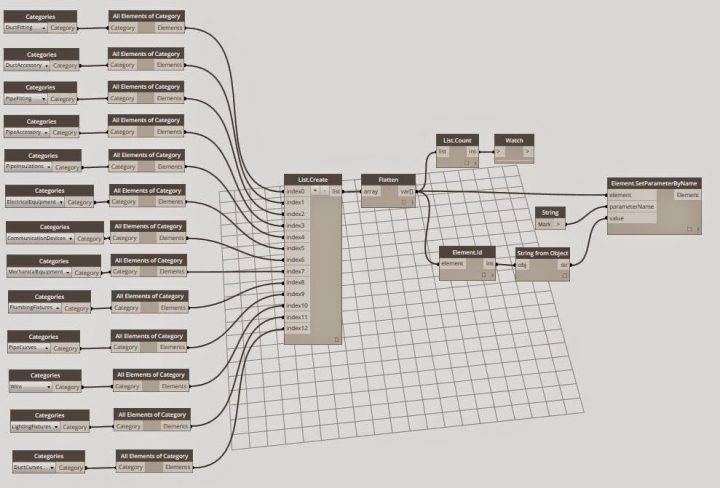
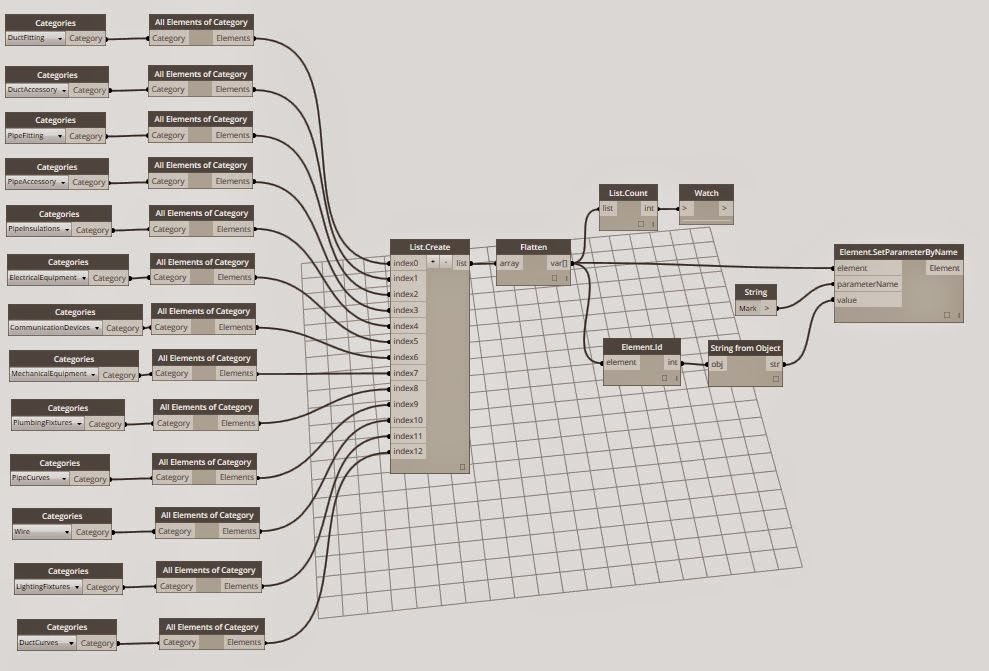
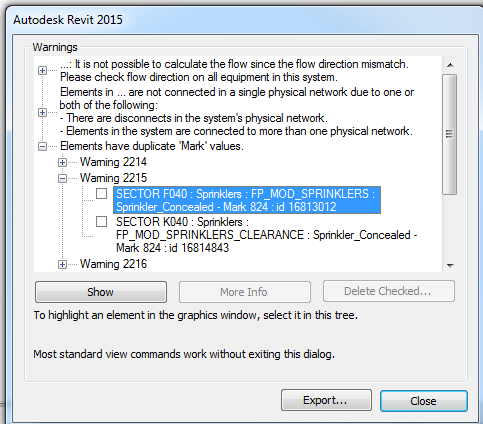
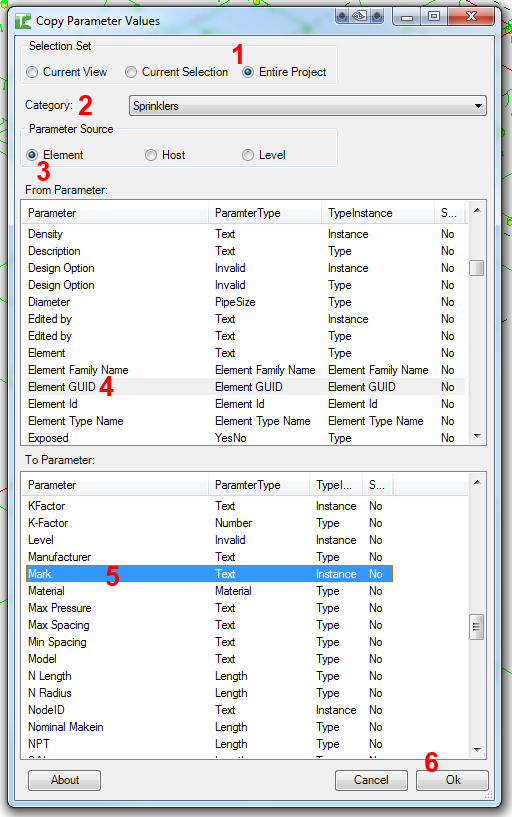
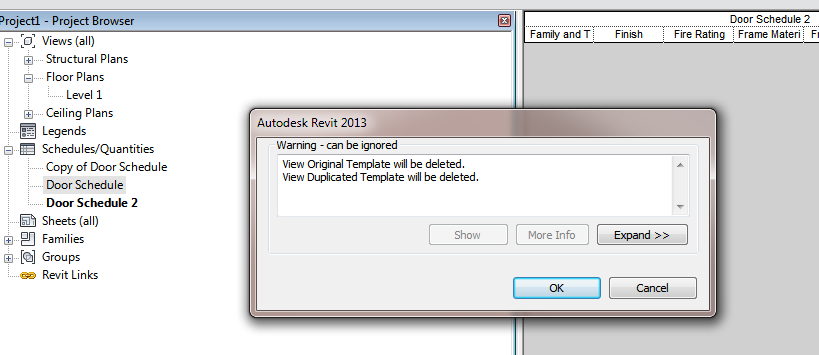
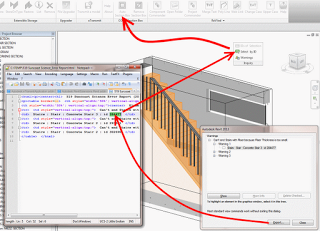
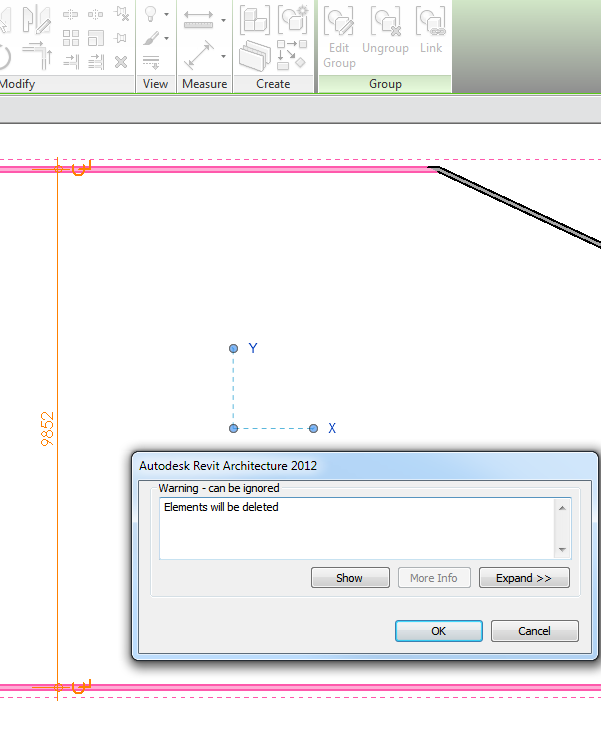
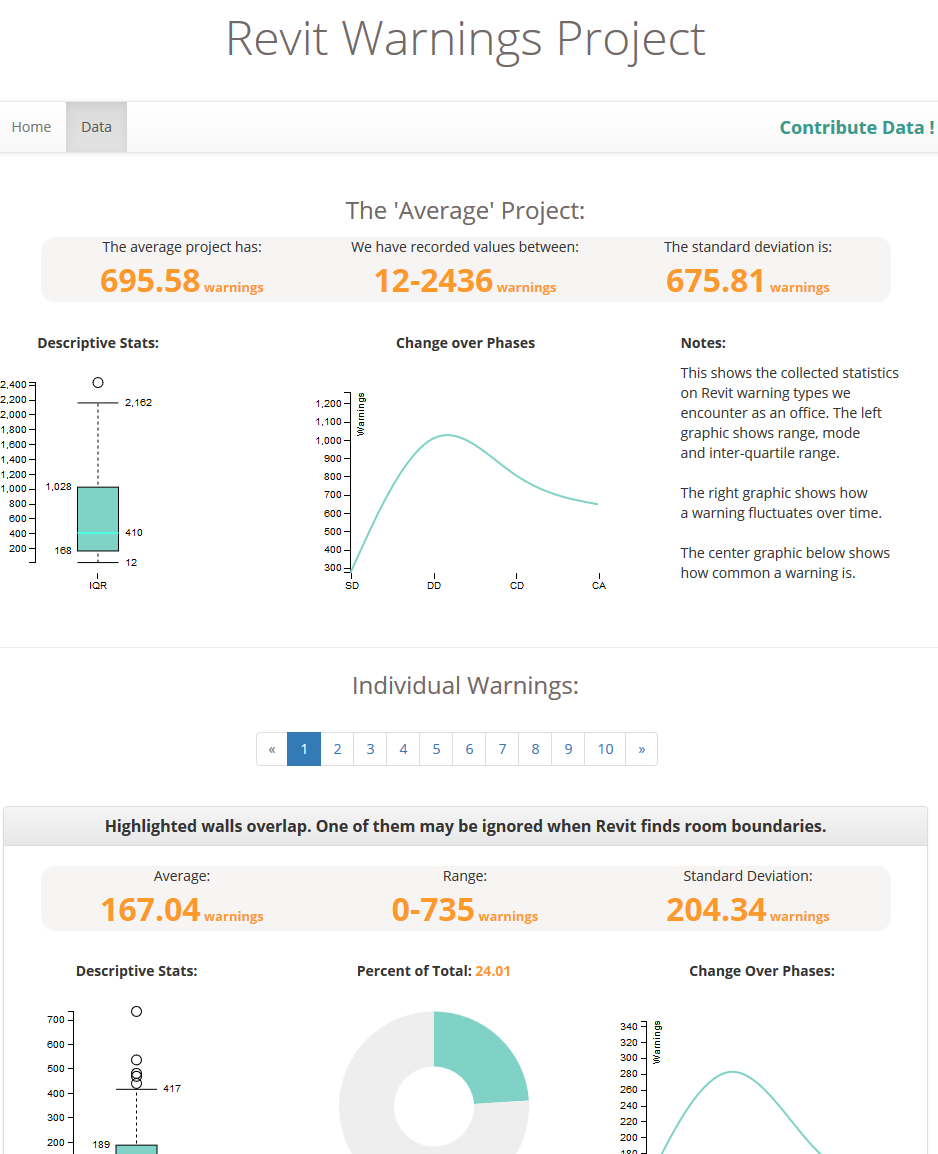
I have also posted previously about warnings and error reports (including how to solve them). The Revit Warnings Project  wants to take your Revit error reports and turn them into some useful, browse-able statistics data and graphs. It is an interesting read, if only to see how your errors compare to some others. I would like to see the Revit Warnings Project expanded to included recommended solutions to the warnings too.

My less-serious take on Revit Warnings and Errors can be viewed here:
What Revit Wants: Funny Revit Error Messages

This tip comes from Troy. He has provided a simple Dynamo definition to set the element Mark to Element ID. It is very fast, and I have tested it on a fairly large data set. As usual though, ‘use at your own risk’ etc.

I posted about how Bonus Tools can handle this too, over here.

How to use it:

  1. Install Dynamo (currently 7.5)
  2. Start Revit, open a project
  3. Open Dynamo, then open DuplicateMarkValuesFromID file from here
  4. Click Run…

Basically, it iterates through each Category in the left most part of the diagram, and sets the Mark parameter to the Element ID. If you aren’t using Mark for anything else, this will instantly clear duplicate mark warnings for those Categories. You could expand or reduce the list by adding or removing Categories and All Elements of Category node sets.

I made a trimmed down version for one Category (Sprinklers), but you can use this to choose a specific Category if you just want to do one at a time.

Thanks to this email from Troy:
Here you go. Feel free to post it and use it as you wish. It is fairly straightforward.

At the left is all of the categories I was checking in my model (mostly mechanical and plumbing). To add or change them just copy and paste the two left boxes, then add an array to the list create. The list count and watch to the top are just there to tell me how many items are being modified. I did about 30,000 objects in all of 30 seconds in one button push.

I’m no expert with Dynamo but I just did this with a spare hour I had int he morning.

I obviously take no responsibility for any damage it may do to any projects, files or computers etc etc.

Regards,
Troy

For some projects, Revit Warnings become a metric in model audit processes (this may be regardless of how much impact those warnings may have in real terms). For example, perhaps your model has become populated with many “Elements have duplicate ‘Mark’ values“. How can we fix these quickly?

I explored a number of options, and I think I have found the easiest. In one particular situation, the Mark value was not important for documentation, and it was simply necessary to make them unique to clear the warnings. What if we could also grab some otherwise unavailable information and apply it to the item? Like Element ID or GUID?

Bonus Tools can do that. Here’s the steps:

  1. Get Bonus Tools
  2. Open your RVT model, check the Warnings dialog, and see what Category is affected
  3. In Bonus Tools 1 ribbon, start Copy Parameter tool
  4. Pick options as per screenshot below

After clicking Ok, the tool will quickly copy the unique ID into the Mark parameter. You can now tag it or schedule it (keeping in mind that it is a static value and may need to be updated from time to time). What I like is how quickly the tool runs – it can do an entire category of thousands of elements in a minute or so.

Note: you could also use Bonus Tools to:

  1. Export multiple categories to Excel using a Multi-Category Schedule – “Export Schedule to Excel”)
  2. Adjust the Mark quickly in Excel with autofill, and 
  3. Re-import to Revit. This method is a bit slower, but you can have more control over how the parameter looks, and you can span multiple categories with unique-yet-readable Mark values.

There have been various other automated ways suggested to fix this over the years, such as:
Automatic Numbering of Elements Within Revit 2015 – Cadline Community 
using element positioning

Revit OpEd: Duplicate Mark Values
using Model Review
 
UPDATE: Recent updates to Bonus Tools include

  • new “Show Warnings” tool (applies a temporary Hide/Isolate after you select a html warning export from Revit) and 
  • a “Renumber Categories” tool (select multiple elements on different categories and it will renumber all elements on those categories by pushing the Element ID into the Mark parameter. It is very fast)

Nasty little bug picked up by Jason Kunkel.  Basically, you make View Template based on a Schedule View.  Then, when you go to delete that original Schedule View, Revit will prompt you with a “View:ViewTemplateName will be deleted” message.  Pressing OK deletes the View Template and therefore leaves any Schedule views with the Template orphaned

I also discovered that if you Duplicate the Template you made as discussed above, and then delete the original Schedule View, it will prompt to delete BOTH the original Template and the duplicated Template!

I tested this using latest update of Revit 2013.

From Jason’s blog:
When you go to delete it, Revit tells you that it is going to delete them.  And then it does.  Poof.  Gone.  Any schedule that had that View Template assigned is now set to NONE.  On top of that, any View Template that was copied from the prior ones are “linked” as well, so this could be pretty disruptive to your schedule View Templates.

Read more / via
View Template and Schedule Hiccup | RVIT – Revit rants, tips, and junk

A couple of concise tweets from some Revit legends:

You have a project with heaps of Warnings / Errors, but you are struggling to find the associated elements.  Here is a quick way:

  1. The first problem is that not all of us can remember 6 random digits easily, but we also can’t copy the element ID direct from the Warnings box (yet).  So… I use Notepad++ (you could easily use Firefox or IE – all of these programs all you to Reload the source error report HTML file when you re-export it).  
  2. Export your Error Report to some neutral location like C:TEMP  
  3. Open the Error Report in Notepad++ / Firefox / IE (you could also use this method if you prefer)
  4. Now you can simply copy the element ID to the Clipboard (Ctrl+C)
  5. Go to a 3D view in which the element will be visible (use the 33 reasons if you need to)
  6. Use Select by ID (tear it off the Ribbon if you like by holding Ctrl)
  7. Paste the Element ID (Ctrl+V)
  8. Use COINS Auto Section Box
  9. Your Warning / Error element will be visible and highlighted

You are about to delete a number of model elements, but you are concerned about how many tags and dimensions are going to be affected by this deletion event.

Here is a quick way to check:

  1. Select the elements you intend to delete
  2. Click Group, then 
  3. Click Link
  4. A warning dialog will show up, saying “Elements will be deleted”
  5. Click Expand, then Export and save a list of the affected elements
  6. Click Cancel
  7. Click undo (to undo the Group command)

Now, you can use that list to check check or correct the affected detail items.

You may also be interested in these posts:
Find all instances of a detail object and report them to a file

Quickly review Error Report by parsing Element ID in spreadsheet