Full credit goes to Adam Sheather for all his hard work on this. Basically, it is a Dynamo package that can talk to Navisworks. I think he has started something pretty special here…

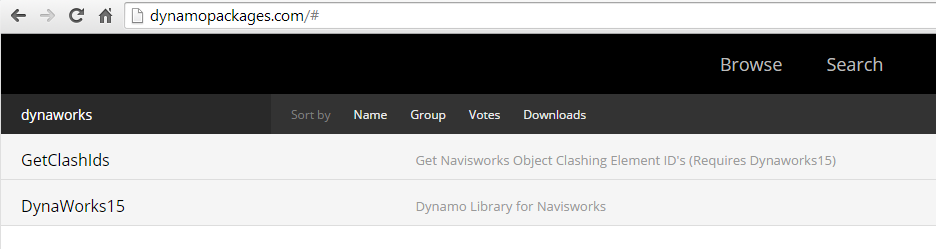
How to get DynaWorks 15:

  1. Download and install Dynamo version 0.7.2
  2. Launch it from the Start Menu ie. DynamoSandbox.exe 
  3. You can download DynaWorks directly from http://dynamopackages.com/
  4. or to use Dynamo package manager: Open Dynamo from the start menu, Packages, Search for a Package, wait to synchronize package list, then click to install DynaWorks
  5. Install GetClashIDs too if you want
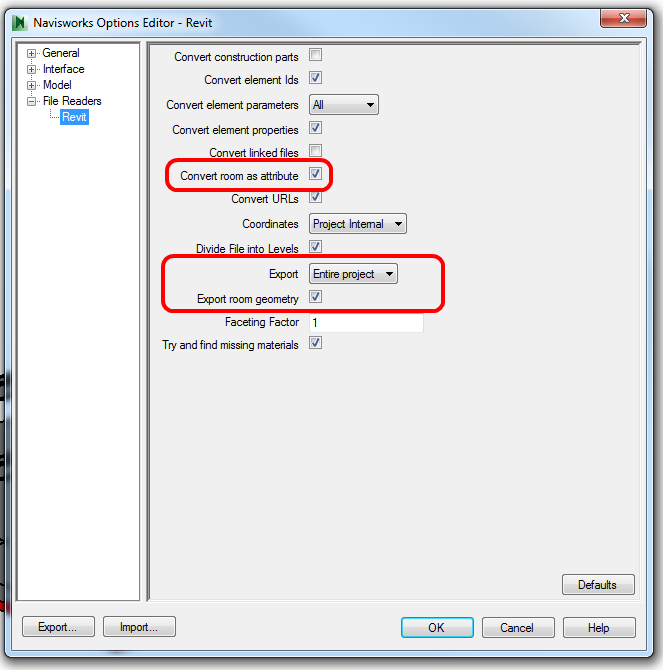
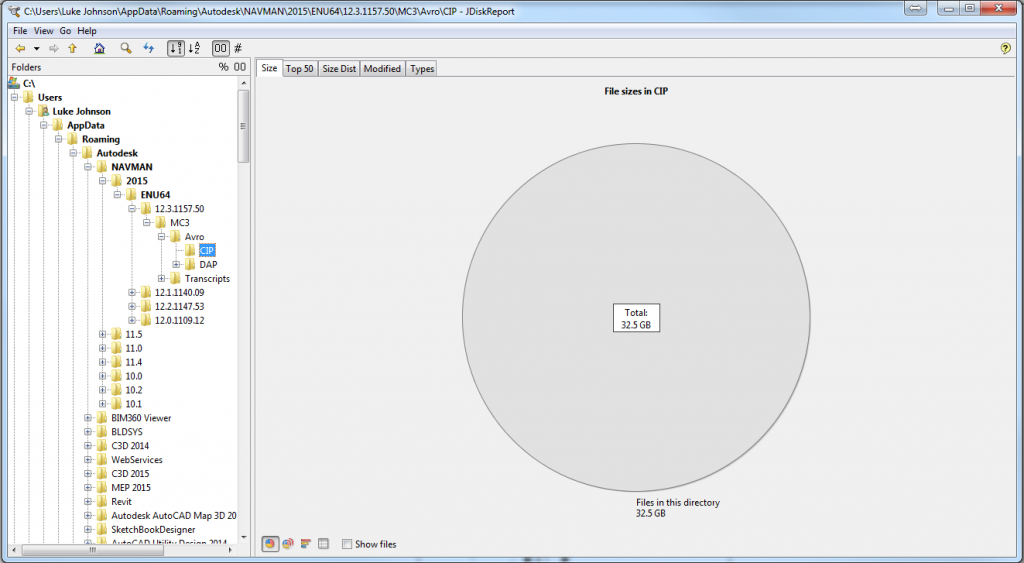
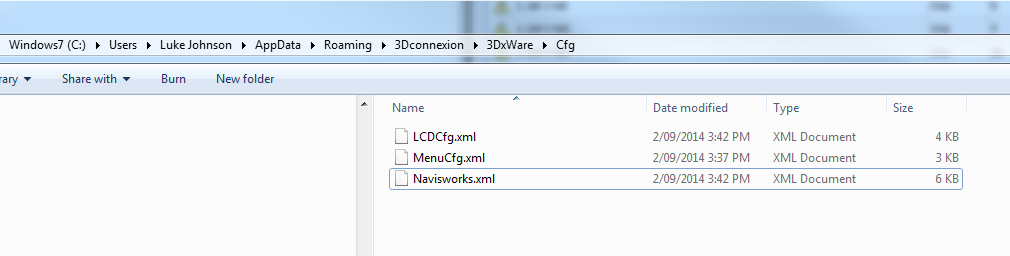
  6. Mine installed itself to this location:
    C:UsersLuke JohnsonAppDataRoamingDynamo.7packagesDynaWorks15bin
  7. To get my install to work, I had to copy missing XML files from step 2, and then used Import Library and chose DynaWorks15.dll from the path above to ‘refresh’ the install and display the extra nodes (you might not have this problem)
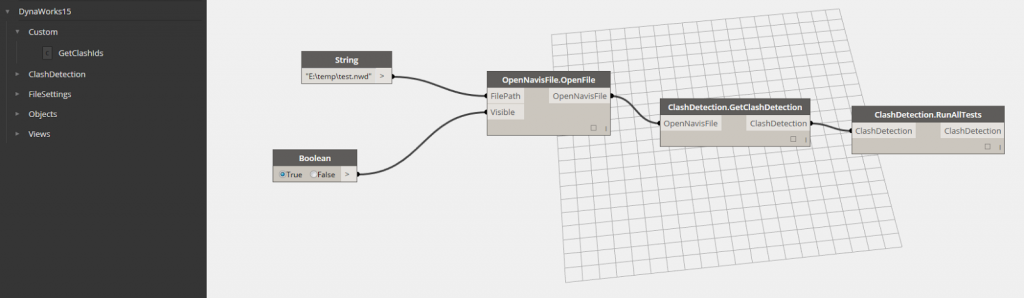
  8. To test it is working, grab the runClashTests definition from this folder,
  9. Open it in Dynamo, point it at one of your Navisworks files by modifying the String property,
  10. Click Run in Dynamo, and it will automatically open the file and run all the Clash Tests.

The above steps should get you up and running… but there is so much more capability here that it deserves more than one post. As Adam mentions in his post, you can use DynaWorks to run Navisworks in hidden mode. I’m looking forward to seeing how others use this … particularly in getting Navisworks to communicate with Revit more effectively.

Heads-up:

Adam’s video:
 

Adam Sheather:
#Dynamo #DynaWorks #BIM is released!! Check here http://t.co/jT7KjiKqwI for installation details or herer http://t.co/t9EvdfJxws for demo.
https://twitter.com/Gytaco/status/517624124986761216

The github page:
https://github.com/Gytaco/DynaWorks

More info at:
Stuff and BIMs: DynaWorks is here!! The Navisworks library for Dynamo

I’m looking forward to tighter BIM 360 Glue and Navisworks integration moving forward…

Quote:

All project and enterprise BIM 360 Glue subscriptions now include access to Autodesk® Navisworks® Manage and Autodesk® Point Layout for use by the purchasing company.

Navisworks Manage 2015 and Autodesk Point Layout 2015

With this new entitlement, connected office and field teams can more easily collaborate using streamlined BIM workflows on everything from multidiscipline coordination and material takeoff to component staking and installation. By removing access barriers, teams can improve information accuracy at the point of construction and help accelerate project delivery.

Navisworks Manage and Point Layout may only be used by the purchasing company’s employees who have access to a BIM 360 Glue Project. These products may be used in conjunction with BIM 360 Glue in order to do work on that specific BIM 360 Glue Project.

In order to grant access to a user to either of Navisworks Manage or Point Layout, the employee will need to be a Host or Project Administrator on the BIM 360 Glue project.

Read more:
New in BIM 360 Glue | BIM 360 Glue | Autodesk Knowledge Network

I noticed these CIP folders were consuming huge amounts of space:

So, I basically deleted everything out of these CIP folders and freed up a lot of space. Upon restart, Navisworks re-created the necessary support files. The current path on latest Navisworks version is:
C:UsersUSERNAMEAppDataRoamingAutodeskNAVMAN2015ENU6412.3.1157.50MC3AvroCIP

Close Navisworks, go to this CIP folder and select all – Delete. Send them to Recycle Bin if you are worried something will break. Open Navisworks, check everything is OK, then you should be able to delete them permanently.

These were the files:

Across various Navis versions:

Sometimes, when enabling and disabling CIP in Navisworks 2015, I will get a crash. Save before you do it!

This great tip comes via Kate Buckle, one of my colleagues here on the nRAH. Basically, when using the Properties pane in Navisworks, you often have to switch between many Tabs to find the Property that you want to view. This addin (or app) allows you to create a custom Properties view that can be docked and used instead of the built-in Navisworks properties pane.

Once installed, you can copy values, and even convert straight to a Search Set via the Find Items option:

Download at:
Properties+ | Autodesk Navisworks | Autodesk Exchange Apps

Help at:
Properties+ | Autodesk Navisworks | Autodesk Exchange Apps

Screencast at:
 

While you are at it, get the Navisworks App Manager, so you can easily check for updates to Navisworks plugins:

And for historical purposes, there are only 10 apps currently on the Navisworks App store – this is certain to change!

If you use a 3Dconnexion mouse with Navisworks, and you have installed the latest drivers (which I highly recommend), you may struggle to find out how to map a Spacebar to a button on your Spacemouse. Obviously, in Navis it is important to be able to hold down the Space key for selection purposes. If you try to record a macro for Spacebar in the 3Dconnexion management menu, you will find that it has both a ‘press’ and ‘release’ action.

You need to use the Keyboard list to map a key press correctly. However, Spacebar does not appear in the default menu… Happily, you can directly modify your profile XML to map the KB_Space action to a button on your 3d mouse. The images below show where to find this file, and how to edit it:

This method will fix the ‘press and release’ nature of macros, meaning you can “hold” the 3d mouse button for a Spacebar or Shift+Spacebar multiselection in Navisworks.

EDIT Good discussion about using a 3D mouse with Navisworks on LinkedIn

I’ll be the first to admit that this is a bit clunky, but it does work:

  1. Go to the Navisworks viewpoint you want, and isolate a single element (hide everything else) that approximates the view extent
  2. Click nearest ViewCube corner that approximates the viewpoint you were just using
  3. Deselect everything and press Page Down to zoom extents
  4. Export to DWF and re-append
  5. Delete everything but this new DWF (with a single item in it)
  6. Glue this using the addin for Navisworks
  7. After Gluing, open this model, click the same ViewCube corner as in step 2, and immediately save the view as a shared view.
  8. Make a new Merged Model with this “view” model
  9. You now can view that viewpoint from Navisworks in your Merged BIM 360 Glue model 

Another option using Element ID, may suit your workflow better:

  1. Copy Element ID from Navisworks
  2. Paste the ID into BIM 360 Glue in the Model Search box
  3. Right-click and Fit to Window
  4. Save the View

I am moved to join ADN and get into the Glue API, more on that later…

The focus of Autodesk Navisworks 2015 Service Pack 3 is the resolution of Revit interoperability issues. Service Pack 3 does resolve issues identified in other parts of the product, we recommend you refer to the supporting documentation for the detail.

Download Navisworks 2015 SP3

Autodesk_Navisworks_2015_Service_Pack_3_Multilingual_Freedom_64bit.msp (msp – 202.29Mb)
Autodesk_Navisworks_2015_Service_Pack_3_Multilingual_Manage_64bit.msp (msp – 269.44Mb)
Autodesk_Navisworks_2015_Service_Pack_3_Multilingual_Simulate_64bit.msp (msp – 269.45Mb)

Readme
Navisworks 2015 Features (English)
Navisworks 2015 Installation (English)

via
http://knowledge.autodesk.com/support/navisworks-products/downloads/caas/downloads/content/autodesk-navisworks-2015-service-pack-3.html

EDIT: Subtle change – dragged window selections and markup are now filled blue in colour

Remember to update your exporter if necessary:
2015: NavisworksExporters2015.exe

I know you can use various addins (like Case Extrude Rooms to 3D Mass) to make a form out of a Room element in Revit. However, there is a vanilla Autodesk way you could go about this:

  1. Export a Revit view to Navisworks with all of the Room-related export boxes ticked in the Navisworks Exporter addin
  2. Open / append the NWC in Navisworks
  3. Turn off everything except the Room objects that the Navisworks Exporter created
  4. Export the scene to FBX, convert to DWG, import it to a family, place that family back in the project (using parts of this workflow). Use origin-to-origin linking to get things right.

You could then use the Room 3D element “family” in an Interference Check, to determine what elements exist in Rooms (this would only work for Categories that support Interference Check in Revit).

I thought it might be useful to set up a shared folder to allow Navisworks users to upload, download and share resources. The idea here is that lots of Navisworks resources (as listed below) can be exchanged and re-used on future projects. Why should we all keep reinventing the wheel?

Only invited users can upload, while any user can view and download the content. Note: if you are an uploader, keep in mind that this will be globally accessible, so you need to be aware of any IP considerations that may apply. At this point, I’m considering this to be “open source” (with associated licensing conditions). Additionally, I am keeping the guidelines to a minimum, just feel free to share something if you think others could make use of it.

Anyhow, here it is:
Shared Folder Link

There is a readme with some basic guidelines at:
this link

If you would like to be a contributor, feel free to contact me via comment, on Twitter or on LinkedIn.

Here is an initial list of the things that I think will be worth sharing (but there will be more added):

  • Appearance Profiler DATs
  • Clash Test XMLs
  • Find Items XMLs
  • NWF Templates
  • Search Set XMLs
  • Settings XMLs
  • Workspace XMLs