Basically, the issue goes something like this:
Revit 2012 can’t find a linked dwg anymore. When I try to reload it, Revit says the file doesn’t exist. There is an other linked dwg in the same folder, which still loads fine.

Here are some relevant forum threads:
http://www.revitforum.org/architecture-general-revit-questions/3432-problem-revit-cant-find-linked-dwg.html

http://forums.augi.com/showthread.php?t=111157

http://forums.augi.com/showthread.php?t=73434

http://www.revitcity.com/forums.php?action=viewthread&thread_id=23907

Here is one solution.  Well, its not really a solution, more of a method that can be used to fix this problem:

1) make view templates for the graphical overrides of the imported dwg (Overrides import)
2) remove the file from the project
3) save under new name
4) reopen the project and Link CAD the same dwg file
5) apply the view template for graphical overrides
6) check all views, if you imported to all views
7) redo dimensions, if there were any connecting the linked dwg with the model

via this post

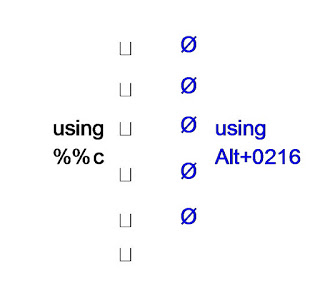
In AutoCAD, you can type %%c and it will get translated into a diameter symbol.  Other control codes may be found here.

However, I have found that this method does not import into Revit correctly.

Instead, you need to use the Alt+0216 code in the AutoCAD DWG file.  When this is imported or linked into Revit, the diameter symbol will display correctly.

You can use the FIND command in AutoCAD to quickly find and replace the offending %%c diameter symbols with Revit-friendly Alt+0216 diameter symbols.

Image and video below to demonstrate:

For related information, check out:
What Revit Wants: How to add symbols to Schedules and Text in Revit

This recent post by RevitKing has a nice list of the main codes you will use:
Revit.King’s BIM coordinator/ Revit Blog: Adding Revit text symbols like (diameter)

ƒ = ALT +0131
™ = ALT +0153
® = ALT +0174
© = ALT +0169
° = ALT +0176
± = ALT +0177
² = ALT +0178
³ = ALT +0179
× = ALT +0215
Ø = ALT +0216
÷ = ALT +0247

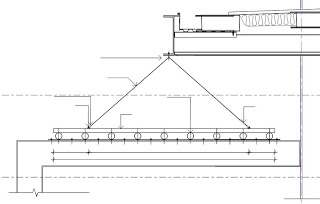
This happened to me recently on a very big workshared project.  Turning off the Crop of the view made the links reappear, but when I zoomed in, they disappeared again!

The solution?  Turn off the Far Clipping for the view in question.  This made the Linked Import reappear and act in a predictable manner.  Most of the views I’m working with already have Display Model set to ‘Do not display’, so it doesn’t cause graphical problems for me to turn off the Far Clip.

This is why upgrading large projects to the next version of Revit is scary to me.  I thought waiting to Web Update 2 would be safe – but it still wasn’t!

Now I need to go through lots of views that have Linked DWGs and check if they are ‘broken’ and need the Far Clip to be turned off…

UPDATE
Some more information:

  1. The views in question seem to Print Preview and Print correctly, suggesting this is some sort of graphical problem?
  2. The Linked CAD Import is selectable, but not visible.  Once selected, it is shown highlighted like any other element.
  3. Not all views are affected, only certain ones (most affected seem to the Linked Imports living in Detail Views and Sections).  Drafting Views appear to be immune.
  4. If no one else has this problem, I may have to look into my hardware configuration.
  5. If a file ALREADY had No Clip set, the Import may STILL not display.  Toggled the view to ‘Clip with Line’ and then back to ‘No Clip’ – and the Import reappeared!
  6. New Revit session has no effect
  7. New Local from Central has no effect
  8. Synchronise has no effect
  9. Reloading the affected Import has no effect

See video below (to prove that what I’m saying is true)

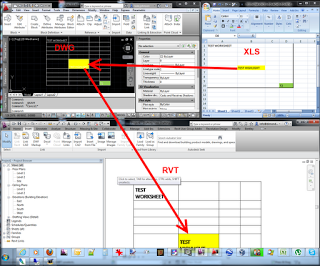
There is a way to link Excel data into Revit, and retain the ability to ‘update’ that data when it changes.  Essentially, it involves using AutoCAD as a middle-man to get the job done.  In simple terms:

  1. Link Excel into AutoCAD DWG
  2. Link DWG into Revit

When you want to update the Excel spreadsheet in Revit, you have to:

  1. Save Excel spreadsheet
  2. Open AutoCAD DWG and update Data Link
  3. Save DWG file
  4. Reload DWG link in Revit

This all works surprisingly well.  Check out the video below as a demonstration:

Here is a little diagram of the concept:

Process via
RevitCity.com | Importing Excel into Revit

In words:

  1. Save Excel File
  2. In AutoCAD – Insert – Data Link – new Excel Data link
  3. TABLE command
  4. From a data link – select Data Link, Ok
  5. Use 0,0 as insertion
  6. Save DWG file
  7. New Drafting View in Revit, link the DWG in Origin to Origin
  8. Its a two step update process whenever you change Excel.  Save, in AutoCAD / update link, Save DWG, in Revit – reload. Done.

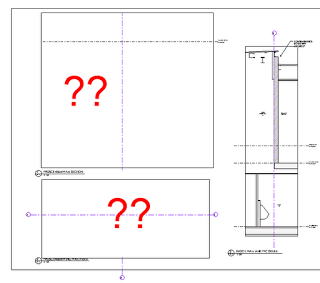
I printed a PDF from Revit today, and was presented with this output:

The text was not printed from a linked DWG.

This problem resulted because:

  1. I linked a DWG into a Detail (Section) View
  2. I then rotated the Detail View in Plan.
  3. I moved the linked DWG back into position.
  4. But obviously Revit was not impressed with this course of events!

It was a relatively simple fix – I used Ctrl-X to ‘cut’ the DWG into nowhere, then pasted it back into the view, and also ‘reloaded’ the DWG from the Manage Links dialog.

A big tip for new players:

Never import a DWG file.  

And never, ever explode an Imported DWG file.

Nothing good will come of it.  Trust me.  Instead, do this (in order of preference):

  1. Use Revit natively, without adding messy DWG or CAD import data.
  2. Link DWG files, rather than import.
  3. Import DWG files into a Detail Component family, and then load that family in.
  4. Eat a very sour lemon.
  5. Import DWG file.
  6. Import DWG file and explode it.
  7. Cry

If you have any thoughts, or any other methods that you use (like Importing a DWG file into a RVT link and then using ‘Linked Views’, feel free to comment).

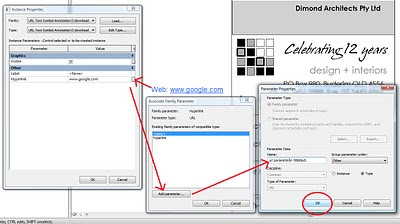
No doubt you issue many PDF files to consultants, Clients, Builders and the like. Why not add a URL link to your titleblock, so that anyone receiving your PDF files can jump directly to your webpage?


Its as simple as adding a parameter of type:URL into your titleblock.


To make it even easier for you, I have created a Generic Annotation family with a URL parameter inside it. Simply load this family into your titleblock, then link the parameter from it to a parameter in your titleblock (see image).
Here is the download link:


Now, when anyone opens this PDF, they can jump directly to your webpage.
The URLs worked fine for me using CutePDF and Adobe Reader, but Foxit Reader seemed to have an issue parsing the link correctly.