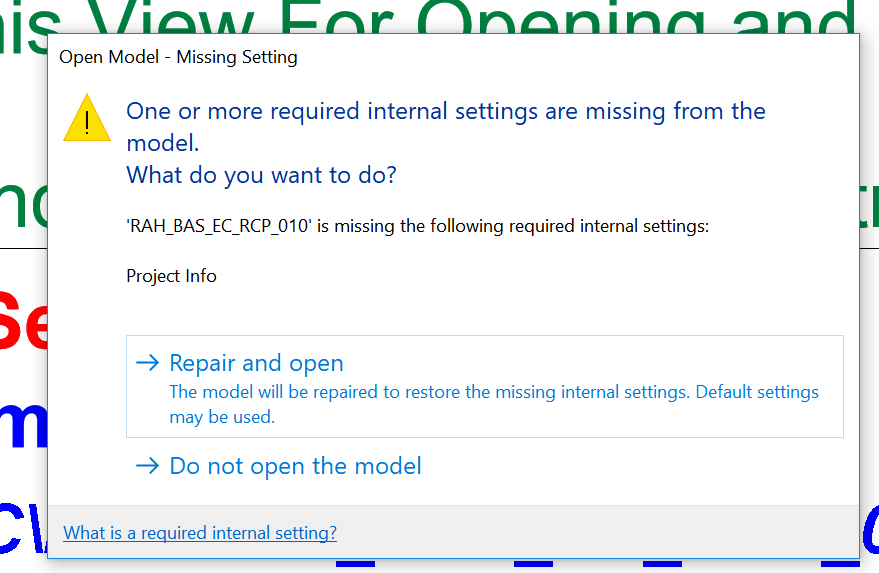
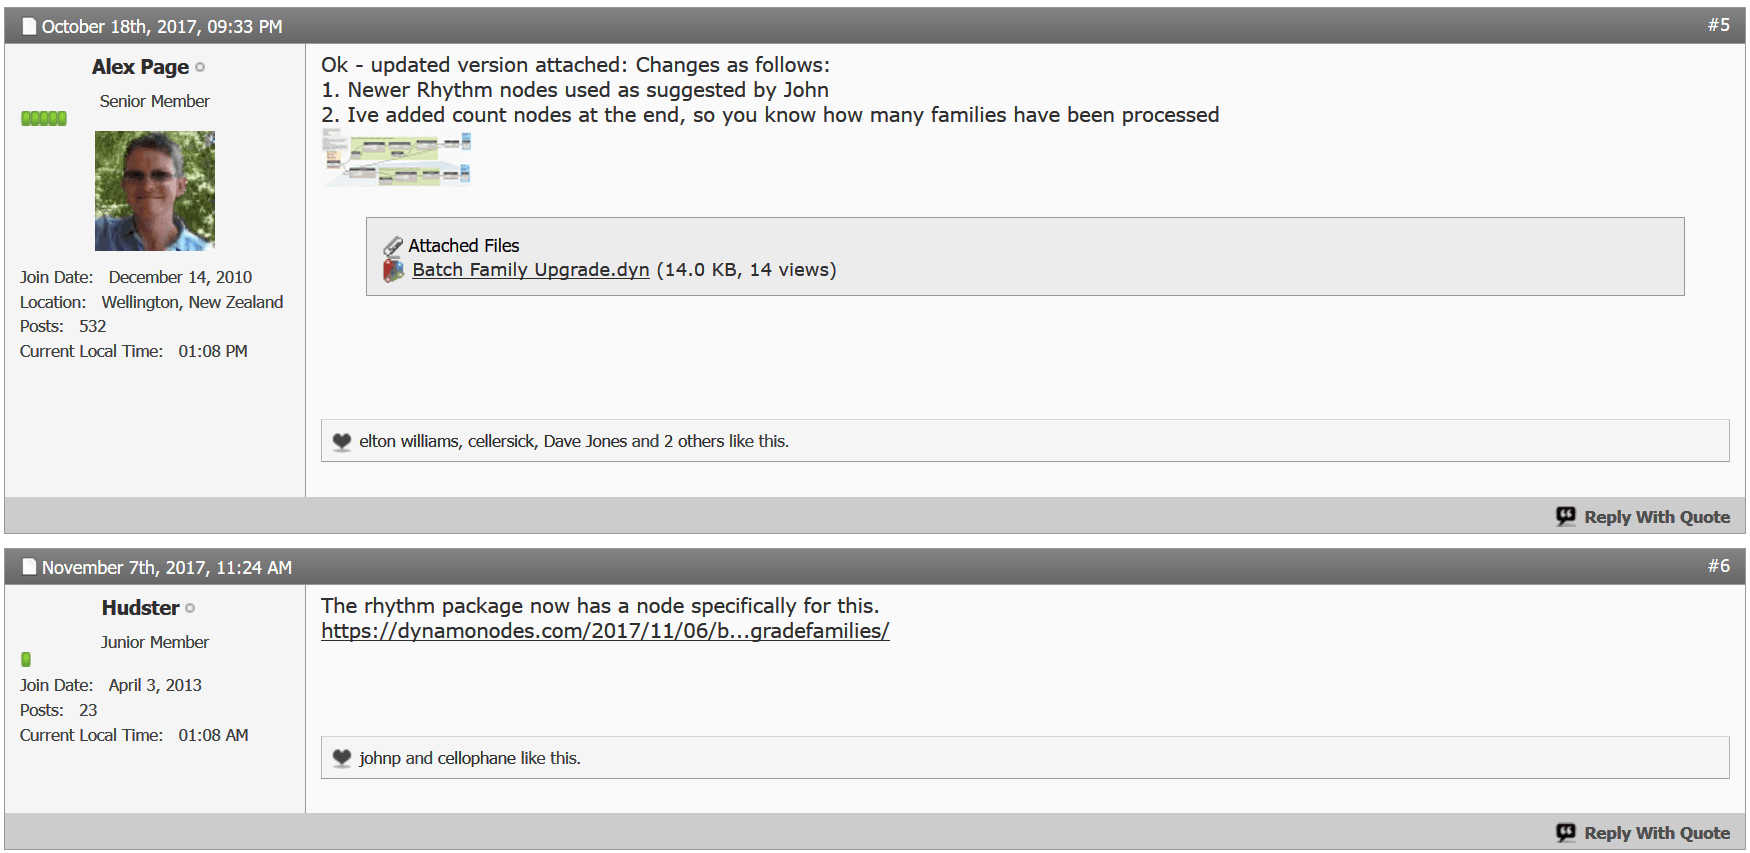
You may have experienced this error when upgrading a file to Revit 2018:
One or more required internal settings are missing from the model. What do you want to do?
Autodesk Support has stated that “In R 2018 we added a “feature” that catches issues like this and repair the model for you, instead of causing problem down the line.”
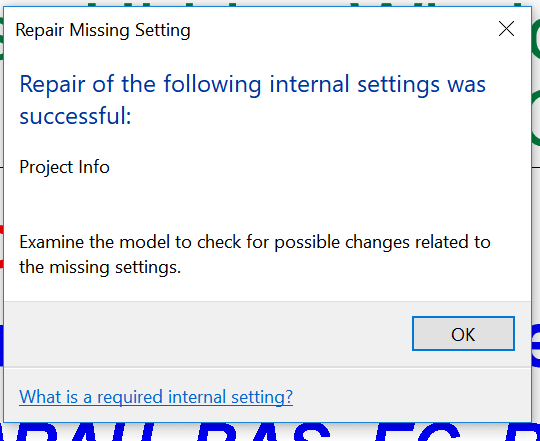
This particular dialog may not be handled by automatic upgrading tools. The resolution of the problem is to open the file manually, and simply press “Repair and open”. You should get a success message like below:
I assume there are other things that this Revit 2018 feature looks for and tries to fix. As Project Info includes a few different things in Revit, my guess for the above error is that it appears that it will set project Location to Default? Or perhaps it reinstates a deleted Project Base Point or Survey Point.
Either way, data and model validation is a good thing. Thanks Revit 2018 🙂
Update: RTV Xporter Pro can define rules for dismissing dialog boxes, in the Task Dialog Settings. See below:
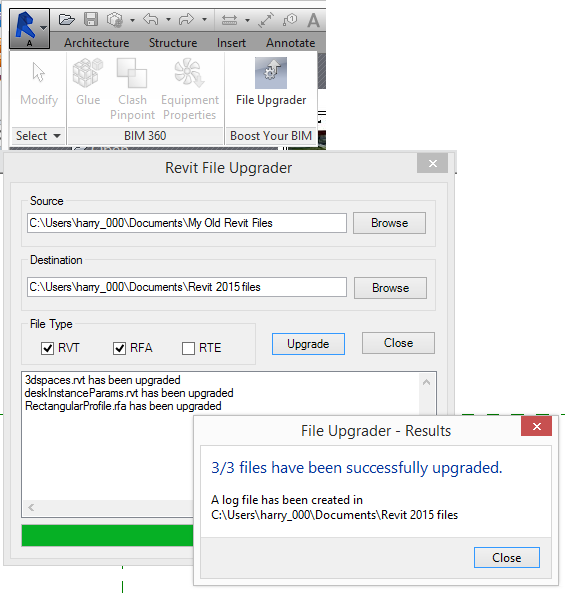
Revit gets a new version every year, and every year we theoretically have to upgrade our Revit files. If you are a pro-active BIM Manager, you also have to upgrade a bunch of families and other files. If you are working on certain large projects, maybe the updates are deferred for a year or two, and then you find that you have to upgrade about 800 Revit files from Revit 2015 to 2018. Obviously, they all have to upgraded at once to maintain the integrity of the data and the workflows. What is the best way to do it?
I investigated a few different options and my notes and links are list below. In my case, I decided to go with RTV Xporter Pro and its File Upgrader option. It is an extremely affordable addin (currently $49USD), considering the amount of batch processing functionality that it provides.
The very first thing to do is ensure you have a backup. In my case, I had a complete offline mirror of the Revit files, and I ran the upgrade against that mirror. Then, I could just overwrite the live network location once I confirm that everything works as expected.
I would say that another thing to do is to create some form of data snapshot of your Revit models prior to upgrade. I have a method of doing this which is pretty powerful, but its a secret (for now).
Here are the steps to upgrade a Revit dataset using RTV Xporter Pro 2018:
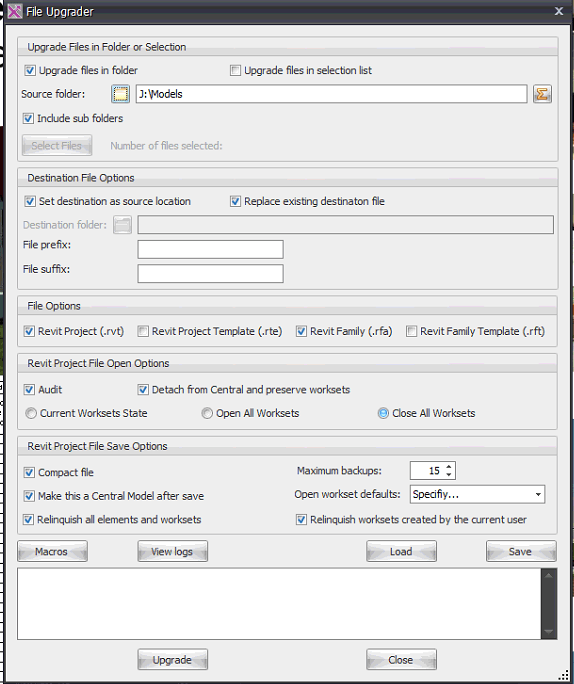
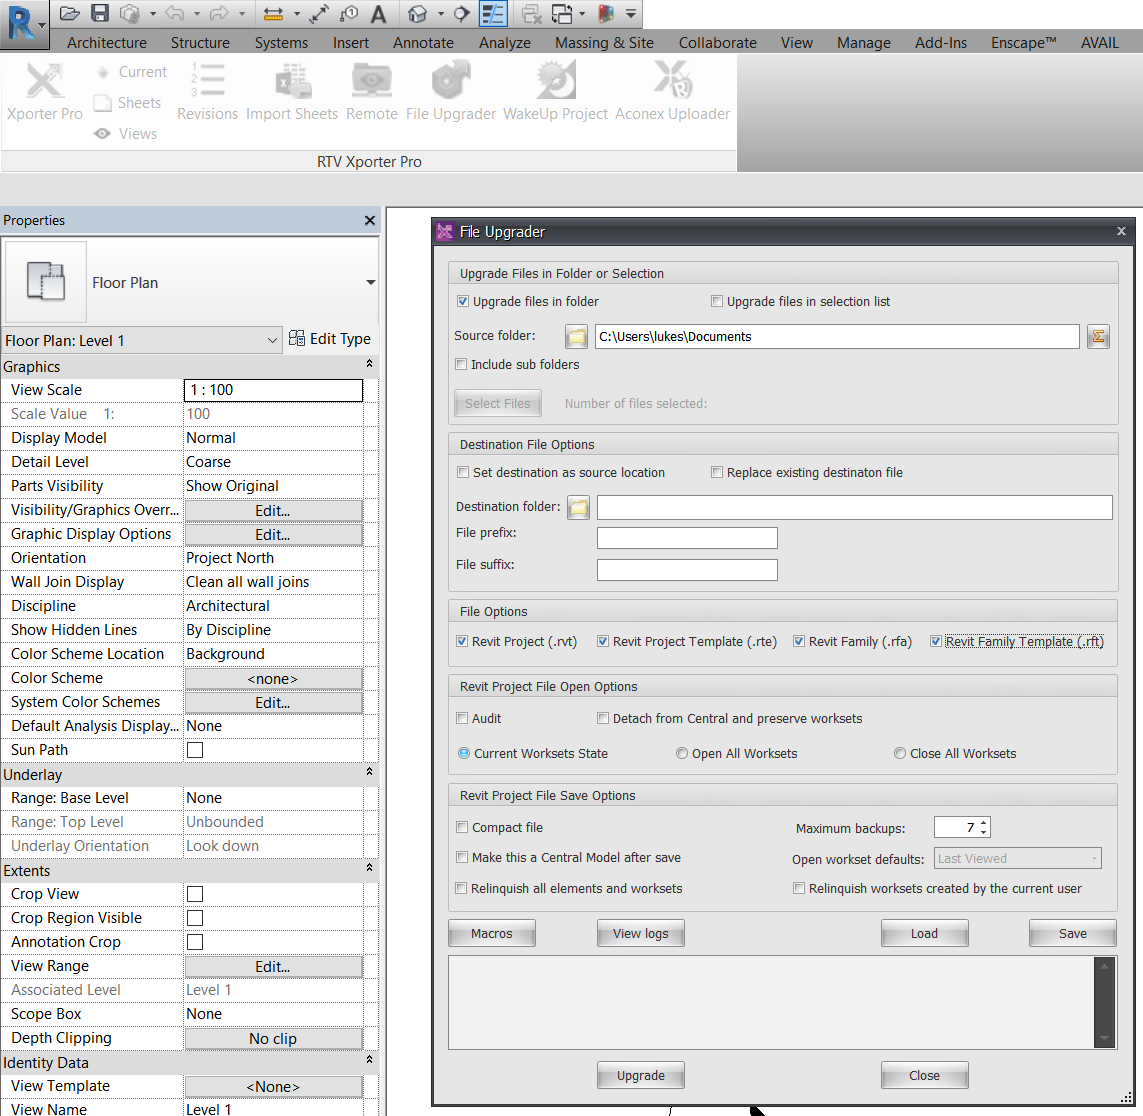
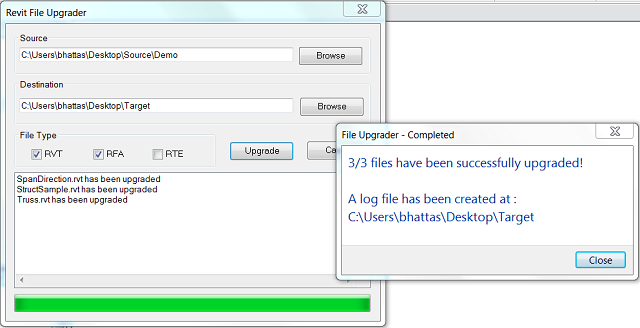
Set up a File Upgrader XML file (my settings shown below). As you can see, I chose to Detach and Audit and then Save the file over the top of the current file in the same location. This way, all of the Revit links should be maintained once the whole dataset is upgraded to the new version.
Open Xporter Pro link from Revit
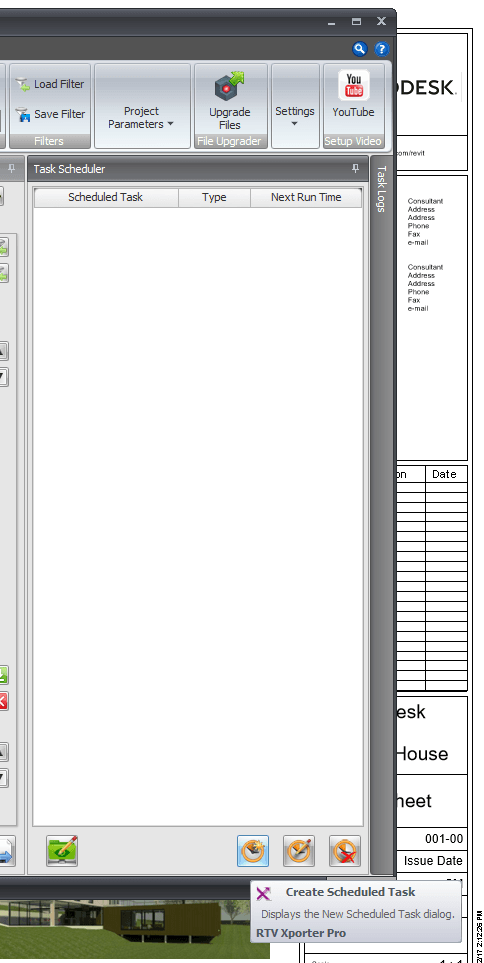
Create Task Schedule
Import the Upgrade XML as a Batch Process
Set the Revit EXE location for the target version
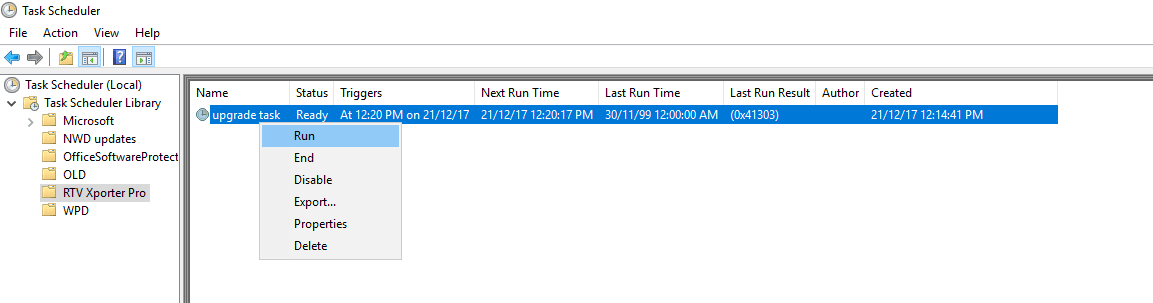
After saving the task, open in Windows Task Scheduler and you can run it immediately.
The screenshots below show the important stuff from the above steps.
1) My RTV Xporter Pro Settings:
3) Creating the Scheduled Task:
4 and 5) Load Batch Process XML and Set Revit Application, like for 2018:
6) Running the Scheduled Task:
Tip: During a typical file upgrade, Revit will often come up with warnings. If you run the RTV File Upgrader task in Interactive mode, you will get the dialog box which requires user interaction (export warnings and proceed past the Revit warnings). However, if you run the upgrade from the Task Scheduler, it will automatically dismiss the warnings for you as it upgrades. Some examples are warning dialog including errors like ‘could not cut instance out of wall’. In the Scheduled Mode, this process will all happen unattended.
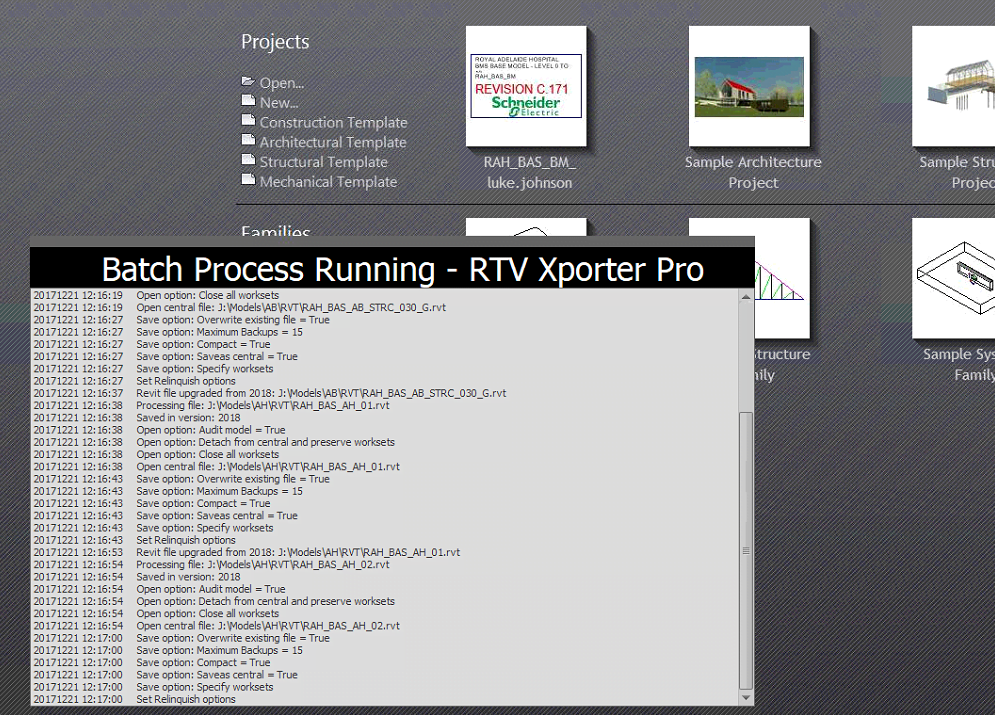
This is what it looks like as it upgrades (scheduled mode):
This is what it looks like as it upgrades (interactive mode):
Update 10/1/18: RTV Xporter Pro can define rules for dismissing dialog boxes, in the Task Dialog Settings. See below:
There are other addins and ways to upgrade. Here is a pretty comprehensive list:
Paid Revit Addins:
Harry Mattison has built a powerful Bulk File Upgrader addin that has a lot of good reviews on the App Store. You can find it here.
Current price: $99USD
BIMWERX Batch File Upgrader. Very simple UI and good reviews. You can get it here.
Current price: $10USD
NTI Tools have a File Upgrader. You can get a trial at this link. You have to register and then get an email with the download.
Previous posts:
These previous posts show some other pretty useful methods to keep in mind…
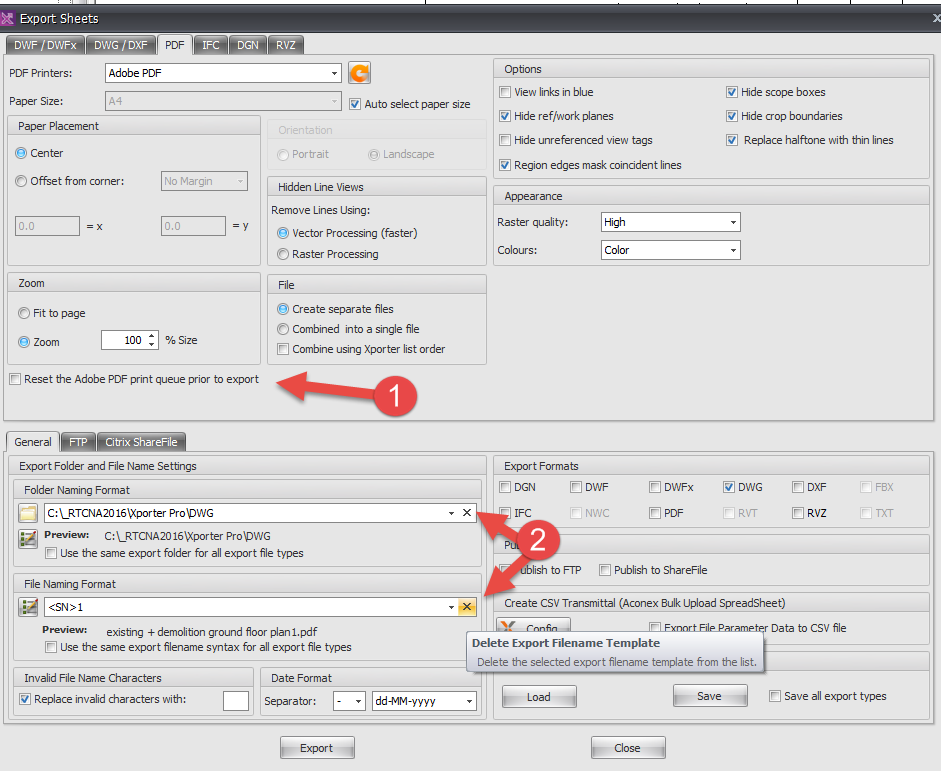
RTV Xporter Pro is one of those addins that I can safely recommend to every Revit user. If you ever need to print more than one sheet, or export a model multiple times, or to multiple formats, this tool is going to save you time. In fact, I think a large percentage of Revit users probably already have it! So, what’s the latest?
As you probably realise, Collaboration for Revit (C4R), Autodesk’s ‘Revit Server in the Cloud’ solution, is gaining popularity globally. It is genuinely a good way to get a team of people in different places to work together in real-time on a Revit project… provided you have good internet that is! So, it is great to see that RTV have now supported batch exporting from C4R projects using the local desktop application. Nice work!
Another interesting feature is that you can now reference additional Revit projects to the current Document Issue / Transmittal record, which is pretty cool.
The latest build for Revit 2017 is 1.0.740.
Oh, and one final thought… if you haven’t tried RTV Xporter in a while (perhaps you recall the days of working with SQL Server and so on), I recommend you give the latest version a try. On almost every project I do, we do not need to use a SQL server because the addin just integrates so well with the information you already have in you Revit model.
How to Batch Upgrade Any Revit File Type
A while back, I posted about an admittedly circuitous method to upgrade Revit files for free using eTransmit.
However, this is a much quicker and easier way, and its pretty affordable too… using RTV Xporter Pro. It supports batch upgrading of every Revit file type: rvt, rte, rfa, rft
To use it, just click the File Upgrader button and fill out the dialog. Easy!
Here is the full list of the latest updates, from the newsletter:
We have been busy working hard to integrate Collaborate for Revit (C4R) with our RTV Xporter PRO App for Revit. It is our pleasure that we are now able to provide C4R access via the desktop application (only). At this time our Remote Processing (Server) doesn’t support C4R but we are working hard to get this functionality added as soon as possible.
The following is a list of new features, updates and fixes included in the above software updates.
Updates:
1. Scanning for PDF printers will only be performed on Export start up, if no registry printer or xml printer list is empty;
2. Multi-line parameter used for the export filename, New Line replaced with a Space;
3. Separate group for Title block Revision schedules in Views list;
Resolved:
1. Fixed DWG layer mapping file selection dialog displaying twice and multiple mapping files added to drop-down list;
2. Fixed Remote GUI when the root shared folder is defined as the watch folder;
New Features:
Export
1. Checkbox option to Reset Adobe PDF print queue prior to export;
2. Delete button added to Export Folder and Export Filename template drop-down lists;
Issue
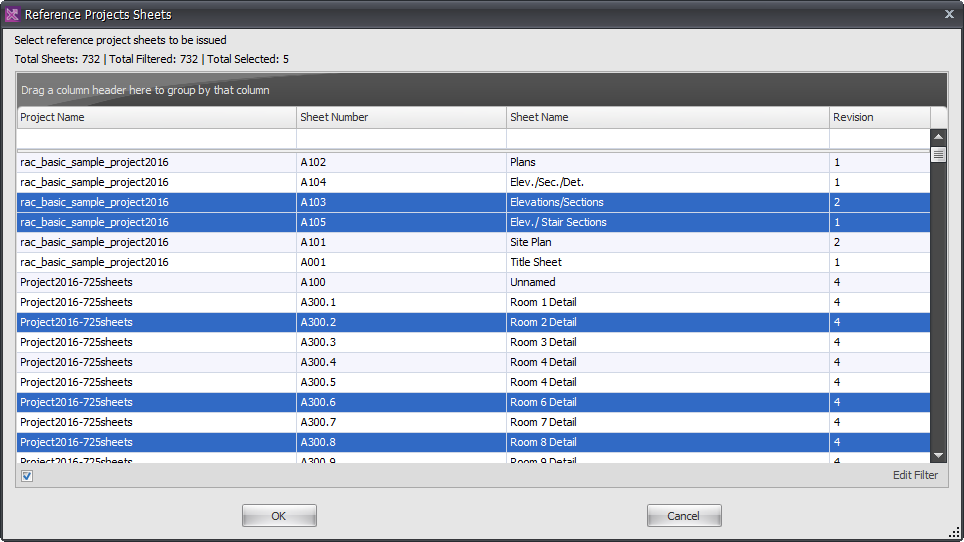
3. Issue, Reference Projects option now added. Users now have the option to reference additional Revit projects to the current Document Issue/Transmittal record. User can browse to select the project or used an existing (loaded) linked Revit project;
Note: Issue Reference Projects support linked models including C4R and Revit Server.
Web Update
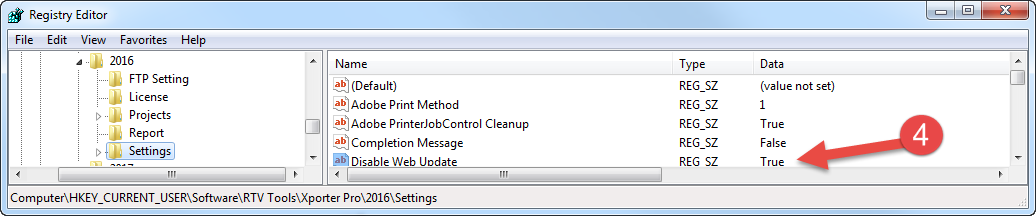
4. New registry key added to disable check for updates by the users (restricted to system administrators);
C4R
5. C4R Support added – limited to current model, not available with the Remote (Server) function;
Ok, two unrelated issues here, but both are along the lines of “weird stuff that happens in Revit that can be fixed but doesn’t always make sense”. If you use Revit long enough, you will certainly come across issues like this…
Firstly, certain Electrical penetration families were not tagging for height when using Spot elevations. These elements were in a model, which was linked into another model. The fix? Super weird one. Try turning on Lighting Fixtures in your View (in the host model). Then, those spot elevations worked… Even though the penetration family was a Generic Model with Nested Mechanical Equipment inside a link file. I’m thinking this one was either an upgrade error, or perhaps the families had some earlier history as a Lighting Fixture?!?
Secondly, I came across a Structural Consultant Design Model in Revit 2015 that doesn’t want to upgrade to Revit 2016. This is due to some corruption inside various families. Here are a few things to try… along with the ultimate solution.
1) Try opening the model in the newer version of Revit with Detach and Audit ticked, and choose Specify from the Worksets dialog dropdown. If the Opening Worksets dialog appears, Close all the Worksets and press OK. Then, Detach and preserve worksets. You should see the Model Upgrade progress dialog.
This fails with the following error: The file cannot be opened. There are too many elements missing in it. Please contact Autodesk Support.
2) Next steps are more detailed and resulted in a successful upgrade:
1. Open in 2015, with Audit and Detach, no Worksets open
2. Save As
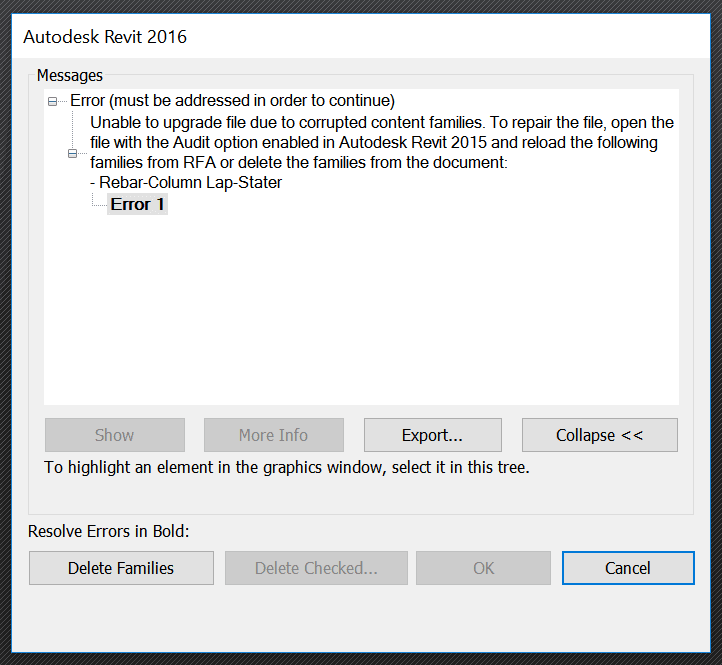
3. Open in 2016, with Audit and Detach, no Worksets open
a. Delete families when prompted (as you can see, it is one problem Rebar family)
b.
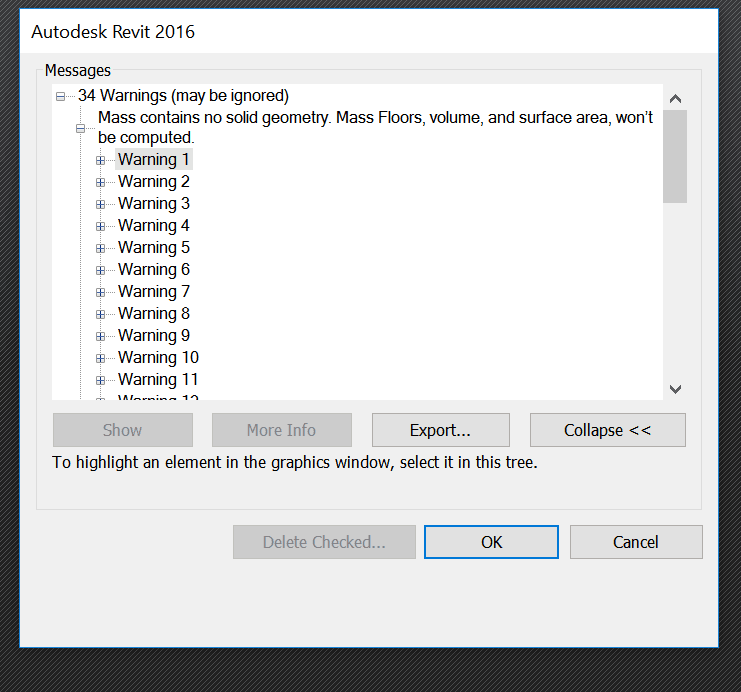
c. Ok to mass errors:
d.
e. Click to resolve Join errors
f.
4. Save As
5. Setup starting view…
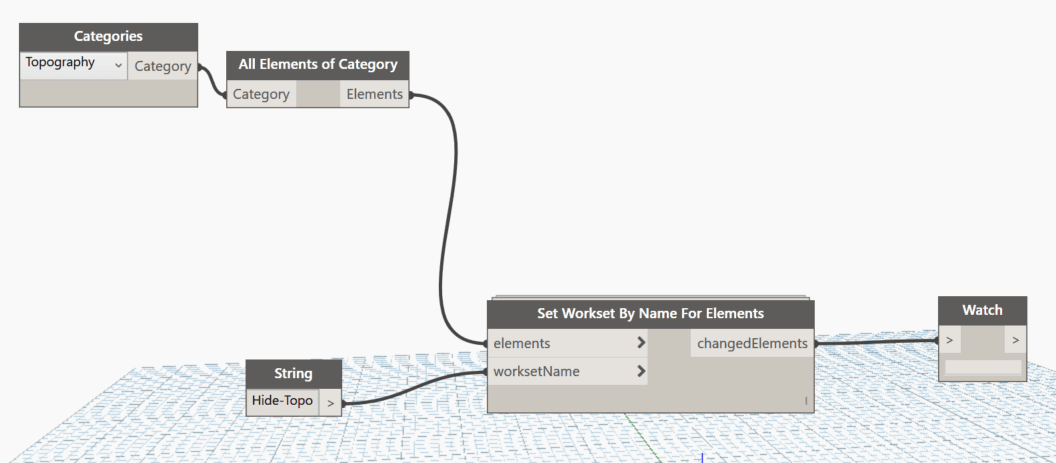
And here are some model tidy-up steps that I did, just #GoodRevit with some Dynamo:
6. Make these worksets:
a. Hide-CADs
b. Hide-Topo
c. Link-Control
7. Move DWGs to workset by:
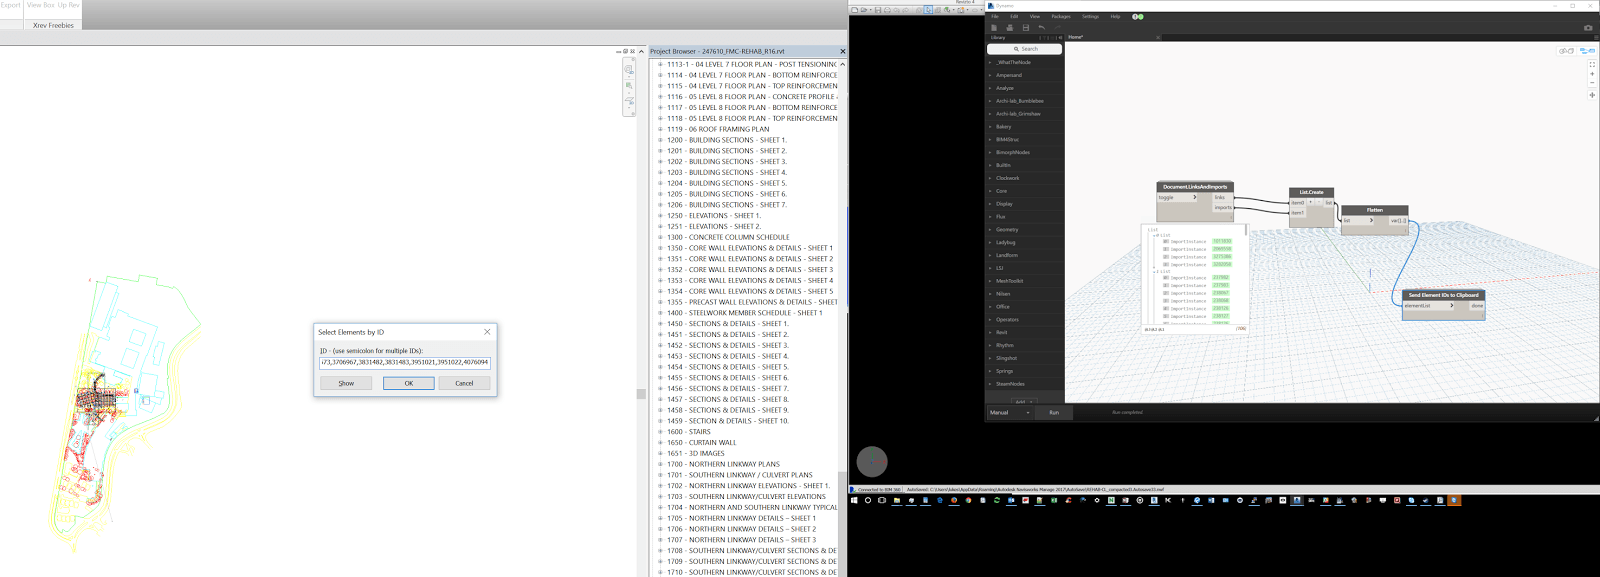
a. Getting Ids in Dynamo
b.
c. Group
d. Change Workset
e. Set workset invisible
8. Move Topo to workset and set invisible
9. Acquire Coordinates from Control Model
a. Copy / paste control model from current ST file to this upgraded one
b. Link neutral coordinate file
i. Acquire
c. Then acquire from BMGR control file
d. Save
Finally, sharing with team:
10. Save to Box
11. Open in Fed
12. Glue
I previously posted about the ADN file upgrader here. Since then Harry has created a more powerful upgrader for Revit 2014 available on Exchange, and he has also released a 2015 version which is not on Exchange yet – see his post with direct download link below.
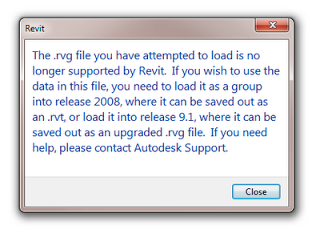
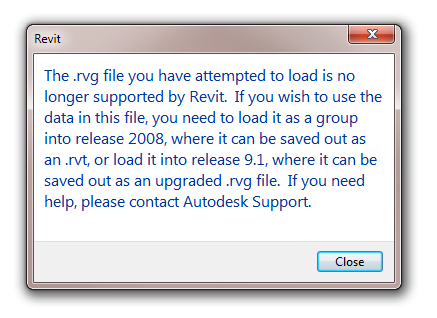
I saw this message from Revit today and I wanted to share it with you:
RVG files used to be Revit’s way of saving Groups out, until RVT became the standard for saving Groups. From the message, it looks like this occurred circa version 9.
Text-only: The .rvg file you have attempted to load is no longer supported by Revit. If you wish to use the data in this file, you need to load it as a group into release 2008, where it can be saved out as an .rvt, or load it into release 9.1, where it can be saved out as an upgraded .rvg file. If you need help, please contact Autodesk Support.
So, if you have any old-school RVG files kicking around, you probably should upgrade them before it becomes too much of a pain to do so!
Railings: When you create a railing in an Autodesk Revit 2013 project, new railing types are available that include top rail and handrail properties. When you upgrade a project, if the new rail (top rail and handrail) properties do not display in the railing Type Property dialog, duplicate the existing railing type, and the new rail properties will be available in the duplicated type.
In the past, a workflow was available in which you could rename older RFT files to RFA, then upgrade them to the most recent version of Revit (perhaps using a batch upgrade tool), then rename back to RFT. This was one way to upgrade your customized family template files. This method does not always work in Revit 2013, due to newly introduced restrictions.
There are still a few ways to upgrade your Template files, however:
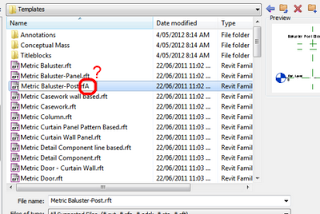
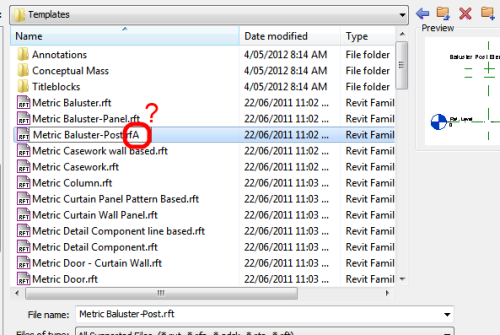
Make a new Family using the RFT file that you want to upgrade. Then, save as RFA. Navigate to the folder, then rename the RFA to RFT. This is a slow, one-at-a-time method.
In some cases, you can still use the original workflow (rename the RFT to RFA and then open) – but this likely will only work on 2011 and older RFT files, not 2012 RFTs.
Confused yet?
Please comment if you have any tips or workarounds related to upgrading Template files.
This happened to me recently on a very big workshared project. Turning off the Crop of the view made the links reappear, but when I zoomed in, they disappeared again!
The solution? Turn off the Far Clipping for the view in question. This made the Linked Import reappear and act in a predictable manner. Most of the views I’m working with already have Display Model set to ‘Do not display’, so it doesn’t cause graphical problems for me to turn off the Far Clip.
This is why upgrading large projects to the next version of Revit is scary to me. I thought waiting to Web Update 2 would be safe – but it still wasn’t!
Now I need to go through lots of views that have Linked DWGs and check if they are ‘broken’ and need the Far Clip to be turned off…
UPDATE Some more information:
The views in question seem to Print Preview and Print correctly, suggesting this is some sort of graphical problem?
The Linked CAD Import is selectable, but not visible. Once selected, it is shown highlighted like any other element.
Not all views are affected, only certain ones (most affected seem to the Linked Imports living in Detail Views and Sections). Drafting Views appear to be immune.
If no one else has this problem, I may have to look into my hardware configuration.
If a file ALREADY had No Clip set, the Import may STILL not display. Toggled the view to ‘Clip with Line’ and then back to ‘No Clip’ – and the Import reappeared!
New Revit session has no effect
New Local from Central has no effect
Synchronise has no effect
Reloading the affected Import has no effect
See video below (to prove that what I’m saying is true)